How to DIY an Indoor DIY Self Watering Planter (Ballard Designs style) Step-by-step instructions
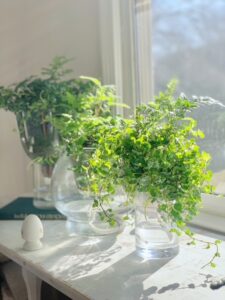
This pretty glass planter was inspired from Ballard Designs Canopy Self-watering Planters. It features a lighting globe and glass vase with a self-watering wicking system.
Equipment
- 1 Hand shovel
- 1 Pair of scissors
- 1 Container of water
- 1 Watering can of water
Materials
- 3 piece Glass globes (with opening on the bottom)
- 3 piece Vases to hold the glass globes
- 1 Pkg Self watering capillary wick cord
- 2 pkg Green moss
- 1 bag Potting soil
- 1 piece Cocoa liner
- 3-4 pots Assorted potted plants
Instructions
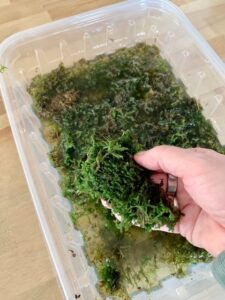
- Fill a container (or sink) with water and soak the moss.
- Gather your supplies for setting up the wicking system. This includes the glass globe, the wick and a coco liner.
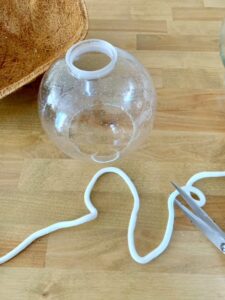
- Using scissors cut a circle from the coco liner. This circle should be a bit bigger than the opening of the small hole in the glass globe.
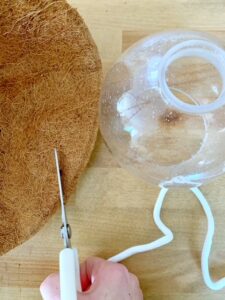
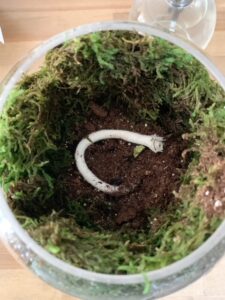
- Fold the circle in half and with scissors cut a small hole in the center for the wick to feed through. Feed the wick through the hole leaving approximately 6" above the coco circle and 6" below.
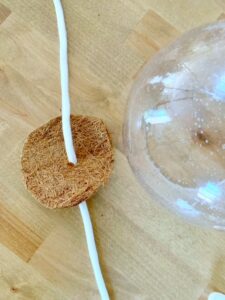
- Tie a knot in the wick right above the hole. This will help keep the potting soil from falling through. Place the coco circle/wick on the bottom (small hole) of the globe planter. The knot should be in the planter, the bottom of the wick hanging through the small hole of the globe. (this part will sit in the water reservoir)
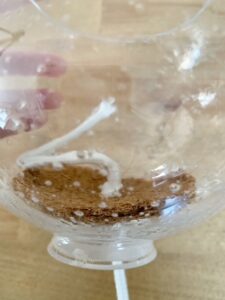
- Coil the wick in the center of the globe to prepare for the moss.
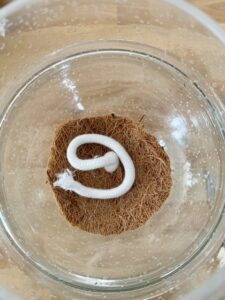
- Take small sections of the wet moss and squeeze the extra water from them. Place the moss around the inside of the globe building up the sides until you reach the top. The moss is more decorative than seeing the soil through the glass.
- While applying the moss leave the center open for the plantings.
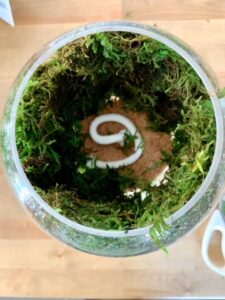
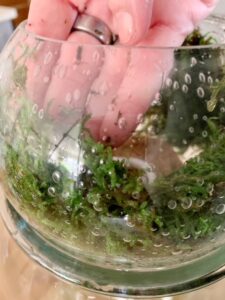
- Place a small amount (approx 1 cup) of potting soil to the bottom of the globe. Keep the wick from getting buried. Add water to moisten the dry potting soil.
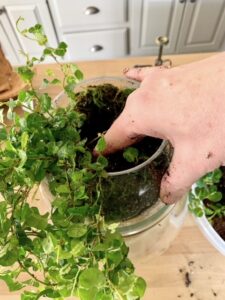
- Take the first plant and remove it from the plastic pot it came in. Place the plant in the globe pressing to one side so you can fit another plant in next to it.
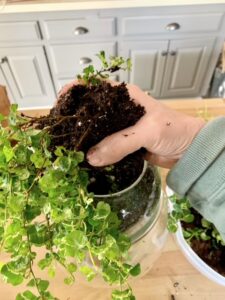
- Continue until all plants are planted. Note: you may need to shake some of the excess soil form the plants to fit it in the globe.
- Fill the base with fresh water and place the globe with the wick hanging in the glass. The wick should come in contact with the water, the planter should sit at the top.
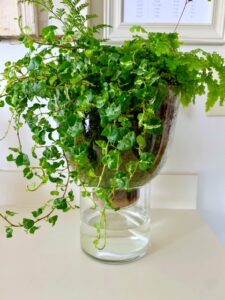
- You're done! Place the plant where it can get plenty of sunlight and periodically check the level of the water reservoir. Add more water as needed.