

How to Make a China Plate Wreath (Using Vintage Plates and Teacups)
A china plate wreath is a unique way to repurpose vintage plates, teacups, and heirloom pieces into decorative wall art. This step-by-step guide shows how to build a sturdy wreath using layered china, strong adhesive, and simple techniques for balance and design. It's a creative project that combines floral styling with vintage charm for a one-of-a-kind statement piece.

Content may contain affiliate links. When you shop the links, we receive a small commission at no cost to you. Thanks for supporting my small business.
As Featured on Martha Stewart
_______________________
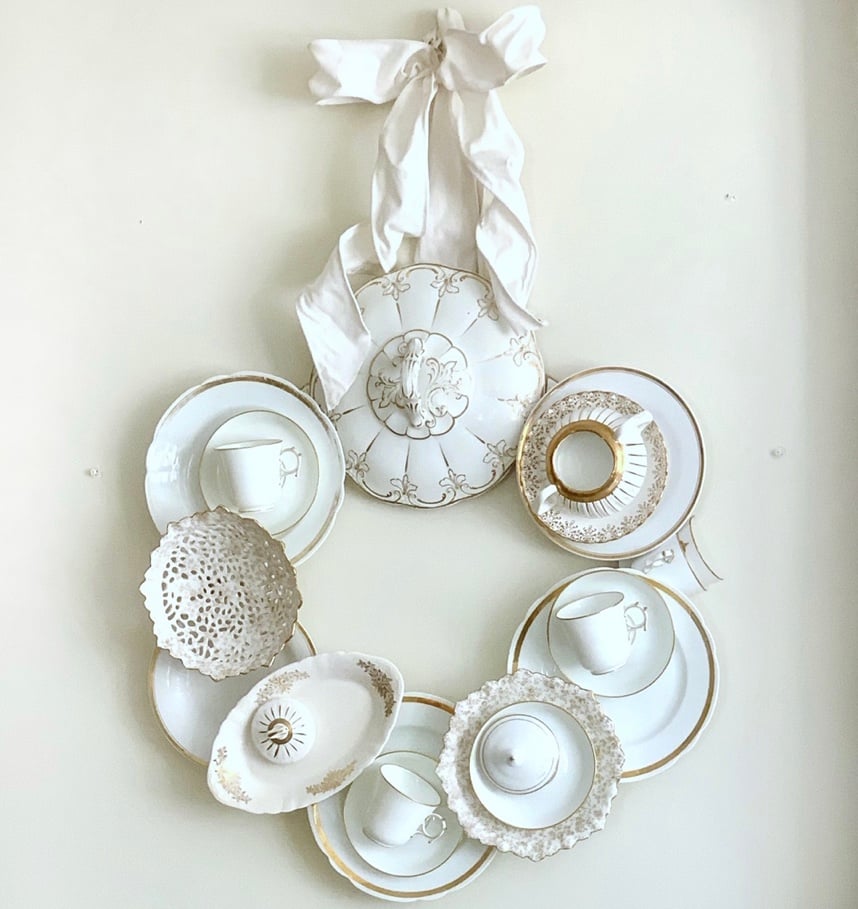
This china wreath was recently featured on Martha Stewart as a creative way to repurpose family heirlooms.
This project didn't come together perfectly on the first try, but it ended up being one of my favorite pieces I've ever made. I've always loved finding ways to use vintage pieces around the house, whether it's styling them into decor or giving them a completely new purpose.
This china wreath was one of those ideas that felt a little different from the start. I used a mix of thrifted china plates, teacups, and saucers to create a layered wreath that feels vintage, a little unexpected, and completely unique. It's also such a beautiful way to use pieces that might otherwise sit tucked away in a cabinet, especially if you have family china that you don't use every day.
If you love decorating with collected pieces, especially during the holidays when vintage details really shine, this is such a fun project to try. I'll walk you through exactly how I made it and what worked along the way.
At a Glance: China Plates Wreath
_______________________
- Made with vintage china plates, cups, and saucers
- Built on a double wreath form for support
- Uses strong adhesive like E6000
- Layered design creates depth and dimension
- Best for indoor or protected outdoor display
Summarize and Save this content on:
Jump to:
Where to find china for your wreath
I wanted to keep the cost down for this project, so I started out at Vintage markets thrifting and was able to find quite a few pieces at The Blessing Barn Store in Mendon, MA. The Blessing Barn is a second-hand store that donates all its proceeds to local charities, and it's one of my favorite places to shop.
This is also a wonderful project for family-passed-down china that may not get used but still holds meaning. Mixing heirloom pieces with thrifted finds can make the wreath feel even more personal and unique.
I was on a mission to find inexpensive plates, cups, saucers, salad plates, sugar bowls, and lids, all with different patterns in gold and white. I knew all of these shapes and sizes would bring their own dimension to the layered wreath and add interest.
My china search was completed at the Winsmith Mill Market in Norwood, MA with a few more pieces, including a sweet gold and white berry bowl. The Winsmith is a great indoor vintage marketplace with many wonderful vendors. Many of the china pieces I found felt like charming relics from past celebrations, which added to the character of the wreath.

How to plan your china wreath design
Once I had all the china pieces collected, I set out to figure out how to assemble the wreath. I knew a flat wreath form would be necessary, as a wire wreath wouldn't offer enough surface for gluing. After some searching, I stumbled upon an 18-inch wood fiber wreath form on Amazon - just what I needed! For the glue, I decided to go with E 6000. This adhesive proved to be an excellent choice for the project, providing the necessary strength and bonding power to securely attach the china pieces.
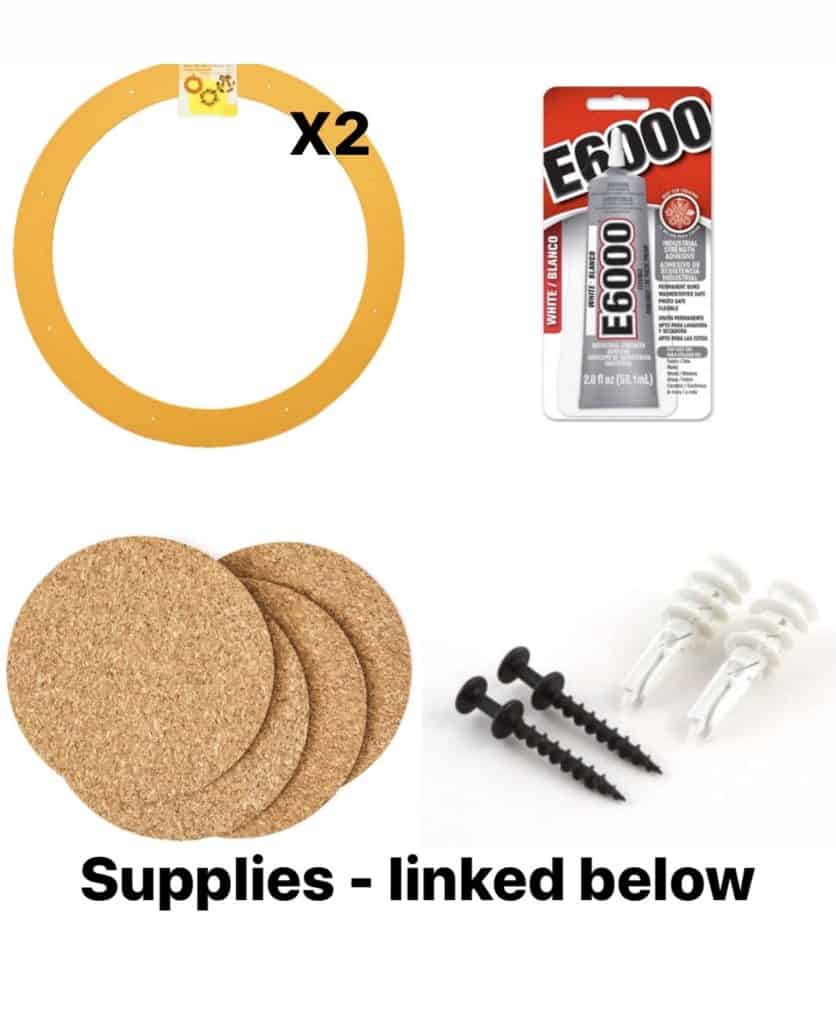
Supplies
- 21 Assorted med to small pieces of china
- 2 Wreath forms
- E 6000
- 1 Pk Cork Coasters
- 2 Screws with anchors
Note: Other than the china, most of these supplies can be found at a craft store.
How to make a china wreath (step-by-step)
1. Two wreath forms are better than one
Once I started laying out the design, I became concerned about how heavy the china pieces would be when they were all layered and stacked. I decided to buy a second wreath and glue them together to support the weight. I'm glad I did! Once the 2 wreath forms were glued together with the E 6000, I let them dry overnight. With this extra reinforcement all set, I laid out the design to get a feel for the placement of the china. I decided that the first layer would consist of the large soup tureen cover and plates.
2. Prepping the plates
To make sure the plates had secure contact with the wreath, I recognized the need for something that would allow them to sit evenly. That's when I came across these cork coasters, which turned out to be the perfect solution! Using E 6000 adhesive, I attached one cork coaster to the back of the plates and allowed them to dry overnight. While it might have taken a while, the overnight drying time was key to ensuring a strong bond. Throughout the process, I kept the Celebrated Nest Tribe on Instagram updated on my progress, and their enthusiastic support and valuable advice kept me motivated and on track!

3. Looping the ribbon
Prior to gluing the china, I looped a piece of ribbon around the wreath beneath where I was placing the lid. I wanted the wreath to appear like it was hanging from the ribbon and knew it would be difficult to add after I had glued all the pieces on. Once the ribbon was in place, I began gluing the first layer of plates onto the double wreath.
4. Gluing and layering the plates
After the cork coasters had fully dried and were securely in place, I proceeded with the assembly. The texture and stickiness of E 6000 adhesive proved to be an ideal fit for this endeavor. The crucial factor was allowing ample time for each layer to firmly adhere and dry before progressing to the next stage.
Tips for layering the plates
- Be Mindful of Size: Opt for smaller and fairly uniform china pieces like small plates, saucers, tea cups, butter plates, and lids, which are easy to work with and can be layered to create visual interest and depth in your wreath.
- Plan Your Design: Lay out your china pieces on a flat surface before gluing to visualize how they will fit together. Experiment with different arrangements to find a pleasing design.
- Start with Large and Flat Pieces: Begin with large and flat pieces as the base layer. Bigger plates and lids work well for this purpose, providing a sturdy foundation for the rest of the arrangement.
- Use Saucers and Tea Cups: Layer smaller saucers and tea cups on top of the larger base pieces. Attach saucers to tea cups to create charming mini-platforms that add height and dimension.
- Create Overlapping Layers: Allow some pieces to overlap slightly for a more textured and dimensional look. This overlapping effect adds visual appeal and helps fill in gaps between pieces.
- Mindful of Balance: Distribute the weight evenly to prevent an unbalanced wreath. Be cautious with heavier pieces, as they could affect the wreath's stability.
- Secure with Strong Adhesive: Use a reliable and strong adhesive like E 6000 to attach the china pieces to the wreath form. Apply the adhesive to the back of each piece and press firmly to ensure a secure bond.

I glued down the first layer and left it to dry overnight. Then I glued the little cups to their saucers and placed the cups on their sides for this design. The next day I began to stack and place the second layer while taking care to ensure that the placement of each piece maximized contact and stability.
Tip: Allow the E6000 to fully dry between each step, it's key to keeping the china pieces secure and the wreath stable.

5. Hanging the wreath on the wall
Finally, wreath done!! As you can imagine it weighed quite a bit so my husband and I had to be super mindful of this. To support it we decided to hang the wreath from the actual wreath form by placing 2 screws with anchors on the inside - 1 at the 11:00 point and the second at 1:00. The screw was not flush with the wall and left a little extended to support the wreath.

6. Filling gaps and overcoming challenges
After hanging up the wreath, I noticed a tiny gap on the right side. Yep, this project had its bumps along the way, as I mentioned earlier, hehe! I hoped the gap wouldn't be a big deal, but it stood out more than I thought. Dealing with limited space (a full china piece wouldn't fit), I got creative. I took one of the leftover cups and saucers, popped them into a big Ziploc bag, and gave them some gentle taps with a hammer until they broke into the right size. Then, I pieced the cup back together and used glue to cover the open spot. The leftover broken bits went in the trash. Honestly, this project was all about finding solutions from start to finish.
In the end, I'm thrilled with how it turned out. The wreath is playful, totally unique, and I can proudly say, it's a wrap!

Tacking the ribbon and bow (optional): I finished by adding a large beautiful bow and tacking the ribbon in place so it looks like the wreath is hanging from it. It's a simple detail, but it adds a softer, more finished look.
.
Frequently asked questions
This is a great project for inexpensive china pieces passed down from relatives. You may also find beautiful plates at flea markets, thrift stores, and antique stores. For some great tips on how to have a successful antiquing outing visit my, Top 10 Tips for Antiquing: The Ultimate Guide to Navigating Vintage Markets and Shops.
Gently! I typically take a damp paper towel and wipe the plates down. This needs to be done a few times per year.
Yes! To switch up your wreath's look for various seasons, swap out the ribbon and incorporate seasonal elements like artificial flowers on a spring wreath or ornaments that match the colors and themes of Christmas. Below is my Christmas wreath for the holiday season.

Here's the plate wreath I made last year, all dressed up with Christmas greens and twinkling lights to go with my green and white decor.
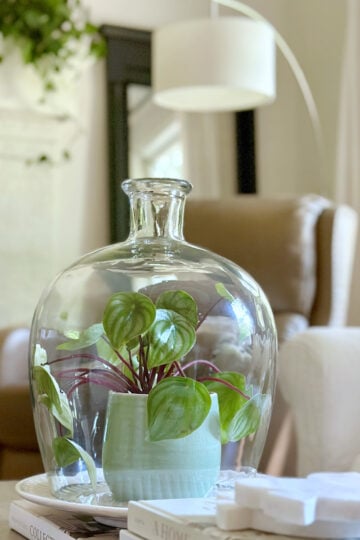
More fun ways to display vintage items in your home


Thanks so much for stopping by to see how I made this china wreath. It ended up being one of those projects I love more every time I walk past it, and I hope it gives you a little inspiration for using pieces you already have.
If you have any questions, feel free to leave a comment, I'm always happy to help. I'm already thinking about trying an all-white version next, maybe with some milk glass, which would be so pretty. And if you enjoy DIY projects like this, there's plenty more to explore here on the blog.


This really is the most beautiful china wreath I've ever seen!! I love the colors that make it so elegant! Thank you for the tutorial. I'll be checking out thrift stores!
Thank you for your kind message Kathy!
What kind of wreath form did you use? I have not seen this type of form before.
The most beautiful china wreath I've ever seen!!! Just stunning! Thank you for the great tutorial!
Hi Kathy,
So sorry for the delay in my response, my comment notifications somehow got shut off and I'm just seeing this. Thank you for visiting the blog. The wreath form is linked in the post. They are flat biodegradable floral craft ring that measured 18" from Amazon. I glued two together for extra support. I hope this helps!
Good morning wow I would love to have a speck of your talent and patience and perseverance! I love old china pieces and have quite a few from mom . She received tea cup sets for wedding shower gifts apparently that was quite popular 60 years ago ! I was thinking for the decorative and creative challenged like myself it would be helpful if yoor talents were shared on a YouTube site ! Or maybe you could offer a class and charge a fee to have you help with these fun projects. Ofcoarse you wouldn’t want it to be to time consuming .Maybe you could host at a venue that wasn’t far from you or at your beautiful home ? You are so talented and although I love everything my first reaction is always nope I could never do that I am not creative or patient enough to do any projects . I am so intimidated by creativity haha For now I will continue to enjoy and admire your gorgeous posts and look forward to seeing your next design !! You inspire so many ! Take care and stay well in this current crazy crisis ! Xo
Thank you so much! Ive been considering a youtube channel! Ill be sending out notice if I do. Stay well!