

Glass Planters: DIY Self-Watering Indoor Planter Idea
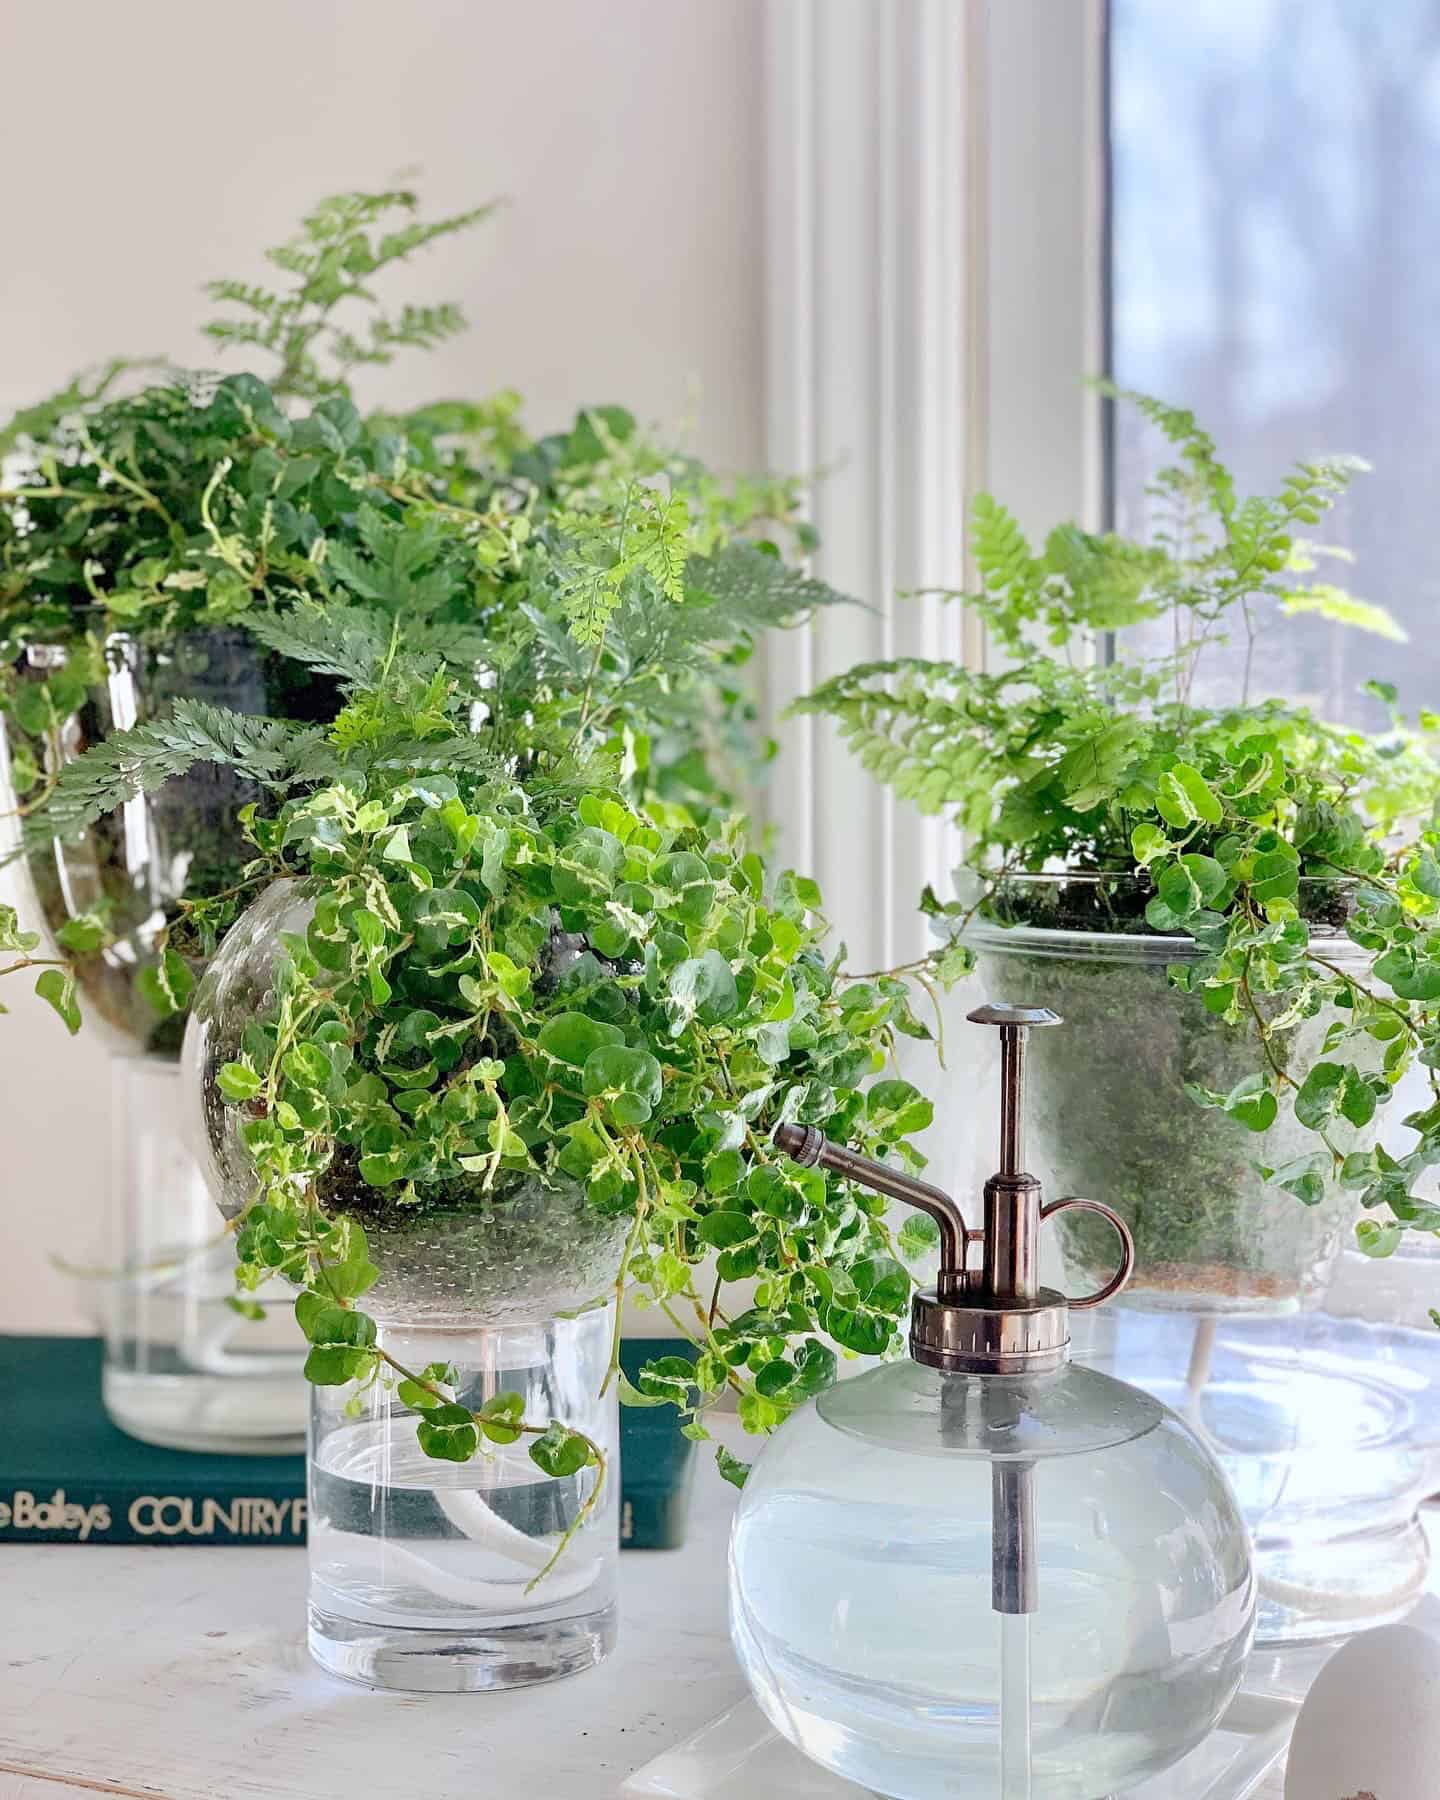
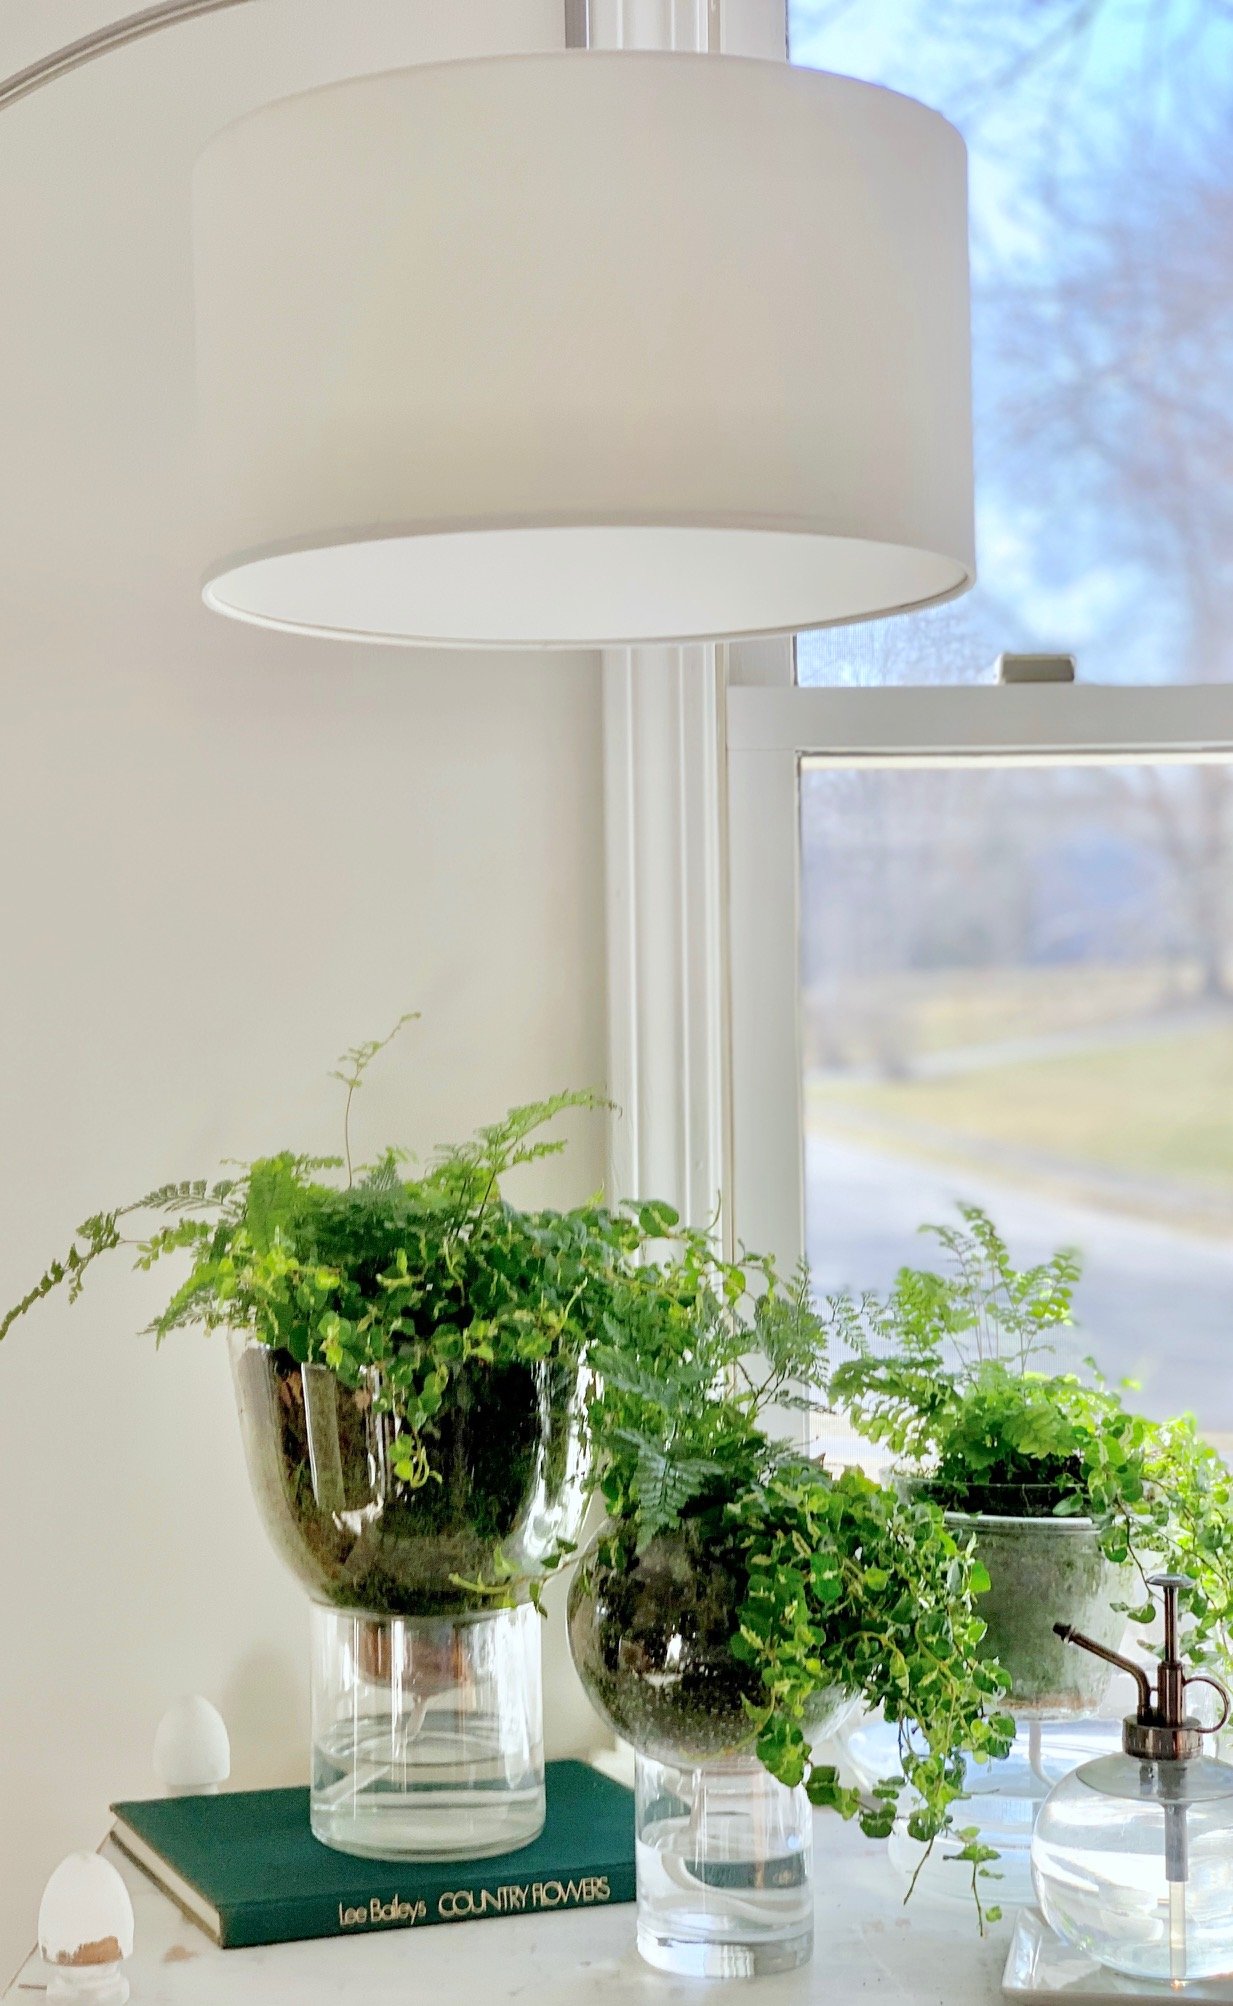
Glass planters can be both beautiful and practical, and this DIY self-watering planter shows how to create one using a water reservoir and wick system that delivers steady moisture to plant roots. Instead of plastic containers, this decorative design uses glass light globes and clear vases to make a stylish indoor planter that keeps plants hydrated for days with minimal maintenance. The transparent design also makes it easy to monitor water levels while growing houseplants like ferns, pothos, herbs, and African violets.
Content may contain affiliate links. When you shop the links, we receive a small commission at no cost to you. Thanks for supporting my small business.
As Featured on Home & Gardens Magazine
_______________________
These DIY Glass Self Watering Planters were recently featured in Home & Gardens as part of their roundup of inspiring tabletop garden ideas.
If you've ever searched for glass planters or a DIY self-watering planter and felt uninspired by plastic bottles and makeshift setups, this project is for you.
This version skips the clunky, utilitarian look and leans into something that actually belongs in your home. Inspired by a now-discontinued design from Ballard Designs, I recreated the concept using glass light globes and clear vases. The result is a beautiful glass planter that doubles as a self-watering system, looking right at home on a windowsill while quietly keeping plants hydrated.
It's simple to make, low-maintenance once assembled, and easy to pull together using thrifted or leftover materials. These glass planters work especially well for houseplants like pothos, spider plants, and maidenhair ferns, which appreciate reliable moisture and look beautiful displayed indoors.
At a Glance: Glass Planters (DIY Self-watering)
_______________________
- Project type: DIY glass planter with a built-in self-watering system
- Best materials: glass light globes, clear vase, cotton wick, potting soil, small plants
- How it works: a hidden water reservoir feeds moisture to roots through a wick Best plants to use: pothos, ferns, herbs, African violets, and other moisture-loving houseplants
- Best location: bright indoor spaces like windowsills, shelves, or kitchen counters
- Why you'll love it: combines the beauty of glass planters with the convenience of low-maintenance watering
Summarize and Save this content on:
Jump to:
- At a Glance: Glass Planters (DIY Self-watering)
- Why most self watering planters aren't pretty
- What makes this DIY self-watering planter unique
- Why glass globes work as planters
- Choosing the right vase for your water reservoir
- Supplies you'll need
- Tools required
- How to build your self-watering planter (it's easier than you think!)
- Best plants for self-watering planters (and where to buy them)
- Variations and DIY wick alternatives
- How to care for plants in self-watering planters
- Frequently asked questions
- Try some of our other plant projects
Why most self watering planters aren't pretty
They're more functional than stylish
Let's be real. Most self watering planters you can buy are made for utility, not design. They're often plastic, clunky, and have awkward shapes or visible tubes that scream "function over form." Sure, they keep your plants watered, but they don't exactly earn a spot on your styled shelves.
The infamous soda bottle trick
You've probably seen this DIY method floating around. Flip a plastic bottle upside down into the soil and let gravity do its thing. It works. But it's not cute. At all. Unless you're going for a greenhouse-meets-garage aesthetic, it just doesn't fit into most home decor.
But aesthetic matters too
I believe even practical solutions should look beautiful. When something sits on your windowsill, entry table, or open shelving every day, you want it to blend in or even add something special to the space. The typical self watering planter? It doesn't check that box.
That's when I got creative
This DIY came straight out of that problem. I had seen elegant versions years ago from Ballard Designs. They were sleek and modern and also very pricey. So I decided to make my own. I used clear glass globes meant for light fixtures and paired them with simple glass vases. The result? A decorative self watering planter that looks high-end but cost next to nothing.
It's easy, it works, and it looks like something you actually want in your home. Let me show you how I made it.
What makes this DIY self-watering planter unique
It's made with everyday glassware
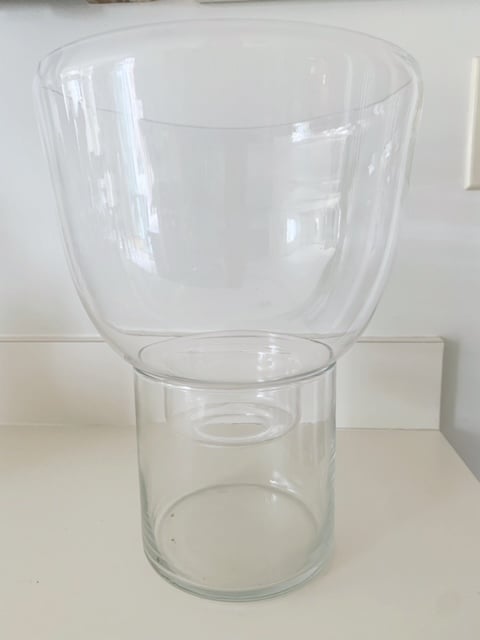
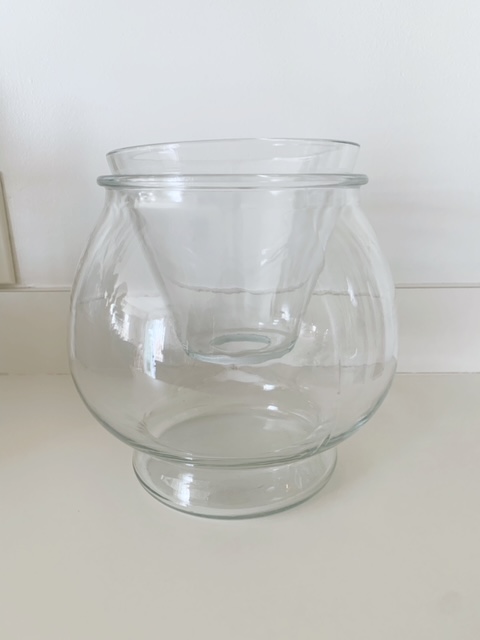
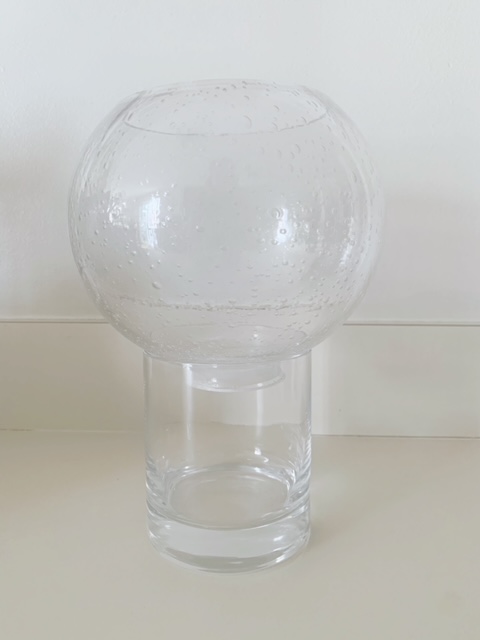
Instead of plastic tubs or soda bottles, I used two things you can find at any thrift store or home center - a glass light globe and a clear vase. Both are inexpensive and easy to find, but when paired together? They look like something straight out of a high-end catalog.
The globe becomes the planter
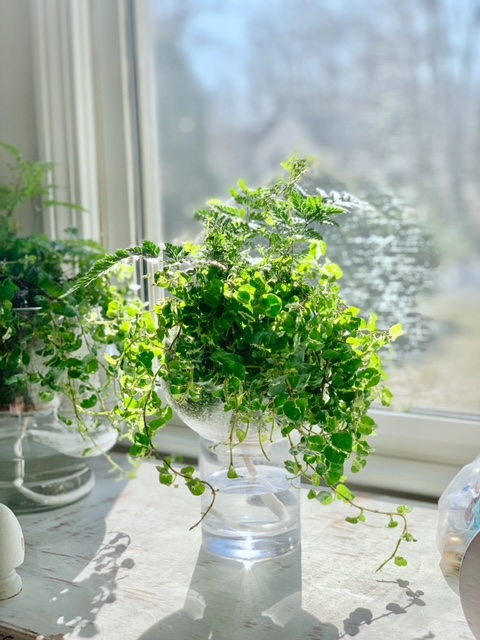
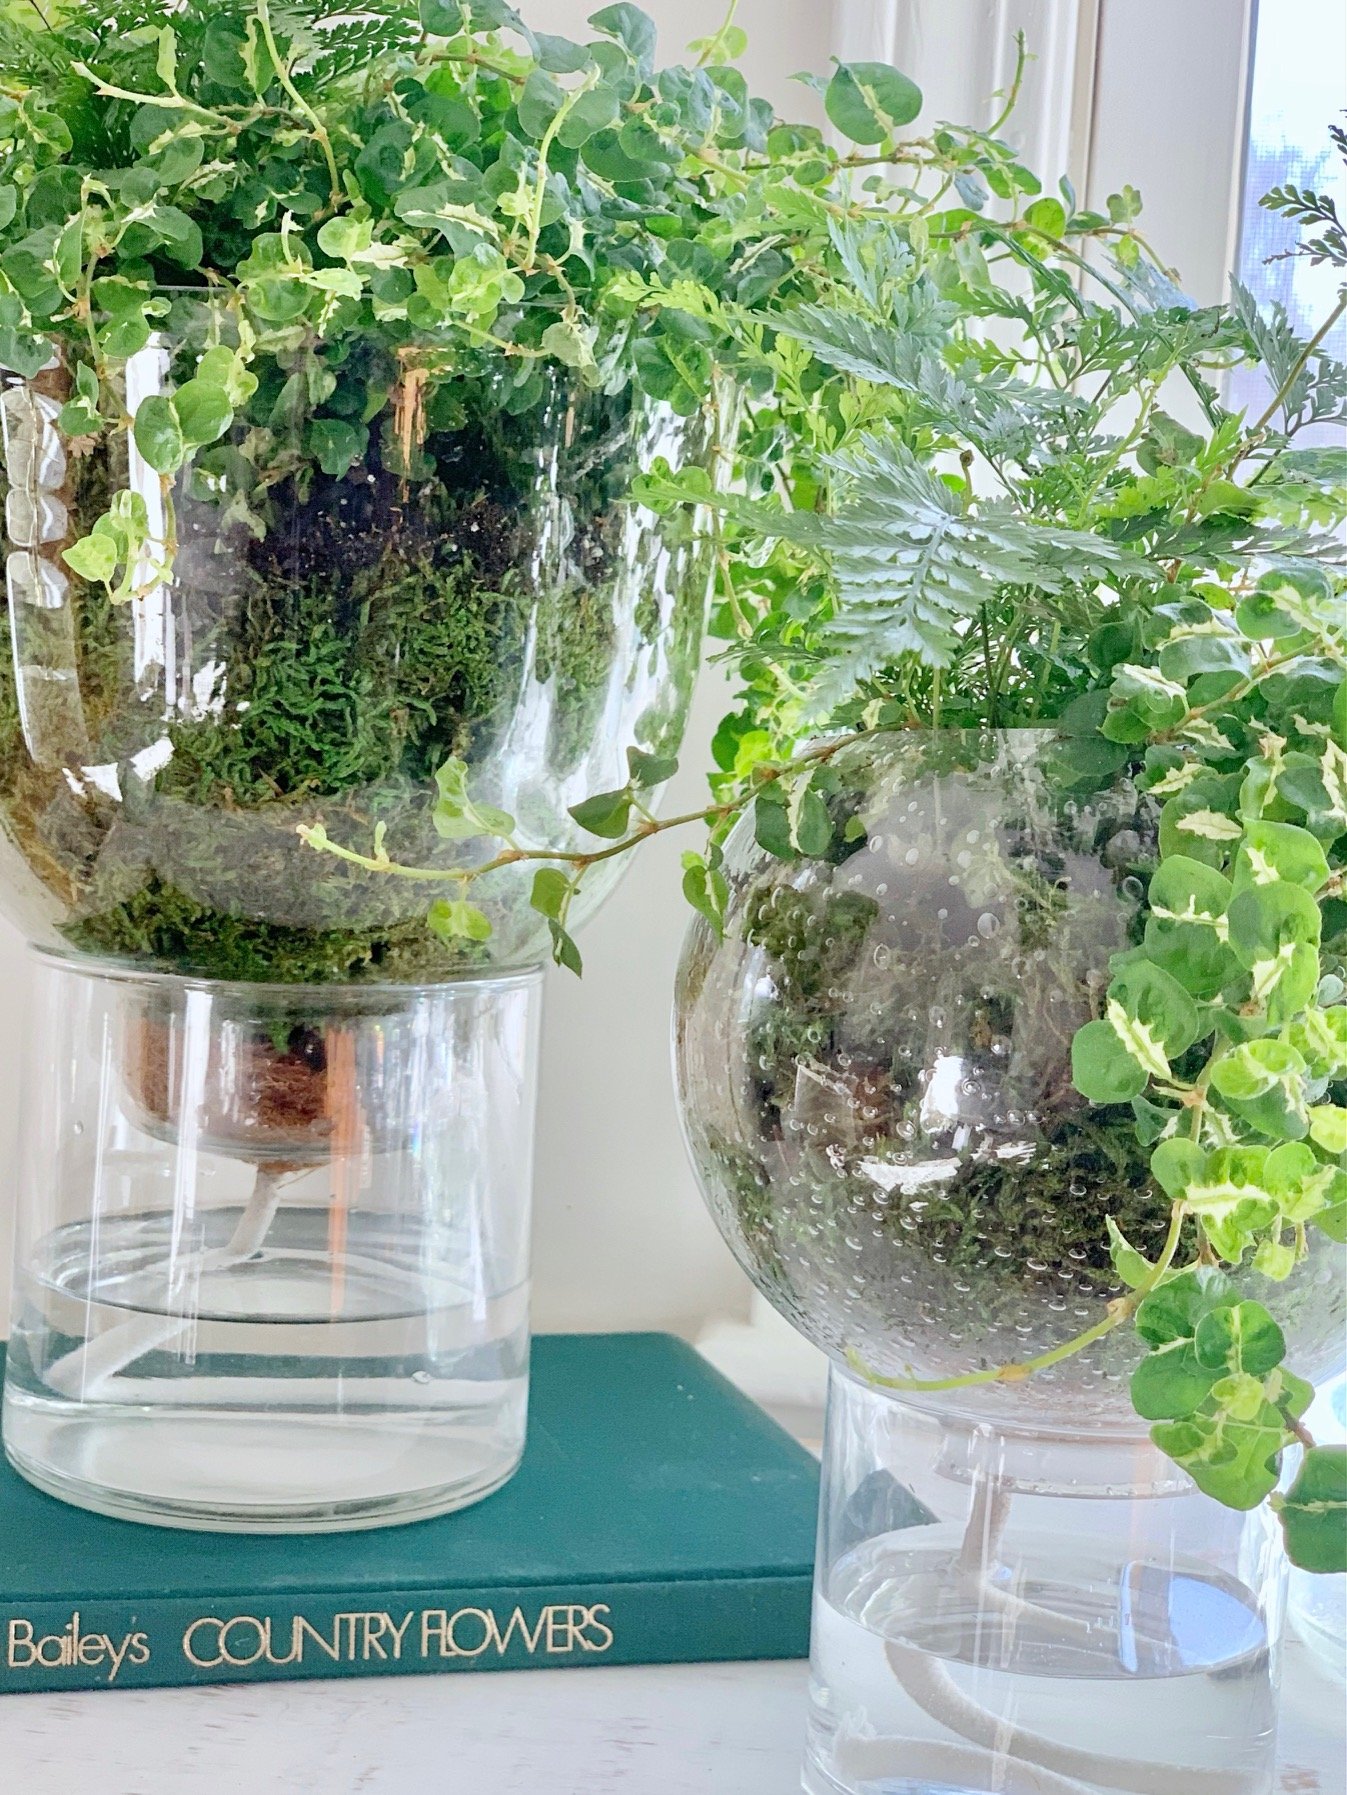
The trick is in the flip. The glass light globe sits upside down and becomes the planter, while the clear vase underneath acts as the water reservoir. A wick runs from the soil down into the water, so as the soil dries out, it pulls up just the moisture it needs. No tubing, no pump, no batteries. Just a simple wick system doing the work quietly in the background.
And it actually looks good
Let's be honest. If something's going to sit on your kitchen Island or bookshelf, it needs to be easy on the eyes. This planter looks like intentional decor, not a science project. You can dress it up with pebbles, moss, or even a decorative tray underneath if you want to go full Pinterest.
It's practical too
Besides being pretty, this setup works especially well for forgetful waterers or when you're heading out of town for a few days. I've tested mine through hot, dry weeks and my plants stayed perfectly hydrated. No wilting, no soggy mess, just happy, thriving greenery.
Why glass globes work as planters
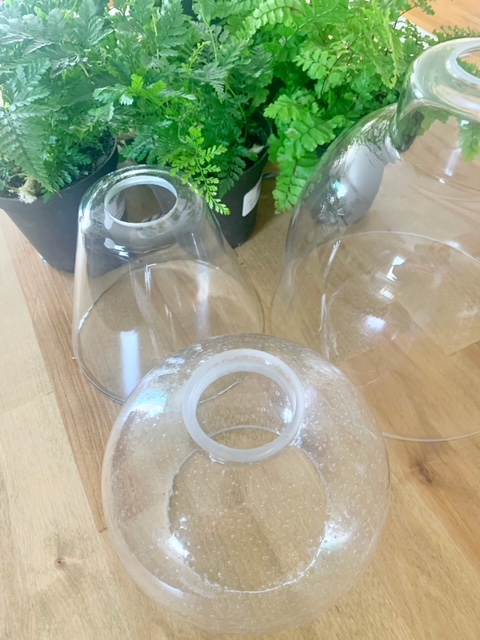
Now back to the design. As I set out to find a way to make my own "pretty" self-watering planters my research brought me to these Glass Planters from Ballard Designs. These planters are in a word, beautiful! They are also quite pricey so I knew finding a cheaper option was in order. We don't often think about glass for planters but these were simply stunning so I knew I wanted to work with glass as the medium.
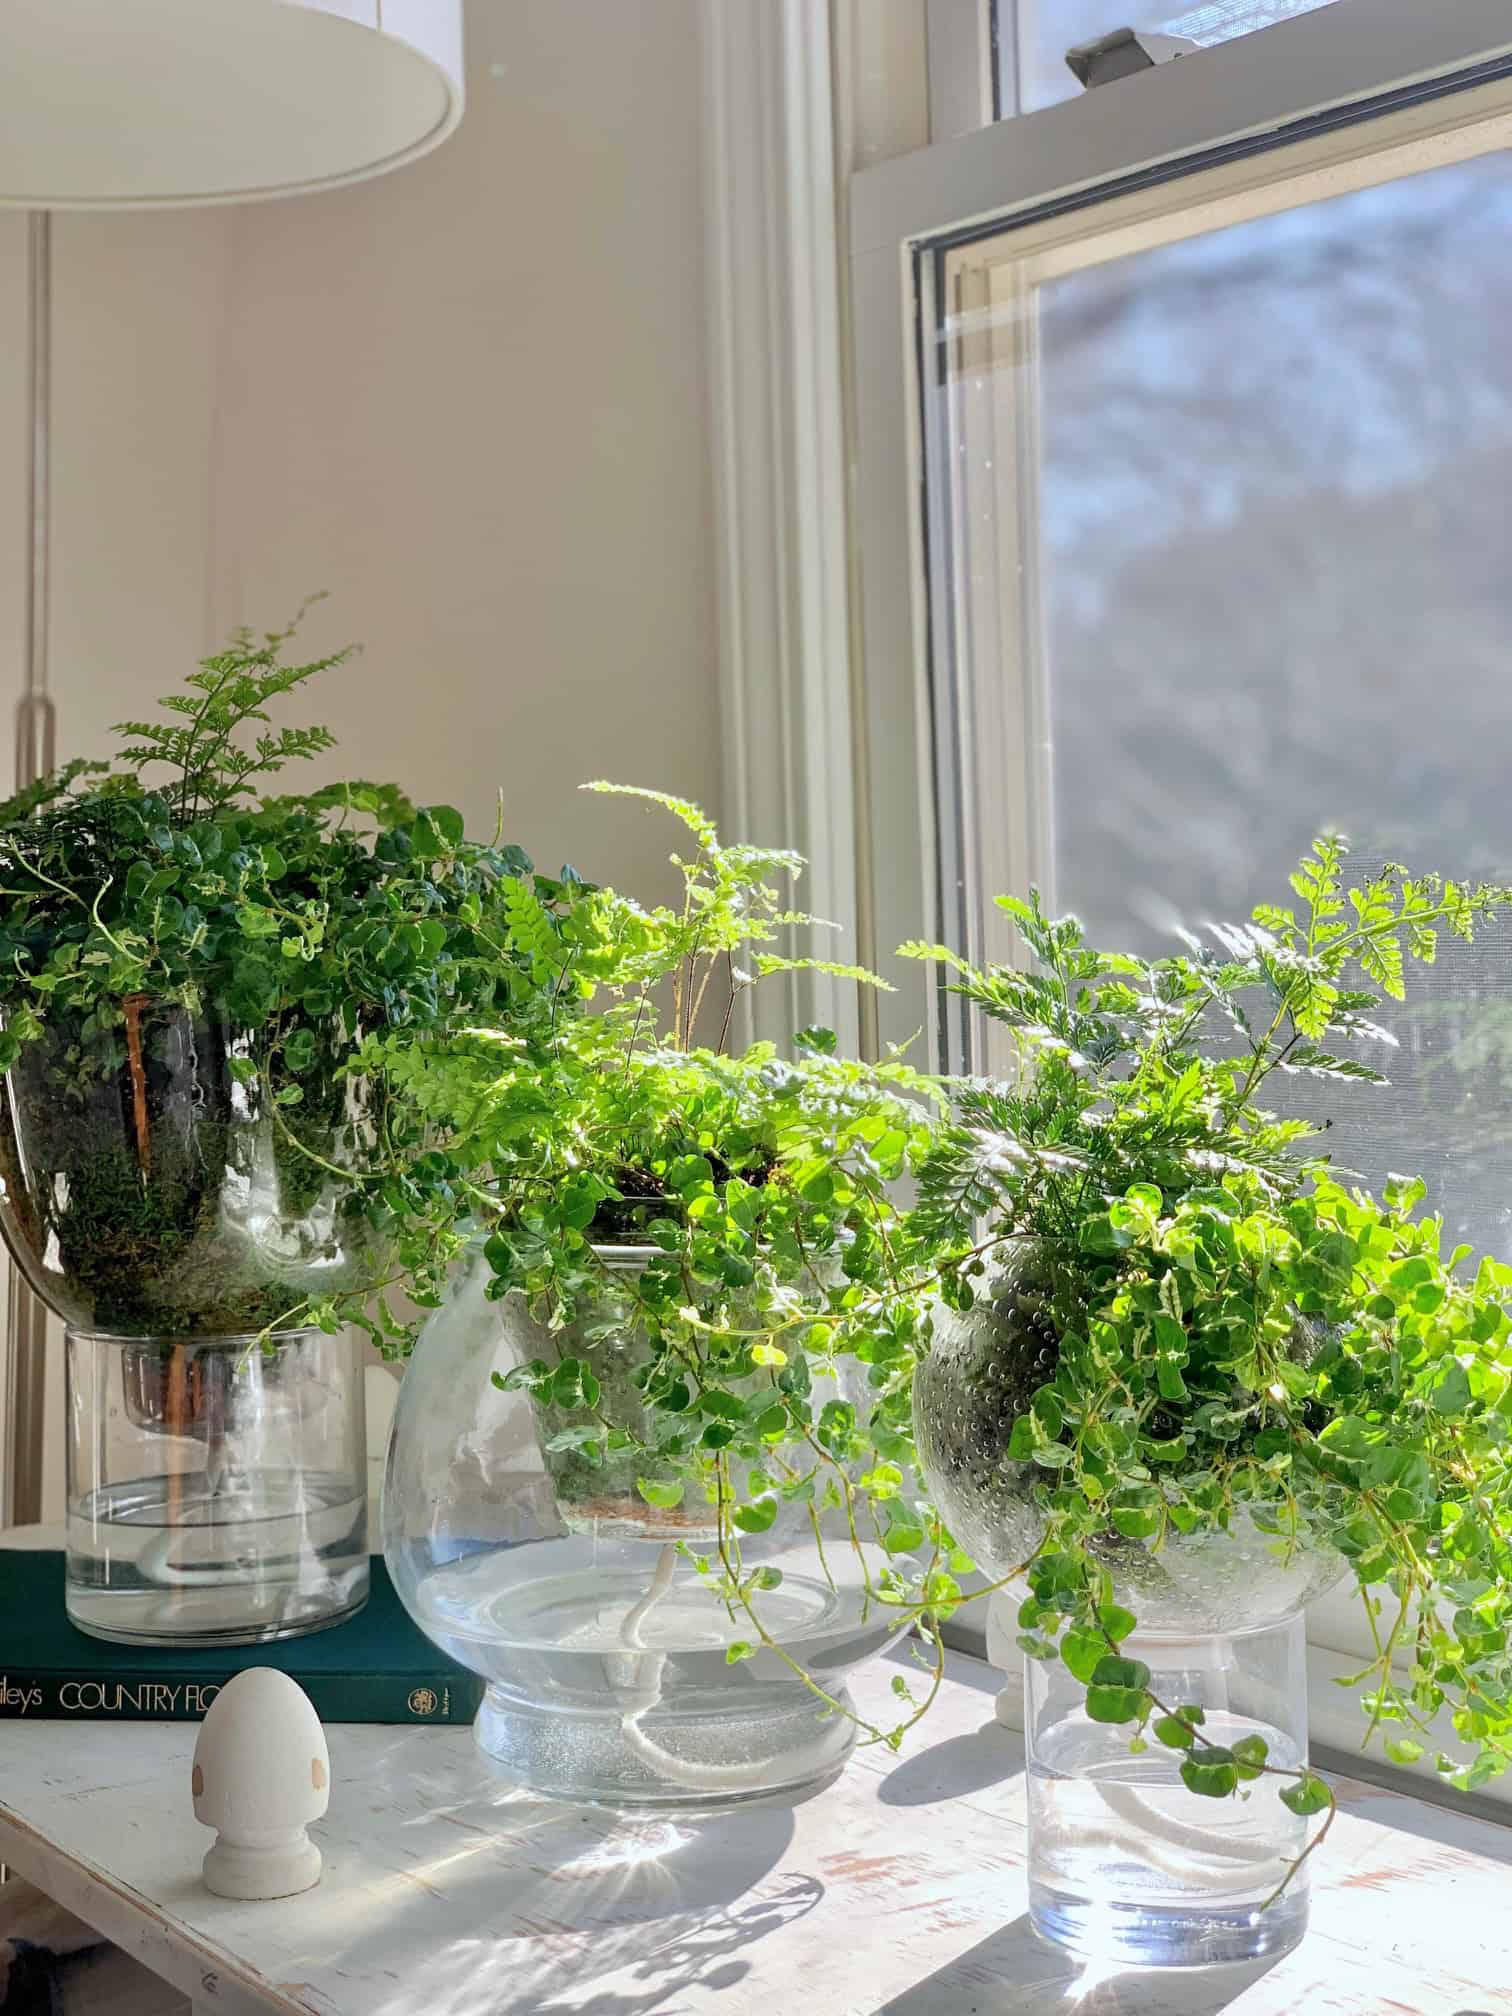
As I considered options I knew I needed a glass container with a large opening (for the plants) and a smaller opening on the bottom (for the watering system). I eventually came up with a great idea to use glass globes (from light fixtures) as they have both a large opening and a smaller one. Lowes carries several types of replacement globes so I started there. I bought 3 different sizes that were different shapes - and just like that my plan to transform these light fixture globes into planters was underway.
Choosing the right vase for your water reservoir
Next, I needed to figure out what to use for the bottom section of the planter where the water reservoir would be. I decided to check my storage unit for used glass vases and found 3 that would work. Here are the globes with their corresponding vases before planting.
Tip: You can find inexpensive glass vases at thrift stores, craft stores or the dollar store.
Supplies you'll need
- 3 Glass lighting globes (linking 1 style)
- 3 glass vases (linking 1 style)
- Self-watering wick
- Coco liner
- Sheet moss
- Potting soil
- Plants
Tools required
- Hand shovel
- Scissors
- Container (to be filled with water to soak the moss)
- Watering can
How to build your self-watering planter (it's easier than you think!)
Step 1: Soak the moss in water until fully saturated.
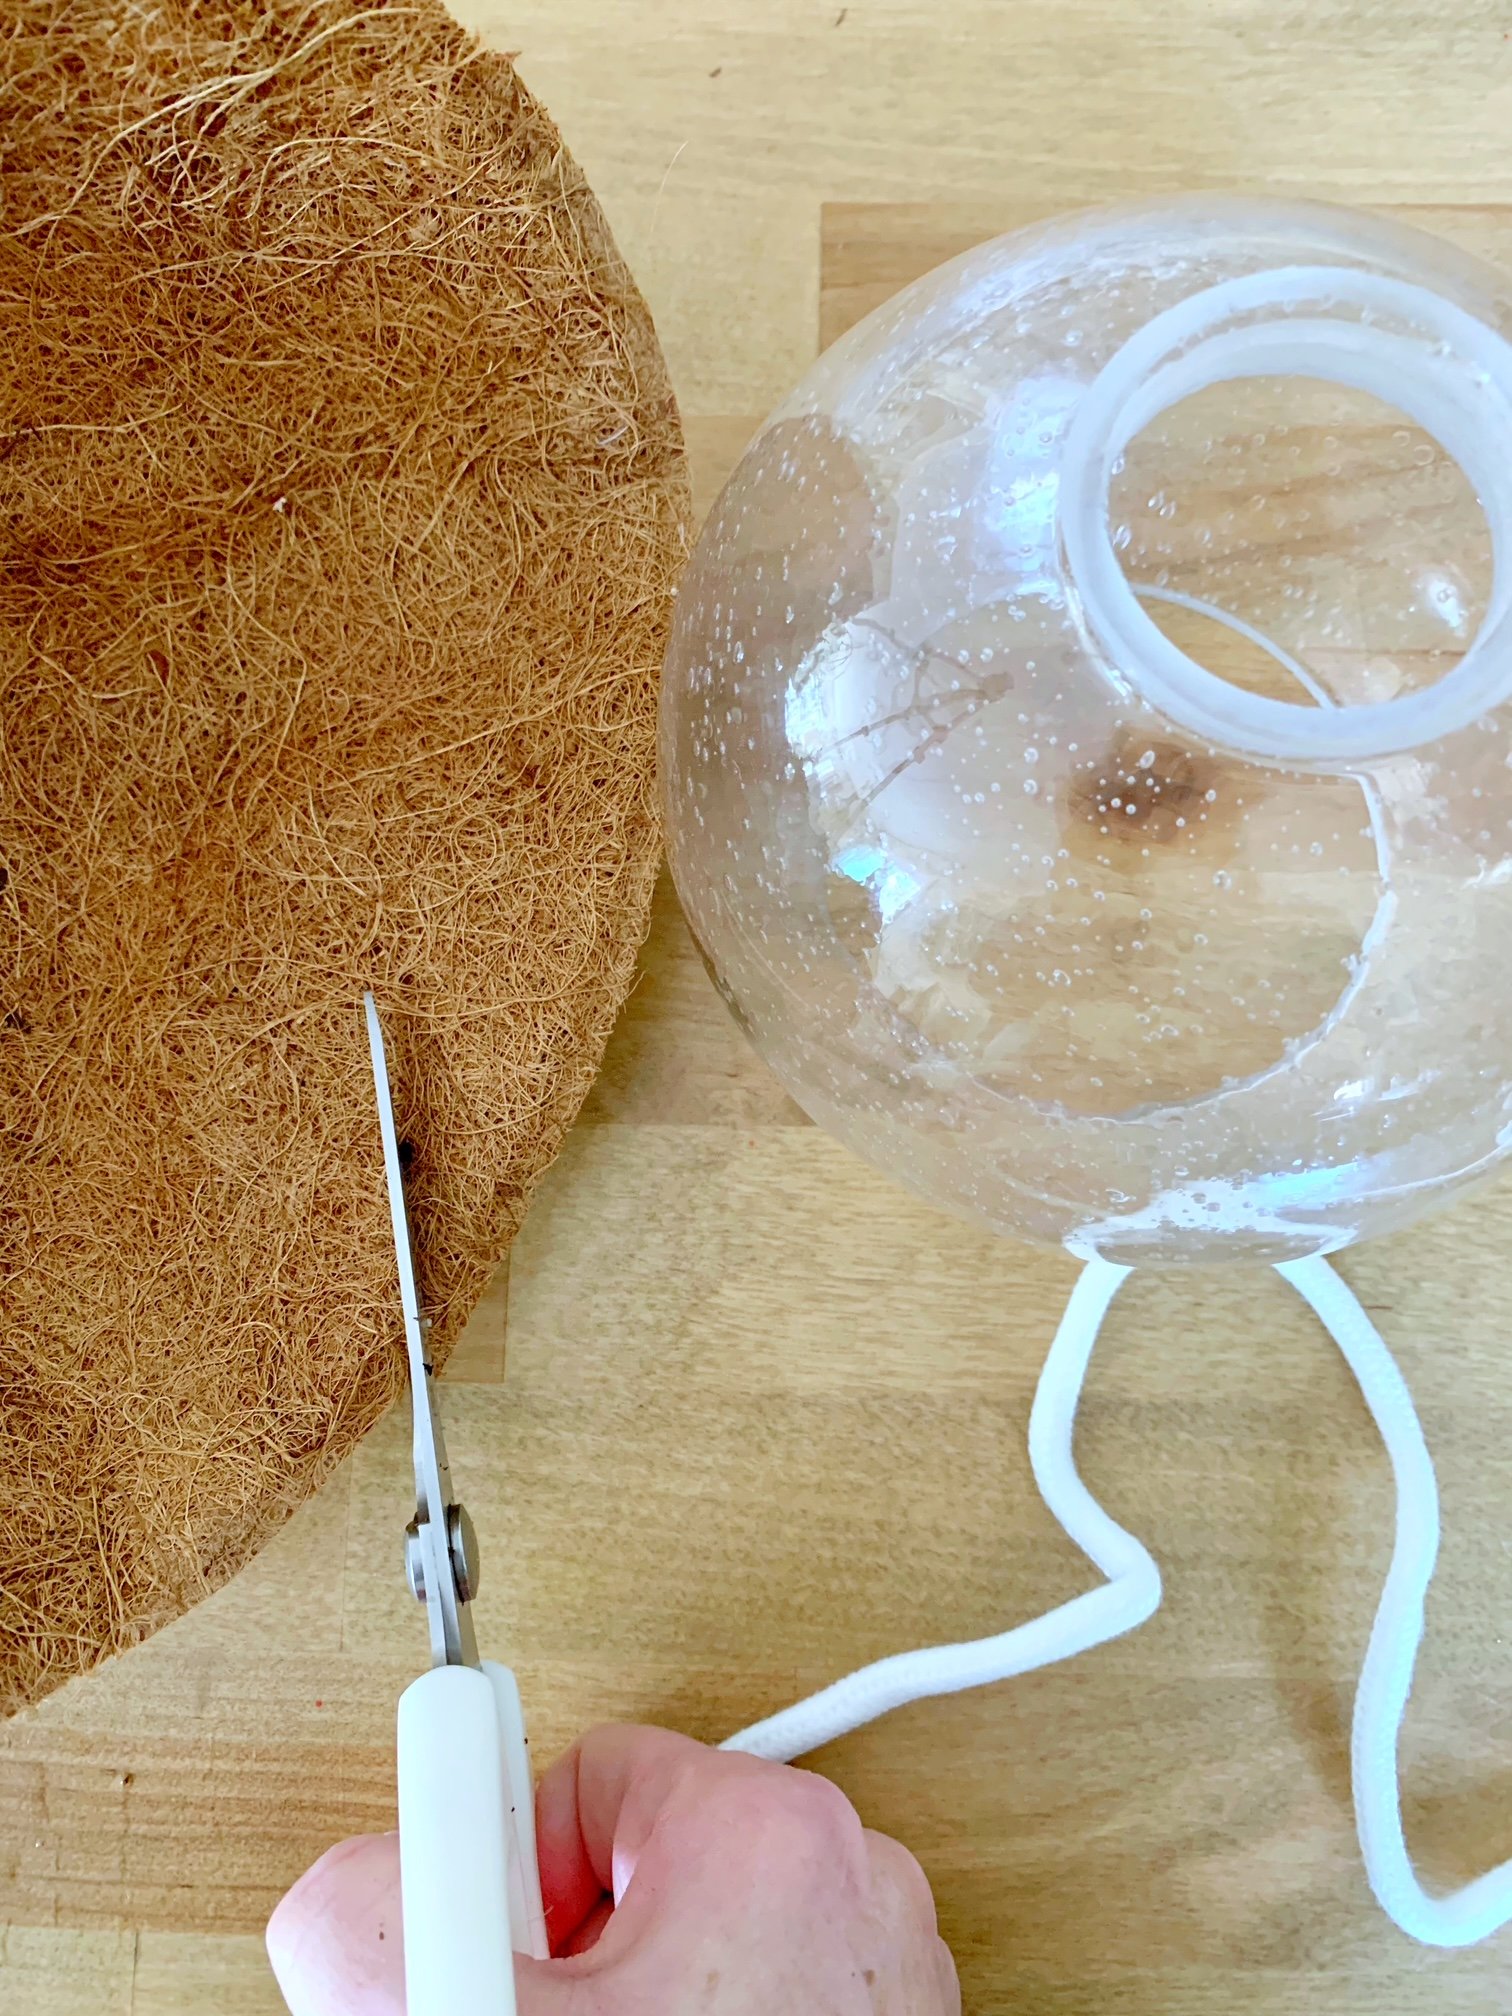
Step 2: Cut a circle from the coconut coir, making it slightly larger than the small opening of your glass globe.
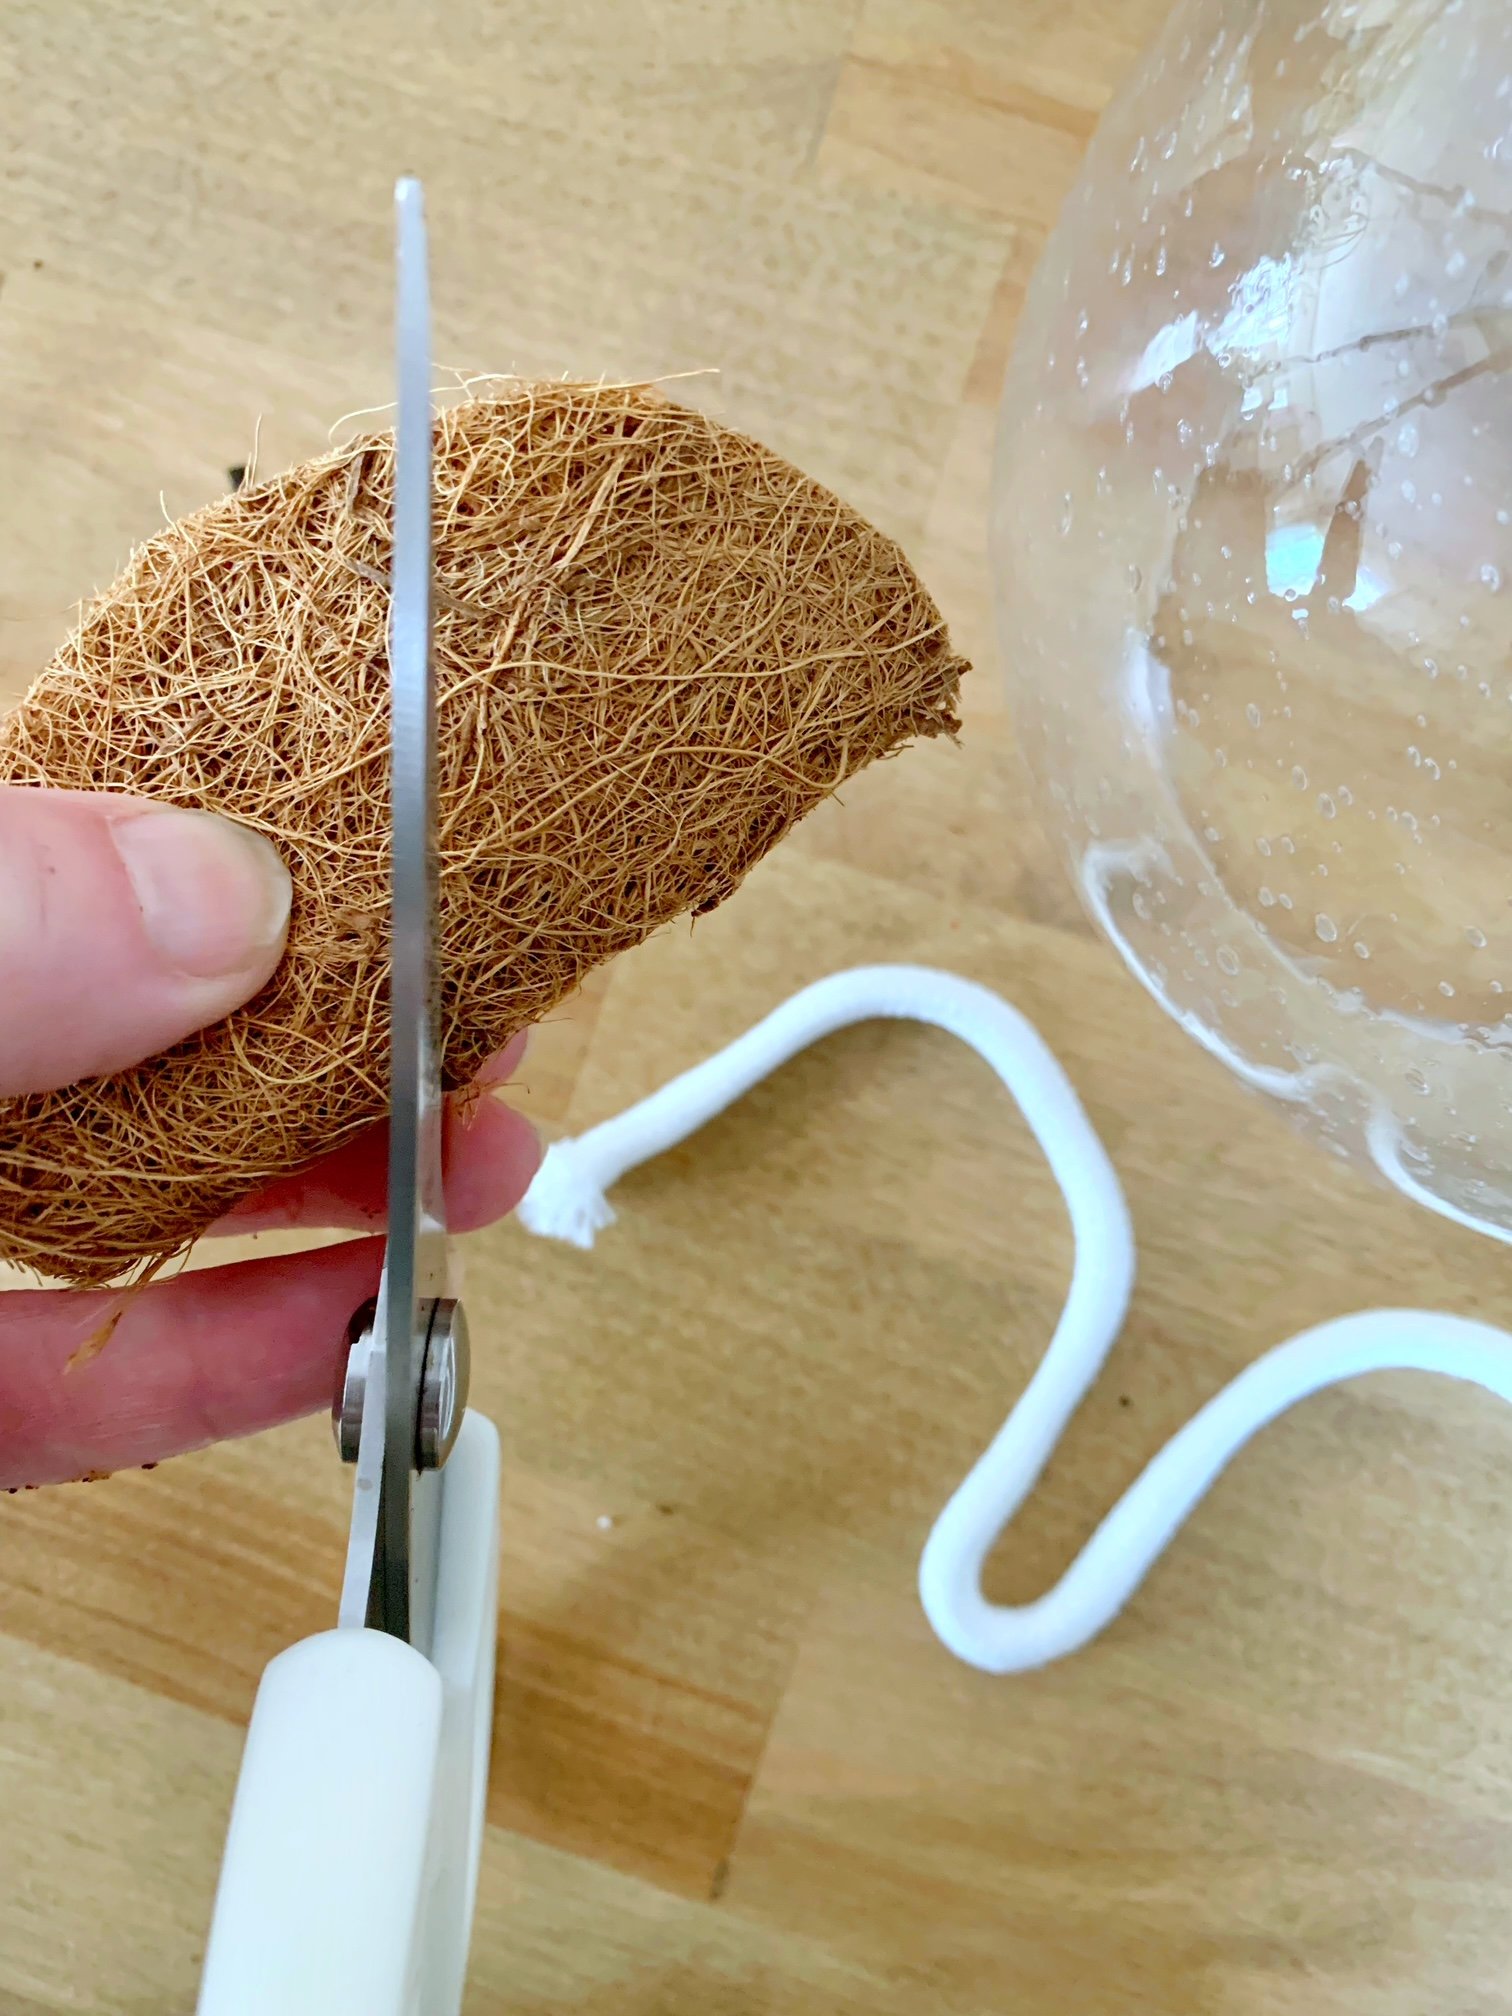
Step 3: Fold the coir circle in half and snip a small hole in the center.
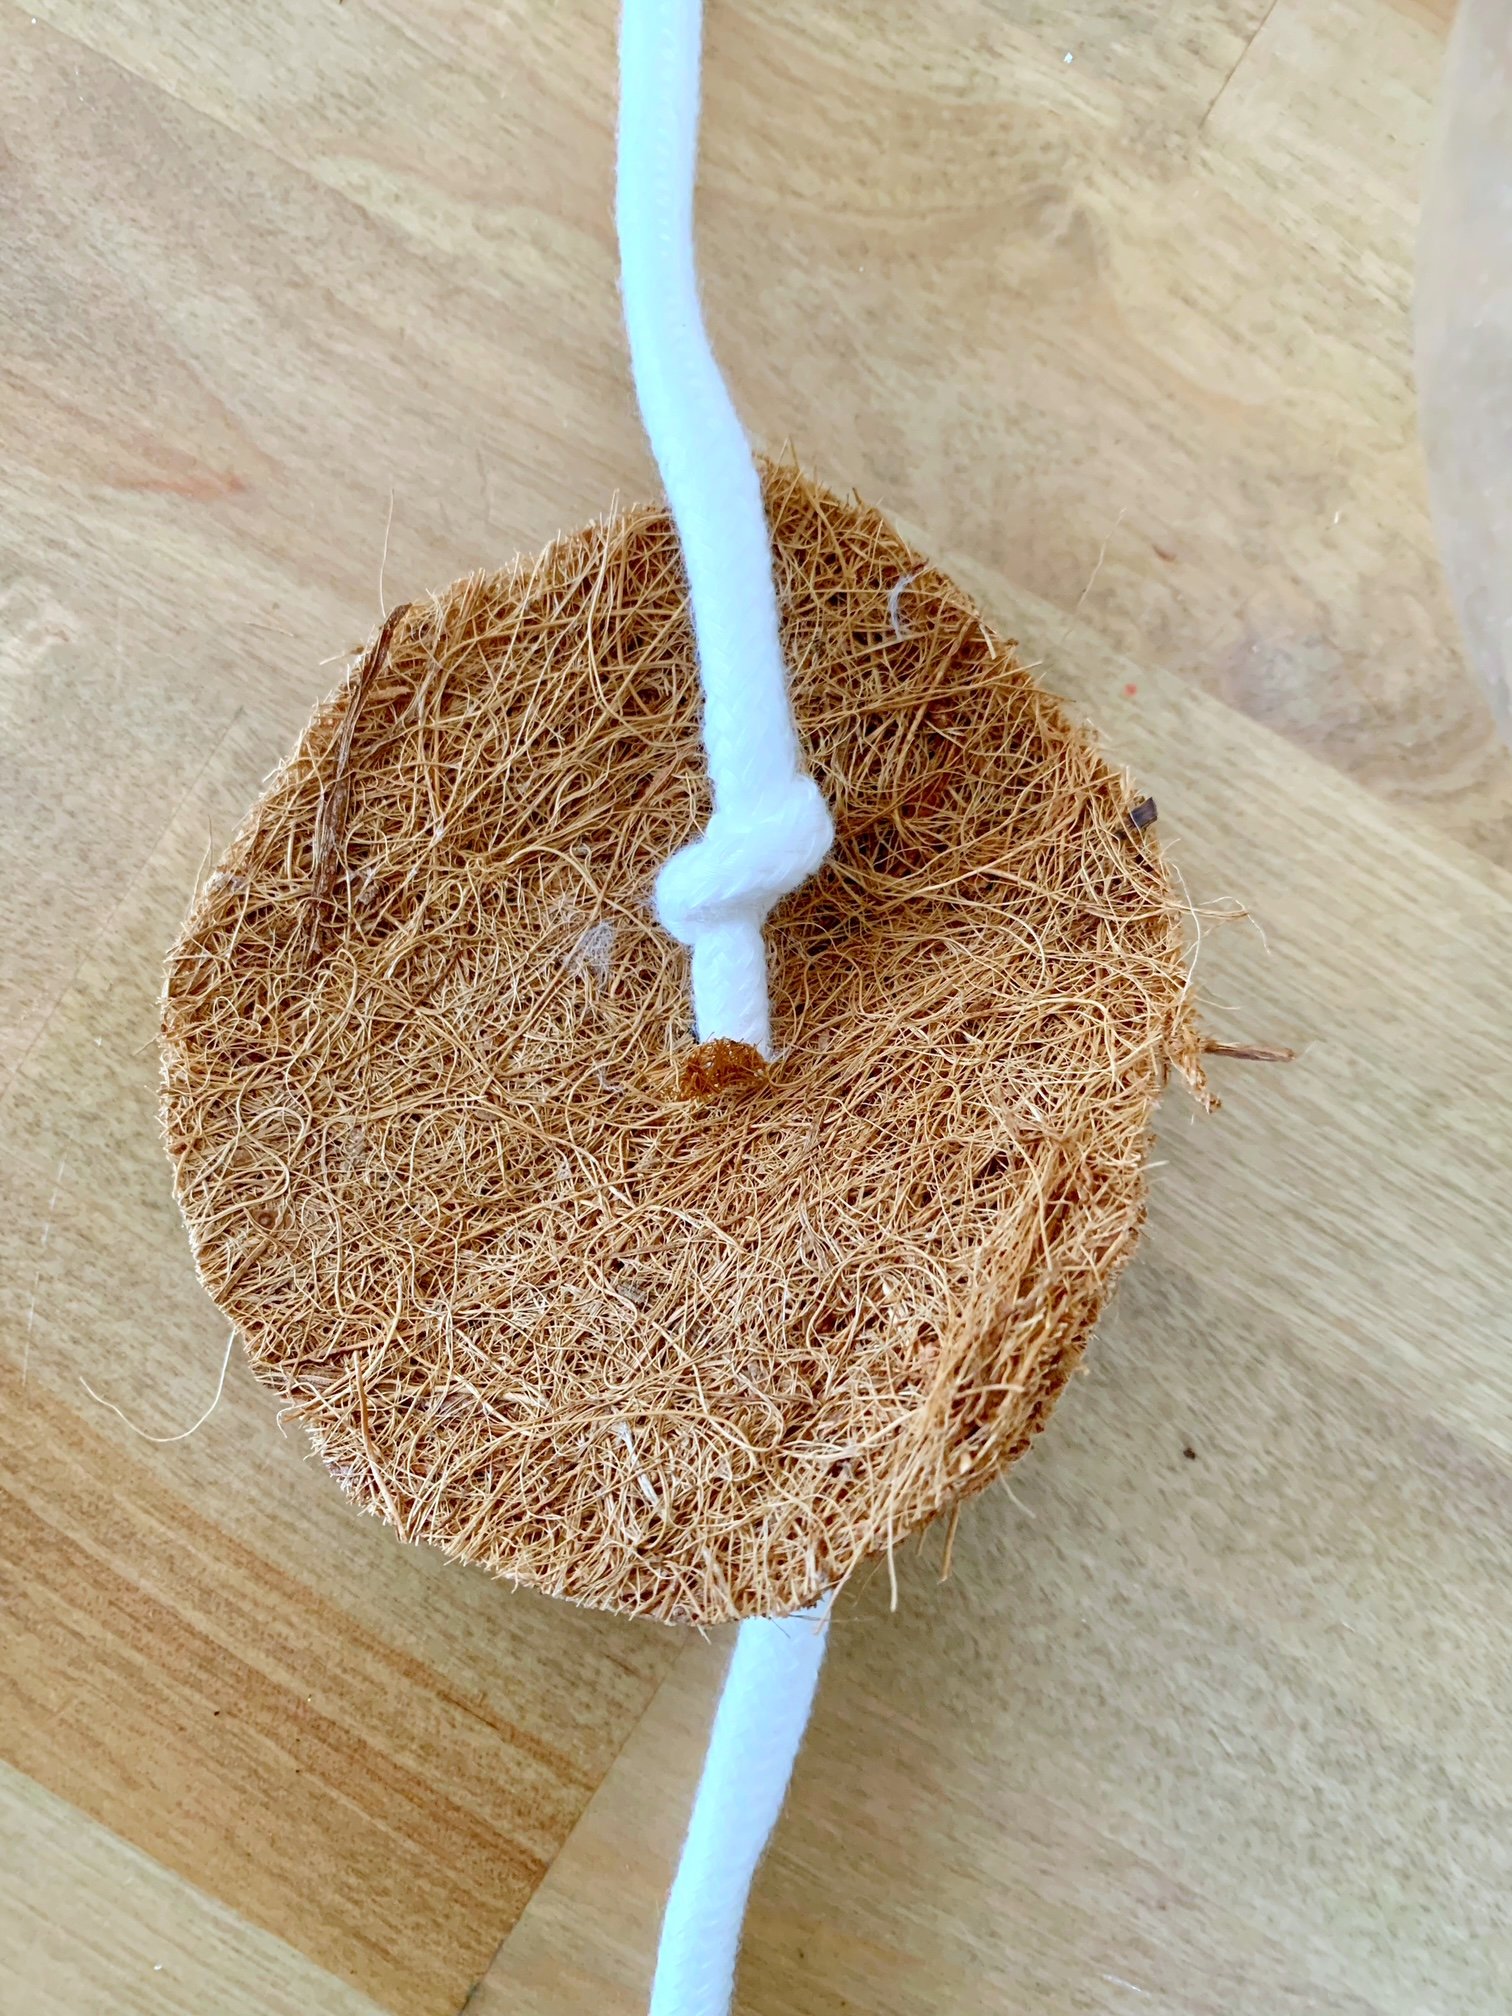
Step 4: Thread the wick through the hole and tie a knot just above it.
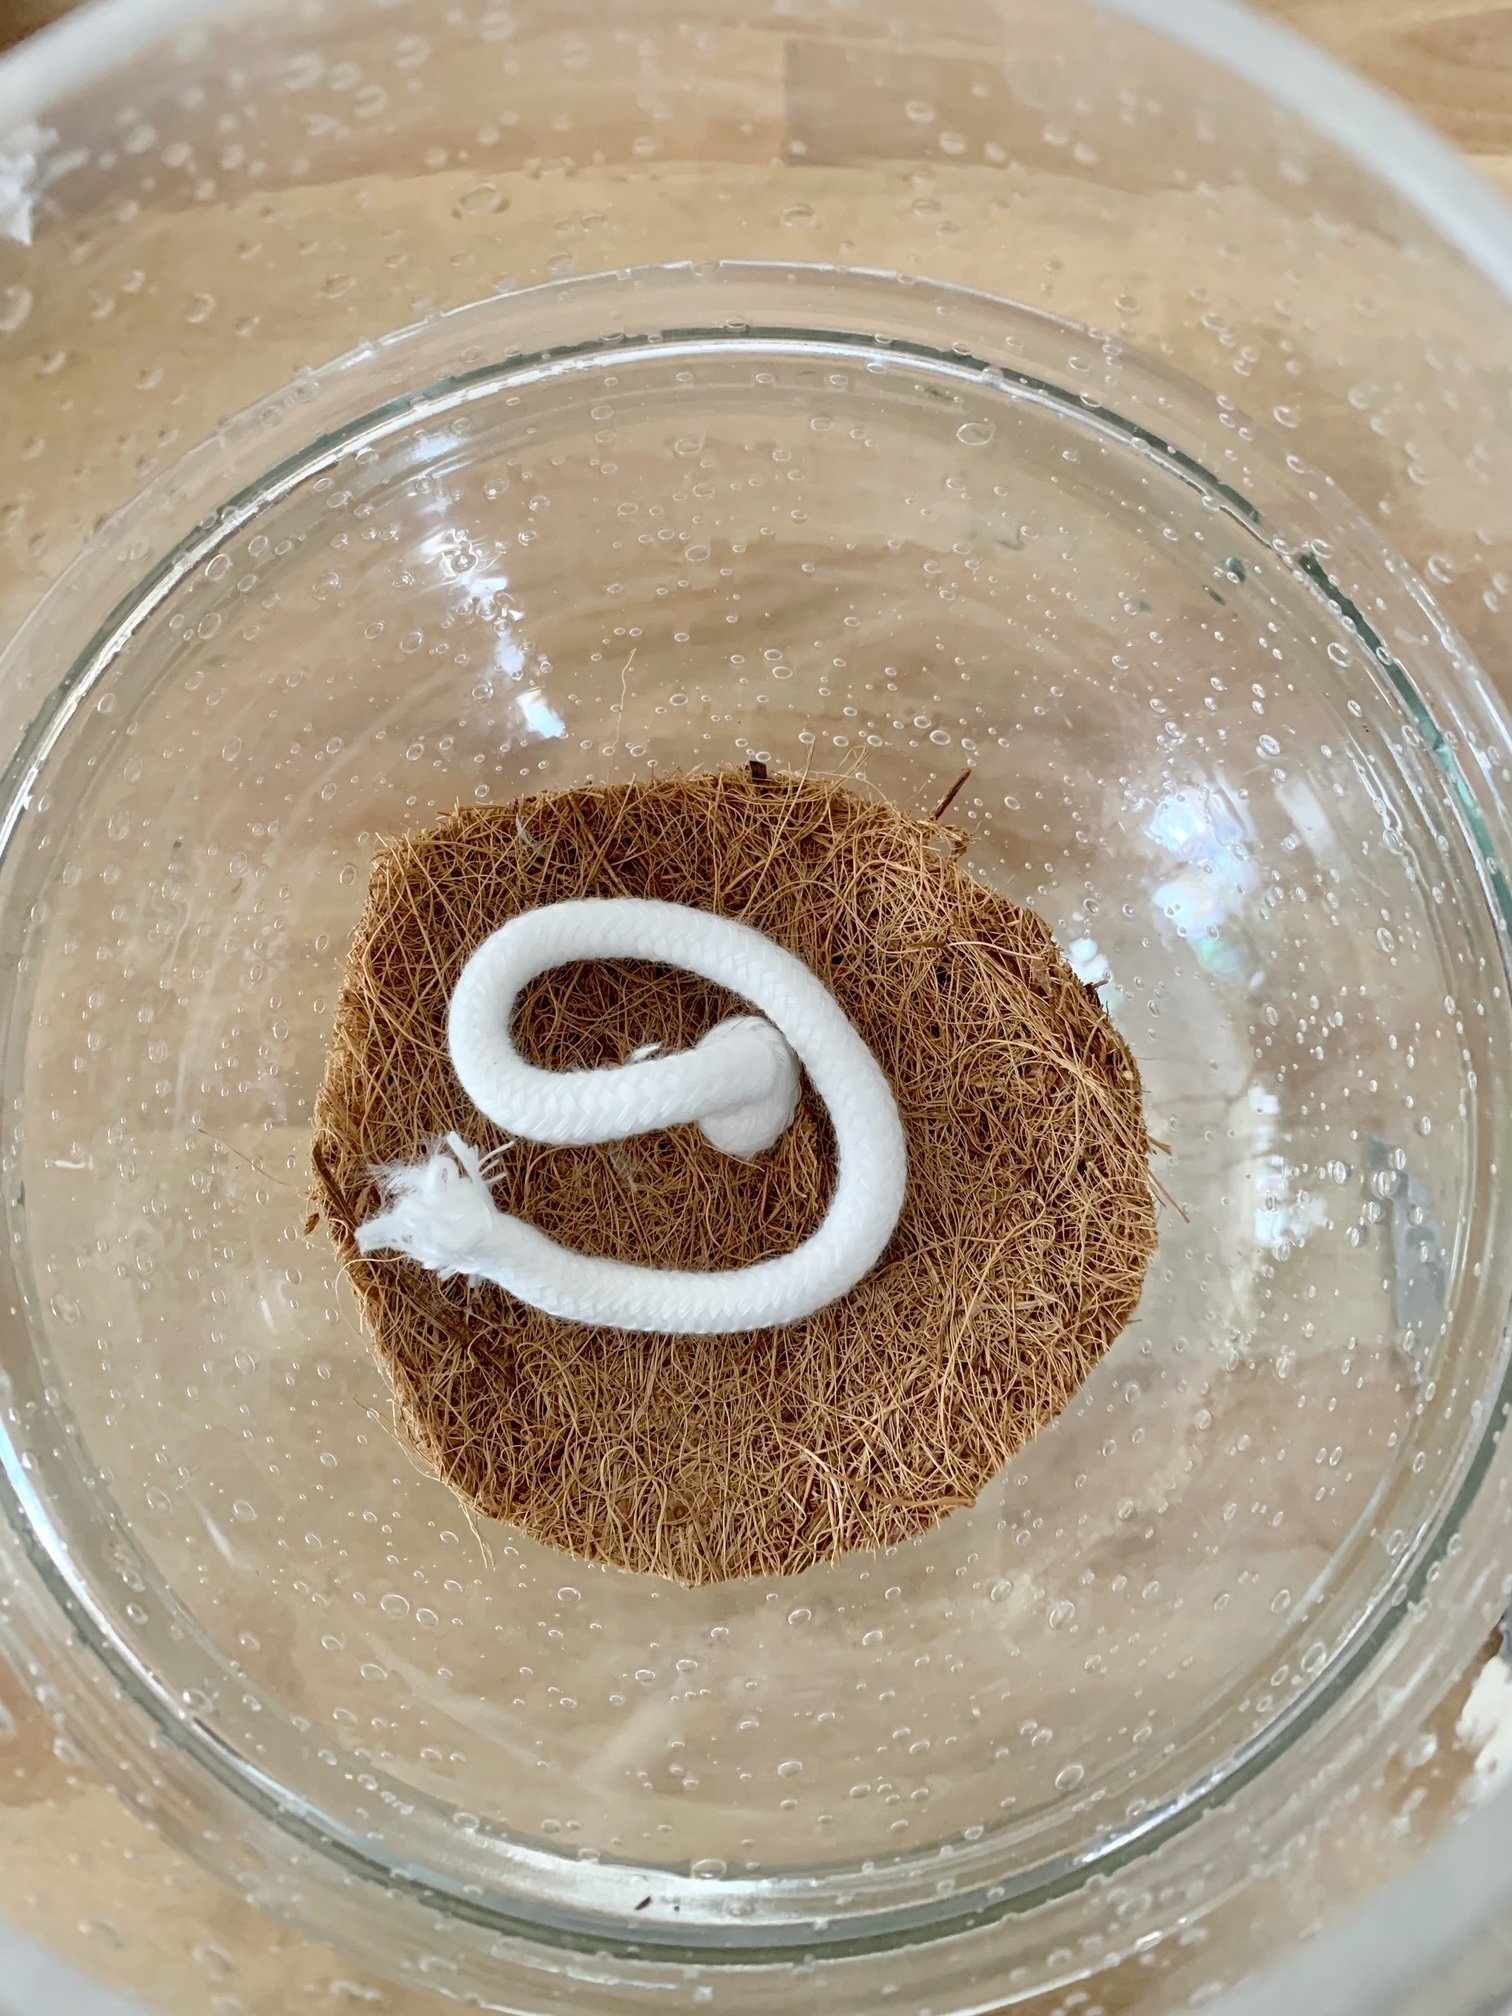
Step 5: Place the coir circle into the globe with the knot facing up, resting at the bottom of the small opening.
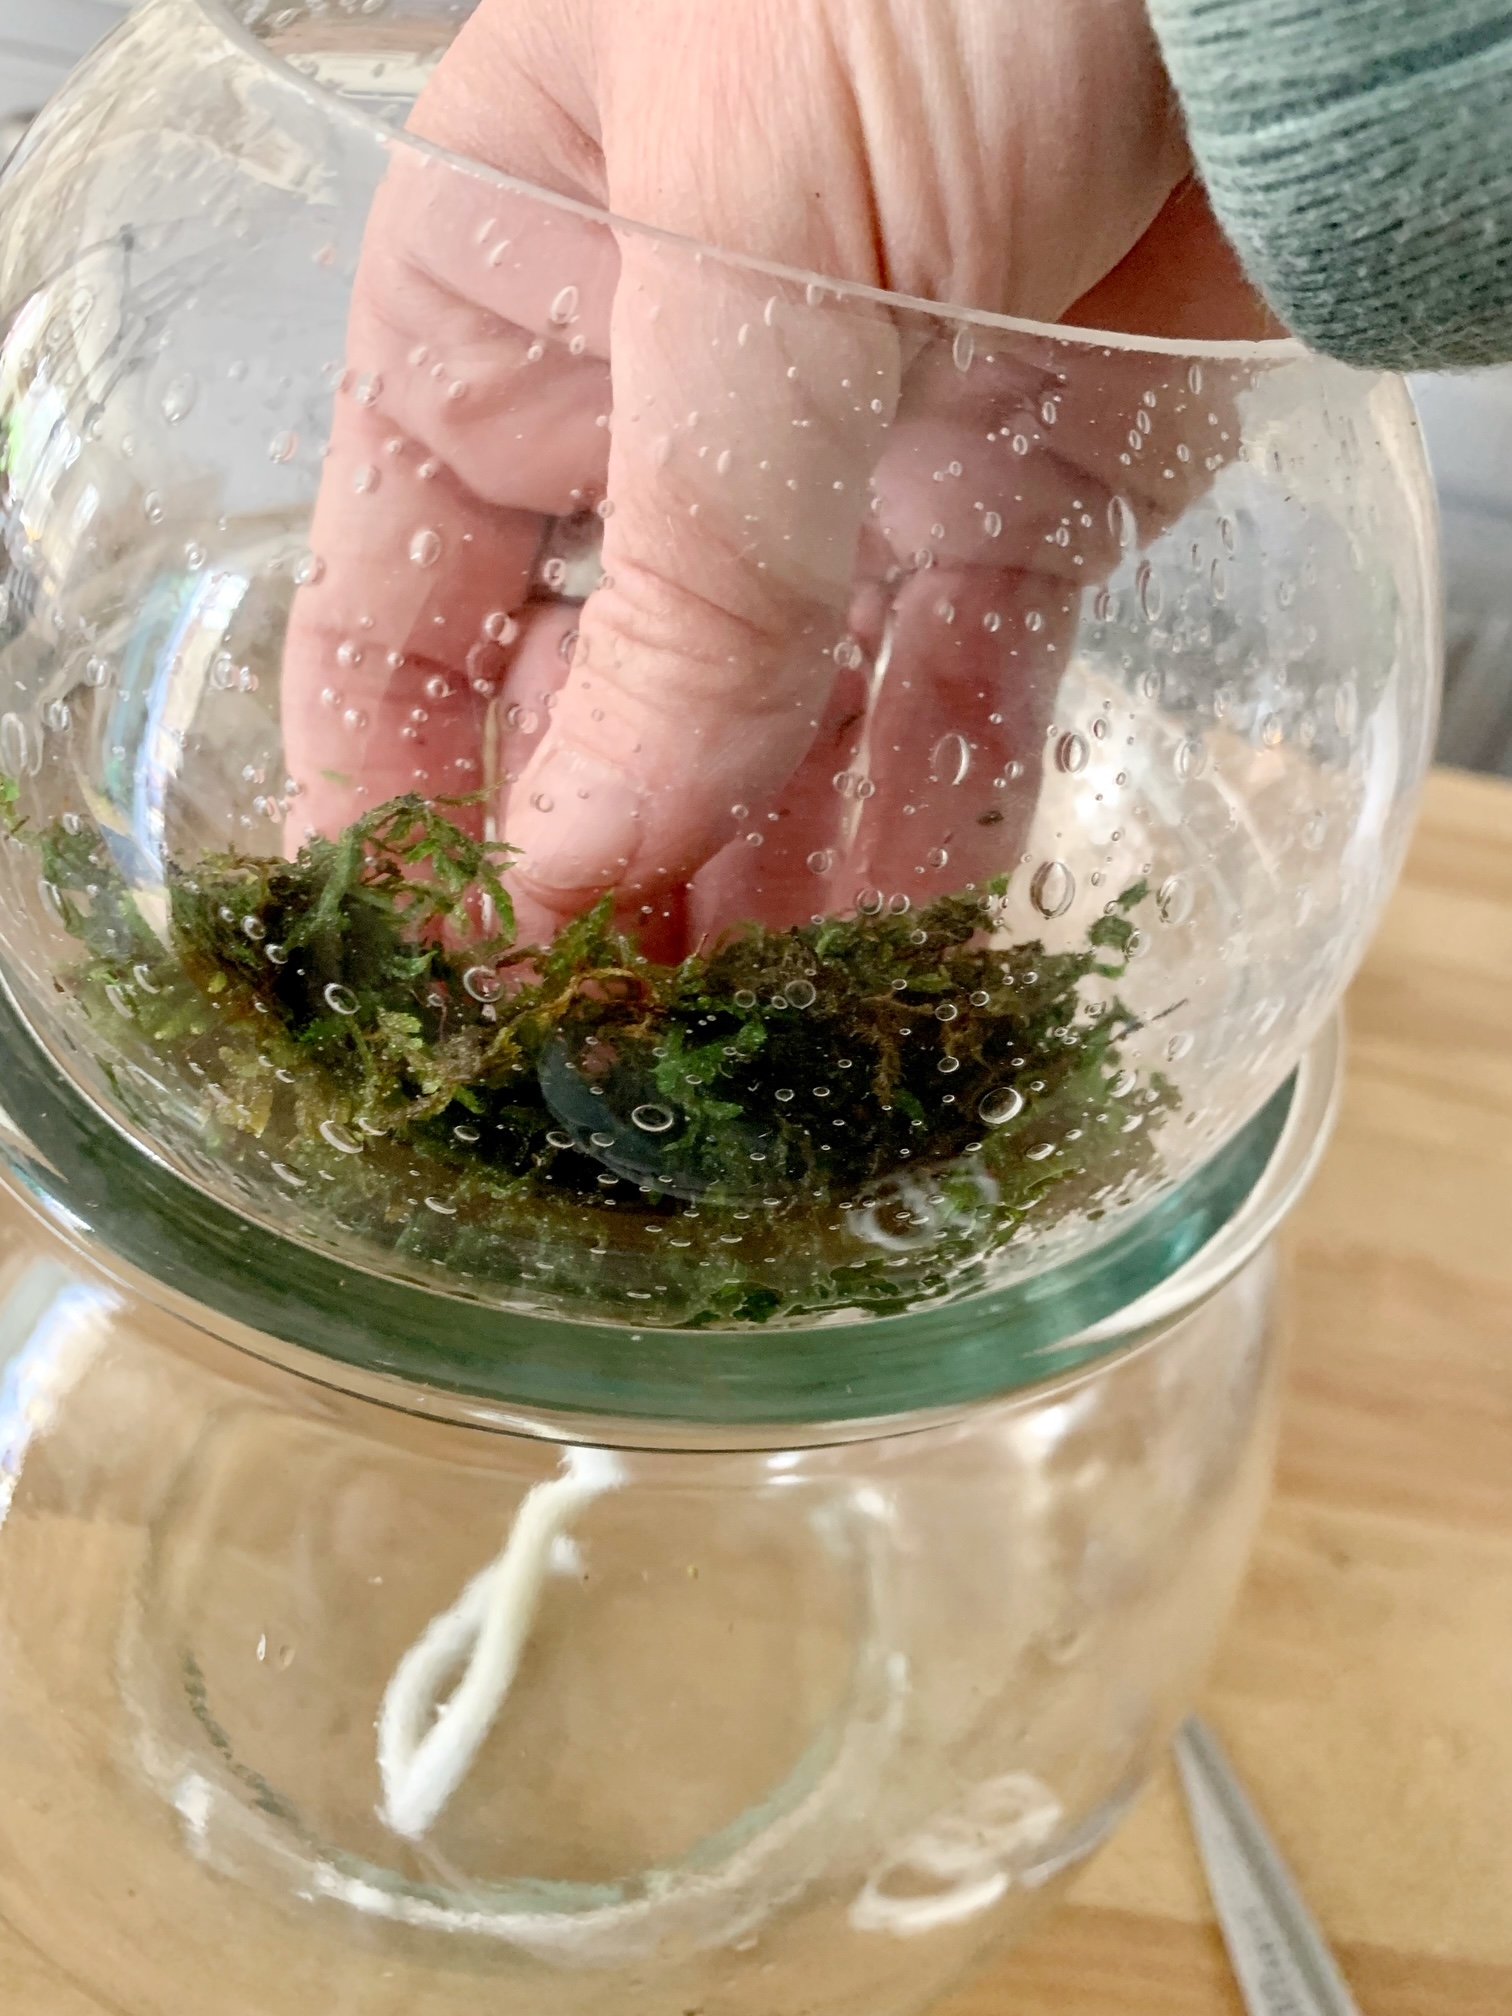
Step 6: Press the damp moss along the inside wall of the globe, leaving space in the center for plants and soil.
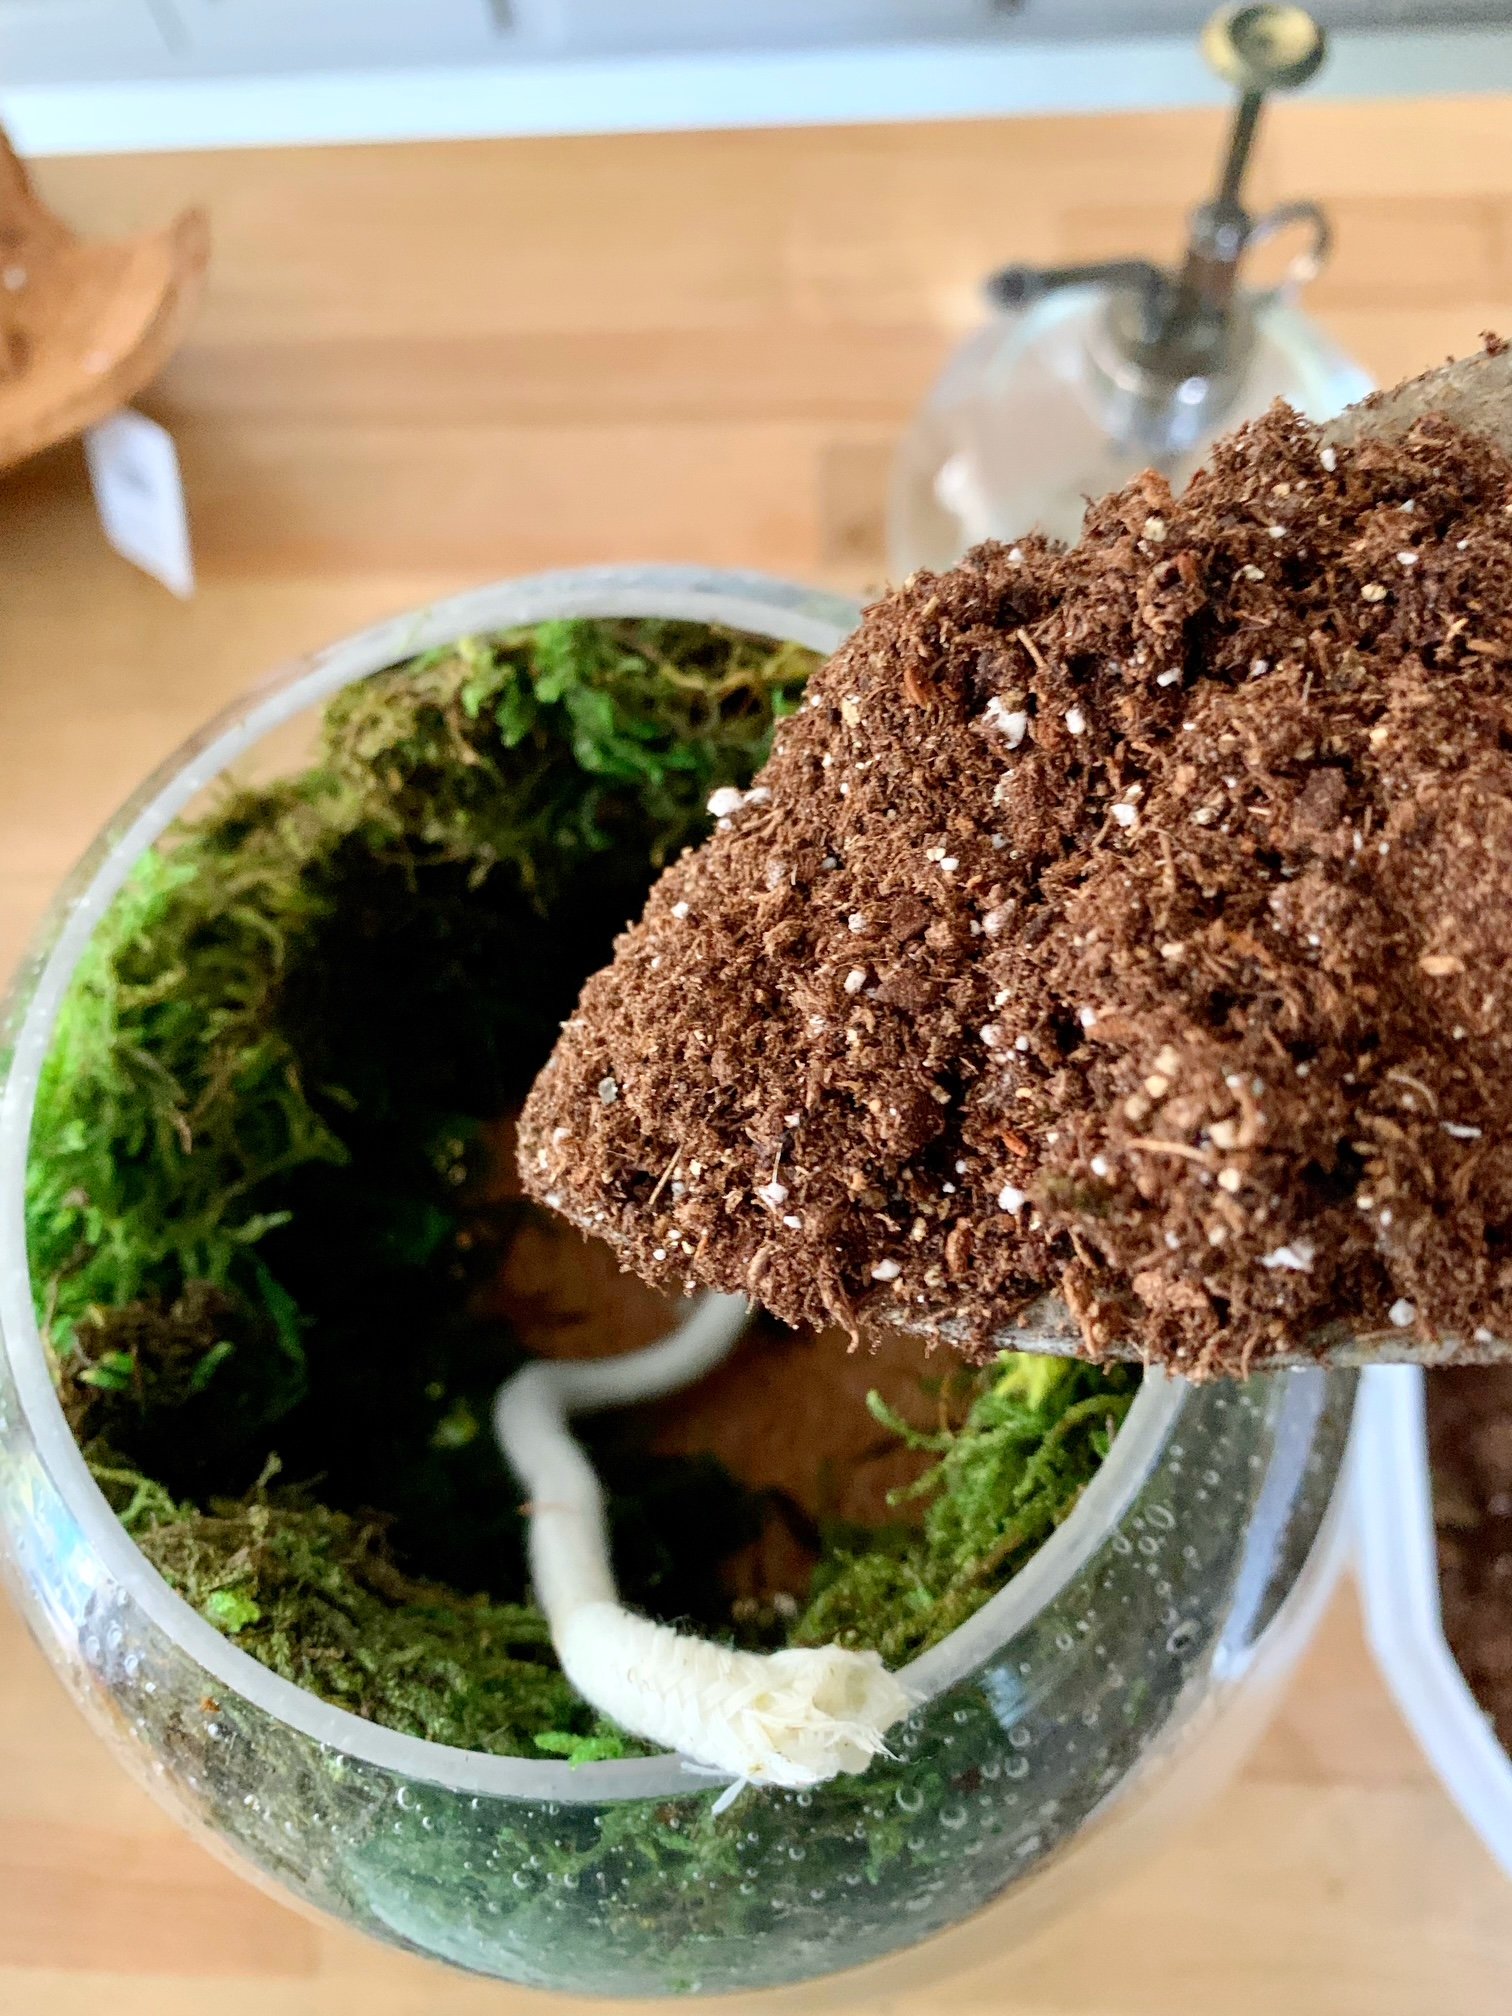
Step 7: Pull the wick upward and begin adding potting soil to the globe.

Step 8: Add your plants, making sure the wick extends into the center of the soil.
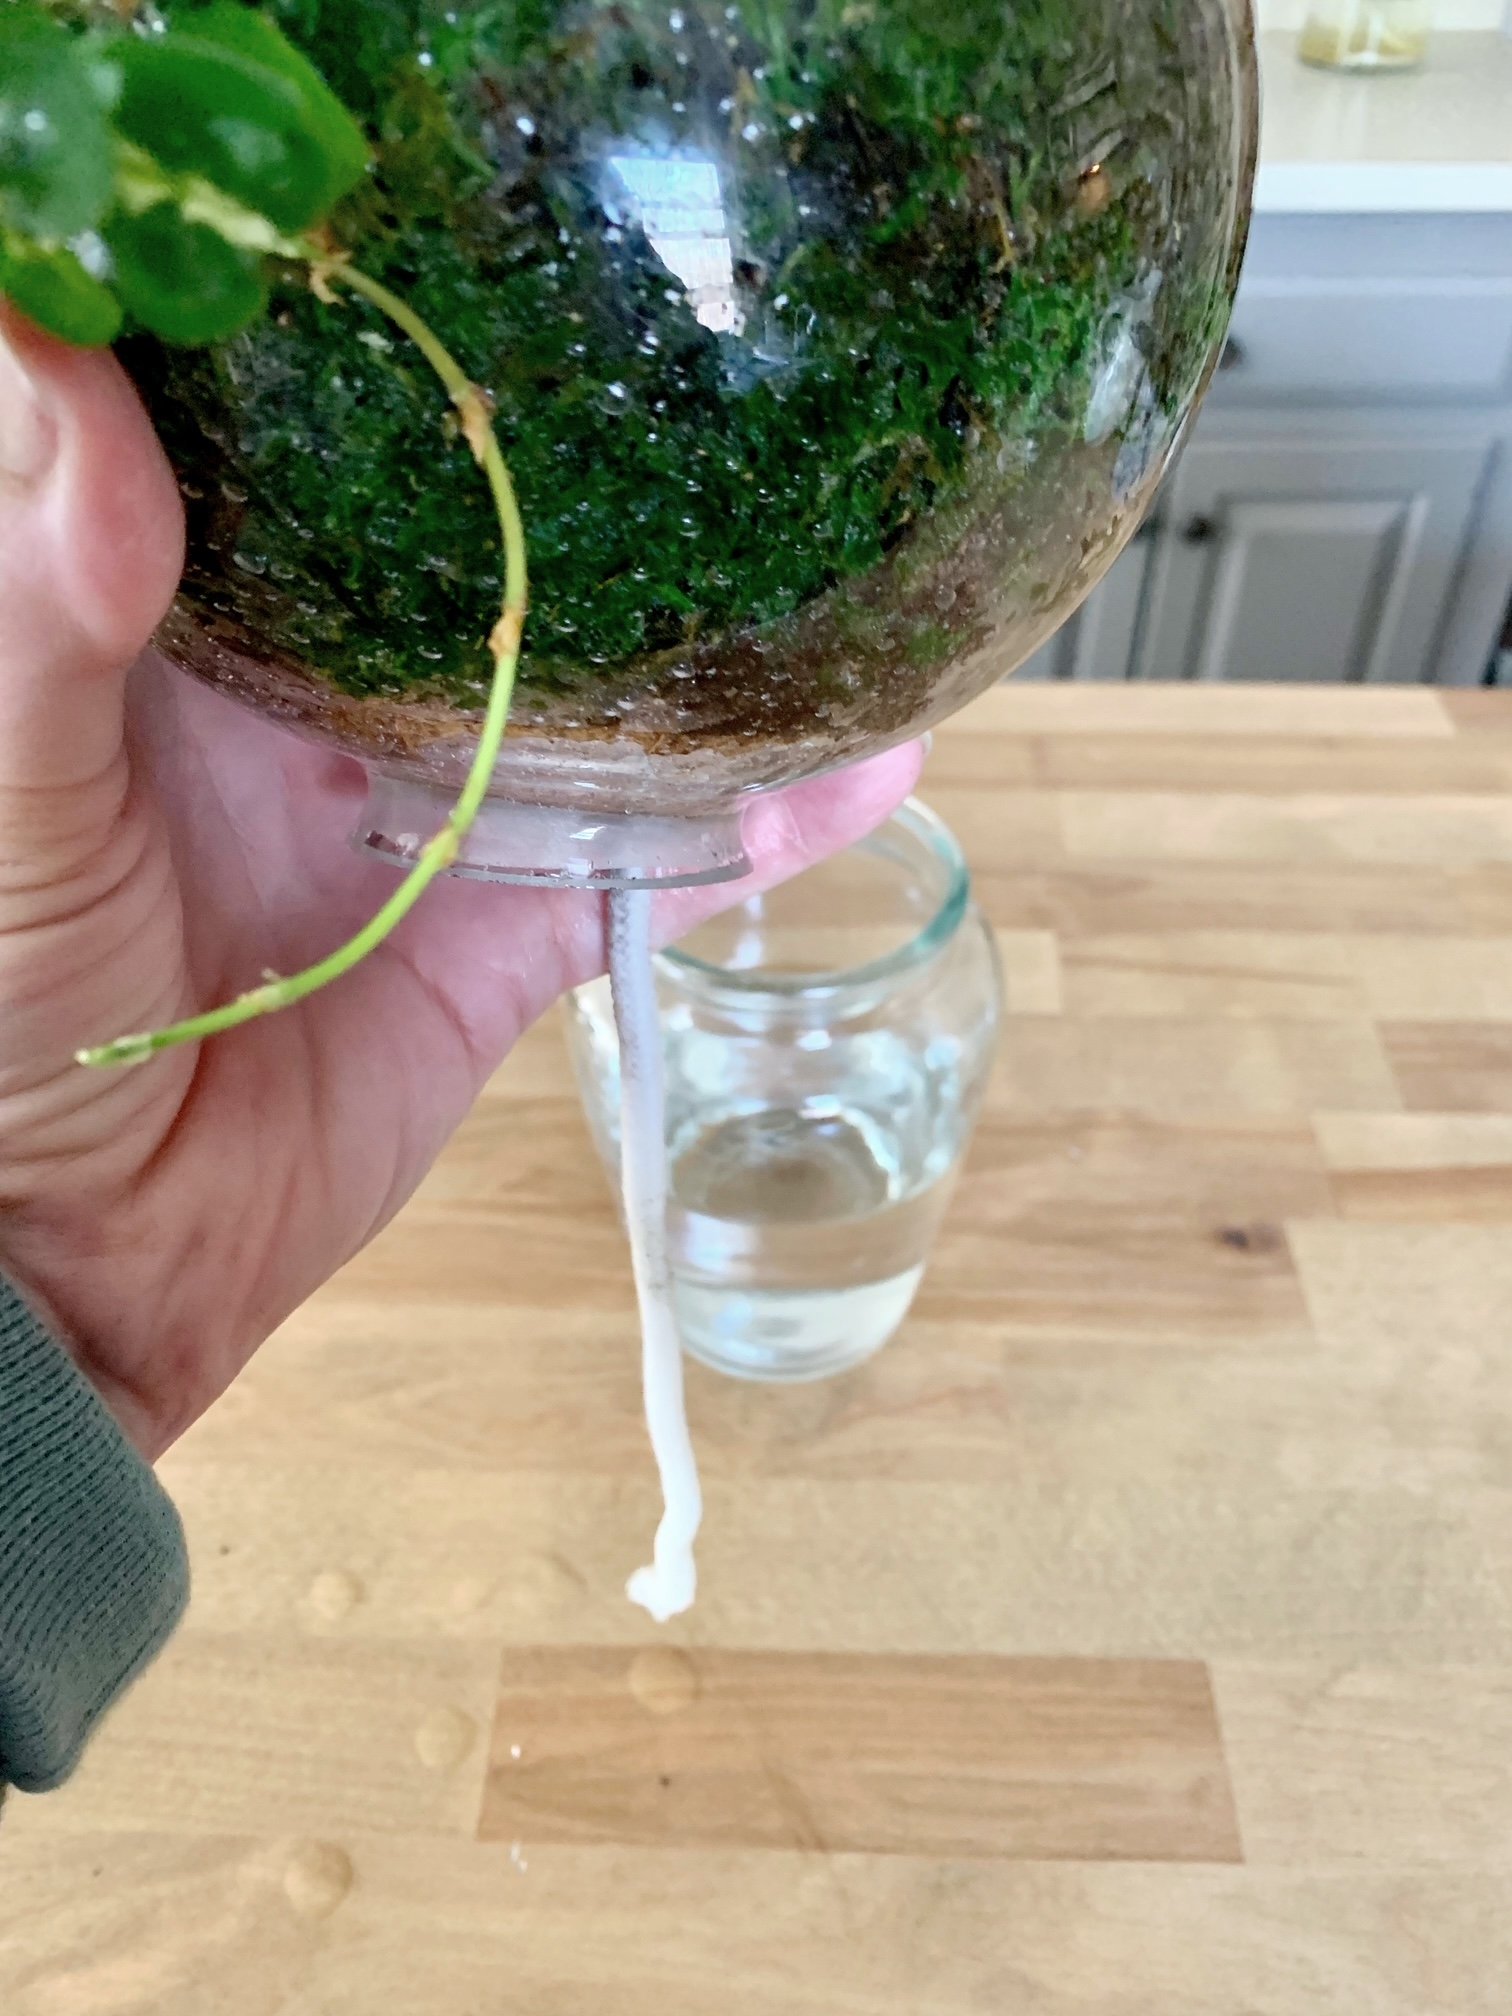
Step 9: Place the globe in a vase filled with fresh water, allowing the excess wick to hang down into the water.

Step 10: Water the plant once to start. After that, just change or top off the water in the vase weekly..
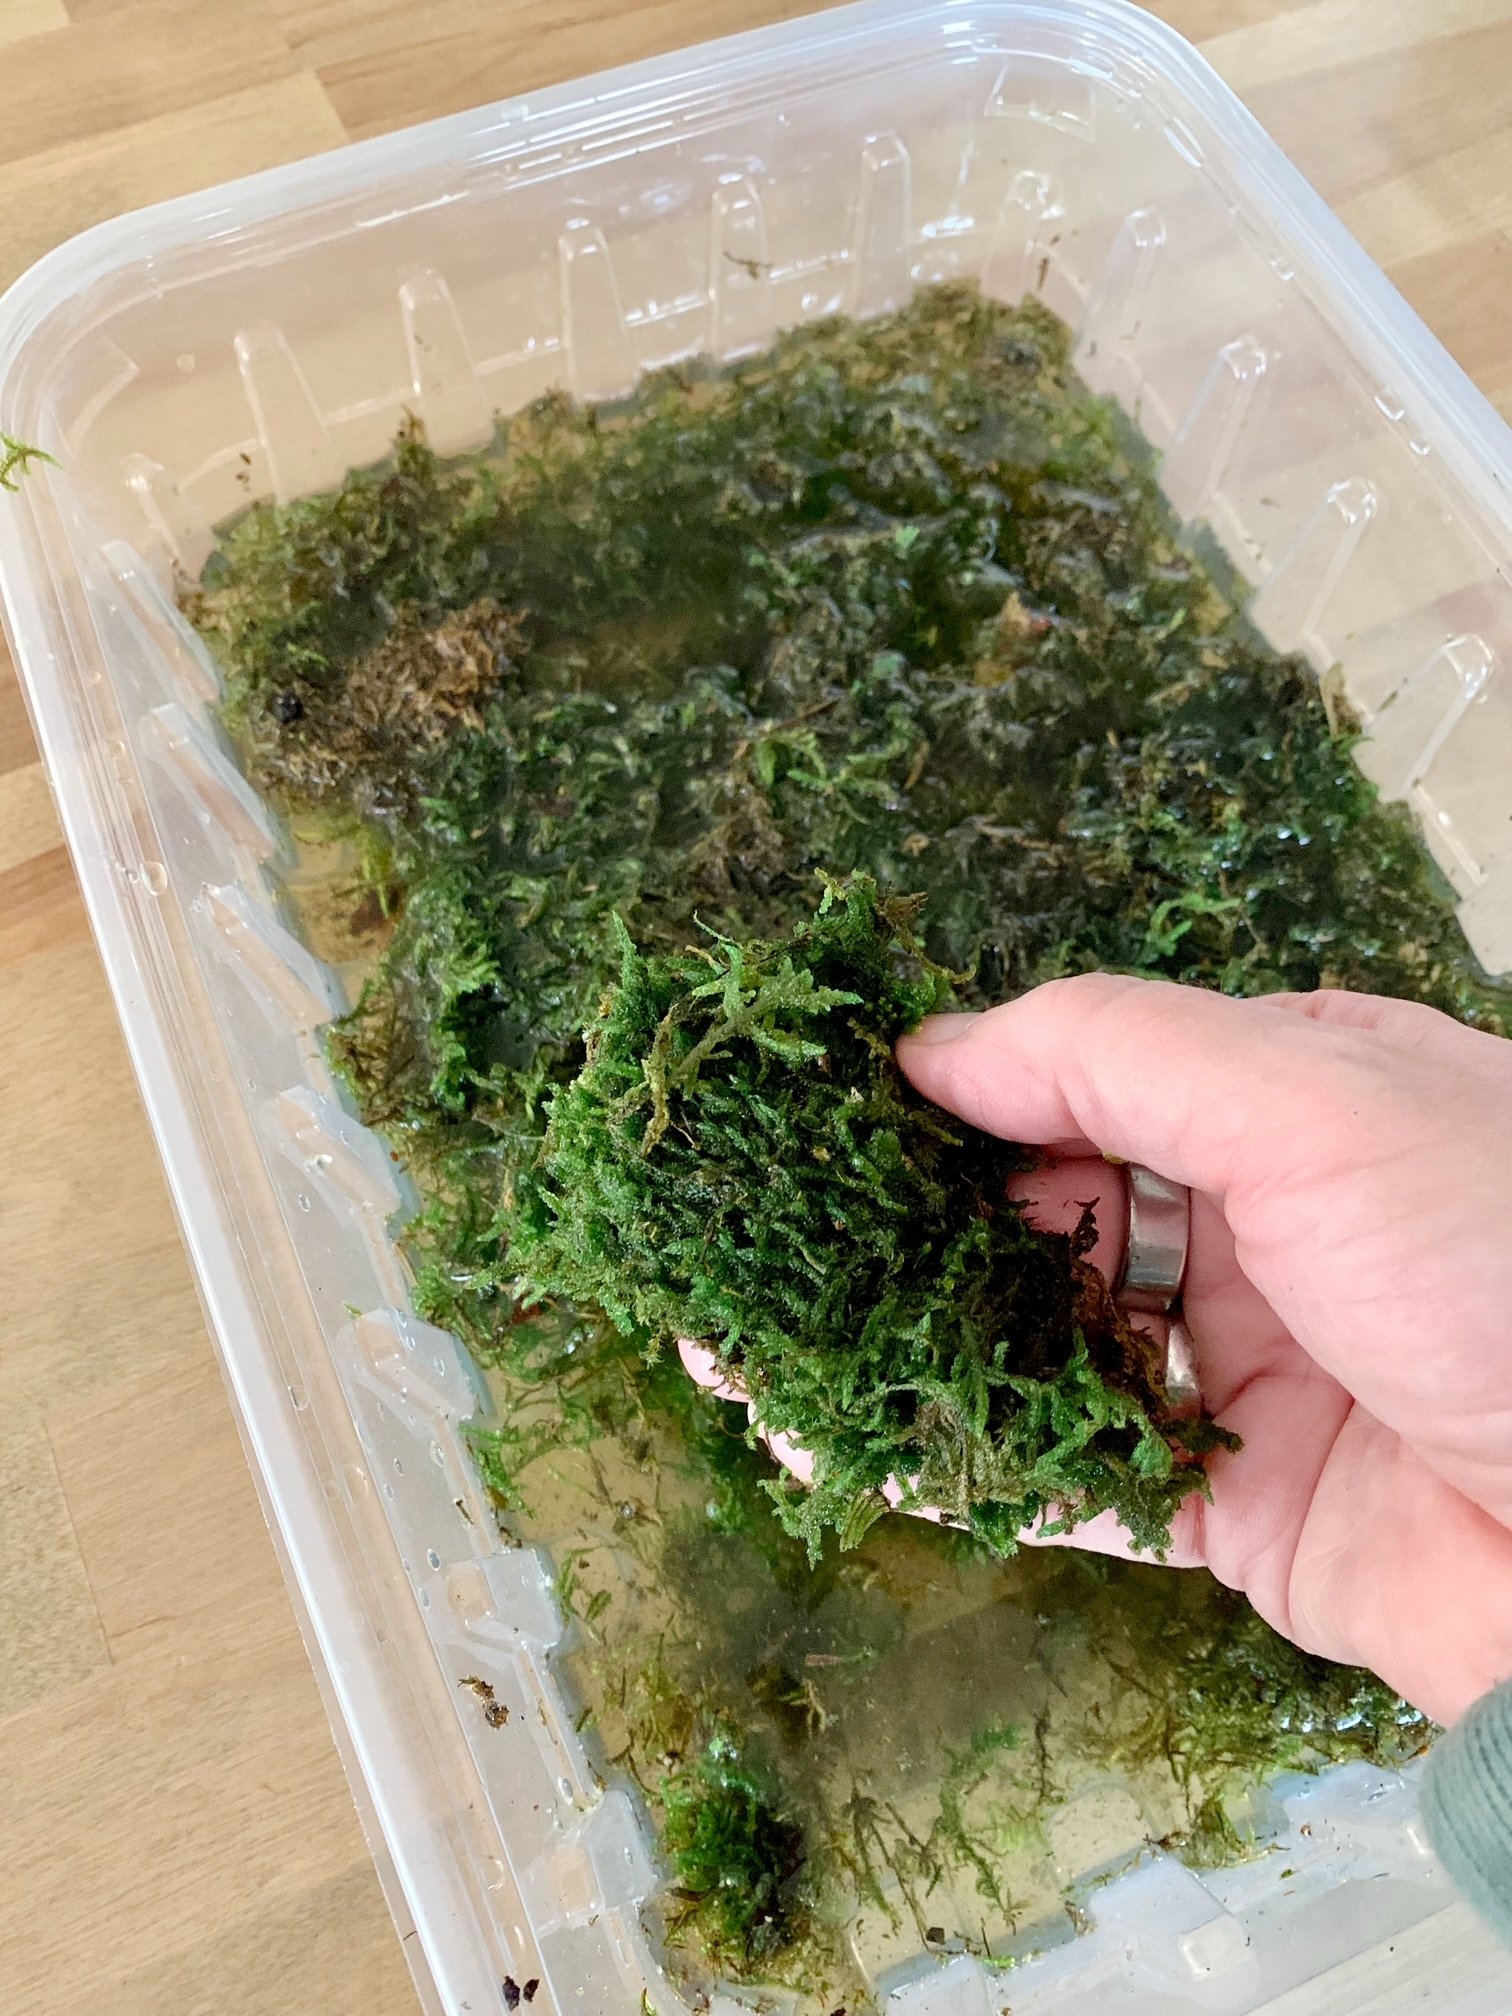
- Soak the moss
Fill a container or sink with water and fully submerge the sheet moss. Let it soak while you prepare the planter. This will help it become flexible and easy to shape
- Prep the wicking system
Grab a glass globe, a piece of self-watering wick, and a coco liner.
Cut a circular piece from the coco liner just slightly larger than the small bottom opening of the globe.
Fold it in half and snip a small hole in the center. - Thread the wick
Feed the wick through the hole you just cut. Leave about 6 inches sticking out on both sides.
Tie a knot in the wick just above the hole. This helps keep soil from falling through the opening later.
Place the wick and coco liner into the globe, knot-side inside. The tail of the wick should hang through the hole at the bottom of the globe. - Coil the wick
Inside the globe, gently coil the wick in the center so it stays in place during planting. This ensures it touches the soil later on.
- Add the moss
Take the soaked moss and gently wring out any excess water.
Press it along the inside walls of the glass globe, working your way up the sides.
Leave the center open for soil and planting. - Add soil
Place about 1 cup of potting soil into the globe. Be careful not to bury the coiled wick.
Moisten the soil slightly using a watering can. - Add your plants
Remove your first plant from its nursery pot and gently loosen the roots.
Nestle it into the globe, pressing it to one side. Add a second plant next to it if there's room.
Tip: Shake off a little soil if needed to help them fit more easily. - Set up the reservoir
Fill your glass vase with clean water.
Lower the globe into the vase so the wick hangs into the water. The planter should rest on top of the vase, and the wick must stay submerged. - Place and monitor
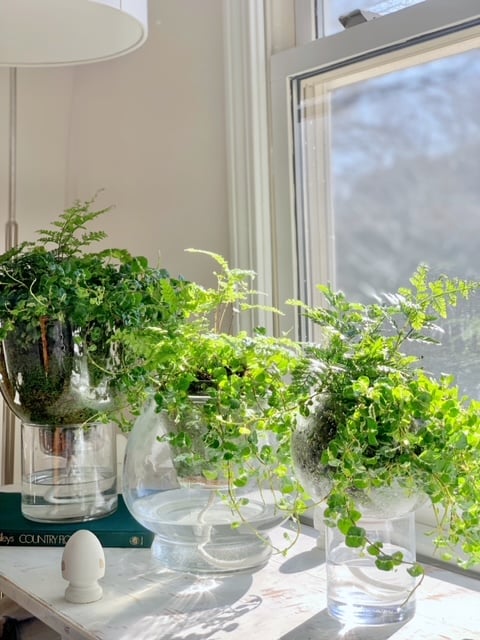
Set your finished self-watering planter near a sunny window.
Check the water level every few days and refill as needed.
Best plants for self-watering planters (and where to buy them)
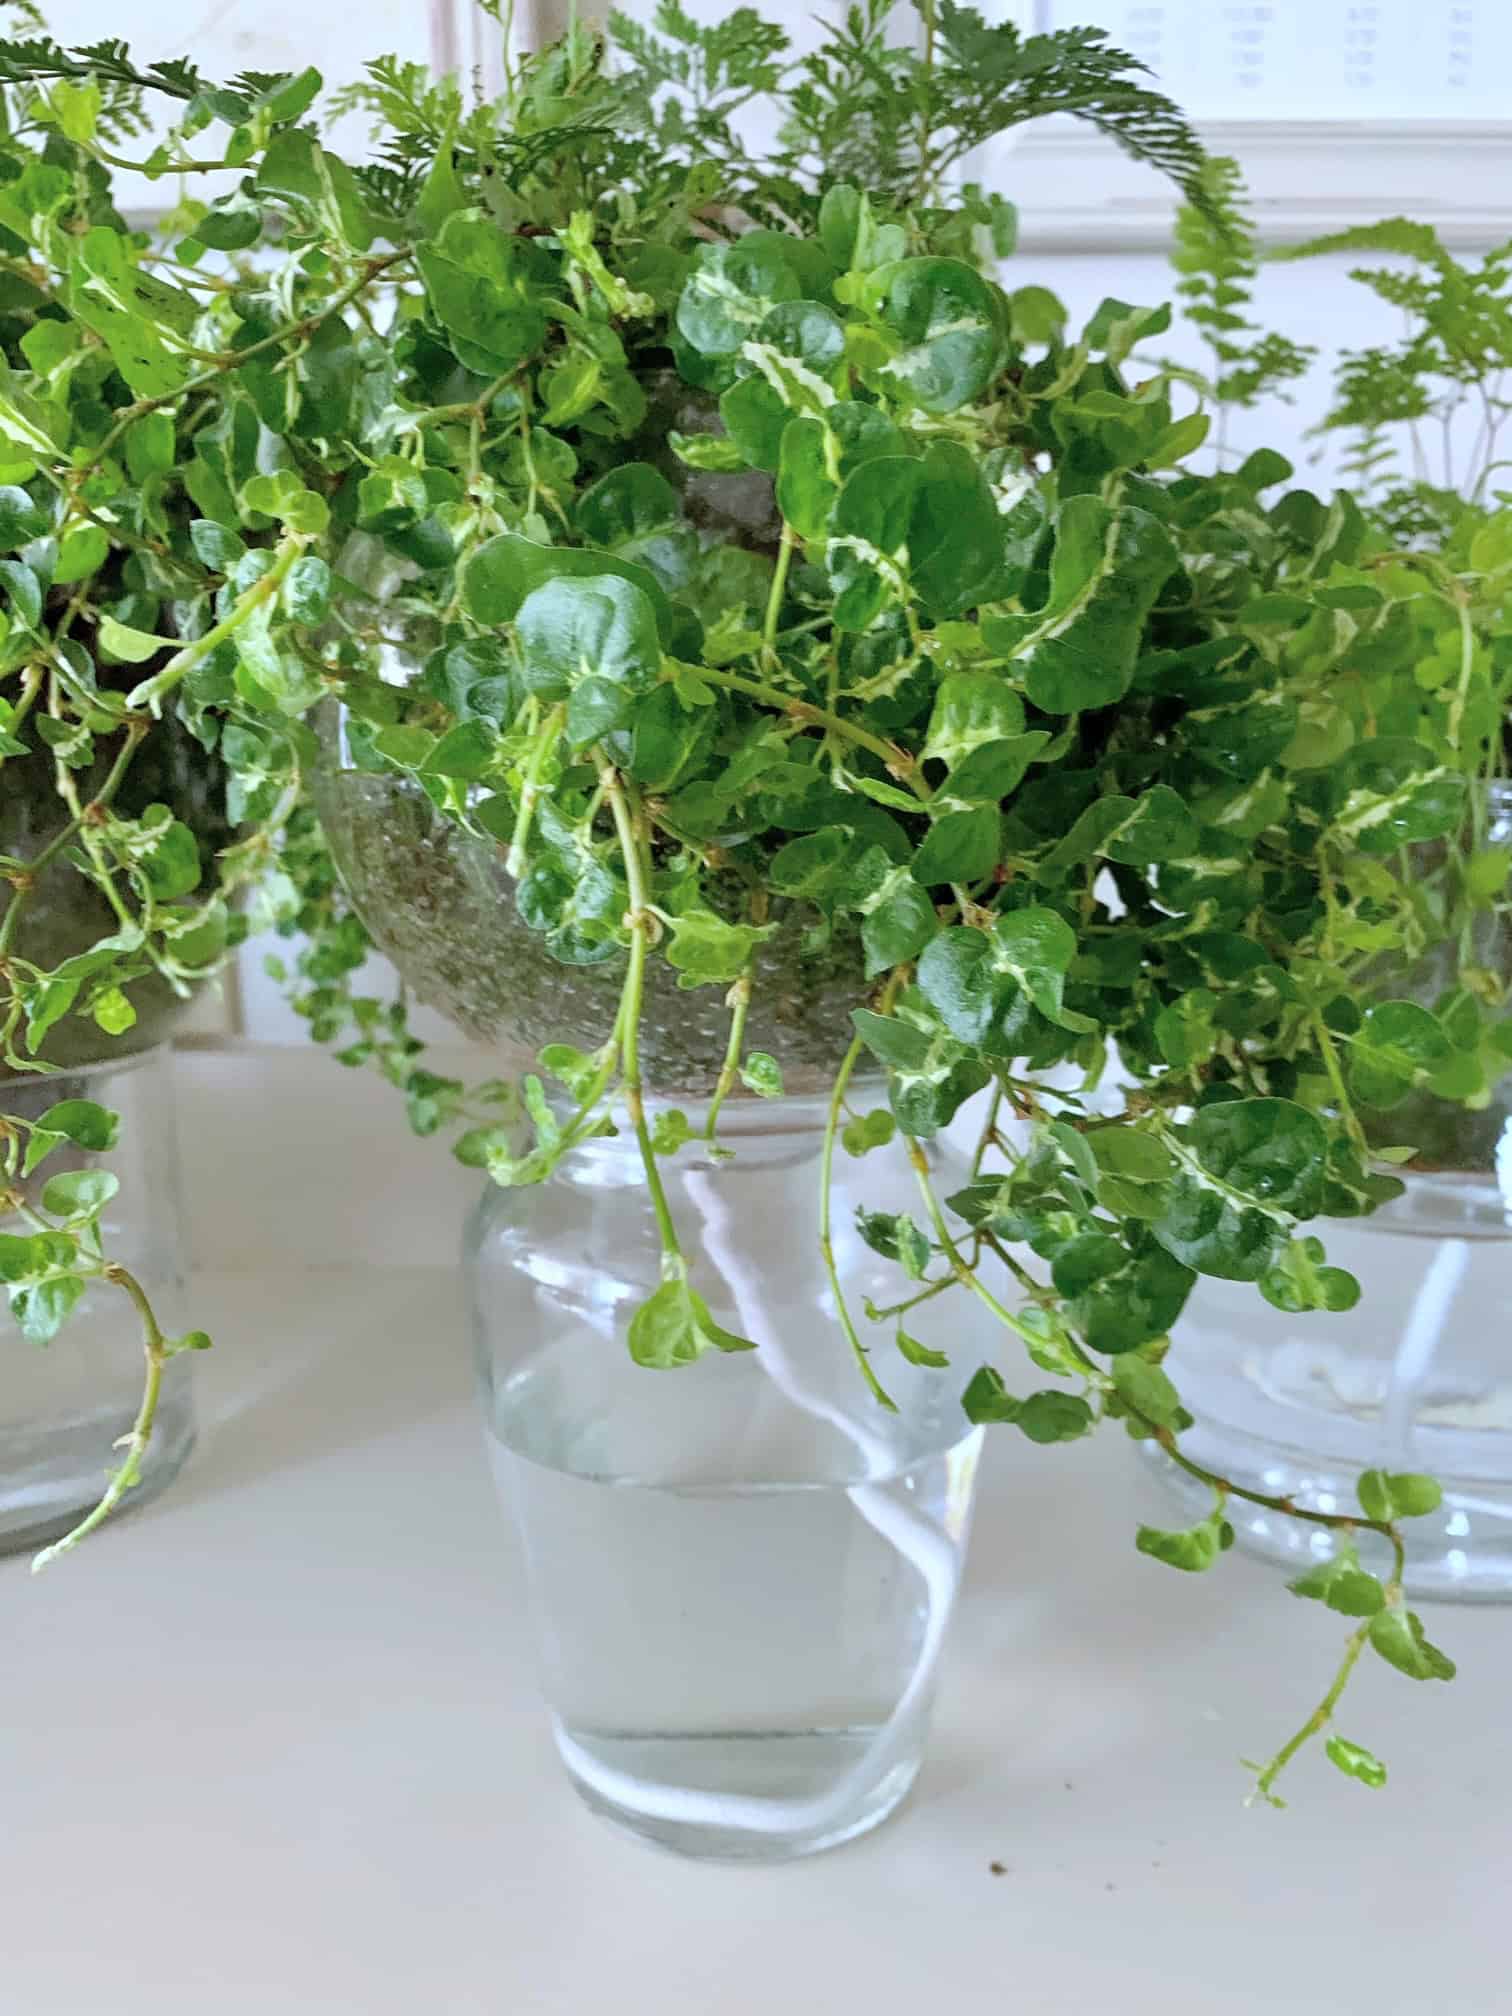
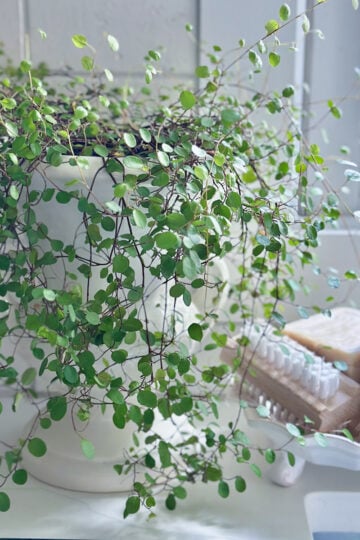
For this project, I chose two types of ferns along with a Ficus Pumila (creeping fig) that I had growing in a plastic hanging pot. I was going for that soft, trailing effect - and the delicate vines of the creeping fig delivered. The ferns added great texture and helped balance the arrangement.
When choosing plants for glass self-watering planters, I recommend going with ones that enjoy consistently moist soil. For example, maidenhair ferns are a beautiful fit, as are pothos and spider plants, which adapt well to a wick system when their roots stay slightly damp.
If you love flowering houseplants, you can also try African violets - just be sure the wick delivers water to the root zone without oversaturating. Jasmine and stephanotis can work too, as long as your planter is in a sunny spot and you're attentive to pruning and airflow.
Tip: Choose smaller, more delicate plants for these dainty glass planters. This will help maintain the aesthetic balance and ensure the plants have enough space to thrive comfortably.
Where to buy Plants: I bought these new plants at Lowes while I was shopping for the lighting globes that way I could estimate how many I would need for this project. Plants typically come in plastic pots and are available at garden centers, grocery stores, and larger home improvement stores.
Variations and DIY wick alternatives
Various materials: My research revealed many different materials that could be used to make DIY self-watering planters. You can use PVC pipe cut into sections, or plastic bottles cut in ½ (the spout is inverted and holds the wick, and the bottom of the bottle holds the well of water.) You can also sit in a traditional plastic container the plant comes in and works a wick through the drainage holes. Then place the pot on a cup of water or another water-holding vessel.
String options: One article I read indicated that you could use a regular cotton rope. I decided to go with a self-watering wick that is specially made for this purpose as it is proven to work and is not very expensive.
Herbs: This setup would make a great kitchen herb garden. Most fresh herbs would do well with this watering system as they require a lot of moisture. Picture a windowsill with several self-watering containers holding basil, thyme, rosemary, and cilantro. Beautiful!
Vegetables: My research also brought me to several outdoor vegetable garden setups. Most included tomato plants in a system for 5-gallon buckets. According to Mind Plants list cherry tomato plants do particularly well with this system.
How to care for plants in self-watering planters
Sunlight
Optimal Lighting - Position your self-watering planters in a location that provides plenty of indirect sunlight each day. Avoid placing them near drafty windows to prevent temperature fluctuations that can affect plant health. For instance, my planters have thrived in my office, enjoying the gentle afternoon sun that filters in.
Water level
Soil Moisture vs. Surface Dryness - Be mindful of the water level in the base container. While the soil surface may occasionally feel dry to the touch, the soil around the plant roots should remain consistently moist. Avoid letting the water level in the reservoir run too low to ensure your plants receive an adequate water supply.
Wick adjustments
Fine-tuning Water Uptake - The wick is your tool for controlling the water flow to your plants. If you notice your plants need more hydration, you can gently unravel the bottom of the wick to allow for increased water absorption. Conversely, if you find that your plants are getting too much water, consider tying a knot in the wick. This simple adjustment can slow down the rate of water uptake, providing your plants with the right amount of moisture.
Maintenance of the water reservoir
Keeping It Clean - It's essential to maintain the cleanliness of the water reservoir. Each time you refill the water container, take a moment to clean the glass vase thoroughly. This practice helps reduce the buildup of bacteria and algae, ensuring your plant's water source remains fresh and clear. Regular maintenance contributes to the overall health of your self-watering planters and the longevity of your plants.
Frequently asked questions
African violets, ferns, Philodendron/Pothos and many moisture-loving herbs and vegetables do well in this self-watering system. Try pothos cuttings for this project!
Adding rocks to the bottom of the water reservoir vase or glass globe is not necessary for the functionality of the self-watering system. The rocks can be added solely for decorative purposes if desired. The self-watering system relies on the principles of gravity and capillary action, with the water being drawn up through the wicking material into the soil. So feel free to skip the rocks if you're primarily focused on the functionality of the system.
Some plants like orchids and succulents prefer drier soil. These types of plants could potentially get root rot in a self-watering planter. It's best to choose plants that prefer moist soil.
This system is intended to make plant care a breeze. Plant lovers who struggle to keep indoor plants alive often "over-care" for them by giving them an excess of water. Too much water and your plants are doomed! This system lets the plant decide how much water it needs taking the guesswork out of - to water plants or not.
The frequency of refilling the water depends on factors such as the size of the globe, the plant's water needs, and environmental conditions. Check the water level regularly and refill as needed. It's essential to maintain a steady supply of water without allowing the globe to run completely dry.
Monitoring the plant's health and observing its growth can indicate whether it is receiving the right amount of water. If the plant appears healthy, with vibrant foliage and growth, and the soil feels moist but not overly saturated, it is likely receiving an adequate water supply. Adjust the water level if necessary based on these observations and your specific plant's watering needs.
Yes, you can definitely plant flowering plants in your self-watering planter. Many flowering plants can thrive in self-watering systems and benefit from the consistent water from the wick system in the water reservoir chamber. Here are a few popular flowering plant options that can be suitable for self-watering planters: Kalanchoe, African violets, Orchids, Cyclamen, Gloxinia, Christmas cactus, and Peace lilies. (Below are three African Violets and a spider plant in glass globe diy self-watering pots)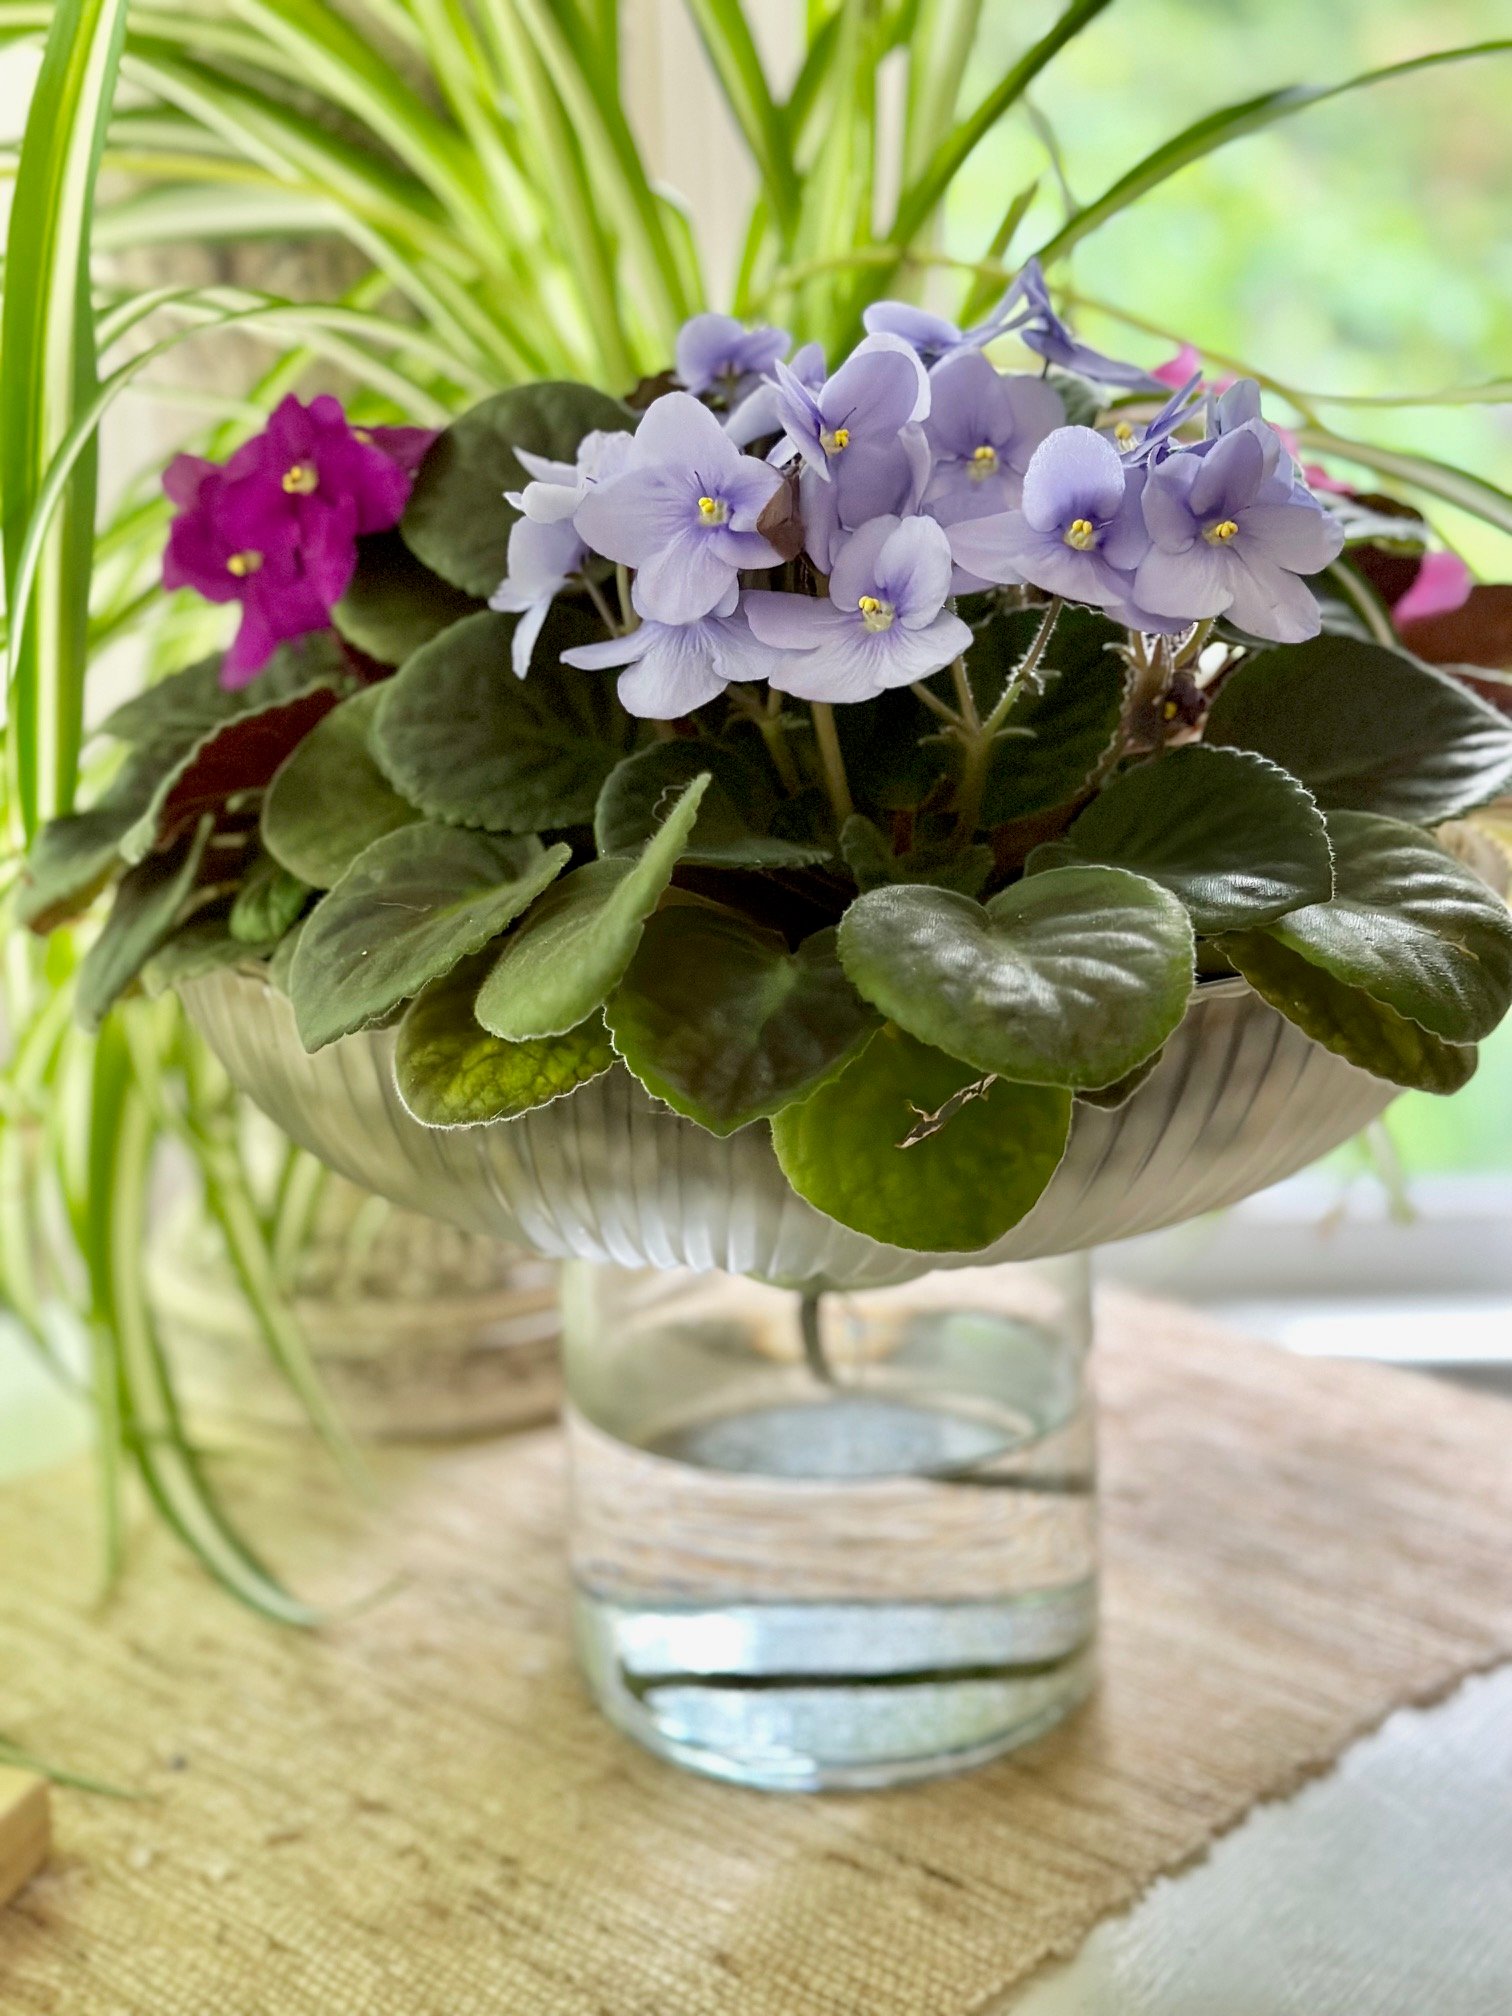
For your self-watering planter, it's best to use a well-draining potting mix specifically designed for container gardening. Look for a high-quality potting mix that contains moisture-retaining additives like vermiculite or perlite. These additives help retain moisture while allowing excess water to drain away. Incorporating organic matter such as compost or coconut coir can further improve water retention and nutrient content.
Fertilizing plants in self-watering planters can be beneficial for their overall health and growth. It's essential to use a diluted, water-soluble organic fertilizer mixed with the reservoir water(instead of adding it to the top of the soil) to ensure a gradual and consistent nutrient supply. However, monitor your plants' specific needs and growth, avoiding over-fertilization to prevent nutrient buildup that could harm the plants. Visit my Indoor Plant Fertilizers You Can Make at Home (Feed Your Plants the Natural Way to learn how to make your own.
Want more hands-on ideas like this? Browse my Indoor Plant Projects & Care Guide for easy, beautiful ways to work with houseplants.


This DIY project proves that glass planters can be both beautiful and practical. With a simple water reservoir and wick system, you can create a stylish self-watering planter that helps keep your plants happy with less daily maintenance.
Have fun experimenting with different glass shapes, vase styles, and plant varieties to make it your own. If you make one, I'd love to hear how it turned out. For more planter and container garden ideas please visit my grapevine wreath topiary and my lightening bug succulent project!
Keep creating friends!


Such an amazing idea!!! I did purchase the small self watering planter from Ballard designs at a great discount…. Before I saw your blog. I’m just wondering how you plants have been getting on over the year. I’m off to go find some glass lampshades now 😉
Thank you Monique!
My plants did really, really well! This summer I moved them to larger pots to give their roots more space!
Hello! Can I use Leca or lava rocks instead of regular soil for this?
Good question! I don't believe so because the wicking system draws water to the soil. the soil then holds the water for the plants.
Thank you! Really great idea and looks so pretty!
Thank you Suzanne!
Love this idea. Thank you for sharing and the step by steps! Diffinetly doing.
Thank you for vising the blog!
Definitely going to try this! Thanks for the step by step!
Thank you Diane!