DIY Book Stack Decor (Easy DIY Book Stacks for Any Season)
Decorative book stacks are simply a small stack of books used as home decor to add height, texture, and a collected look to shelves, coffee tables, mantels, and vignettes. They can be left as-is for a classic style, or customized with paint, ribbon, florals, and seasonal details to match your home.

Content may contain affiliate links. When you shop the links, we receive a small commission at no cost to you. Thanks for supporting my small business.
I'm a big believer in decorating with what you already have, especially in the middle of winter when I'm craving something fresh but not trying to spend a fortune. This year I had a stack of red hardcover books left over from an old project, and it turned into the easiest little Valentine moment.
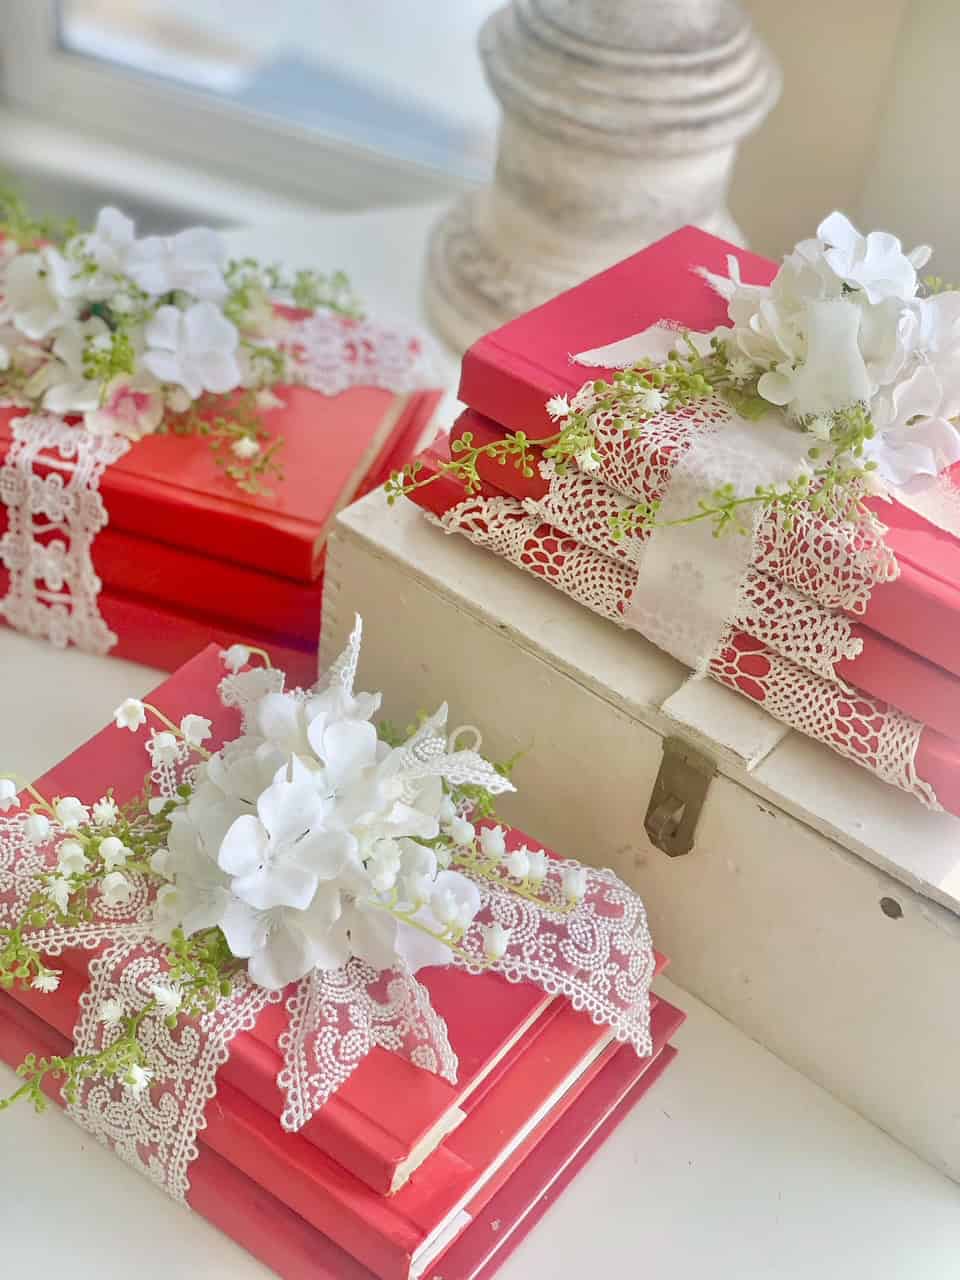
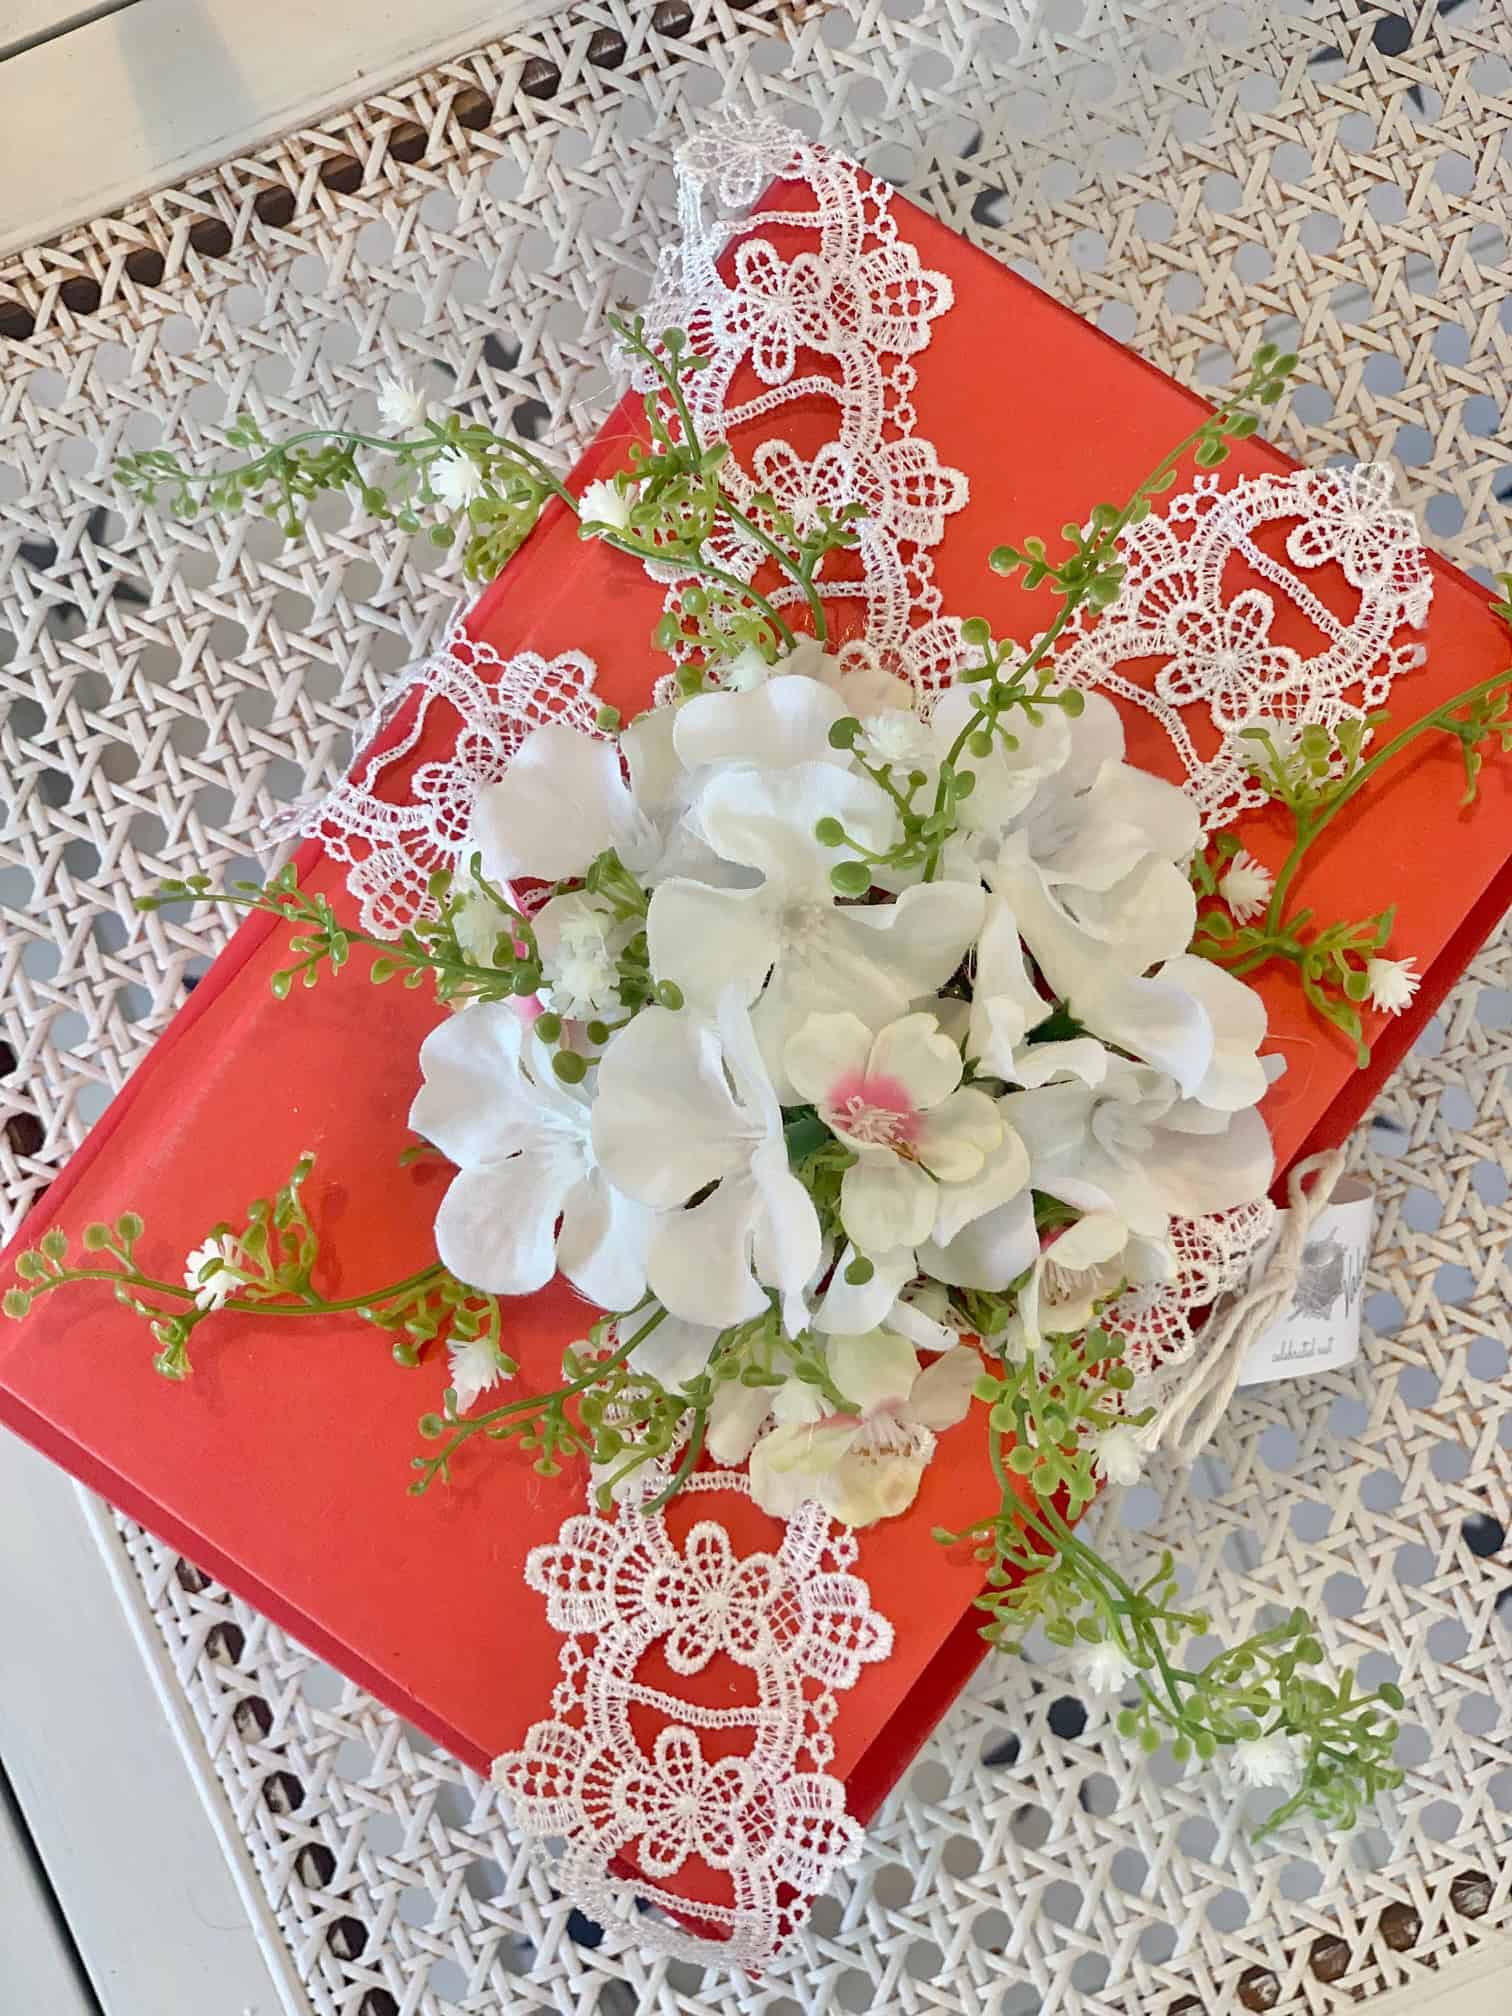
This DIY book stack has a soft, vintage-inspired look with lace, doilies, and florals, but the best part is how easily it can be changed. Swap the ribbon, paint color, or topper and you can use this same tutorial for spring, fall, Christmas, or everyday shelf styling.
Jump to:
Elevate your vignettes
At some point, books transcended utilitarian objects and became decorative standalone pieces. And I'm not mad about it! I love incorporating hard covers into my home vignettes and displays.
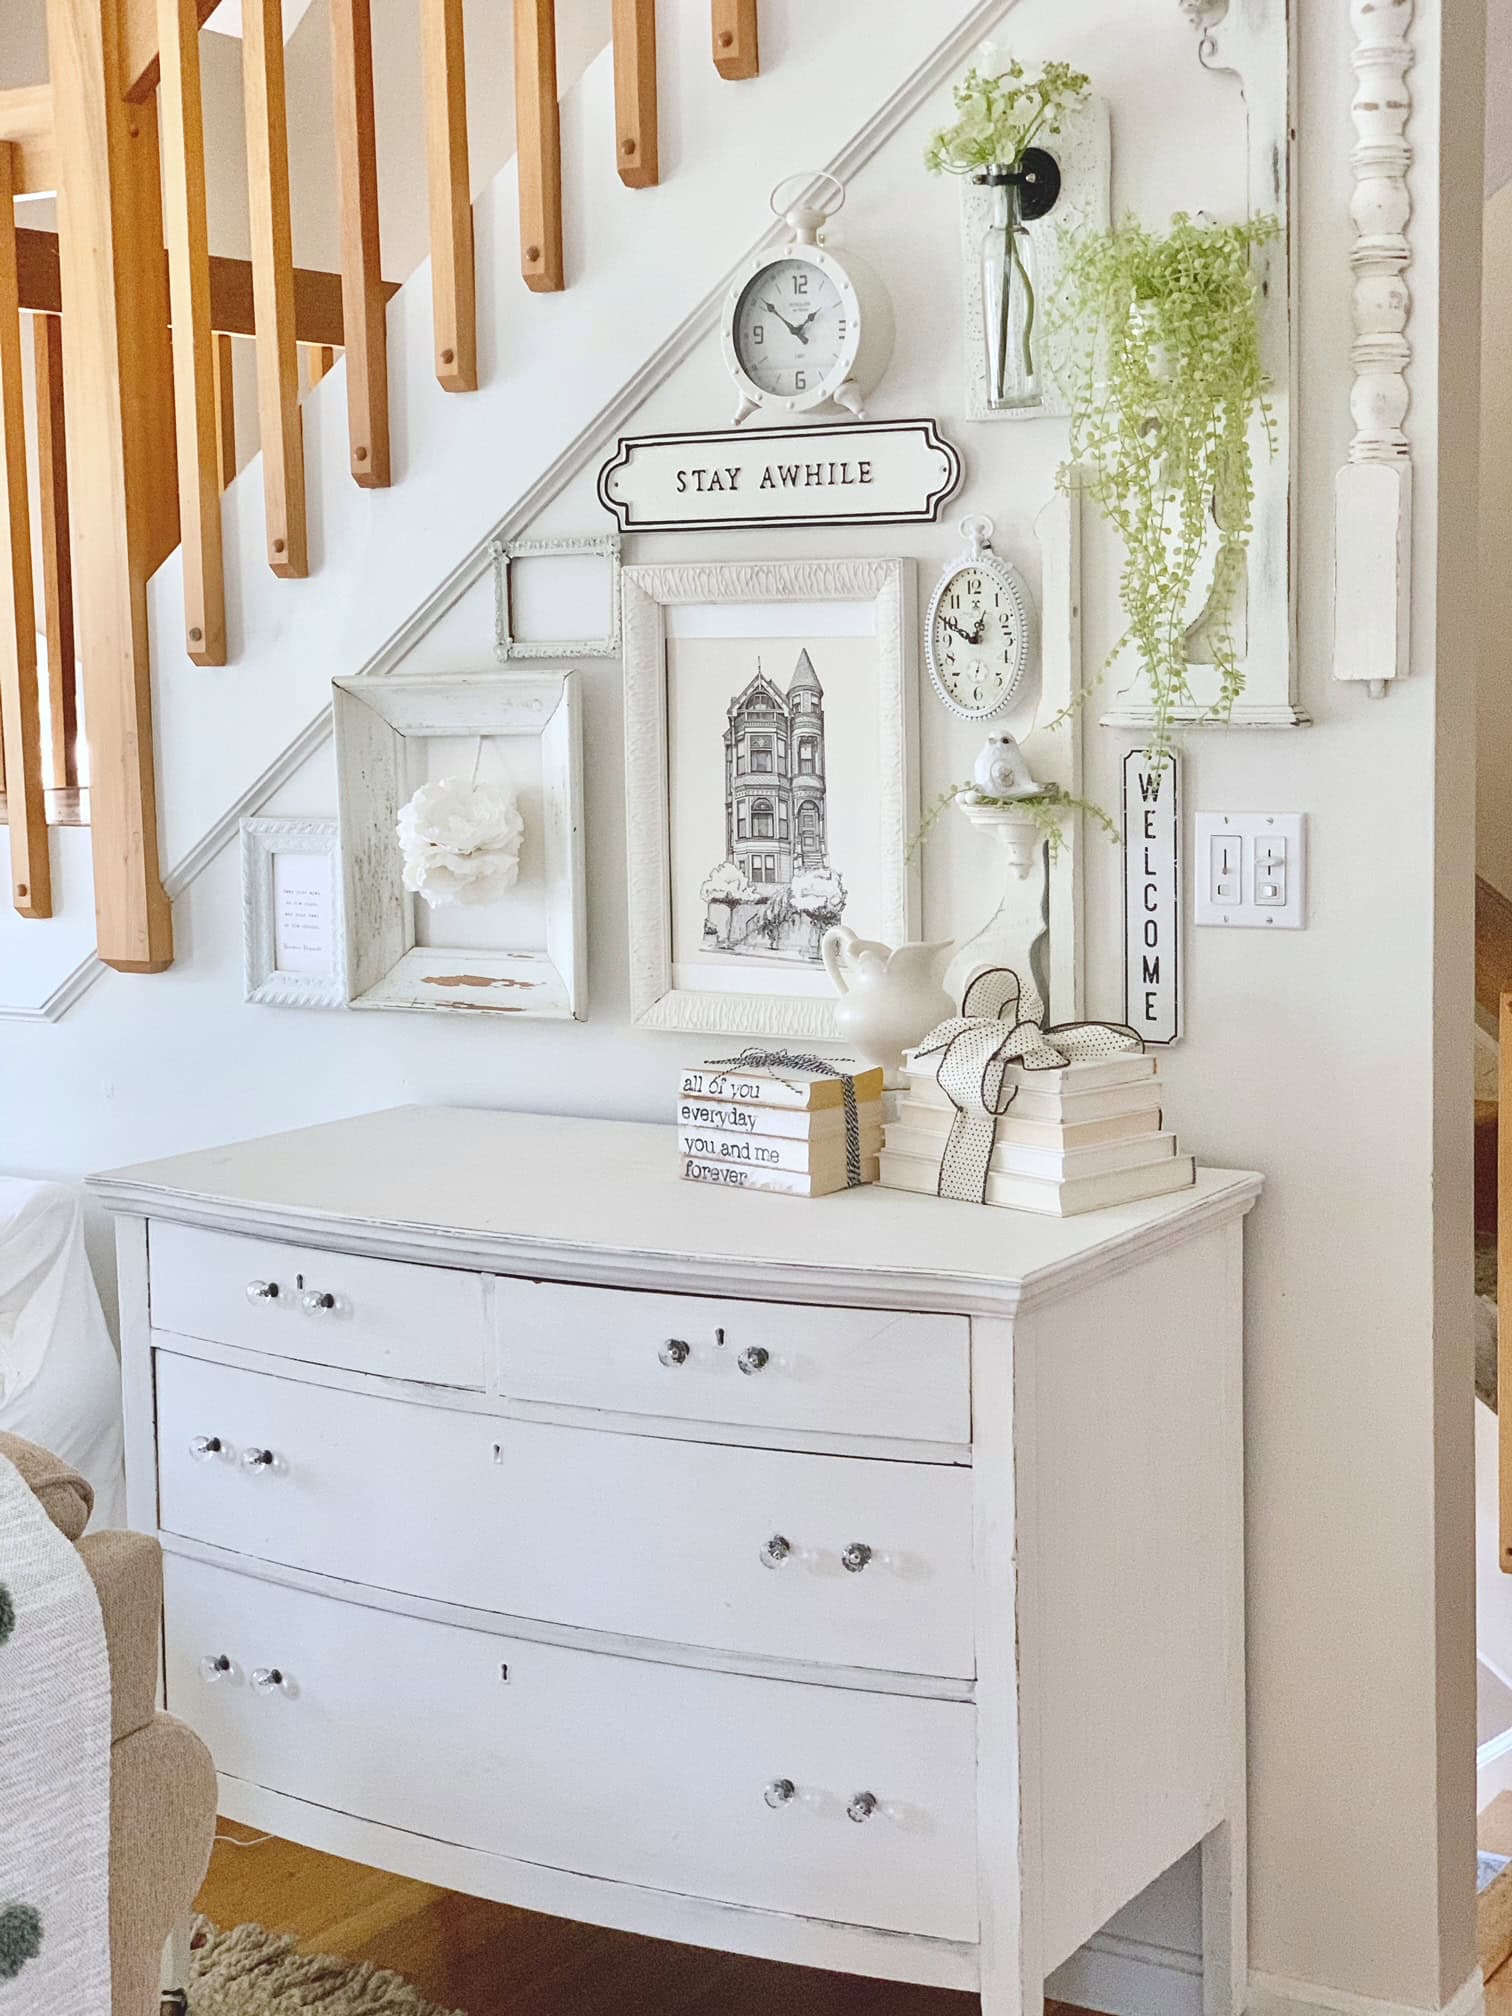
Stacked books make excellent risers and lifts, adding dimension and texture. You can use them to prop up other decor elements at varying heights, creating more visual interest. For example, in the photo below I created a coffee table display by placing a vintage bee pitcher on top of a stack of neutral-toned books. The books provide the perfect platform to showcase the pitcher in my cozy white living room.

Farmhouse-style decor frequently utilizes book stacks like these to add cozy, well-layered charm. And you can customize stacks so easily by playing with heights, widths, orientation and book colors! Beyond farmhouse style, books pair well with any theme and help display collectibles or florals to their best advantage.
Next time you style a shelf, console table or mantel, reach for some books in different sizes to lift your cherished items. Experiment with staggered and asymmetrical arrangements for lots of character. Let your book collection finally get some appreciation as decor!

Get creative with DIY book stacks
Introduction to Book Stack Decor
Book stacks have become a popular farmhouse decor element, allowing for lots of customization. You can use found books as-is, or alter them to suit your style. Options are endless!
Customization Ideas For example, you can:
- Distress hardcovers to expose an inner tattered layer
- Stamp names or quotes on the pages
- Paint them bright hues or neutral chalk paint
- Wrap with twine or ribbon bows
- Decoupage with burlap or paper ...anything you can imagine to make them unique!
Personal project example
I once created a farmhouse book stack by stamping a favorite romantic movie quote from The Notebook on the book spine of paperback books. After removing the covers from inexpensive paperbacks, I inked the poignant phrase on each book's side profile.
Personalized book stacks
Use typewriter style alphabet stamps to make stacks featuring unique dates, the date of your wedding, your kid's birthdays or a personal message on the spines of your books.
Book stacks as display stands
And don't forget old books can serve as handy lifts for displaying other cherished items like the petite cake stand holding mini topiaries on a book in the photo.
Styling tips
So next time you're styling a vignette, consider bringing in a DIY book stack! Tailor the colors, patterns, and textures to your decor. Add charms, flowers, or found objects for more personality. With so many customizable options, you can create book stacks as unique as you are!
How to make a romantic DIY book stack
Follow these easy steps to create beautiful books decor for any season:
- Paint book spines (sides of the books). This gives a clean, cohesive look if covers seem inappropriate or overly text-heavy.
- Stack books by size. Place largest on bottom graduating to smallest on top. With hot glue, glue the book covers together for stability (again optional). For the doily stack, first glue the vintage doily over the spine before gluing the books.
- Wrap white ribbon/lace around the top of the books. Use wide lace on stacks without doilies, and delicate ribbon on doily stack. Tie ribbons into bows over spines for added romance.
- Embellish with florals on the center of book stack. Glue trailing greens down book sides first. Then affix a hydrangea bloom cluster to the top. Sporadically tuck in cherry blossoms, lilacs etc. around the hydrangeas. Let whimsical pieces hang over stack edges.
There you have it - in a few simple steps you have beautiful romantic keepsake book stacks for tables and shelves! Tailor wrapping ribbons/trims and flowers to your taste. Mix different heights for lots of charm!
Tips, tricks and substitutions
- Lace/Ribbon: The options are endless with lace and ribbon. Regardless of the ones you choose, you will find that most are flimsy and difficult to loop in a way that will stand. Due to this, I made "faux loops" and added them in and around the flower topper to give the appearance of a bow. First I laid the ribbon tails on the book stack, added the floral topper (greens and hydrangea) then glued them in individual loops.
- Books: Shop your home for books you are willing to part with otherwise a local thrift store, Dollar Tree, or other dollar store, garage sales, and yard sales are great for finding a good stack of books! I often grab books when out antiquing. Be sure to choose books that are of different sizes. You may choose all one color or if you prefer you can go with different colors.
- Holiday Themed: These stacks were made with Valentine's Day in mind, however by changing out a few things you can easily make Easter, fall, or Christmas-themed book stacks. You can also add text (family names or special phrases) to either the spine of your book or the pages using letter stamps and an ink pad. These book stacks make great gifts.
- Covered Book Technique: If you can't find the right collection of books, consider covering your books with wrapping paper, scrapbook paper, kraft paper, or fabric. This will also be less destructive whereas the glue will go on the paper or fabric instead of the cover of the real book.
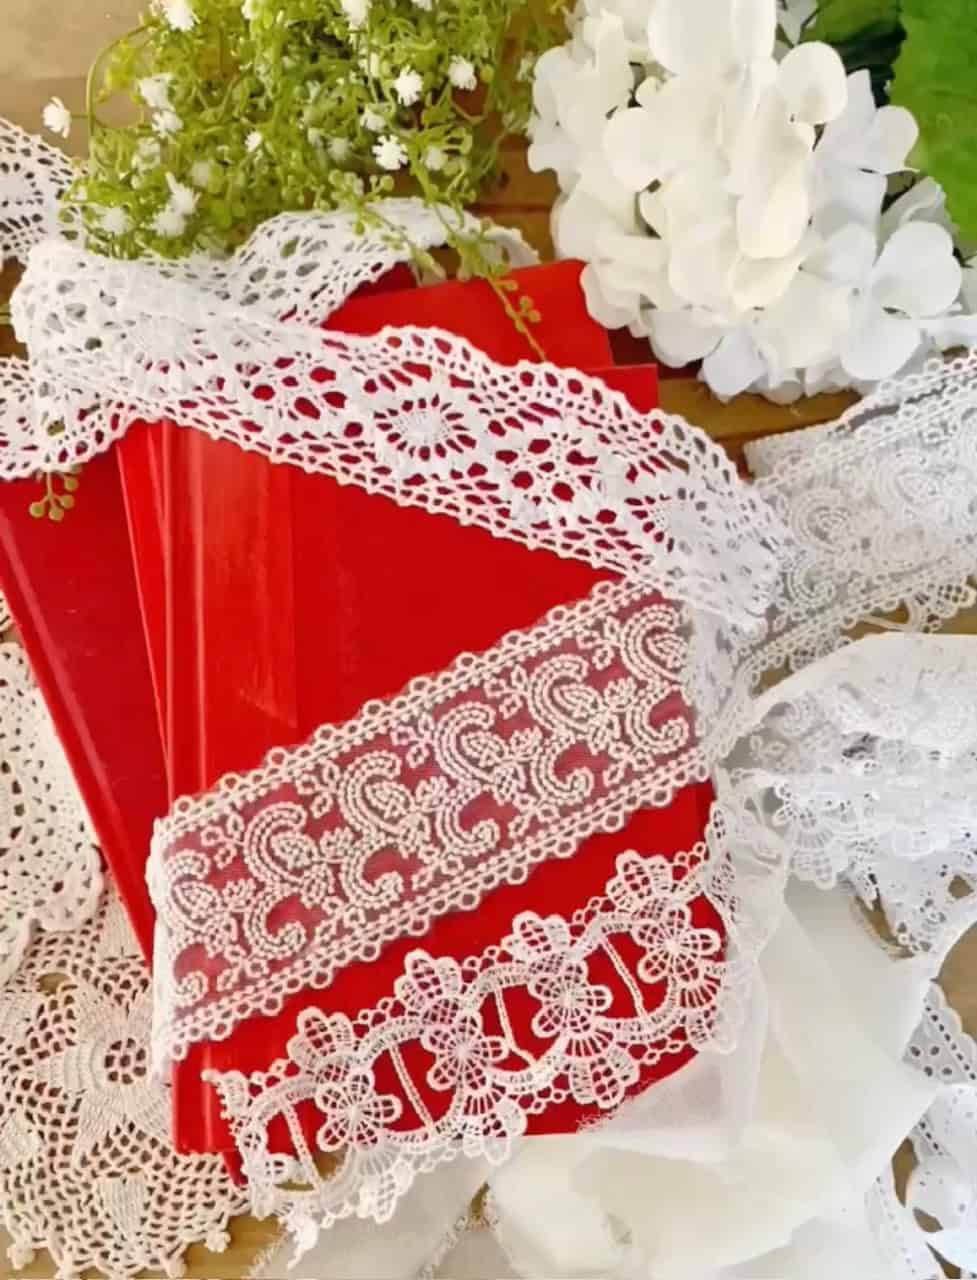
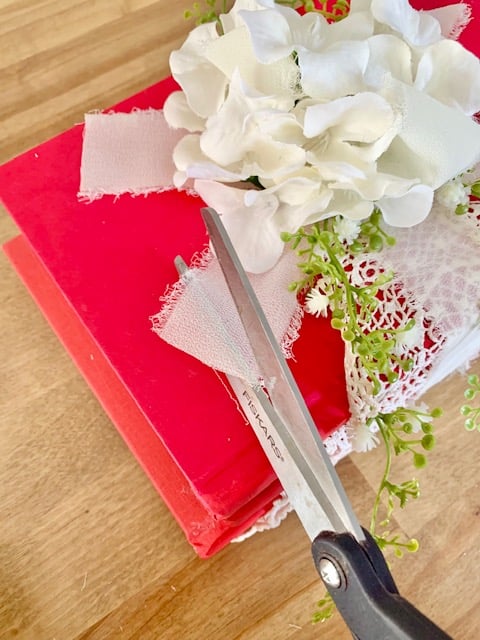
Supply list for this project
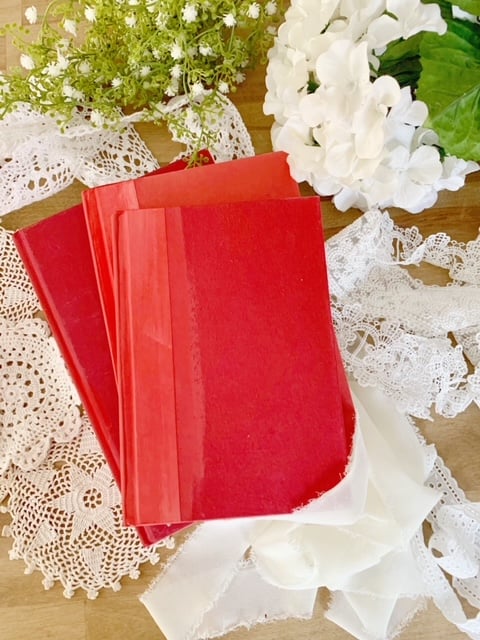
- 3 Red hard-covered books - I found mine at local thrift stores
- Red acrylic paint
- Paintbrush
- Glue gun / Glue Sticks
- Scissors
- A variety of lace
- A variety of vintage doilies
- Chiffon Ribbon
- Cream-colored Hydrangea stem (similar linked)
- Faux trailing greenery (similar linked)
How to make a DIY book stack (Valentine's style)
- Choose your books
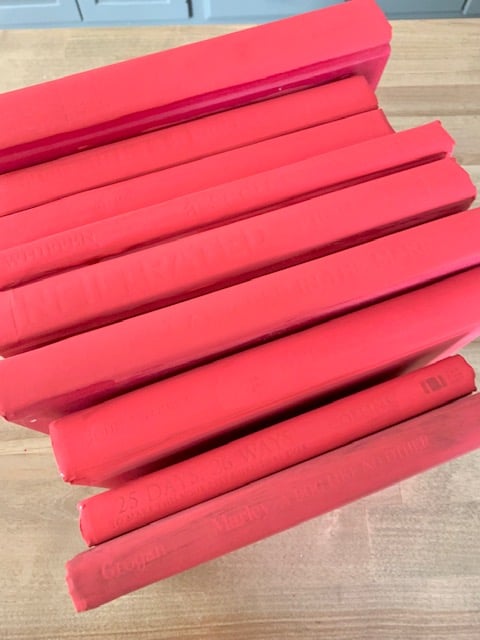
Gather 3 red hardcover books that are similar in size (but not identical). When stacked, they should create a simple pyramid shape with the largest book on the bottom and the smallest on top.

- Paint the book spines (optional)
Use craft paint and a paintbrush to apply 2 coats of red paint to the spines of each book. This covers the titles and gives your DIY book stack a cleaner, more cohesive look. You can skip this step if you like the look of the original book spines.
- Let the paint dry
Allow the painted spines to dry for about 30 minutes, or until dry to the touch.
- Plan your stack
Lay the books out in the order you'll stack them: largest on bottom, medium in the middle, and smallest on top.
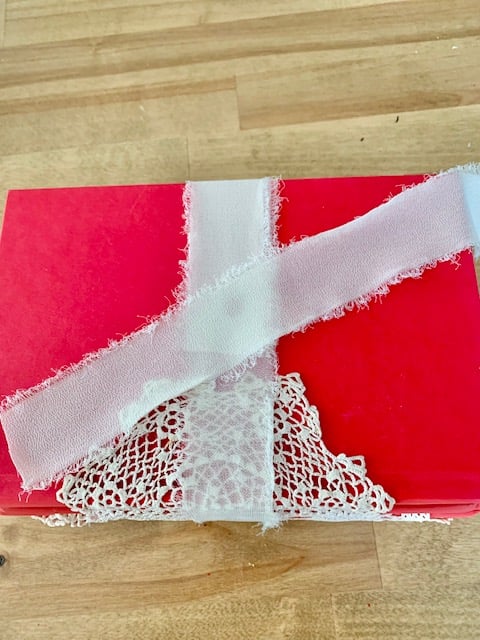
- Attach the doilies
Using a hot glue gun, glue a vintage doily to the spine of each book. Start by gluing the center of the doily to the center of the spine, then carefully tack down the edges.
- Stack and glue the books together
Stack your books into a pyramid shape. Add a few dots of hot glue between each layer to keep the books from shifting.
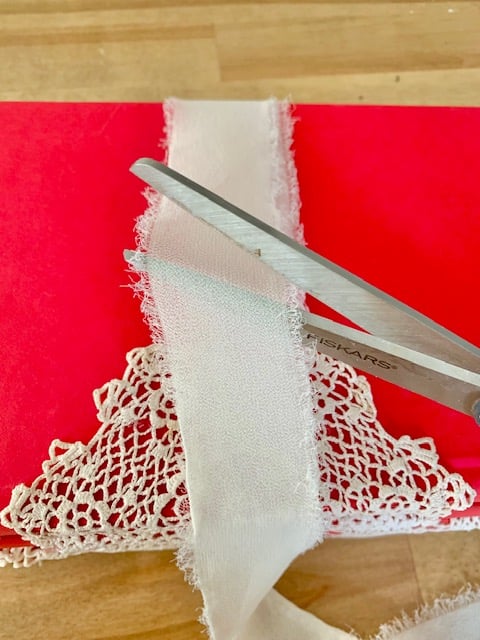
- Wrap the stack with ribbon
Slide a piece of chiffon ribbon underneath the bottom book and wrap it around the stack once. Cut the ends where they meet, then secure them with a small dab of hot glue. Don't worry if the glue shows slightly, it will be covered by the floral topper.
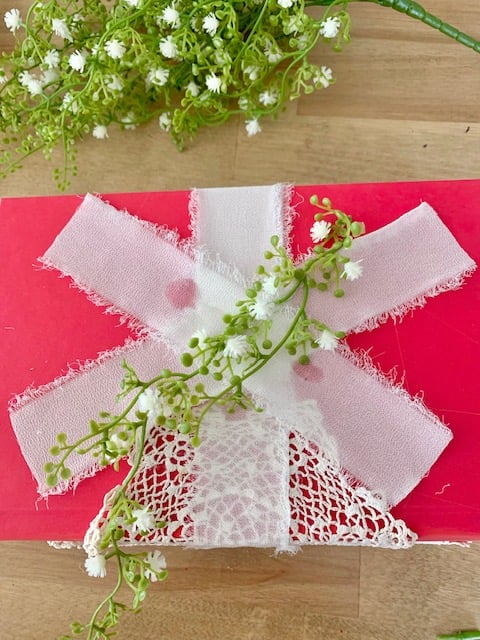
- Add ribbon tails to the top
Cut two strips of chiffon ribbon about the width of the top book. Lay them diagonally in an "X" shape across the top and secure each strip with a dab of hot glue.
- Add the greenery
Start by gluing a few sprigs of greenery in the center of the stack, letting it extend slightly over the edges. Add a few more sprigs heading in different directions for a soft, layered look.
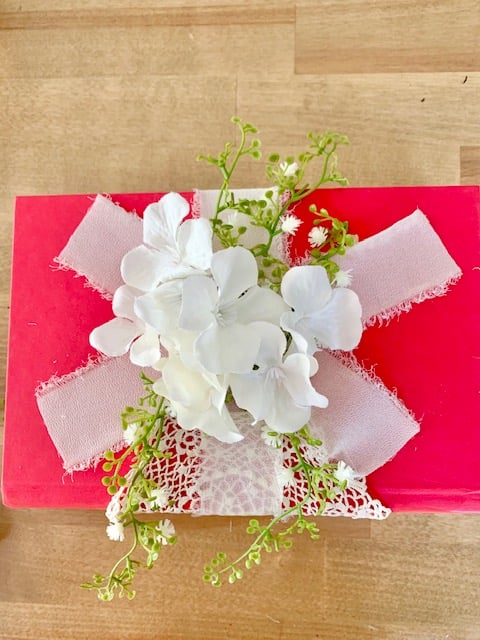
- Add the hydrangeas
Glue a small cluster of hydrangea blooms into the center of the greenery and hold it in place until the glue adheres. If needed, cut and glue a few individual blooms around the cluster to fill in any gaps.
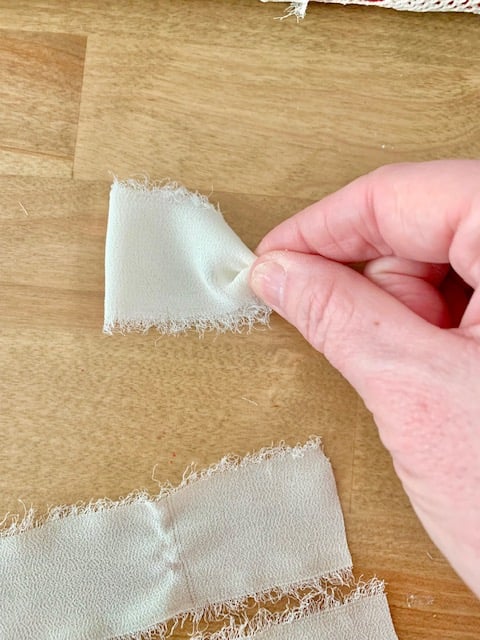
- Create faux ribbon loops (for a bow look)
Cut 3 pieces of chiffon ribbon into 4-inch strips. Add a dab of hot glue to the ends of each strip to form loops, then pinch the base (carefully) so the loops "puff" up. Glue the loops into the florals to create the look of a bow.
- Finish the ribbon tails
Trim the ribbon tails at an angle to complete your DIY book stack.


Notes: This post shows three different book stack styles. To make the lace-only stacks, simply omit the doilies and follow the rest of the directions.
Displaying ideas
- Add a stack to your living room holiday-inspired coffee table vignette alongside your favorite wooden beads.
- Place them on your mantel with your favorite vase of flowers and/or candles.
- Put them on your nightstand for a romantic bedroom setting.
- The best part about these stacks of books is they make great Valentine's Day gifts or the perfect gifts for the book lovers in your life.
Frequently asked questions
To make a DIY book stack, choose 3 hardcover books in graduated sizes (largest on bottom), stack them into a pyramid shape, and optionally glue them together for stability. You can leave the covers as-is or paint the book spines for a cleaner look. Finish with ribbon, lace, doilies, or faux florals to match your decor style.
The best way to stack books is to keep the stack balanced and intentional. For decorating, use books that are similar in width and stack them largest to smallest so they feel stable. Stick to 3-5 books per stack, and add one decorative item on top (like a candle, small vase, or flower bundle) to make it look styled instead of cluttered.
To keep books from slipping, stack them on a flat surface and line up the centers so the weight is evenly distributed. If you want a permanent DIY book stack for decor, add a few dots of hot glue between the covers. You can also wrap ribbon around the stack to help hold everything in place.
No, gluing is optional. If you're using your DIY book stack as decor and want it to stay perfectly aligned, a few small dots of hot glue between the book covers will keep everything stable. But if you plan to restyle your books later, you can skip the glue and simply stack them neatly by size.
More creative Valentine's Day projects


Explore our collection of heartfelt DIY crafts:
- Design an elegant moss heart display framed in vintage wood for a natural yet sophisticated wall decoration
- Craft a lush hydrangea heart wreath that combines romantic symbolism with stunning floral textures
Thank you for visiting the blog this fun project! Watch the full tutorial click here. For more fun DIY projects visit my handmade home accents page. I hope you make a book bundle of your own!
Happy creating, friends!