

DIY Topiary with Grapevine Wreaths and Live Plants
Today, I'm sharing how to create stunning, living topiaries that break from tradition in a beautiful way. While typical topiaries often hide their forms beneath lush foliage, my project celebrates the rustic charm of grapevine wreaths, allowing them to shine alongside the plants.
In this guide, DIY topiary with grapevine wreaths and live plants I'll demonstrate how to craft a unique topiary, planted in a vintage soup tureen for an extra touch of charm. I'll be working with ivy, but the technique we'll share works well with any "leggy" plant that has long tendrils.

Content may contain affiliate links. When you shop the links, we receive a small commission at no cost to you. Thanks for supporting my small business.
The circular shape of the grapevine wreath is perfect for creating a ring topiary, and you'll love how the woody branches hold their own in this design. It's a perfect blend of natural textures that adds depth and interest to your creation.
This project is ideal for those who enjoy combining gardening with creative decor. Whether you're a seasoned plant enthusiast or new to DIY, you'll find this to be a fun and rewarding way to bring a unique touch of greenery into your living space. Let's get started on creating your own living art that's sure to be a conversation piece!
Jump to:
- Soup tureens as planters: A charming twist on topiary containers
- Grapevine wreaths: A natural element for unique topiaries
- Step-by-step instructions
- How to care for your Ivy Topiary
- Exploring aromatic topiaries: Rosemary and mint
- Exploring the world of faux topiaries
- Frequently asked questions
- More Plant Projects To Inspire
Soup tureens as planters: A charming twist on topiary containers
While terra cotta pots are a common choice for topiaries, why not add a touch of vintage charm to your home decor with an unexpected container? Enter the soup tureen - a perfect addition to your topiary project that brings both elegance and whimsy to your living space.
Using soup tureens as planters is a great way to upcycle these beautiful pieces and create a unique focal point in your home or outdoor area. Whether placed on your front porch or as a centerpiece on your coffee table, these DIY topiary trees in vintage tureens are sure to catch the eye and spark conversation.
For a deep dive into the world of repurposing soup tureens as planters, be sure to check out our dedicated post on the subject Soup Tureens as Planters. You'll find a wealth of ideas and easy steps to transform these classic pieces into stunning homes for your green thumb creations.
By thinking outside the traditional planter, you'll create a unique and stylish addition to your decor that reflects your personal flair and appreciation for reimagined vintage pieces.

Grapevine wreaths: A natural element for unique topiaries
For a rustic and organic twist on traditional topiaries, consider using a grapevine wreath as your topiary form. This approach combines the charm of real sticks with the structure needed for a stunning focal point in your home or garden.
Grapevine wreaths are readily available at craft stores and even dollar stores, making them an affordable and accessible option for your topiary project. These natural forms provide an excellent base for creating topiaries with character and depth, offering a unique alternative to more conventional topiary structures.
These grapevine topiaries make for a perfect addition to various decorating styles, from farmhouse chic to bohemian or nature-inspired interiors. They can serve as a striking focal point on your front porch, in your living room, or as part of a larger garden arrangement.
By choosing a grapevine wreath as your topiary form, you're not just creating a decoration - you're crafting a piece of natural art that brings warmth, texture, and a touch of the outdoors to your space. It's an approach that truly embodies the spirit of creative, nature-inspired DIY projects, allowing you to blend the rugged beauty of grapevine with the elegance of shaped greenery.

Step-by-step instructions
For this project, I used standard English ivy plants (Hedera helix). I used both green and variegated (green and white in the leaves) types for a nice variety. Ivy plants are timeless and a popular choice for topiaries as they are a vining plant. The ivy stems grow "leggy" which is a great thing when training a topiary. The process is the same for the Rosemary topiary.
Supplies
- Soup Tureen - or other similar size container
- Potting Soil
- Small stones, rocks or gravel
- 8" grapevine wreath
- 4- 4" potted Ivy plants
Tools
- Hand shovel
- Watering can
- Florist's wire
- Wire cutters
- Floral string or Garden Twine
- Scissors or Floral design knife
- Spray bottle
Step by step instructions
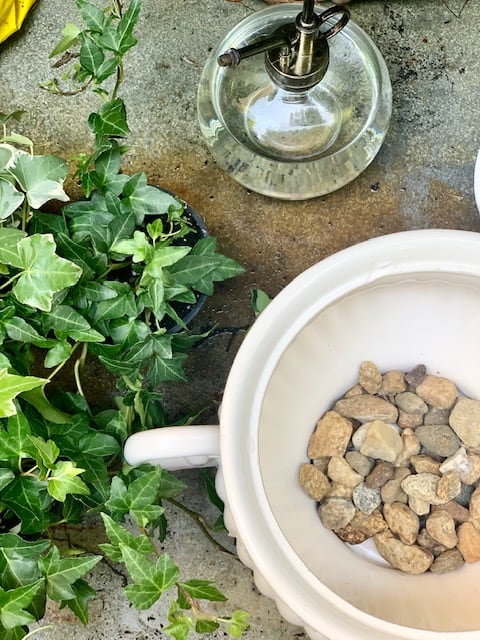
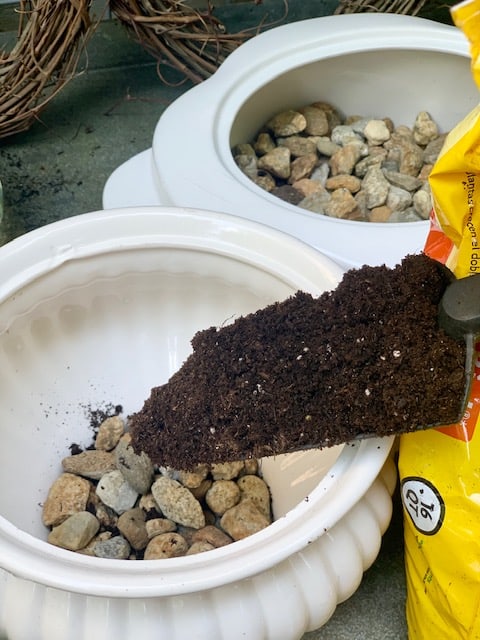
- Prepare the tureen
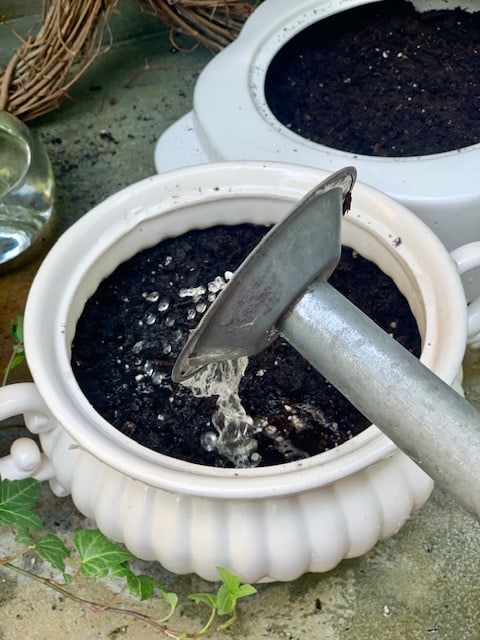
Cover the bottom of the tureen with a layer of small stones for drainage. Add potting soil until the tureen is ¾ full. Moisten the soil with water.
- Plant the ivy
Remove each ivy plant from its original pot. Plant all four ivy plants in the prepared soil. Ensure the base of each ivy plant is beneath the soil, while allowing the leaves to gracefully crown the top. Position the two plants with the longest stems on opposite sides of the tureen, as these will be used to wrap around the wreath.
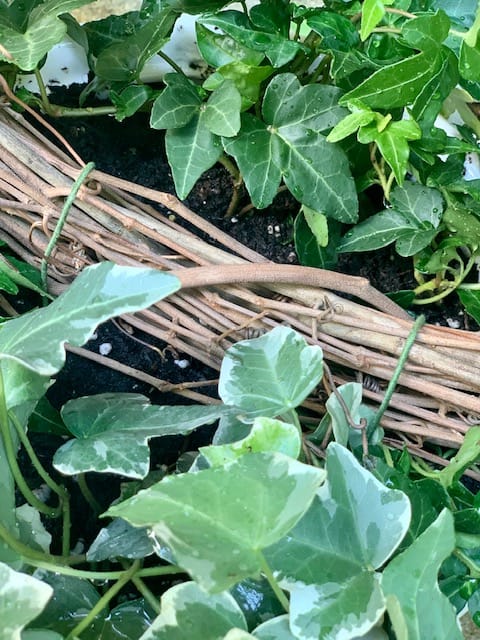
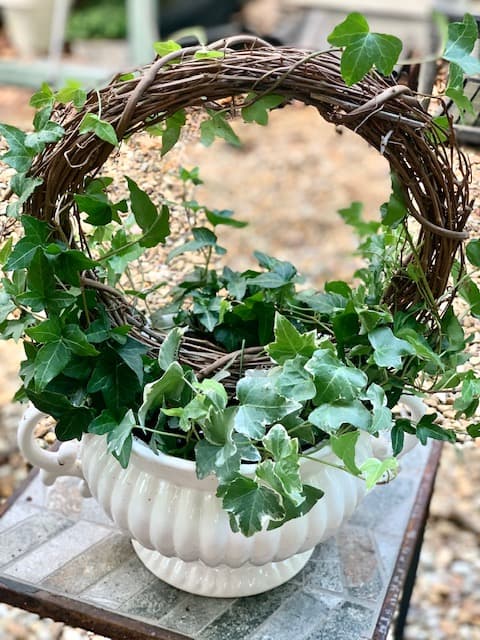
- Position the grapevine wreath
Carefully nestle the grapevine wreath on its side in the soil, avoiding the ivy plants as much as possible. To stabilize the wreath, use floral wire (flocked wire works best). Cut three pieces of wire in half and shape each into a U. Push these U-shaped wires over the bottom of the wreath at three evenly spaced points to secure it in place.
- Create the topiary shape
Shape With the wreath secured, gently weave the ivy stems around it. Start with the longest stems from the plants on the sides. For this ivy topiary, additional support from floral string or garden twine wasn't necessary, as the ivy easily wrapped and held onto the wreath.

How to care for your Ivy Topiary
Ivy's are fairly easy to care for. Place it in a sunny window and watch for it to tell you when it needs water. You will notice the leaves will be a bit less perky when water is needed. Once you see this add 1 -2 cups of water and let the soil dry to the touch to a depth of ½ inch before watering again. You do not want to add too much water because the soup tureen that this topiary is planted in does not have good drainage. Ivy's like most plants do not like their roots sitting in water. After a period of time, you will find a routine for watering your ivy topiary.
As the ivy grows continue to weave and wrap the ivy around the wreath to train vines. During the summer months, I moved my ivy topiary outside and placed it in a partial shade spot - it thrived! I was sure to bring it back in before the first frost in the fall.
Exploring aromatic topiaries: Rosemary and mint
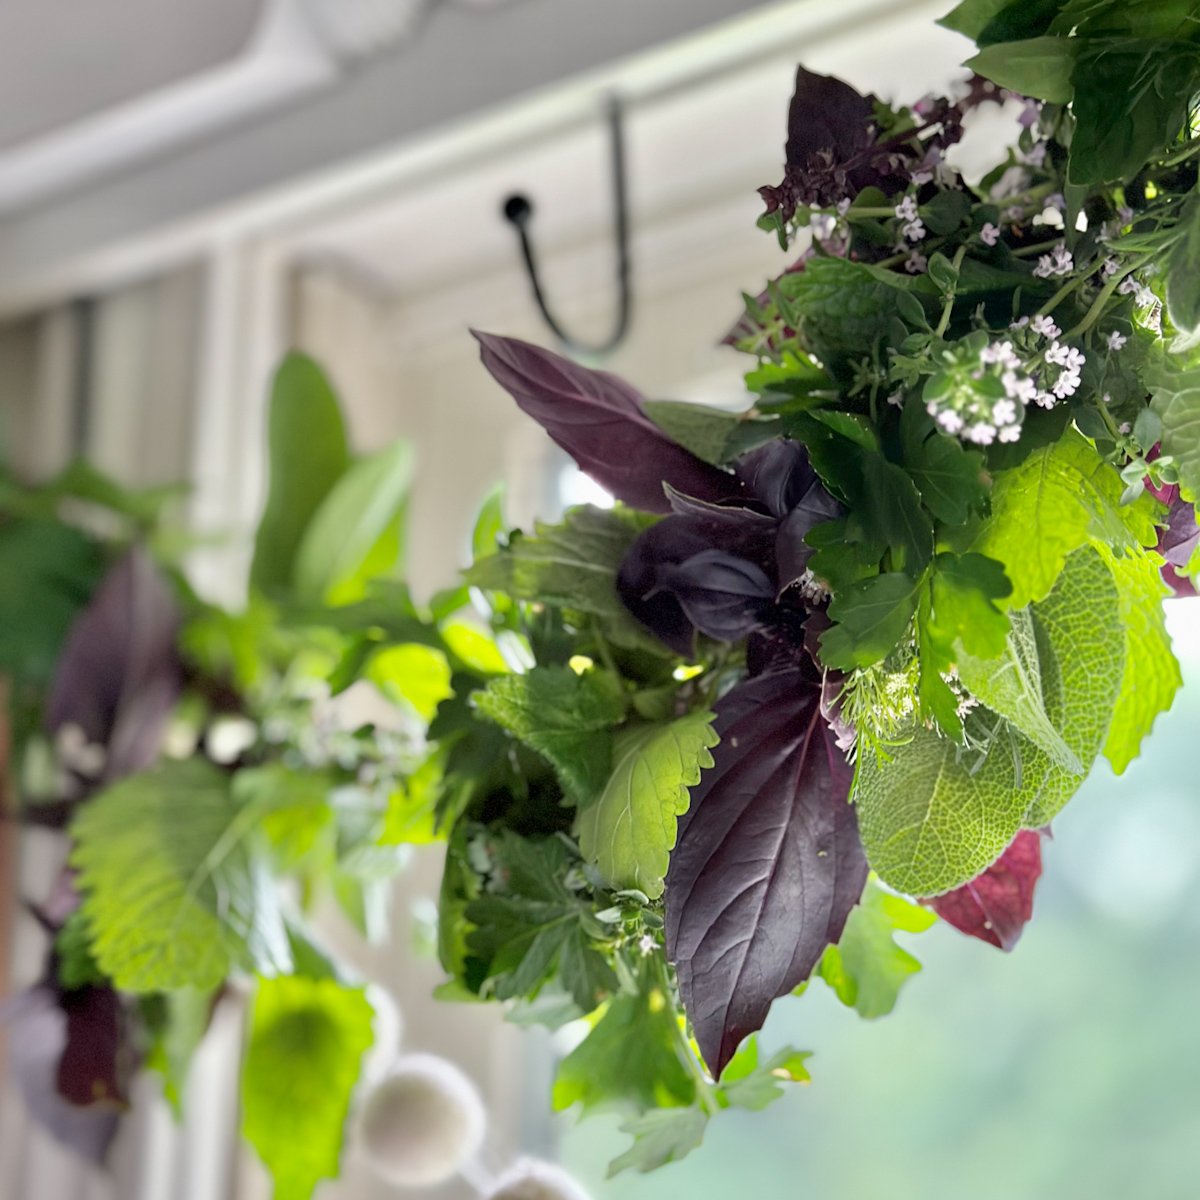
While traditional topiaries often feature dense foliage plants, don't overlook the potential of aromatic herbs for your topiary projects. Two standout choices that offer both visual appeal and delightful scents are rosemary and mint.
Rosemary topiaries bring a touch of the Mediterranean to your space. With their woody stems and needle-like leaves, rosemary plants can be easily shaped into classic topiary forms. These evergreen perennials not only look great but also fill your outdoor area or kitchen with a refreshing, piney aroma.

Mint topiaries, on the other hand, offer a bright, fresh scent and vibrant green color. Their rapid growth makes them ideal for quickly filling out topiary shapes. Plus, the variety of mint species available - from peppermint to chocolate mint - allows for exciting variations in both appearance and fragrance.
Both rosemary and mint topiaries serve as functional decor, doubling as living herb gardens. They're perfect additions to a sunny kitchen window or a patio herb collection. These aromatic topiaries engage multiple senses, making them unique focal points in your home or garden.

Creating topiaries with these herbs is a fun project that combines gardening with artistic expression. It's an easy way to add a natural element to your decor while also having fresh herbs on hand for culinary use. Whether you have a green thumb or you're just starting out, these aromatic topiaries offer a rewarding and fragrant DIY experience.
Exploring the world of faux topiaries
While live plant topiaries can be rewarding, they do require ongoing care and maintenance. If you're looking for a low-maintenance alternative, why not try your hand at creating faux topiaries? These artificial beauties offer the same elegant look without the need for watering or pruning.
To get started, you'll need a few key supplies. Most craft stores like Hobby Lobby carry faux plants, artificial topiary trees, and essential materials such as styrofoam balls or wire forms. These will serve as the base for your creation. For a more versatile option, consider using floral foam, which can be easily shaped and provides excellent support for your artificial stems.
You can choose from a variety of artificial plants to achieve your desired faux topiary look. Begin by selecting a topiary ball, shaping your wire form, or carving your floral foam into the desired shape. Then, using a glue gun, carefully attach your chosen faux plants to the form. Work in sections, ensuring even coverage for a natural appearance. With practice, you'll be crafting stunning artificial topiaries that add a touch of greenery to your space year-round.
Remember, the beauty of faux topiaries is their versatility. You can easily change them with the seasons or your decor, making them a flexible and fun DIY project for any home.

Frequently asked questions
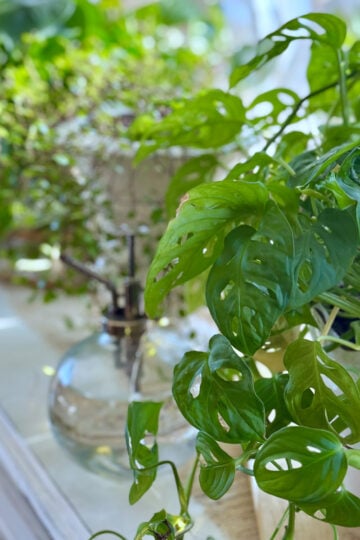
Yes! For best results choose plants that grow long tendrils (i.e. plants that can become "leggy") this is important to wrap the tendrils (vines) around the grapevine wreath. Jasmine plants with their delicate flowers and twining stems make beautiful topiaries. Also Creeping fig seen here in my DIY self-watering planters.
Any container would work as long as the grapevine wreath fits into the container and the depth of the container allows for enough potting soil to keep your plants happy! Keep in mind grapevine wreaths come in different sizes so finding one for your container should not be difficult.
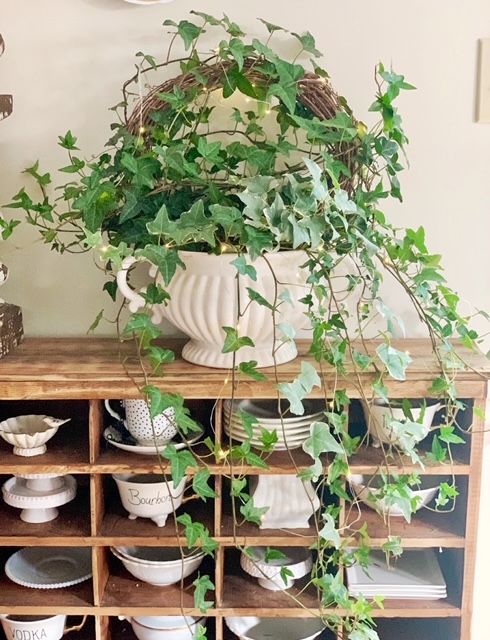
As the plants grow you will continue to wrap the vine "legs" of the plant around the topiary. As you can see in the photo below, the Ivy topiary grew quite large and some of the Ivy vines were wrapped around the wreath while some were left hanging.
The topiaries included in this post are ring topiaries as they use a circular form. Other topiary shapes include ball-shaped, Christmas tree shape (conical topiaries), topiary tree or obelisk frame shape, and heart shapes.
Most topiary forms (or topiary frames) for live topiaries are wire forms. That is what makes these grapevine wreath forms so different! I have also seen topiary forms made from unusual materials such as chicken wire and even a wire coat hanger.
From fertilizer recipes to self-watering planters, you'll find more plant care favorites in the Indoor Plant Index.
More Plant Projects To Inspire
Looking for creative ways to incorporate more greenery into your home? Explore these unique plant projects that combine style and functionality:
- Create magical glow-in-the-dark succulent displays that double as charming nightlights - perfect for adding whimsy to evenings on your porch or patio
- Learn the art of crafting an elegant open glass terrarium complete with a custom stand that showcases your favorite small plants in a sophisticated way
- Discover how to build a practical self-watering planter system that keeps your indoor plants thriving with minimal maintenance - ideal for busy plant lovers
Whether you're a seasoned plant parent or just starting your green journey, these projects offer beautiful solutions to display your plants while adding personal touches to your living spaces.
A special thank you to my friend my friend Emily Traxler from Le.Cultivateur Blog who first shared a fun DIY Angel Vine Topiary that I absolutely loved! Emily used an Angel Vine plant for her topiary. Angel Vines are perfect for topiaries with their delicate leaves and trailing vines. They wrap easily around structures and with a good amount of sun - they're generally happy! I searched wide and far here in MA for Angel Vine and could not find one. However, I did find some "leggy" ivy plants and rosemary plants, so I went with those instead.

Thank you for visiting the blog today! It was fun sharing my DIY Topiary with Grapevine Wreaths and Live Plants in two styles! Save this project, as ivy and rosemary topiary plants make great gifts! I hope you have fun making your own topiary.


I FINALLY got around to doing this with a white tureen I bought years ago and some ivy plants I bought last summer! I really struggled securing my vine wreath into the soil; I may have needed a slightly smaller one but couldn’t find one. I ended up using pins I made from the outer corners of wire hangers. Not the most secure, but it stays upright. I love it!
Hopefully as the plant grows it will help support the wreath! Thank you for visiting the blog!
Hey Stephanie, Always fun reading your blog!
Thank you Susan!
Beautiful! You are so talented! Thanks fo teaching us. ♥️🙏🌹
Thank you so much!
Super cute and what a great idea! They look so pretty in those white tureens! Love love love this project! Now, I wish we had a Blessing Barn! 💜❤️💜
Thank you Maraye!!!