

Terrarium Plants: A Complete Guide to Choosing and Growing Stunning Glass Gardens
When it comes to terrariums, choosing the right plants is crucial for creating a thriving miniature ecosystem. Terrarium plants come in a variety of shapes, sizes, and care requirements, suited for both open and closed setups. After researching expert gardeners' recommendations and popular choices, we've compiled a comprehensive guide to help you select the perfect terrarium plants for your glass garden.
From the trailing golden pothos to the neatly mounding baby's tears, terrarium plants are adaptable champions that can handle diverse environments. These versatile species thrive in the unique conditions of terrariums, whether it's the high humidity of closed systems or the more varied climate of open containers. Their lush, green appearance and compact growth make them ideal for creating stunning miniature landscapes.
*This post includes affiliate links, for more info on affiliate links visit here
Whether you're a seasoned plant enthusiast or a beginner, this guide will help you navigate the world of terrarium plants. We'll explore various species that can handle different terrarium conditions with ease and style, proving that when it comes to terrarium plants, good things really do come in small packages. Let's dive into the fascinating world of terrarium plants and discover how to create your own thriving miniature garden!
Jump to:
- What is a terrarium?
- Types of terrariums and their ideal plants
- The fascinating case of David Latimer's terrarium
- Best plants for terrariums
- Supplies needed
- Tailoring your terrarium for different plant types
- Steps for creating your terrarium plant ecosystem
- Caring for your plants
- Frequently asked questions
- Some Serious Terrarium Inspiration:
- More creative plant project ideas
What is a terrarium?
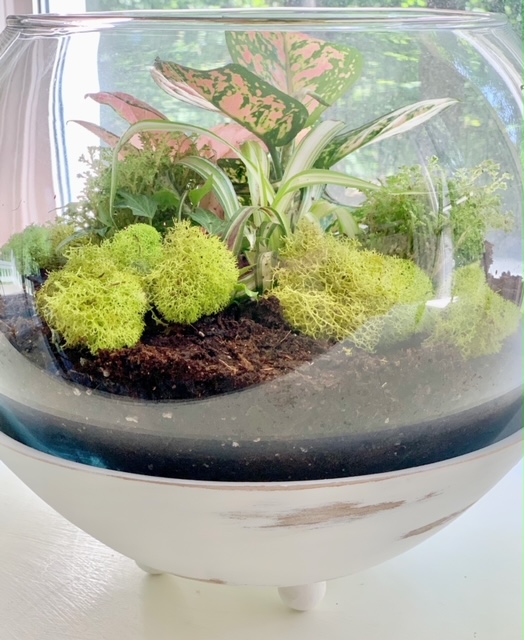
A terrarium is a miniature ecosystem that brings the beauty of indoor plants into a compact, manageable space. These captivating glass-enclosed gardens offer plant enthusiasts a unique way to enjoy greenery year-round, even in limited spaces or with minimal gardening experience.
At its core, terrariums are a collection of small plants growing in a terrarium container usually glass containers. This enclosed environment creates a microclimate that can support a variety of terrarium plants, each contributing to a living landscape in miniature.
Terrariums provide an ideal setting for showcasing small plant species that thrive in high humidity. The enclosed or partially enclosed nature of terrariums allows for the creation of specific environmental conditions, making it possible to grow plants that might be challenging in regular indoor settings.
One of the most fascinating aspects of terrariums is their ability to mimic natural ecosystems. Depending on the design, terrariums can be largely self-sustaining, with the plants and soil working together to create a balanced water cycle through transpiration and condensation.
Whether you're a seasoned plant enthusiast or a beginner with a less-than-green thumb, terrariums offer an accessible and rewarding way to bring a touch of nature indoors. By carefully selecting terrarium plants and providing the right care, you can create a thriving miniature garden that serves as a living piece of art in your home or office.

Types of terrariums and their ideal plants
Different terrarium types cater to various terrarium plants. Let's explore each type and the plants that thrive in them:
- Open Terrarium
- Features an opening in the container, allowing air circulation
- Requires more frequent maintenance and watering
- Ideal plants: Pothos, English Ivy, African Violets
- Sealed Terrarium
- High-humidity, self-sustaining ecosystem
- Specific setup required for optimal plant growth
- Ideal plants: Ferns, Moss, Fittonias
- Note: For a truly self-sustaining system, small insects may be recommended
- Succulent Terrarium
- Designed for plants that prefer drier conditions
- Requires well-draining soil and less frequent watering
- Ideal plants: Echeveria, Haworthia, Sedum
- Air Plant Terrarium
- Easiest to set up and maintain
- No soil or drainage required
- Ideal plants: Tillandsia species (Air plants)
The fascinating case of David Latimer's terrarium
Did you know that in 1960, David Latimer created a sealed terrarium that's thrived for over 60 years without additional water or care? This remarkable example showcases the importance of choosing the right terrarium plants. Latimer used Spiderwort (Tradescantia), a hardy plant that thrives in high humidity. Its success in this long-term environment highlights key factors to consider when selecting terrarium plants: humidity tolerance, growth rate, light requirements, and mature size. Other plants suitable for similar long-term, sealed terrariums include Pothos, certain ferns like the Bird's Nest Fern, and various moss species. Latimer's terrarium serves as an inspiring example of how carefully chosen plants can create a self-sustaining miniature ecosystem, requiring minimal maintenance while providing years of beauty and fascination.

Note: I have yet to try my hand at a sealed terrarium - the idea both excites and intimidates me! While my open terrariums keep me busy enough, I'm fascinated by the thought of creating a self-sustaining ecosystem like Latimer's. I will certainly share my experiences!
Best plants for terrariums
Terrariums offer a unique environment for a wide variety of plant species, making them suitable for both novice and experienced gardeners. The key to a thriving terrarium lies in selecting plants that can adapt to the specific conditions of your container. Here's a guide to some of the best terrarium plants to consider for your next planting!
Ferns

Ferns are perfect for higher humidity, low-light conditions in closed terrariums. Try the dainty Fluffy Ruffles (Nephrolepis) or the versatile Asplenium for a lush, green backdrop.
Mosses

Moss is ideal for creating a soft, carpet-like base in your terrarium. They thrive in moist environments and add a natural, forest-floor aesthetic.
Fittonia (Common name: Nerve Plant)

Nerve plants are loved for its striking vein patterns in white, pink, or red. It's compact and thrives in the high humidity of closed terrariums.
Begonias

Begonias are tropical beauties that come in various colors and sizes. The Begonia foliage rex is particularly well-suited for terrariums.
African Violets
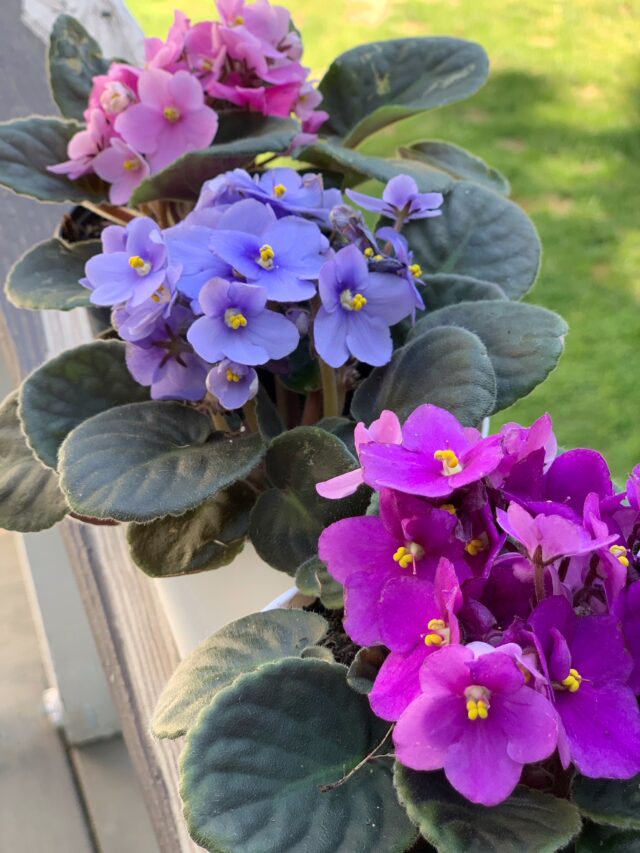
African Violets are known for their beautiful blooms, they prefer the humid environment of a terrarium but need some airflow to prevent leaf rot.
Syngonium

Syngonium is an upward-growing plant that won't crowd out others, they are good terrarium plants for both open and closed terrariums.
Parlour Palm (Chamaedorea elegans)

Parlour Palm offers height and a tree-like structure, perfect for adding dimension to your terrarium.
Golden Pothos
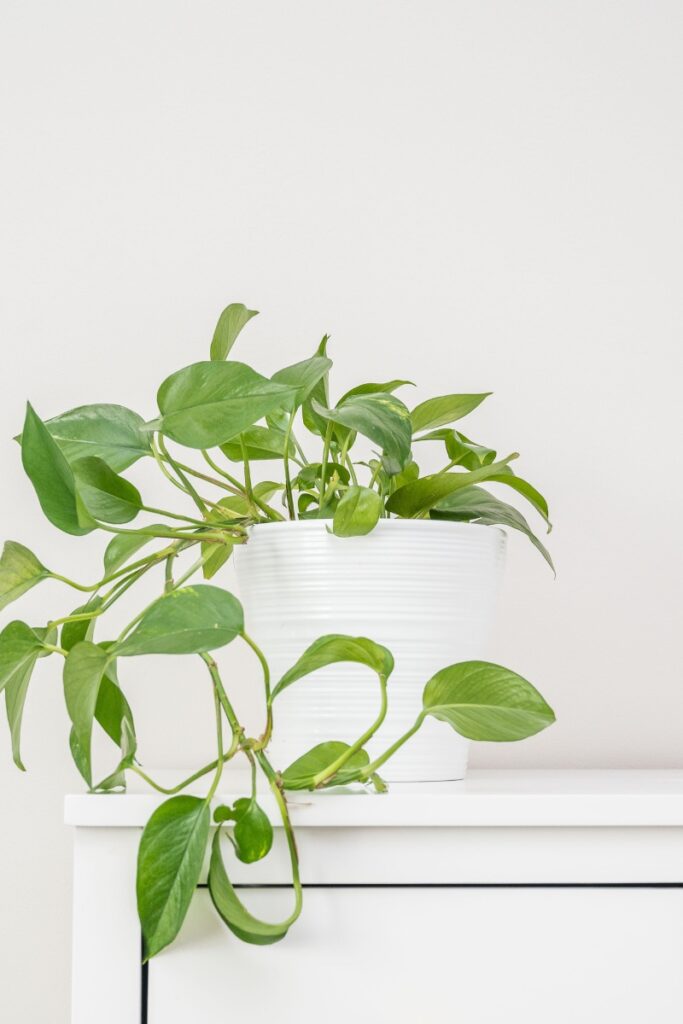
Golden Pothos is a popular choice with trailing vines, easy to care for and adaptable to various conditions.
Baby's Tears
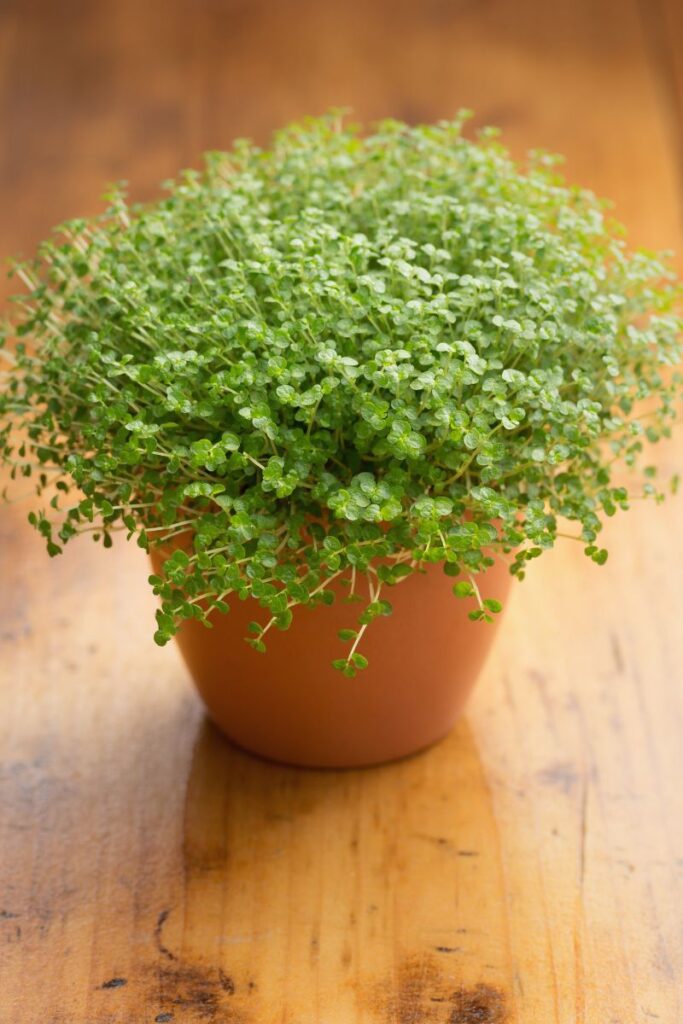
One of my favorite terrarium plants! Baby tears creates a lush, carpet-like effect with its small leaves and compact growth. A perfect choice for a moist environment, making it one of the most popular closed terrarium plants.
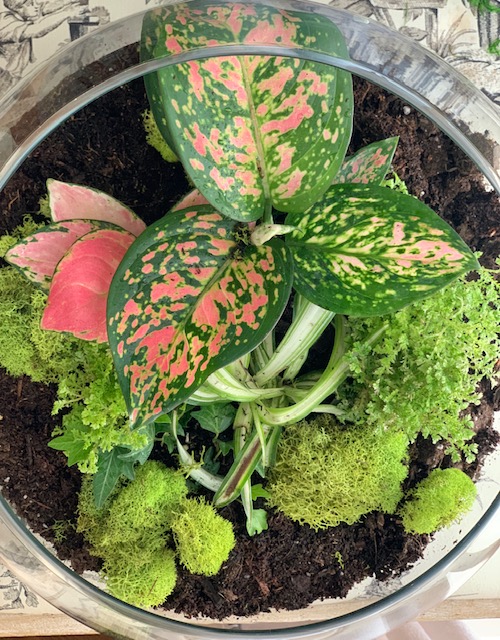
Polka Dot Plant
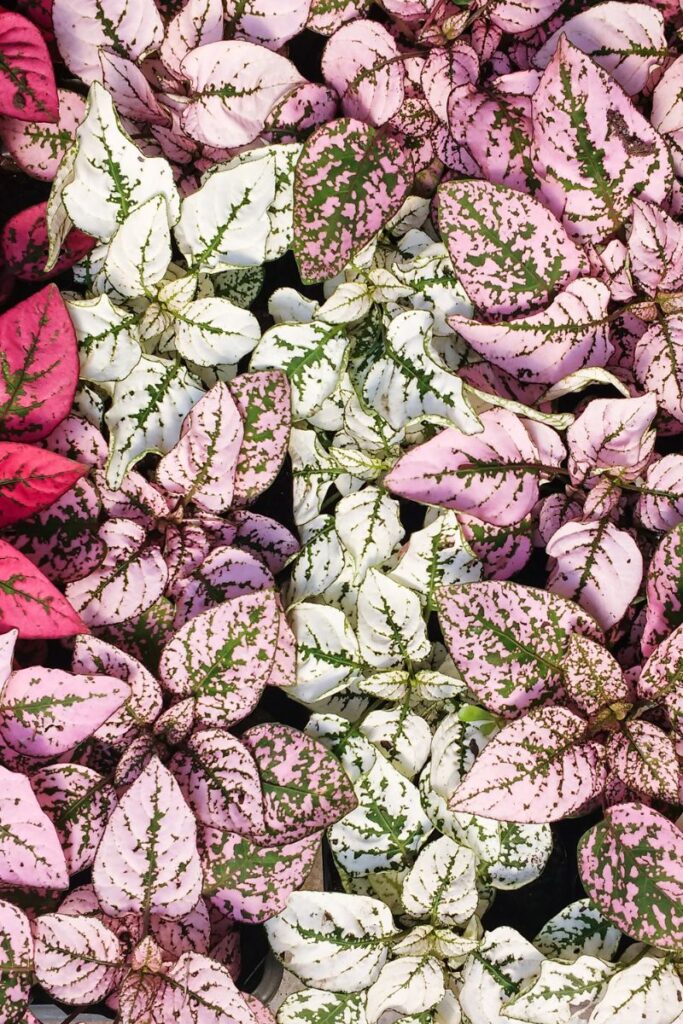
Polka Dot Plants adds a splash of color with its pink-spotted foliage, bringing visual interest to your terrarium. A nice step away from the many plants with simple green leaves!
Additionally, I love Spider plants for open terrariums and often use their small "pups" or offshoots in my miniature glass gardens. These baby Spider plants are an excellent choice for adding a cascading effect and are easy to propagate, making them ideal for terrarium projects.
For open terrariums, consider drought-resistant plants like:
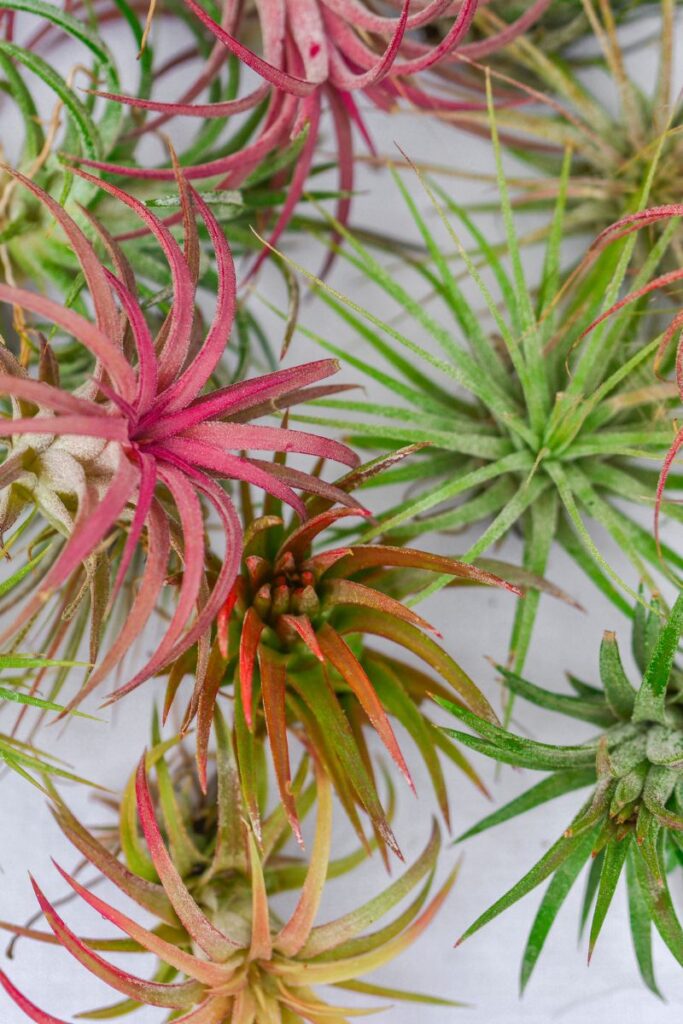
- Air Plants (Tillandsia)
- Cacti: Desert plants that prefer in dry conditions
- Succulents like Haworthia and Crassula Ovata (Jade Plants)
When selecting plants, consider the size of your terrarium. Smaller containers require miniature varieties or slow-growing species. Most garden centers offer terrarium-specific plants, or you can find a wide selection online. Remember to choose plants with similar care requirements to ensure a harmonious and thriving miniature ecosystem, this will make care so much easier!
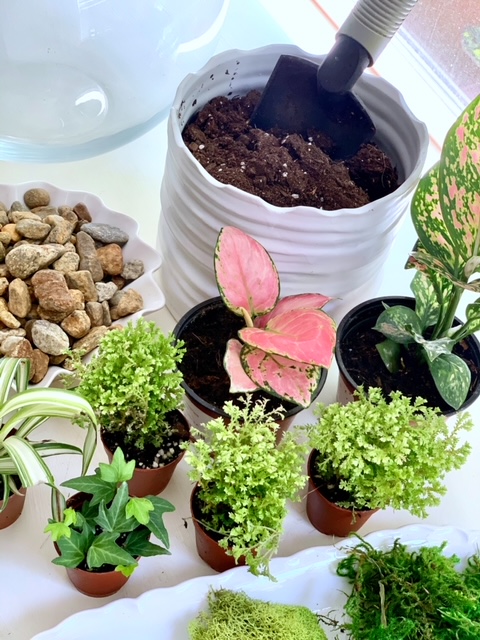
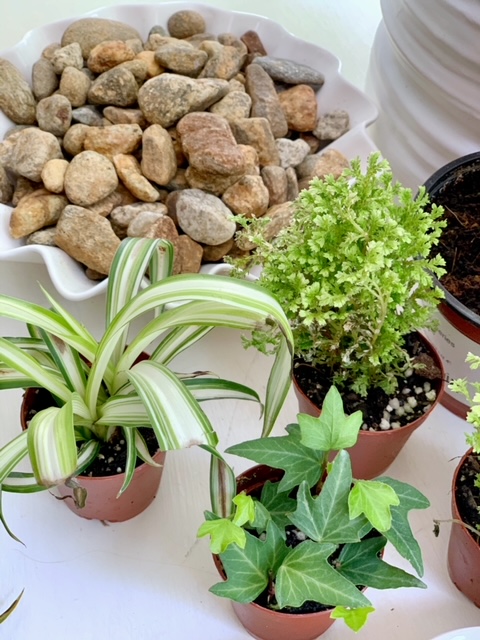
Supplies needed
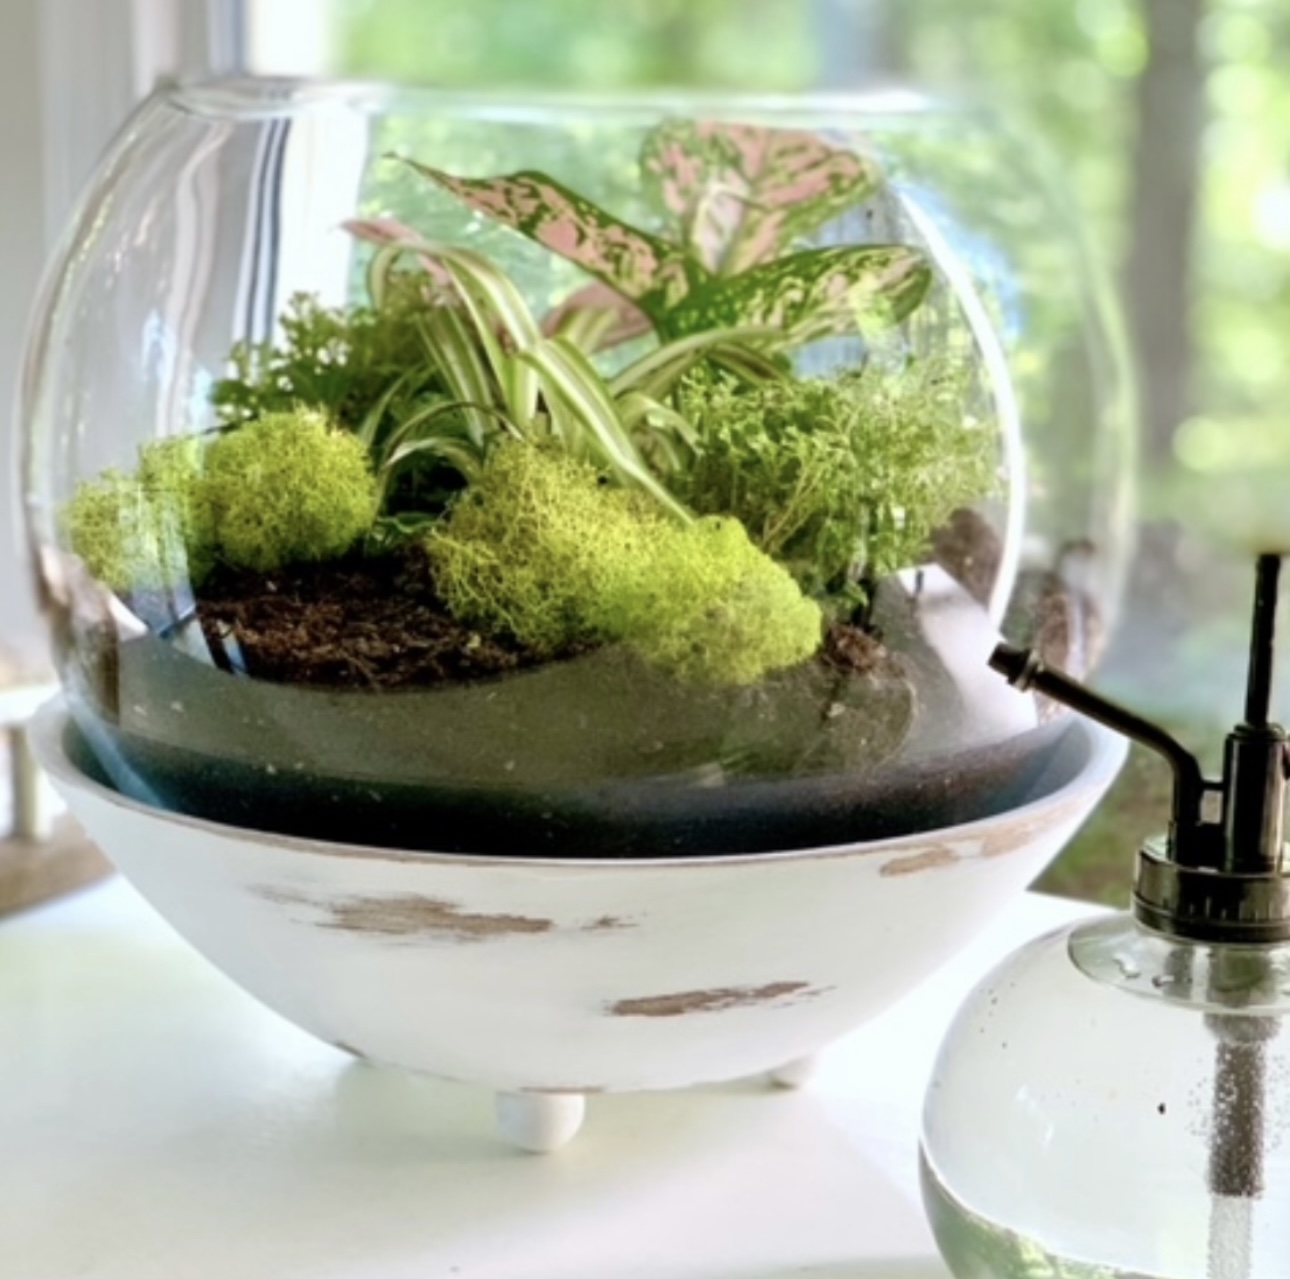
- Glass Container: Choose a container suitable for your space and desired plants. Options range from small jars to large bubble balls.
- Terrarium Plants: Select plants appropriate for your container size and terrarium type (open or closed). Ensure they have similar care requirements.
- Substrate Layers:
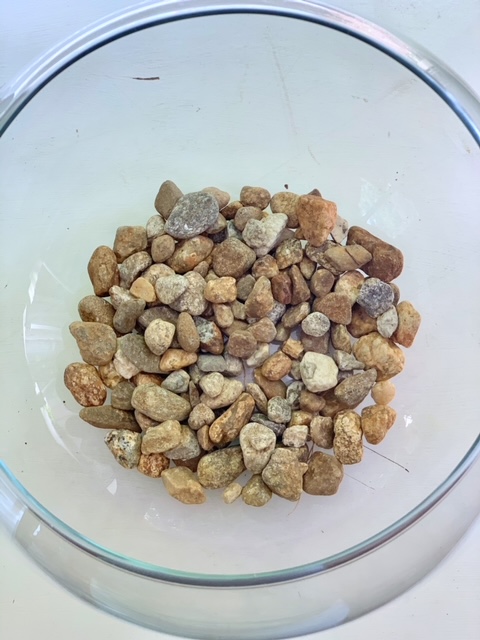
- Drainage Layer: Gravel or small rocks
- Filtration Layer: Activated charcoal to remove toxins and odors
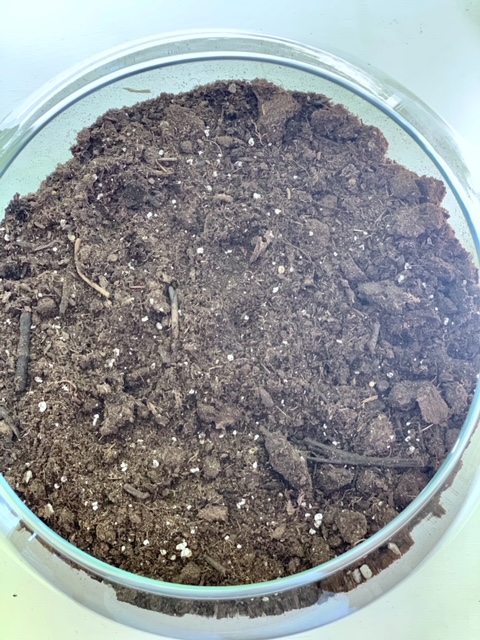
- Growing Medium: Potting soil suitable for your chosen plants
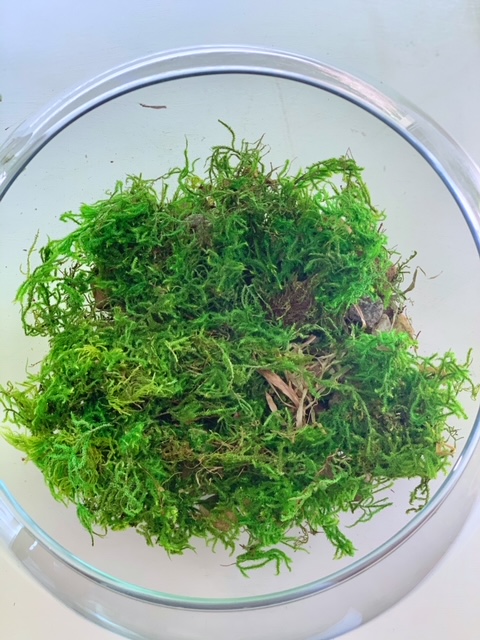
- Live Moss: Adds decoration and helps maintain moisture. Options include reindeer moss and sheet moss. ( I use moss from my yard for my terrariums)
- Tools:
- Long tweezers or chopsticks for planting
- Small shovel or spoon for adding substrate
- Plant mister for watering (optional)
- Decorative Elements (optional):
- Decorative rocks or pebbles
- Miniature figurines
- Small branches or driftwood
- Cleaning Supplies:
- Soft cloth for cleaning the container
- Spray bottle with diluted vinegar solution for glass cleaning
Pro Tip: Consider purchasing a DIY terrarium kit for convenience. These often include all necessary supplies except for the container and plants.
Tailoring your terrarium for different plant types
When creating your terrarium, consider how different plants thrive in various environments. Here are some special considerations for different terrarium setups:
Open vs. Closed Terrariums:
- Open terrariums suit a wider variety of plants, including those that prefer less humidity.
- Closed terrariums create a humid environment ideal for tropical plants, ferns and other plants that prefer moist soil.
Container Choices for Different Plants:
- Large openings (e.g., bubble balls, fish bowls) are suitable for most terrarium plants and easier to arrange.
- Narrow-necked containers (e.g., bottles, demijohns) require careful plant selection and special planting tools.
Succulent and Cactus Terrariums:
- Use well-draining cactus soil to prevent mold.
- Layer your terrarium: gravel, charcoal, moss, then cactus soil.
- Choose open containers with large openings for these drought-resistant plants.
Plant-Specific Considerations:
- Tropical plants: Thrive in closed, humid environments.
- Air plants: Can be placed in open terrariums without soil.
- Moss varieties: Excellent for creating lush, green carpets in both open and closed terrariums.
Decorative Elements to Complement Your Plants:
- Woodland theme: Add twigs and extra moss around ferns and shade-loving plants.
- Beach theme: Incorporate shells and pebbles with air plants or succulents.
- Fairy gardens: Use miniature figurines alongside small-leaved plants like Baby's Tears.
Tip: The key to a successful terrarium is matching your plants to the right environment. Always research the specific needs of your chosen terrarium plants to ensure they will thrive in your miniature garden ecosystem.
Steps for creating your terrarium plant ecosystem
- Prepare the Glass Container:
- Clean your chosen glass container thoroughly.
- Create drainage layer with rocks or a layer of gravel (about 1-2 inches deep).
- Add a thin layer of activated charcoal for filtration.
- Place a layer of sphagnum moss to separate substrate layers.
- Add Growing Medium:
- Fill the container about ⅓ full with moistened potting soil appropriate for your chosen terrarium plants.
- Create small hills and valleys for visual interest and varied plant depths.
- Plant Your Terrarium Plants:
- Carefully remove plants from their pots, loosening the root ball gently.
- Create small holes in the soil for each plant.
- Place larger plants first, then fill in with smaller varieties.
- Space plants 2"-3" apart to allow for growth.
- Add more soil around the roots, pressing gently to eliminate air pockets.
- Add Decorative Elements:
- Place additional moss between plants for a lush appearance.
- Incorporate decorative stones, figurines, or other items to enhance the theme.
- Water and Position:
- Lightly water the plants, being careful not to oversaturate.
- Use a spray bottle for more controlled watering.
- Place your terrarium in a location with appropriate light for your chosen plants.
- Maintenance:
- Monitor your terrarium plants for growth and health.
- Trim plants as needed to maintain desired shape and size.
- Water sparingly, allowing the soil to dry slightly between waterings.
Remember, the key to a thriving terrarium is selecting the right plants and providing them with an environment that mimics their natural habitat. Enjoy watching your miniature ecosystem flourish!

Caring for your plants
Proper care ensures your terrarium plants thrive in their miniature ecosystem. Follow these guidelines:
Light for Terrarium Plants:
- Place in natural, indirect light.
- Avoid direct sunlight, which can overheat the terrarium.
- Rotate periodically for even growth.
Watering Terrarium Plants:
- Start with minimal water, increasing as needed.
- Aim for consistently moist, not wet, soil.
- Use a spray mister for even distribution.
- Adjust watering based on season and plant types.
Maintenance of Terrarium Plants:
- Monitor plant growth and health regularly.
- Prune overgrown plants to maintain size and shape.
- Remove any yellowing or dead leaves promptly.
- Clean the glass container to ensure optimal light penetration.
Plant-Specific Care:
- Research the specific needs of each plant in your terrarium.
- Some plants may require occasional fertilization (use sparingly).
- Replace plants that outgrow the space or show signs of decline.
Troubleshooting Common Issues:
- Fungus or mold: Improve air circulation and reduce watering.
- Leggy growth: Ensure adequate light and prune as needed.
- Yellowing leaves: Check for overwatering or nutrient deficiencies.
Each terrarium is unique! Observe your plants closely and adjust care as needed. With proper attention, your terrarium plants will create a thriving, miniature ecosystem that brings joy for years to come.
Frequently asked questions
Ideal plants for closed terrariums include Fittonia (Nerve Plant), Peperomia species, Maidenhair Ferns, Baby Tears (Soleirolia soleirolii), and Miniature Begonias. These plants thrive in humid conditions and can adapt to the limited space of a terrarium.
Some terrarium plants that tolerate low light include Pothos (Epipremnum aureum), Snake Plant (Sansevieria trifasciata), ZZ Plant (Zamioculcas zamiifolia), Chinese Evergreen (Aglaonema), and Peacock Plant (Calathea makoyana). Remember, even low-light plants need some indirect sunlight to thrive.
Excellent ground cover options for terrariums include Irish Moss (Sagina subulata), Cushion Moss (Leucobryum glaucum), Creeping Fig (Ficus pumila), String of Turtles (Peperomia prostrata), and Baby Tears (Soleirolia soleirolii). These plants create a lush, carpet-like effect in your terrarium.
Watering frequency depends on the terrarium type and plants. For closed terrariums, water sparingly every 3-4 weeks or when condensation disappears. Open terrariums typically need watering when the top inch of soil feels dry, usually every 1-2 weeks. Always observe your plants and adjust watering as needed.
Yes, you can mix different terrarium plants, but ensure all plants have similar care requirements. Don't mix drought-tolerant succulents with moisture-loving asparagus fern. Group plants with similar light, water, and humidity needs for a healthy terrarium ecosystem.
To manage plant growth in your terrarium, choose slow-growing varieties, regularly prune plants to maintain size, remove any plants that become too large for the space, and start with smaller, younger plants to allow for growth.
Some Serious Terrarium Inspiration:

This closed terrarium showcases a diverse miniature ecosystem, featuring delicate ferns, lush moss, and small leafy plants. What stands out is the careful layering of substrate visible at the bottom, providing essential drainage and nutrition for the plants, while the cork lid adds a natural, eco-friendly touch to seal in the moisture.

This open succulent terrarium is a real beauty, combining different textures and colors to create a mini desert landscape. What really stands out is how they've mixed contrasting elements - you've got smooth, polished stones next to grainy sand, and soft, fleshy succulents alongside a spiky cactus.

This aquatic terrarium is like a tiny underwater world in a jar! The lush green plants and colorful fish really pop against the dark background. It's amazing how much life they've packed in there. I love how it feels both cozy and mysterious at the same time - it's the kind of thing you could stare at for hours, always noticing something new.

This bottle terrarium showcases a charming miniature landscape within an elegant glass vessel. I love how the curved shape of the bottle magnifies and distorts the plants inside, very cool indeed!

Check out this air plant terrarium! It's just a Tillandsia chilling in a glass ball, but it looks so cool. The way the round glass makes the plant look bigger is pretty neat - you can really see all the little details in its leaves. It's such a simple setup, but it definitely catches your eye.

Look at this closed terrarium - it's like a tiny world in a jar! It's packed with moss and little plants, all living together in their own mini ecosystem. The cool thing about these is that once you set them up, they pretty much take care of themselves. I'm thinking of giving one of these a shot next.
More creative plant project ideas
Explore our collection of unique gardening inspirations:
- Create magical glowing ambiance with our lightning bug lanterns that combine succulents with enchanting evening illumination
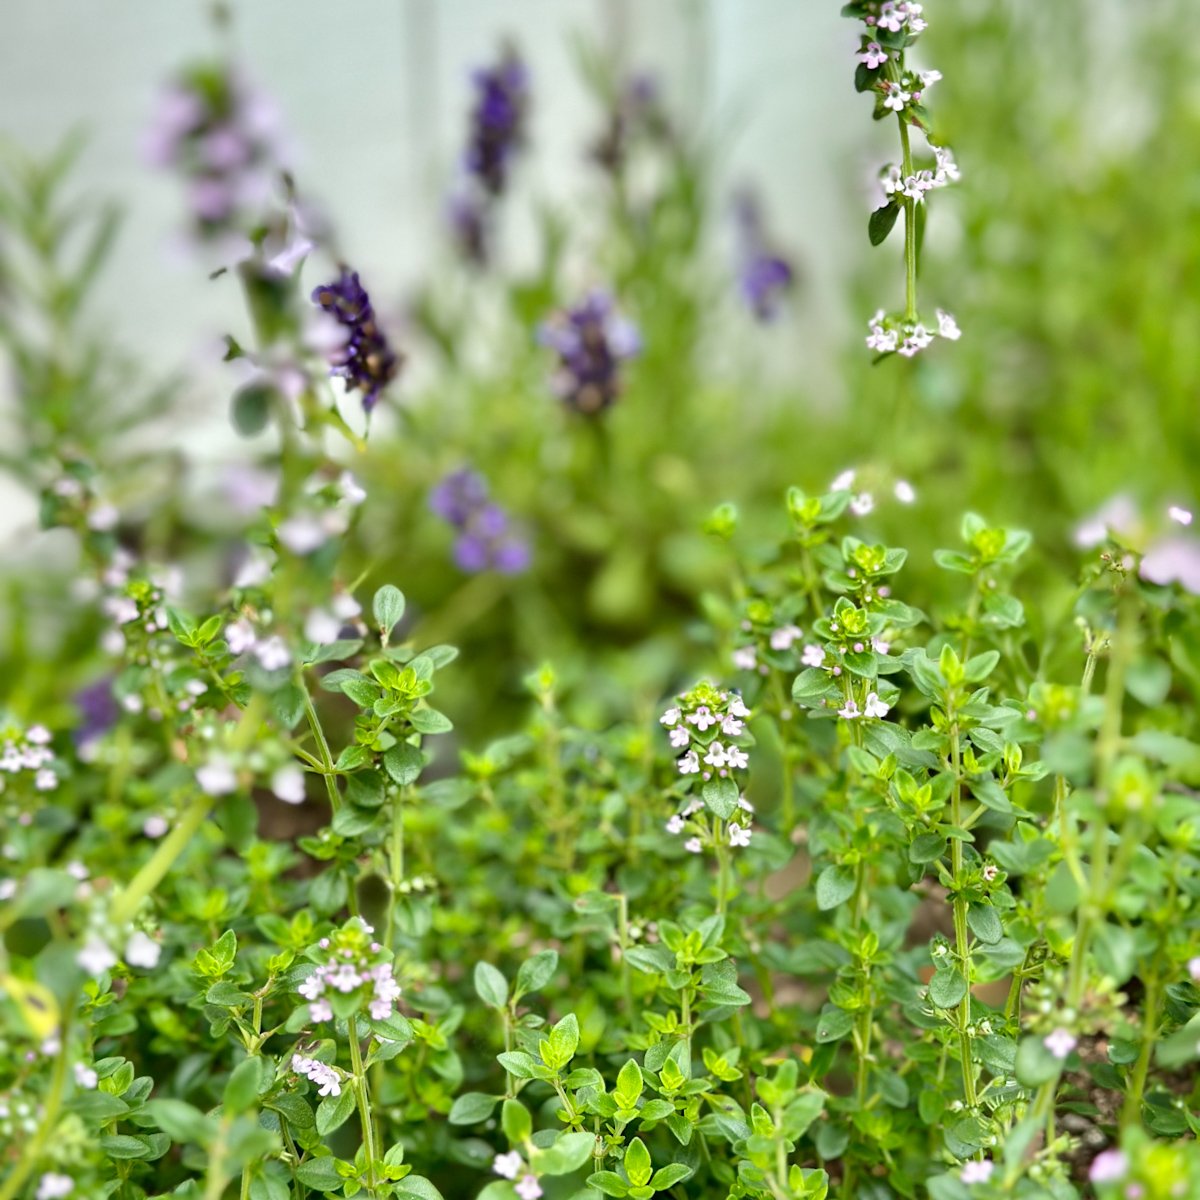
- Craft elegant topiaries using simple grapevine wreath forms that transform ordinary herbs and vines into living sculptures
- Build your own indoor self-watering planters that ensure perfect moisture levels while adding stylish design elements
- Transform vintage soup tureens into charming planters that blend classic elegance with living greenery
These plant-focused DIY projects offer beautiful ways to incorporate more greenery into your home while creating conversation pieces that showcase your creativity and gardening skills.
The sky is the limit on these low-maintenance gardens! Thanks for visiting the blog today for my Terrarium Plants: A Complete Guide to Choosing and Growing Stunning Glass Gardens post! Will you be heading to your local garden center to make your own terrarium? Let me know in comments!
Happy Planting friends!


I have had a few open terrarium bowls over the years but I am loving the wood bowl stand. That is so creative and adds just a great touch. I love following your creative ideals. Great job Stephanie!!!
Thank you Debi!
Thank you!