

DIY Artificial Flower Balls: Peony Kissing Balls
Kissing balls aren't just for the holiday season although I do love a beautiful ball of fresh Christmas greens during Christmas time. Today I'm sharing a spring/summer version in this DIY Artificial Flower Balls: Peony Kissing Balls post that is not only easy to make but adds a fun puff of florals into your home for the spring and summer months.
*This post includes affiliate links, for more info on affiliate links visit here
Jump to:
The history of flower balls
Historically these decorative little flower balls date back to the middle ages when villagers would create ball-shaped ornaments made of twine and evergreen branches. In the center, they would place a clay figure of an infant representing baby Jesus. Today I'm putting a floral spin on this timeless home decor piece by using faux peonies instead of evergreen branches, mistletoe, and pinecones.
About this design
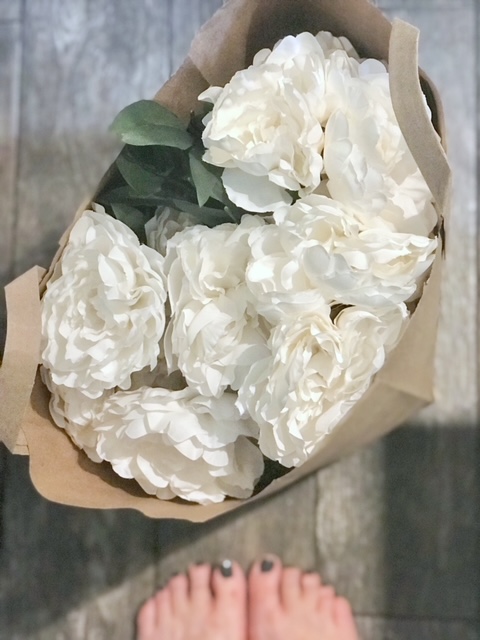
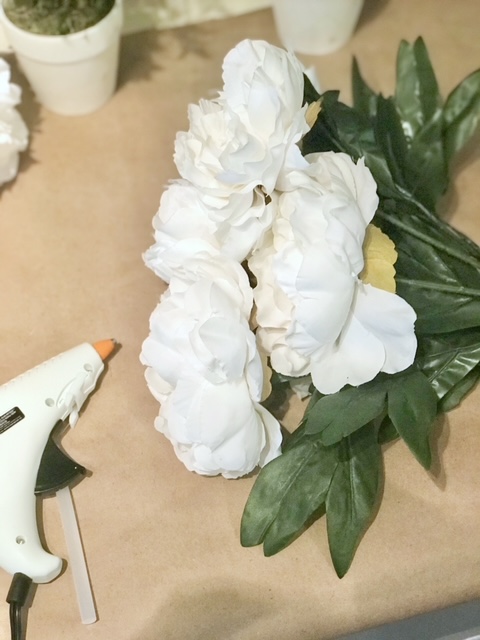
For this design, I took a quick trip to Joann's for a few supplies. I bought what is called "peony bushes." These have several peony blooms on one stem instead of just a single bloom. Faux peony's come in a variety of colors and locally here in Massachusetts the best place to find them is at Joann's, Hobby Lobby, and Michael's stores.
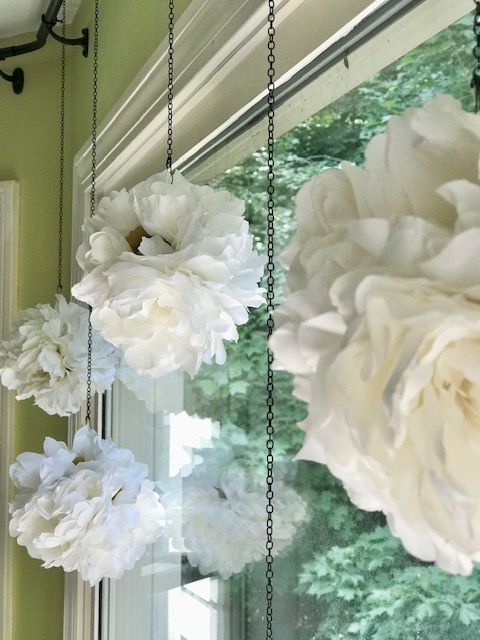
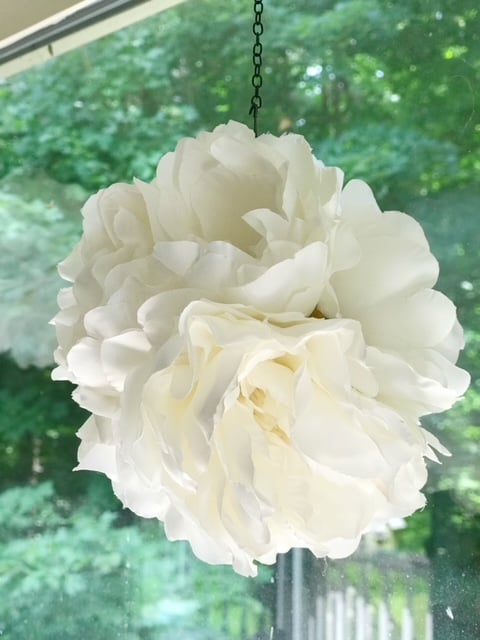
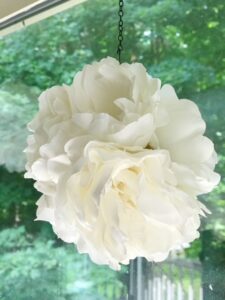
I had envisioned these floral balls to be hanging from our bay window so I knew each would need to be fairly small. For this window display, I made 7 kissing balls in total, the entire ball measures 7" across - each is made from 5 floral heads (blossoms).

Supplies for this project
- Faux Peony bunch: I'm linking similar. Have fun with your faux flower selection! I'm partial to peonies, but roses and hydrangeas would work well too!
- Black jewelry chain: I liked the contrast of the white peonies with the delicate black chain. Ribbon would work well for this application.
- Black bulb pins: You could also easily hide a traditional safety pin in the fluff of the peony petals.
Step by step instructions
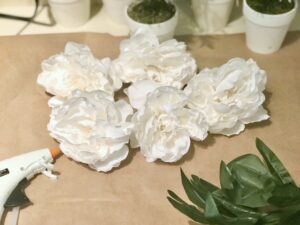
Step 1: Preparing the Blooms
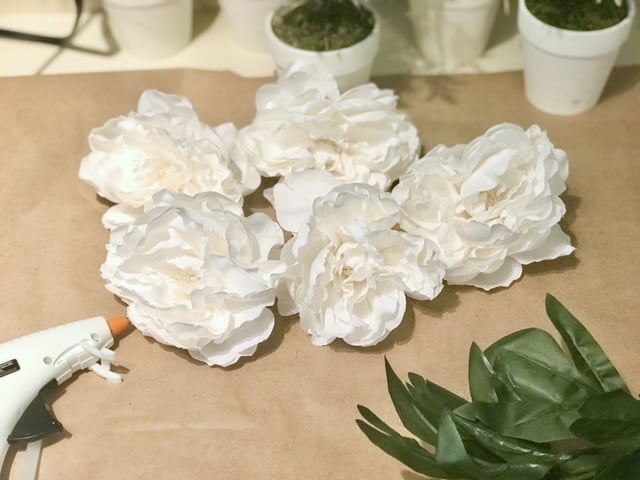
Remove the flower heads from the bush by simply popping them off. If they don't pop off easily use wire cutters to remove them from the bush. You will need 5 large open peony flower heads for each ball. The blooms I used measure almost 5" across each flower head.
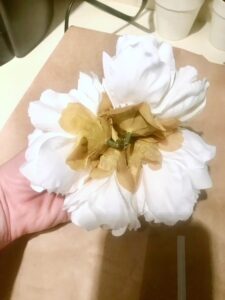
Step 2: Assembling the Kissing Balls
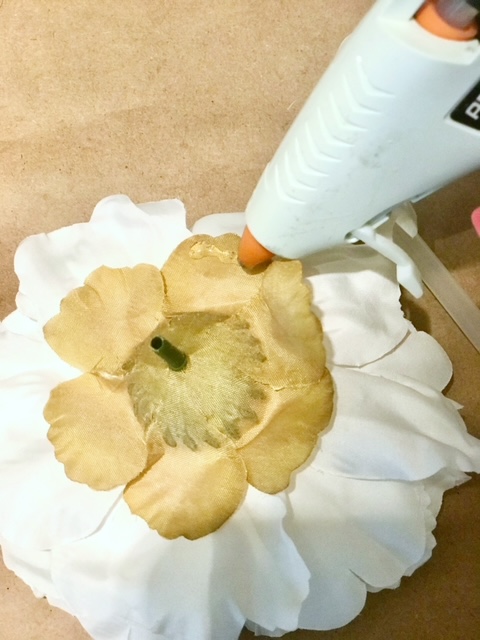
Take the first flower head and on the bottom give it a dab of hot glue. Press the bottom of the second flower to the glue, hold until dry, and then move to the next one. Once 4 blooms are glued next to one another and in a circle, close the ball by gluing a 5th bloom on top. You are gluing the base of the flower heads on the flower petals. You may see small gaps between the blooms which just adds to the look.

Step 3: Pinning the Kissing Balls
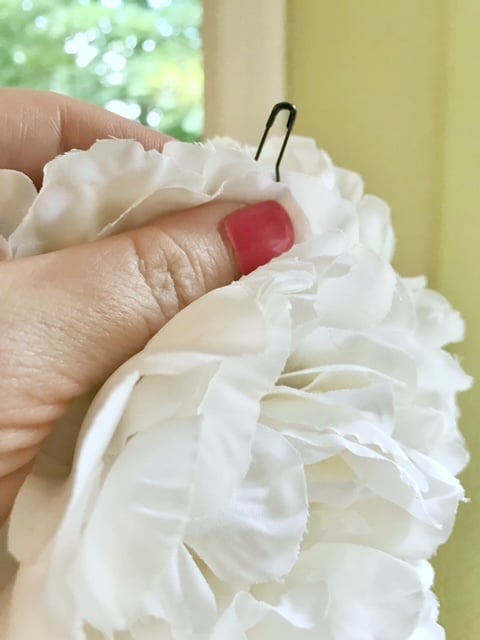
Take each kissing ball and with a bulb pin pierce a small cluster of flower petals that are on the top of the ball. The pin should only make small holes that will not be noticeable if removed.
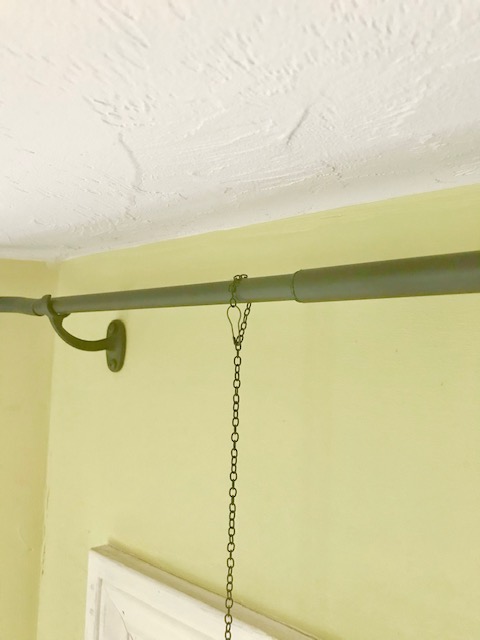
Step 4: Hanging the Kissing Balls
The final step is to hang the balls. Measure how long you want the peony balls to hang from your curtain rod or other hanging spot. I choose to have them hanging at different heights. Take the jewelry chain and lace it through the bulb pin that is on the peony ball then add a second pin to the other end. Loop the end of the chain over the curtain rod and connect it with the second bulb pin.
Variations and creative ideas
- Exploring Different Mediums: If you're looking for a more budget-friendly option, consider making these floral balls using tissue paper to create lovely paper flowers. Another unique approach is using cupcake liners, just like in my cupcake liner wreath project. Simply purchase a styrofoam ball and glue the liners onto it for a whimsical touch.
- Perfect for Flower Girls: These floral balls make a fantastic accessory for flower girls to carry during a wedding ceremony. Simply attach a looped ribbon for the flower girl to hold onto, adding an adorable and elegant touch to her ensemble.
- Endless Color Possibilities: One of the best aspects of DIY peony kissing balls is the versatility of colors. You can create these charming decorations in a wide range of hues, allowing you to select a color that complements your existing decor or matches your wedding color scheme.
- Explore Different Flower Options: While I used large peony blooms for these silk flower balls, feel free to experiment with other silk flowers like hydrangeas, artificial roses or any other variety that catches your eye. Let your creativity flourish as you mix and match different flowers to achieve your desired look.
Embrace the versatility of these DIY peony kissing balls by exploring various mediums, utilizing them in different settings, playing with colors, and experimenting with a variety of flowers. Enjoy the process of crafting unique and stunning floral decorations!

Frequently asked questions
A kissing ball is a decorative orb-shaped arrangement typically made of flowers, greenery, or other decorative elements. It is often used as a festive decoration during special occasions or holidays. Kissing balls are often hung but can also be seen as flower ball centerpieces.
Kissing balls have a long history and can be traced back to the 17th century. They were originally made with evergreen branches, herbs, or mistletoe tied together to create a ball-shaped ornament. In the Victorian era, kissing balls were associated with good fortune and were used during the holiday season.
Of course! When using fresh instead of artificial flowers there are a few things to keep in mind. The first is to figure out what you will use as a water source. For this, you have two options - the first would be a floral foam ball often called an Oasis ball. You would soak the ball in water and design your fresh flowers right into the ball. The second option would be to place each flower in a water pick and then add it to a green or white Styrofoam ball.
The other thing to keep in mind is the weight of the kissing ball. It will be much heavier than one made with faux flowers. You may need a wire to hang it.
These DIY peony balls are glued to one another. You may also make your kissing ball by gluing the flowers to a whiffle ball, a Styrofoam ball or a moss ball. The size of your ball will determine the size of your kissing ball.
Kissing balls can be made using various materials and techniques. Traditionally, fresh flowers, evergreen sprigs, artificial plants or artificial flowers are arranged and secured onto a foam or Styrofoam ball using hot glue or wire. Different variations may include adding pine cones, ribbons, or other decorative elements.
Kissing balls can be hung in various locations, such as a front door, windows, arches, or as decorative centerpieces. They are commonly seen during weddings, holiday celebrations, or as festive home decor.
Yes, there are several variations of kissing balls. Some popular variations include Christmas kissing balls made with evergreen branches, pine cones, and ribbons. Additionally, pomander balls are smaller versions often made with fragrant flowers like roses or carnations. Kissing balls can be customized to match different color schemes, themes, or occasions.
Historically, kissing balls were associated with good tidings, holiday traditions, and even romance. In the Victorian era, unmarried maidens would stand beneath the mistletoe-adorned kissing balls, hoping for a kiss from an unmarried gentleman. Today, they are cherished as decorative pieces that add charm and beauty to special events and gatherings.
Yes, kissing balls can serve various purposes. They can be carried by flower girls during weddings, hung from shepherd's hooks as aisle markers, or placed in tall vases as stunning floral arrangements for a special event. Kissing balls are versatile and can be adapted to suit different settings and occasions. I like to place them on top of candle holders, using the holders as a unique pedestal to showcase the beauty of the peony kissing balls.
Where to hang
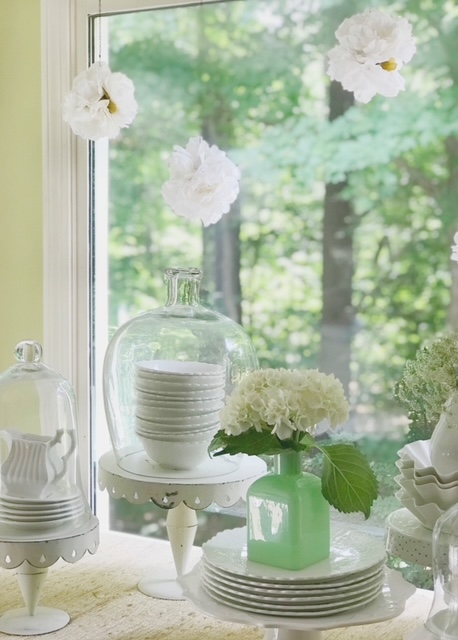
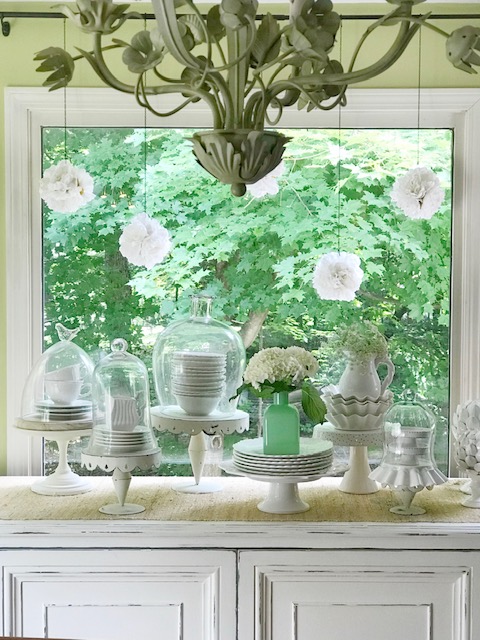
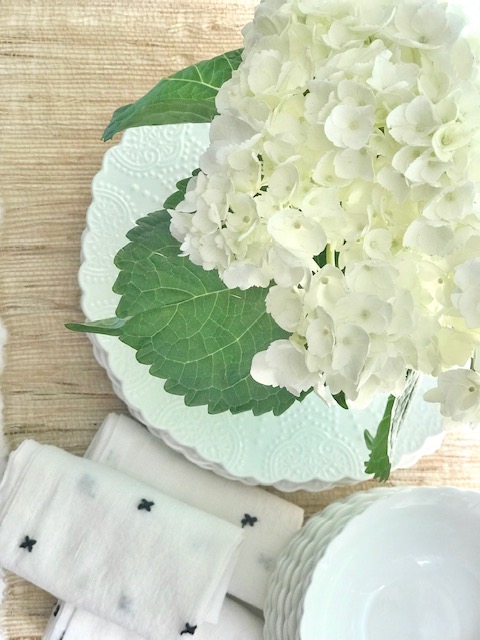
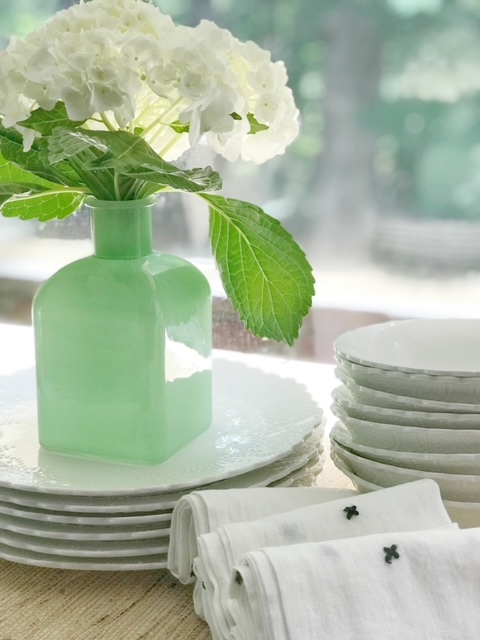
The dining room bay window came to life with the addition of the Artificial Flower Balls. Placed on top of the white chalk-painted buffet, they stole the show and became the centerpiece of the space. I played around with stacked plates and fancy cake plates covered with cute cloches, creating a delightful setup. The combination of lush greenery and elegant white blooms blended perfectly, giving the room a fresh and tranquil vibe. It's amazing how a simple decorative accent can turn a bay window into a welcoming spot.


DIY Artificial Flower Balls: Peony Kissing Balls
Equipment
- 1 Hot Glue Gun with Glue sticks
- 1 Tape measure
Materials
- 2 bunches Faux Peony bush (each flower is made from 5-6 flower heads)
- 1 pkg Black Jewelry Chain
- 1 pkg Black bulb pins
Instructions
- First using your hands pop the flower heads (blooms) off the Peony bush. Depending on the peonies you buy you may need to remove the blooms with wire cutters or scissors. Discard the foliage and stems or save them for another project.

- Take 5 Peony blooms and flip them over. With your hot glue gun add a little bit of glue to the bottom flower petals and begin to glue the flower heads together. Place them in an open circle - one at 12:00, then 3:00, then 6:00 and finally 9:00. Carefully hold the two petals together while the glue dries.

- Next with a dab of glue add the 5th bloom to close the circle to make a ball.
- Take each kissing ball and on one of the top flower petals poke a bulb pin through the petals.
- Next measure how long you want the chains to be and lace one end of the chain through the bulb pin that is on the peony ball.
- Add a second bulb pin to the end and loop the end around the curtain rod and secure with the second pin.
- Hang remaining peony kissing balls at different lengths.


Notes
For more DIY inspiration visit:
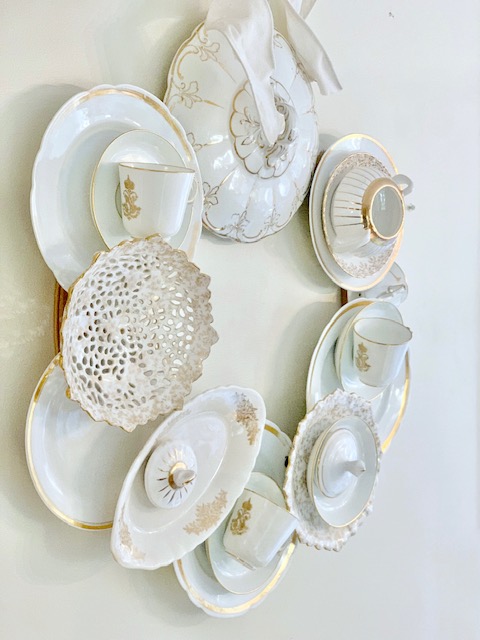
5 DIY Projects for Your Home: In this post, I take a trip down memory lane and share my top 5 favorite DIY projects for your home. From creating a wreath using assorted china plates to transforming a card catalog with green chalk paint, each project has its own unique story. I also share how my husband and I recycled lighting using embroidery hoops and how I made my own Pottery Barn-inspired ticking stripe curtains. Lastly, I reveal an easy DIY fireplace cover board that adds style to any fireplace. I hope these projects inspire you to get creative and add a personal touch to your home!
For even more ways to decorate with faux stems, hop over to the Floral Design Index where I keep all my tutorials in one place.
Thank you for joining me on the blog today to learn about these DIY Artificial Flower balls: Peony Kissing Balls. If you're not up for a big project and a quick crafting session sounds like a better plan, grab your glue gun and make these delightful and fluffy kissing balls! They offer timeless appeal offer and a charming way to bring summery floral beauty to your windows. Give them a try!
Keep creating friends!


Stephanie, I love these kissing balls! Could you just sort of “nest” one on a candle holder (pillar size) or similar “riser”?
Yes! that would be so pretty! They could also sit in a pretty bowl on a table! Lots of "non-hanging" uses!
Stephanie, peonies are one of my very favorite flowers. This is such a pretty way to use them!
Thank you Debi! they are favorites of mine too!