

Mason Jar Candles DIY: The Effortless Crockpot Method
Today I'm sharing how to make easy, mess-free Mason Jar Candles DIY. I have always wanted to try my hand at making candles but was hesitant because I thought candle making was a long, cumbersome messy process. Umm, no thanks! The idea of melting wax in a double boiler seemed like a lot of work that would require a lot of clean up. In the end, I decided to leave the candle making to the professionals!

*This post includes affiliate links, for more info on affiliate links visit here!
Jump to:
Discovering the crockpot method
One day while scrolling through Pinterest (you know how that rabbit hole goes!), I stumbled upon the most brilliant idea - using a slow cooker to create DIY scented candles. I mean, genius right?! After reading the instructions, I was like "Wait, that's IT?" I was shocked by how simple the whole process seemed.
Instantly, I was totally hooked on the idea of these no-fuss, clean-and-easy slow cooker candles. No double boilers, no wax spills all over my kitchen, just pop everything in the slow cooker and let it do its thing! I literally couldn't wait to give it a try and started gathering supplies that same day!

How to make
Supplies needed
- Natural Soy Wax (10 lb bag) (5 lb bag)
- Cotton Candle Wicks
- Fragrance oils
- Coffee stirrers (or pencils)
- 4oz ball jars
- Crockpot
- Boiling Water
Fortunately these candles are made with nontoxic soy wax and 100% cotton wicks so you don't have to be concerned about unwanted, unhealthy fumes while burning them.
Step by step instructions
- Prepare the Jars
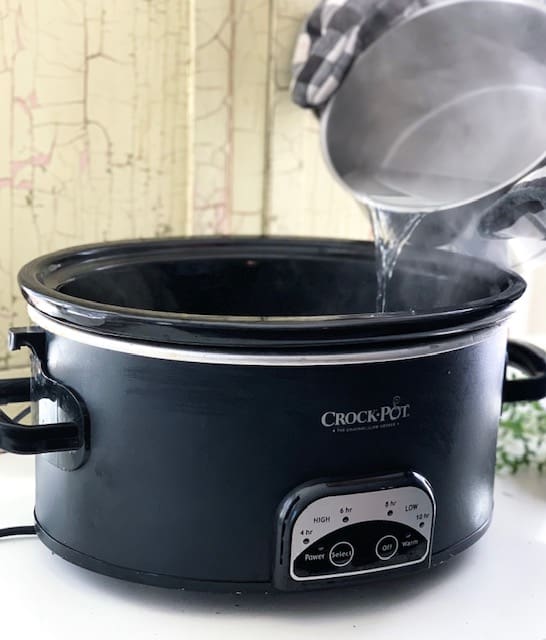
Fill each mason jar to the top with soy wax flakes. Place the jars in your crockpot.

- Set Up the Water Bath
Carefully pour boiling water into the crockpot around the jars until it reaches halfway up the sides. Avoid getting water inside the jars. This is an important step for even melting.

- Melt the Wax
Place the lid on the crockpot and set the temperature to high. Allow the wax to melt fully, which typically takes about 1-2 hours. Check after 1 hour as melting time may vary.
Note: The wax will have a yellow hue but you will have a white candle when it cools.
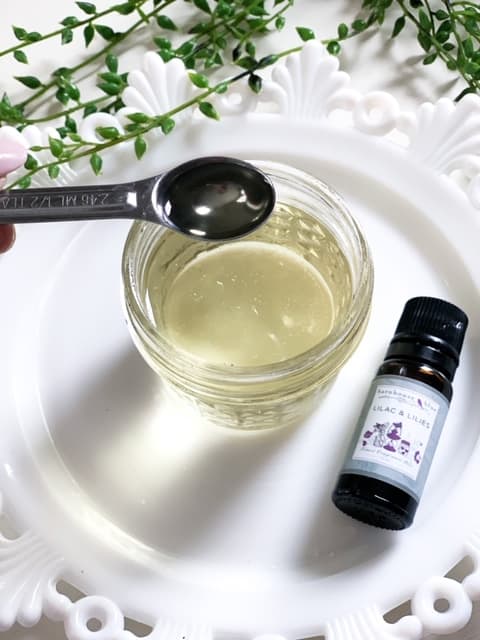
- Add Fragrance
Once the wax is melted, carefully remove the jars from the crockpot using oven mitts. Let them cool for 10 minutes. Add your chosen essential oils or fragrance oils. For these small jars, about 1 tablespoon of oil per candle provides a nice scent blend.
- Insert the Wick
While the wax is still liquid, it's time to add the candle wick. This can be tricky, but here's a helpful
Tip: Tie the top of the wick around a coffee stirrer or popsicle stick, then lay it across the top of the jar. This keeps the wick centered on the bottom of the jar as the melted wax cools. - Let the Candles Cool
Allow the candles to cool completely at room temperature. The wax will turn a soft white color as it solidifies.
- Finish the Candles
Once the hot wax is cooled, remove the stirrer/stick and trim the wick to about ¼ inch above the wax surface. Place the mason jar lids on top.
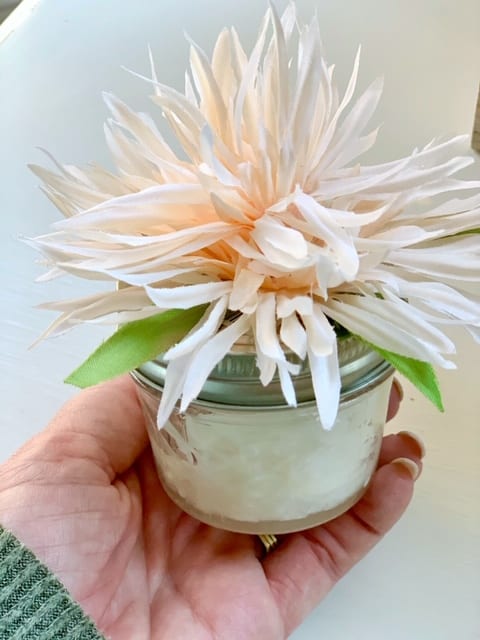
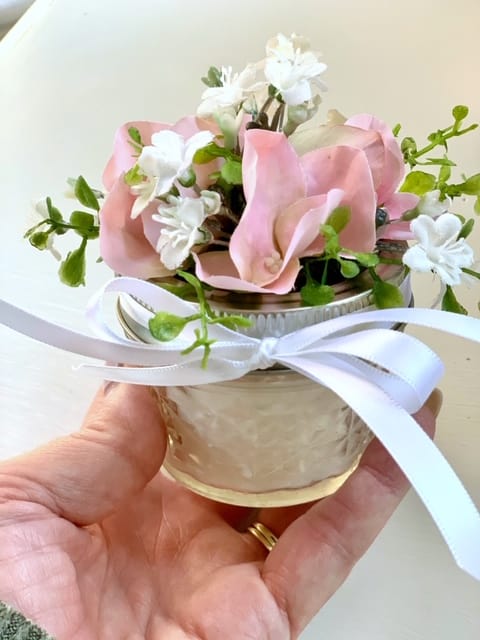
- Add Decorative Touches (Optional)
Personalize your homemade candles with ribbons, twine, or gift tags for a charming touch. These make great gifts for Mother's Day, Valentine's Day, or any special occasion.


Tips:
- Always monitor the crockpot while in use.
- For larger batches, you can melt a larger amount of wax in a mixing cup placed in the crockpot, then pour into individual jars.
- Experiment with different essential oil blends to create your favorite scents.
- These DIY mason jar candles are perfect for handmade gifts during the holiday season.
Remember, making candles at home can be much fun, but always prioritize safety. Enjoy your new soy mason jar candles at your own risk!

Tips and tricks
- Wick Placement:
- Use a popsicle stick or pencil to keep the wick centered or buy these wooden wick holders to save time (and frustration!)
- Dip the metal base of the wick in melted wax before placing it at the bottom of the jar for better adhesion
- Decorating Ideas:
- Tie twine or ribbon around the jar for a rustic look
- Add dried herbs or flowers to the jar lid for a natural touch
- Create custom labels for gifting
- Use washi tape to create patterns on the outside of the jar
Remember, simple decorations often have the most impact. Let your creativity shine!
Benefits and uses
These DIY crockpot candles are perfect for gift-giving and special occasions. They make thoughtful, personalized presents for birthdays, holidays, or just because. Consider creating themed scents for different events:
- Lavender scented or chamomile for a relaxing spa day gift
- Fresh, clean scents for housewarming presents
- Seasonal fragrances for holiday gifts
- Custom scents for wedding or bridal shower favors
- Citrus or herb-scented candles for kitchen-themed gifts
Not only are these candles cost-effective to make in batches, but they also allow you to tailor the scents and decorations to suit the recipient or occasion. Plus, the homemade touch adds an extra layer of thoughtfulness to your gift.

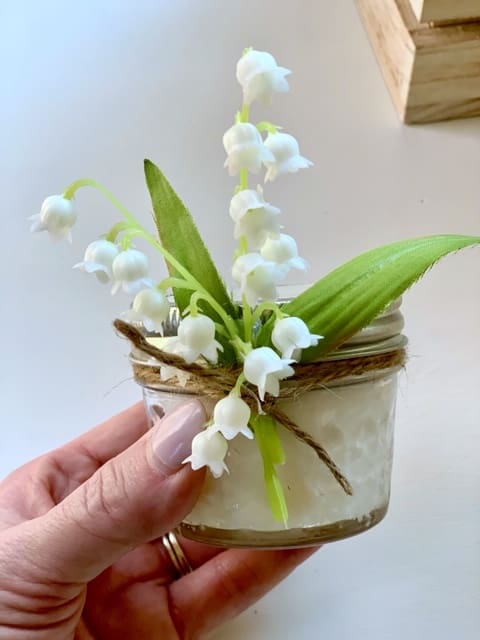
Decorating the candles
With my hot glue gun, a few faux floral stems, twine and ribbon I had fun adorning these sweet little floral scented candles. Here are some other decorating ideas you might want to try:
- Wrap burlap around the middle and secure with baker's twine for a rustic farmhouse look
- Attach tiny pinecones and cinnamon sticks for a cozy winter vibe
- Add wooden gift tags with personalized messages tied to the metal lid
- Use colorful washi tape to create patterns or stripes around the jar
- Apply gold leaf to portions of the glass for an elegant touch
- Spray paint the metal lids in different metallic colors
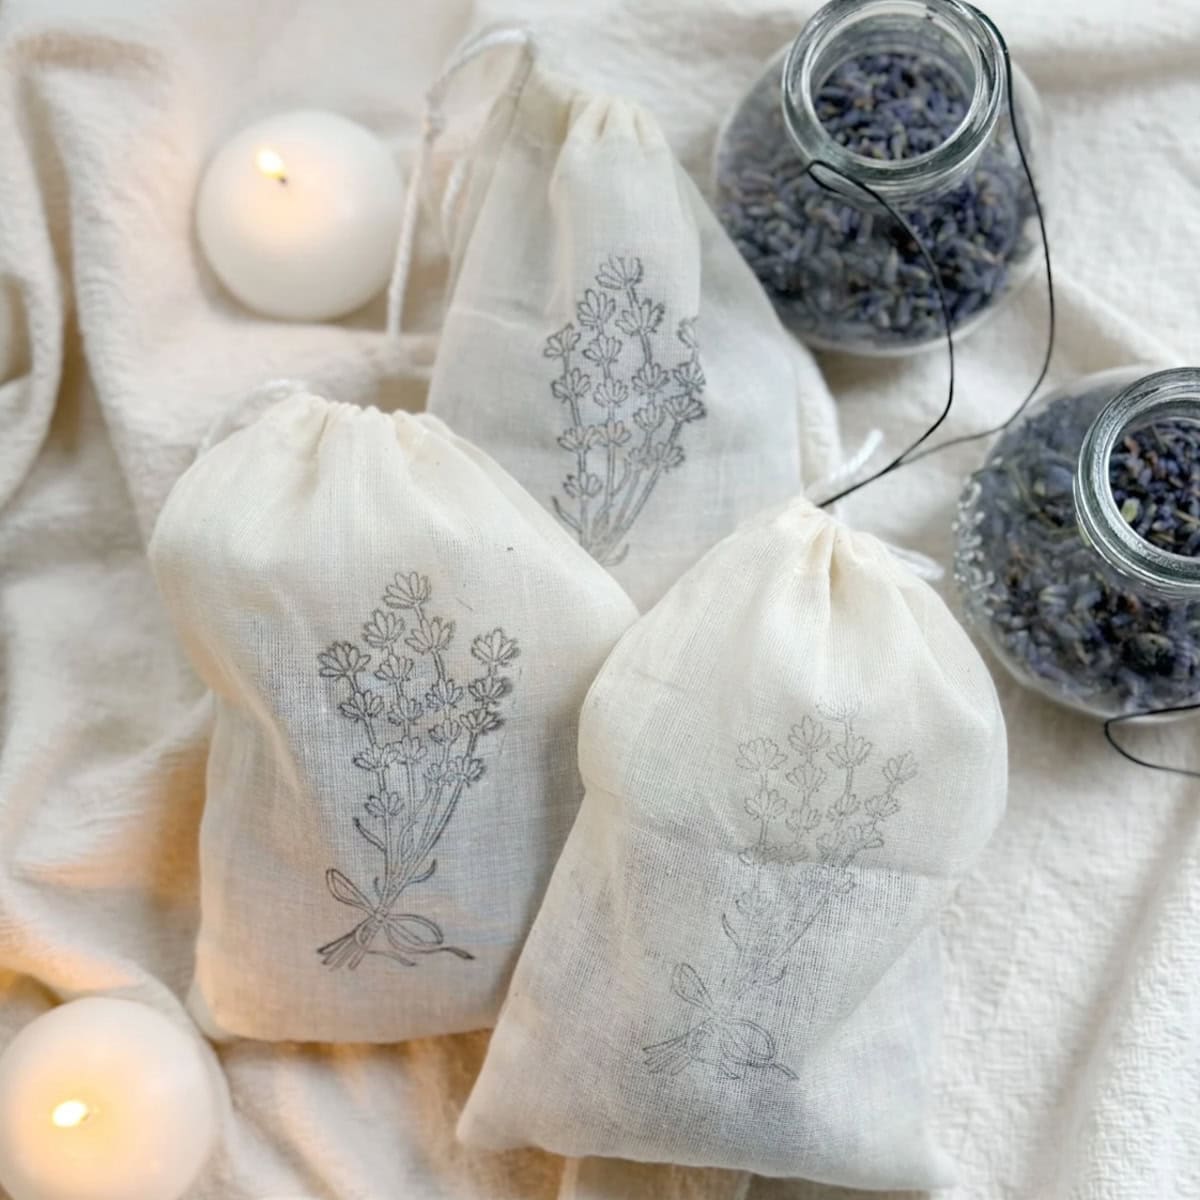
- Tie small dried lavender bundles around the jar with raffia
- Add a band of lace for a vintage-inspired look
- Wrap copper wire with tiny fairy lights around the jar for a magical glow
- Stick on mini pom-poms in coordinating colors for a playful touch
These would be perfect for gifts, bridal shower favors, or just brightening up your own home! The best part is you can customize them to match any season or celebration.
Making candles is fun! For other ideas visit these candle recipes from my sister site:

Easy and Mess-free DIY Lavender Scented Candles: This easy DIY project transforms simple soy wax and cotton wicks into luxurious lavender-scented candles using just a crockpot. By adding a few drops of lavender essential oil to the melted wax, you can create aromatic homemade candles that rival expensive store-bought varieties, all while enjoying a mess-free, relaxing crafting experience.

DIY Thyme Candles with the Crockpot Method: Create your own aromatic DIY candles infused with the fresh scent of thyme using the simple crockpot method. This easy technique allows you to melt candle wax safely and effortlessly, resulting in unique, homemade thyme-scented candles that add a touch of nature to your space.
So fun sharing how to make easy, mess-free DIY Crockpot scented candles! I hope I encouraged you to make your own candles using this mess-free, fuss-free DIY Slow cooker technique a try. Especially if like me, you expected candle making to be a fussy endeavor - one you wanted to stay away from!
Happy candle making friends!


hi! where did u buy those mini faux lily of the valley stems??
Hi Mary, I believe I bought those at Hobby Lobby. Thanks for visiting the blog!
Stephanie, I’ve also been reluctant to do candle making because of the mess! This looks like a fun project. Thanks for sharing!!
Thank you Debi!
Thank you for sharing this great and easy way to make candles!
I love scented candles!
Thank you! I hope you give them a try!!