How to Paint a Dark Wood Mirror Frame White Without Stain Bleed-Through
Want to paint a dark wood mirror frame white without the stain bleeding through? You're not alone. Many antique mirrors have rich, dark finishes that can ruin a crisp white paint job if you don't prep them properly. In this step-by-step tutorial, I'll show you exactly how to refinish a dark-stained mirror frame using the right primer, tools, and techniques to block bleed-through and get a smooth, bright finish that lasts. Whether you're working with an heirloom piece or an antique market find, this simple makeover adds vintage charm to any room.
*This post includes affiliate links, for more info on affiliate links visit here
Jump to:
About this project
I chose to write about this particular project because, despite its apparent simplicity, it presented me with some unexpected challenges along the way. Refinishing the antique mirror not only required several steps, such as repairs and stripping, but also forced me to deal with the dreaded issue of bleed through, a common problem with old, dark pieces. However, after some trial and error, I was able to overcome these obstacles and achieve a beautiful end result. Sharing this DIY painted mirror project here!
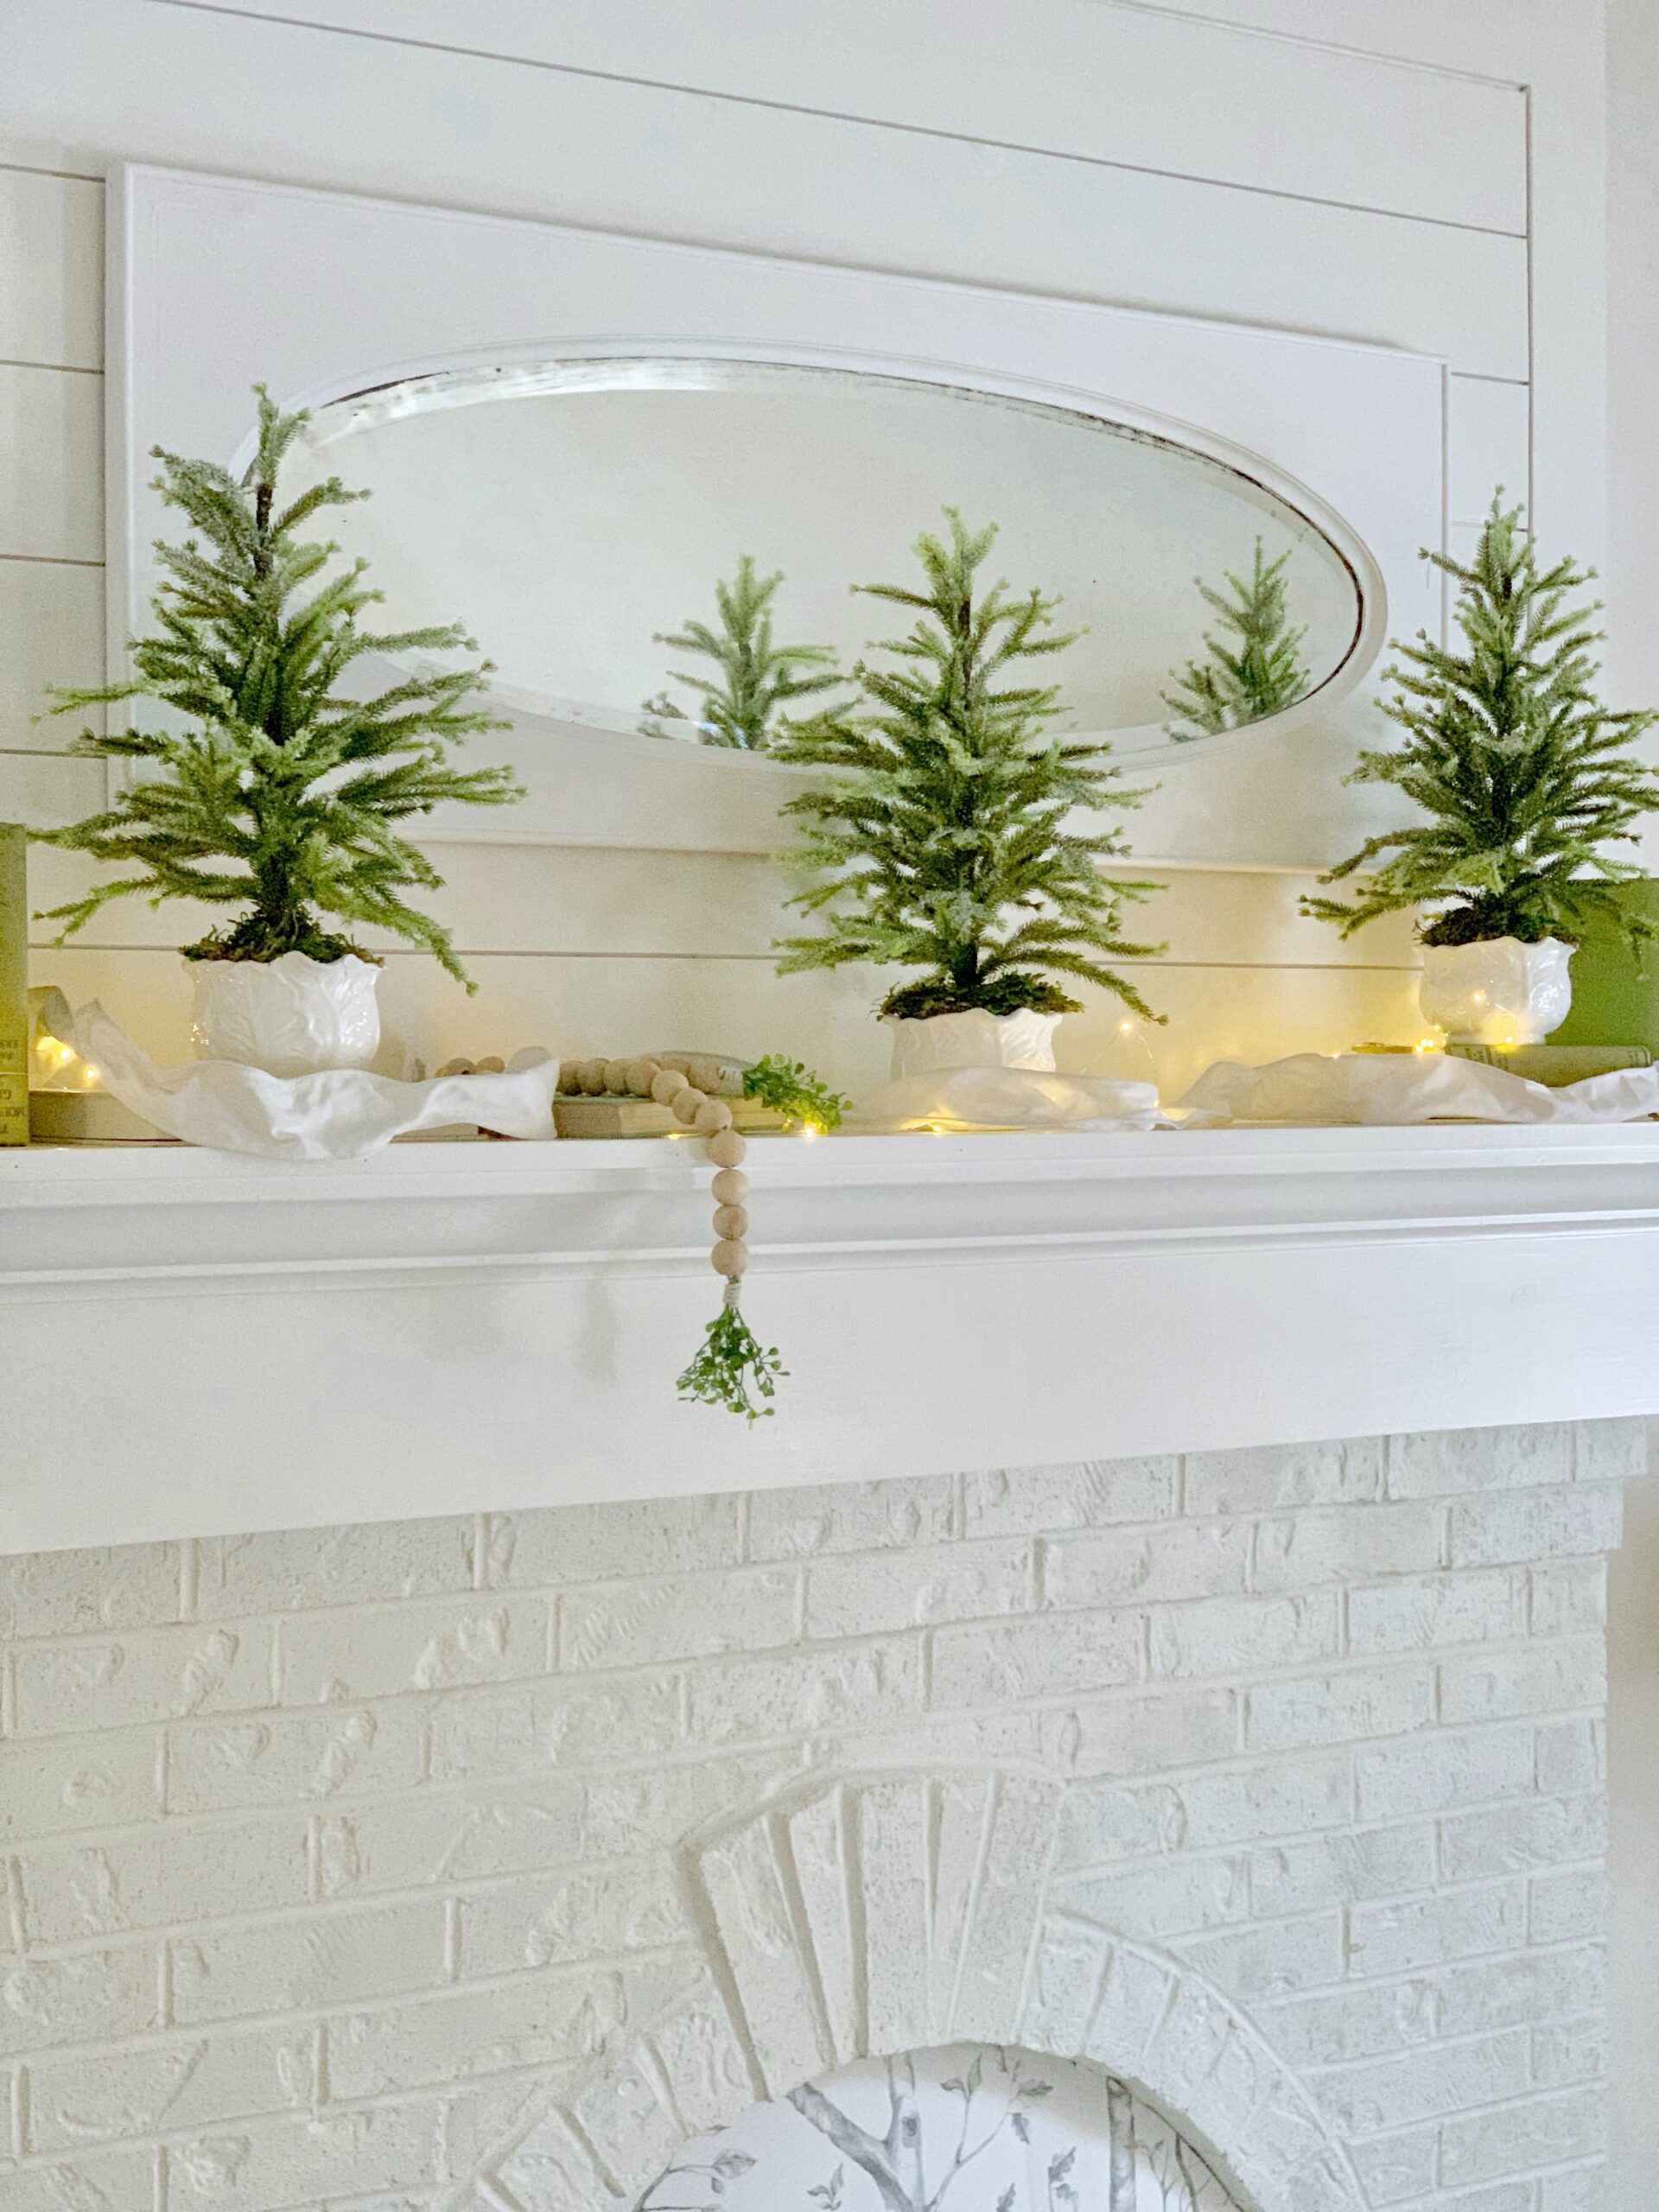
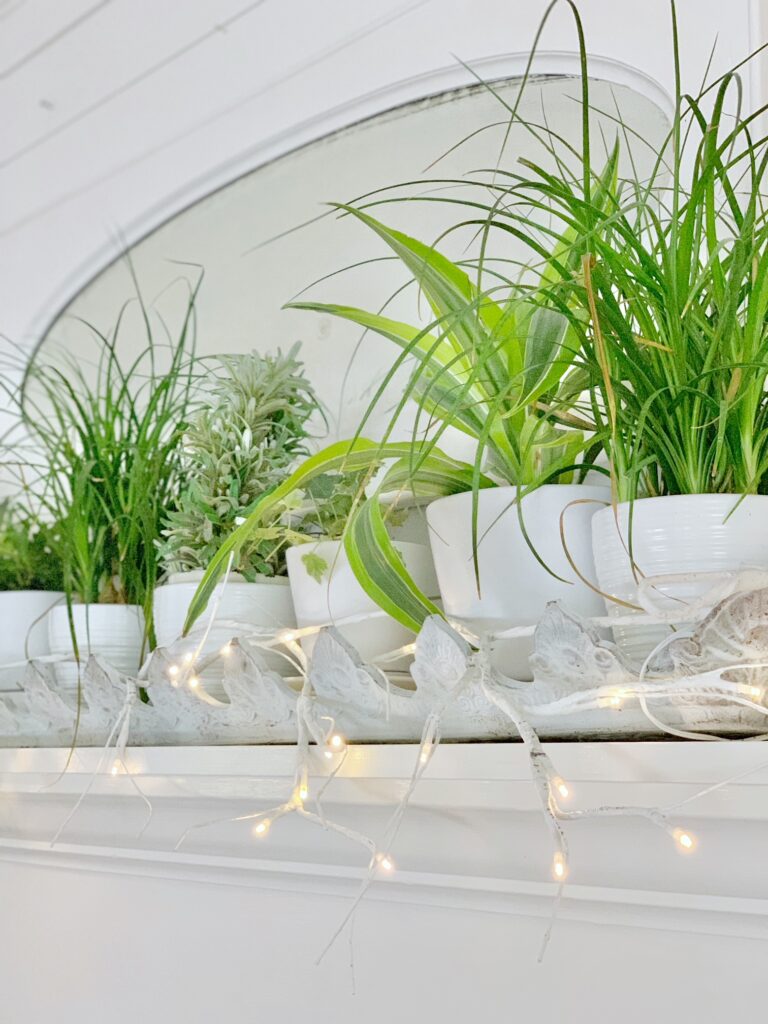
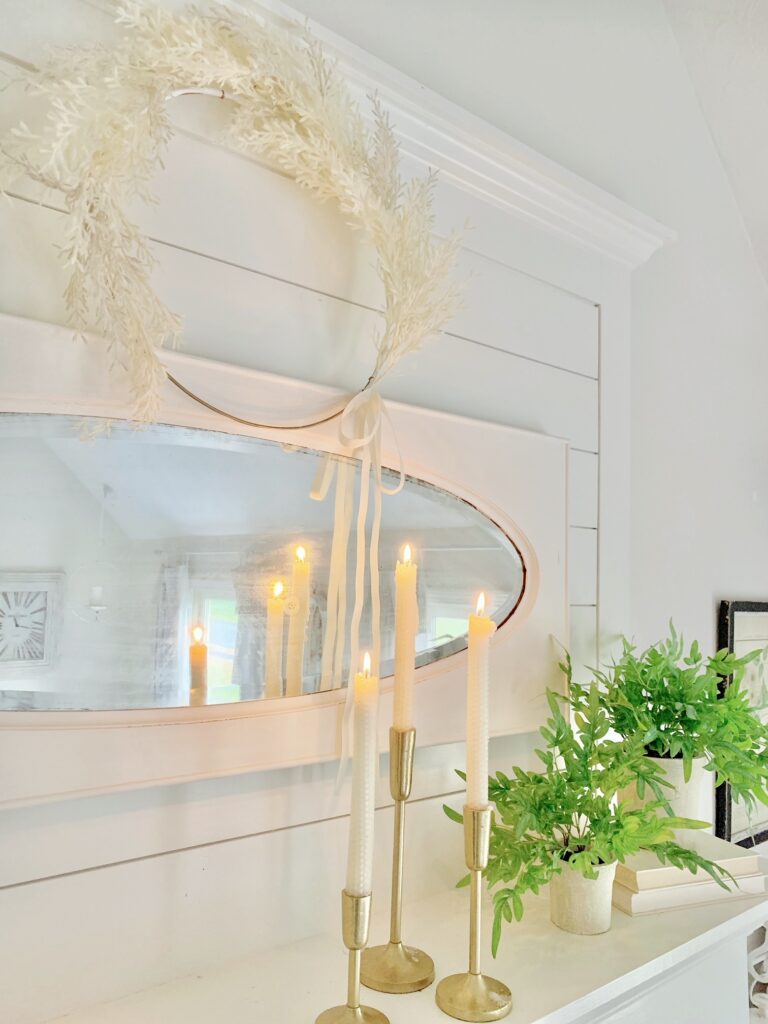
This mirror now hangs in our white living room and adds just enough contrast to all the soft tones. You can see how I styled it with other cozy elements in my White Living Room Hub.
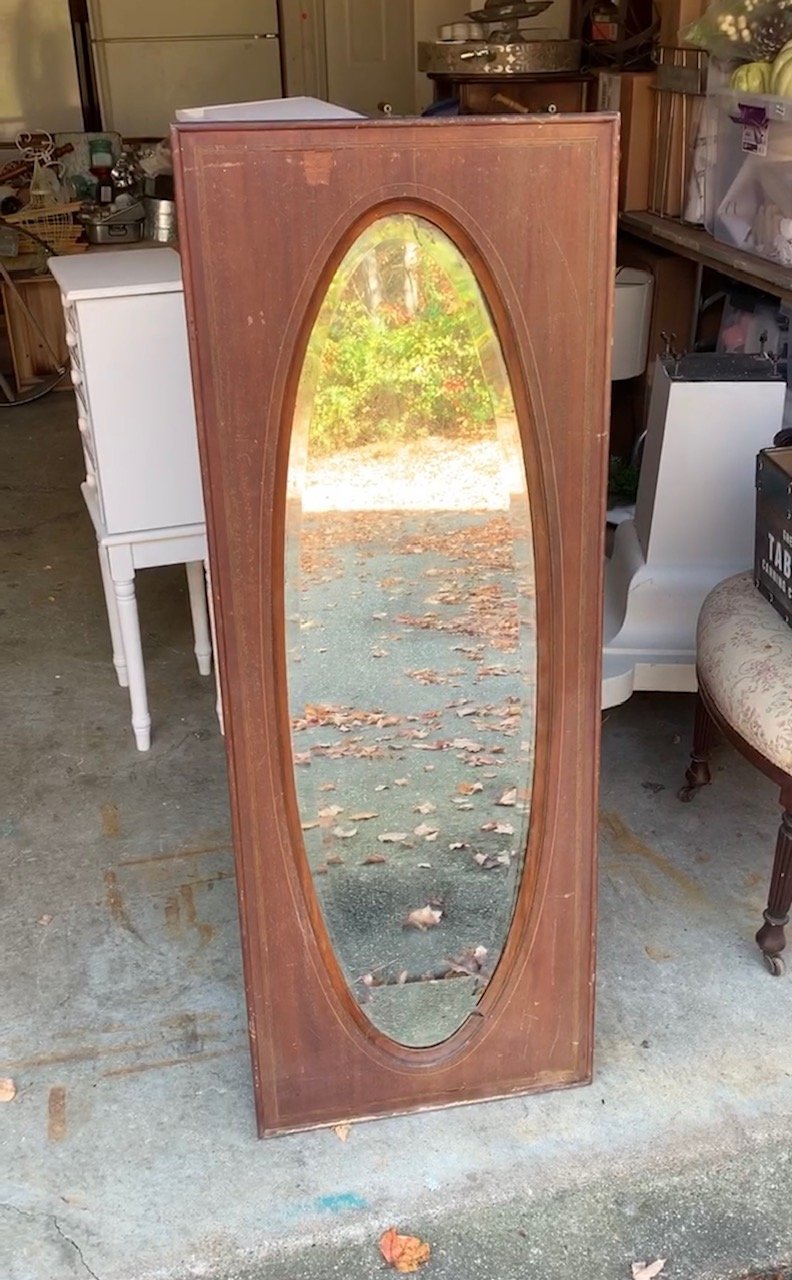
About this mirror
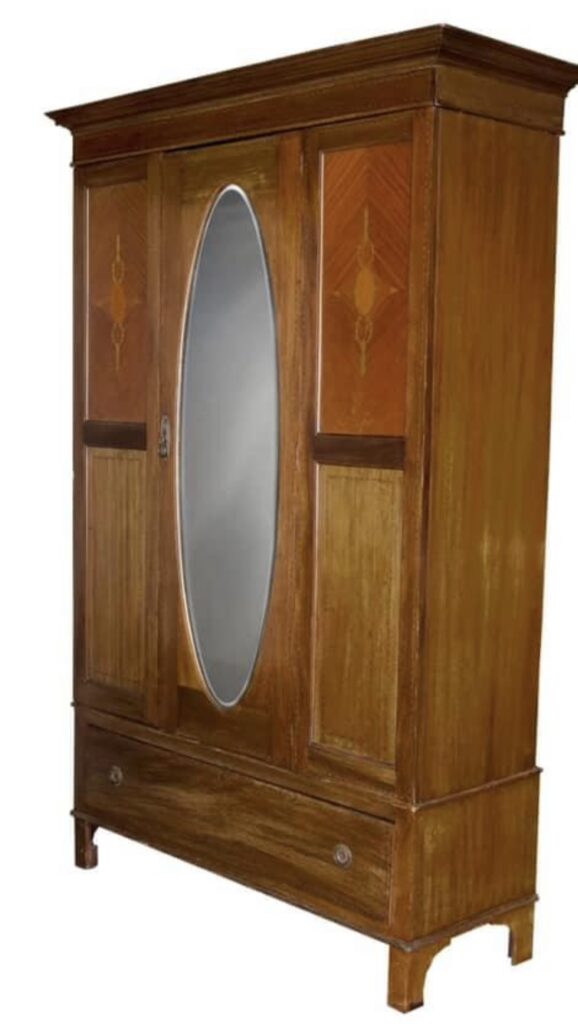
On one of my antiquing trips, I bought this mirror for $40. What drew me to it was the oval mirror that mimics the large oval glass often seen in the front doors of Victorian error homes. There are many of these homes in Waltham ,MA where I grew up and I've always envied them - and the gorgeous homes they belonged to. Additionally, I was on the hunt for an old mirror that we could place on our newly updated fireplace overmantel. I knew this would be perfect! From my research, it seems the original mirror may have come from an antique armoir or wardrobe like the photo below.
The original finish
Upon closer inspection, it becomes apparent that this mirror, despite being crafted from heavy wood, features a delicate layer of decorative wood veneer. I found it quite fascinating that such an old piece would have veneer, as I had assumed veneer was a more recent innovation. However, it turns out that veneer has been in use for centuries, offering benefits such as cost savings, structural reinforcement, improved aesthetics, and design flexibility.
It is unclear what type of wood the veneer is made from but the whole frame was stained in a dark, reddish mahogany finish that we see on many old wood furniture pieces. Some portions of the veneer had become damaged, necessitating some repairs. Nevertheless, the mirror itself possesses a beautiful patina that adds to its allure, complemented by its beveled edges. Moreover, the mirror is of considerable thickness, contributing to the overall weightiness of the piece.

How to refinish an antique mirror with a dark-stained frame
Supplies for this project
- Painters tape
- Citristrip
- Putty knife
- Wood fill
- Fine sandpaper
- Damp cloth
- BIN Shellac Primer
- Foam brush or paint brush
- Drop Cloth
- Fusion Mineral paint (I used the color: Casement)
Step by step instructions
Step 1: Prep work
Before diving into any painting project, it's essential to do some prep work. To get started with your mirror makeover, gather your materials, including painter's tape, drop cloth, paint stripper, putty knife, wood fill, damp cloth, and fine grit sandpaper. Place a drop cloth under the mirror before you start.
Then using paint stripper applied with a paintbrush and a putty knife to remove any existing stain from the wood frame. I used Citristrip which is a powerful paint and varnish stripping gel that is designed to remove multiple layers of paint and varnish from surfaces such as wood, metal, and masonry. Here are the steps on how to use Citristrip:
- Prepare your workspace: Before you start stripping, make sure you have adequate ventilation and wear protective gloves and eyewear. Lay a drop cloth on the floor to catch any drips.
- Apply Citristrip: Using a paintbrush, apply a thick layer of Citristrip onto the surface you want to strip. In this case the entire frame. Be sure to apply it liberally and evenly. Do not brush back and forth; this may damage the surface.
- Wait: Citristrip takes time to work, so it's important to be patient. Wait for at least 30 minutes, but no more than 24 hours. Check on the surface periodically to make sure the gel has not dried out.
- Scrape: After waiting, use a putty knife or scraper to remove the softened paint or varnish. Start at one edge and work your way across, being careful not to gouge the surface.
- Clean up: Once you've scraped off as much as you can, use a damp cloth to wipe away any remaining residue. You can also use a fine steel wool pad to scrub away any stubborn spots.
- Sand: If the surface is not smooth after stripping, you may need to do some light sanding with fine grit sandpaper to remove any remaining residue or roughness.
- Repeat: If you have multiple layers of paint or varnish, you may need to repeat the stripping process until you have removed all of the layers
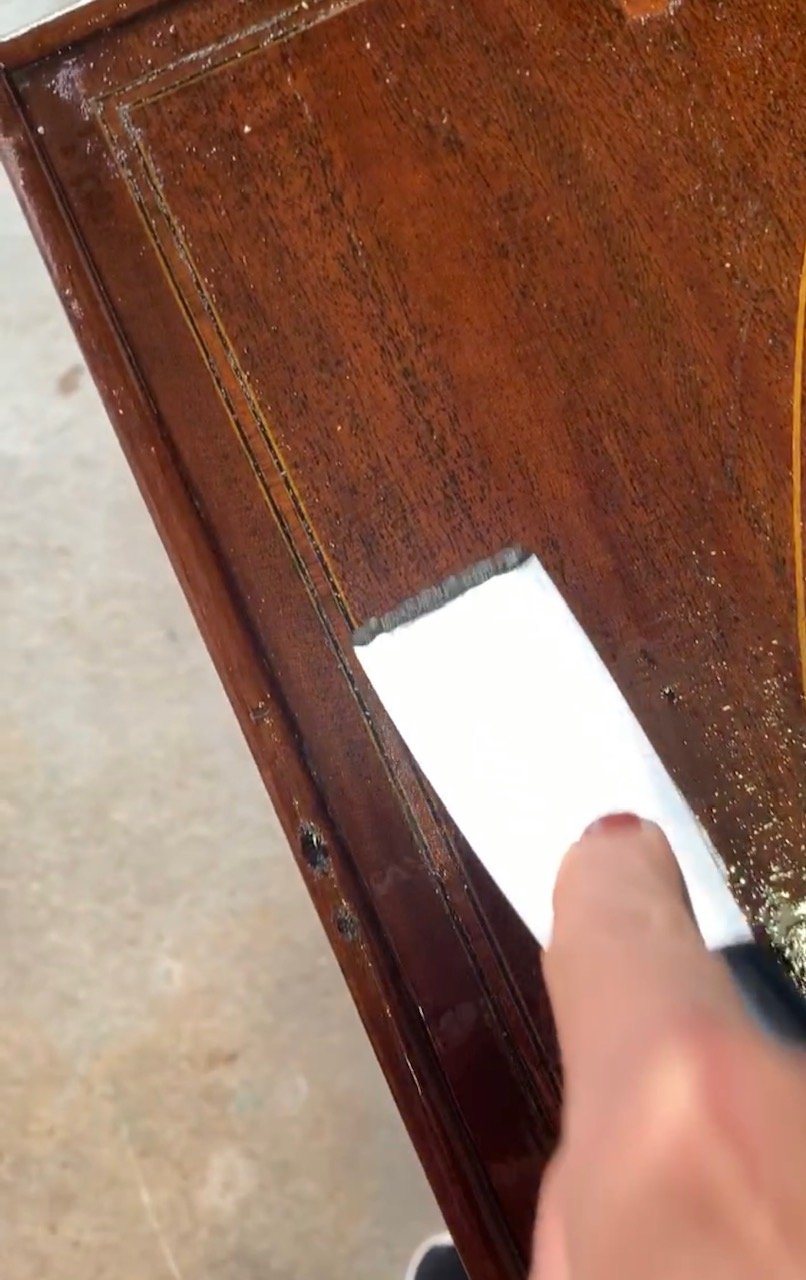
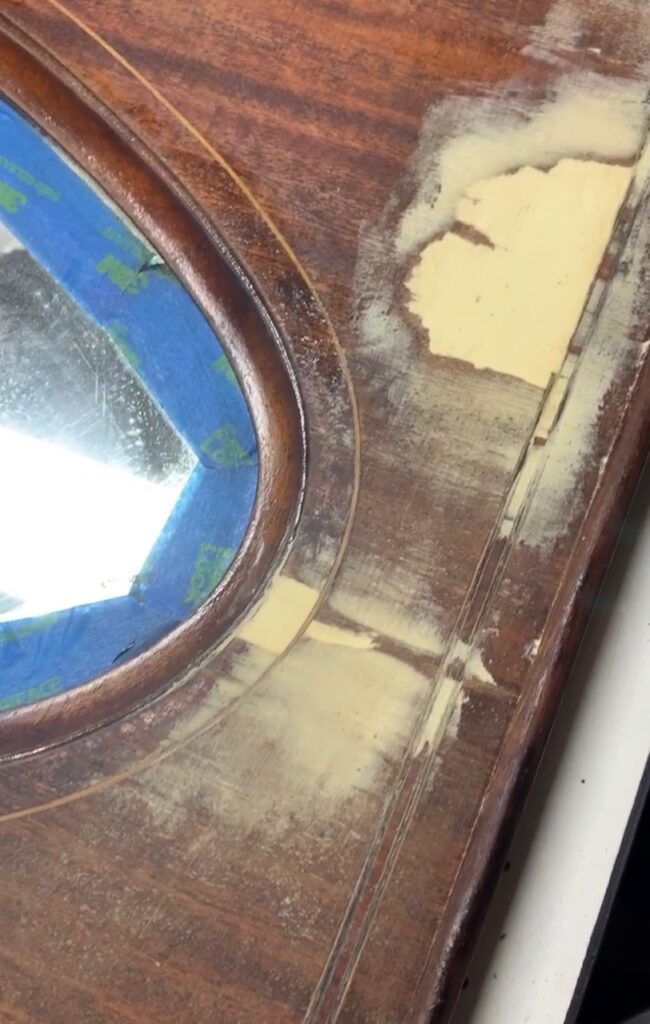
Step 2: Fill in the gaps and holes
Protect the mirror by placing the painter's tape around the edges. Then fill in any gaps or holes with wood fill, and let it dry for a few hours. Afterward, use a fine-grit sandpaper to smooth out the surface of the mirror's frame, and then wipe it down with a damp cloth to remove any dust or debris.

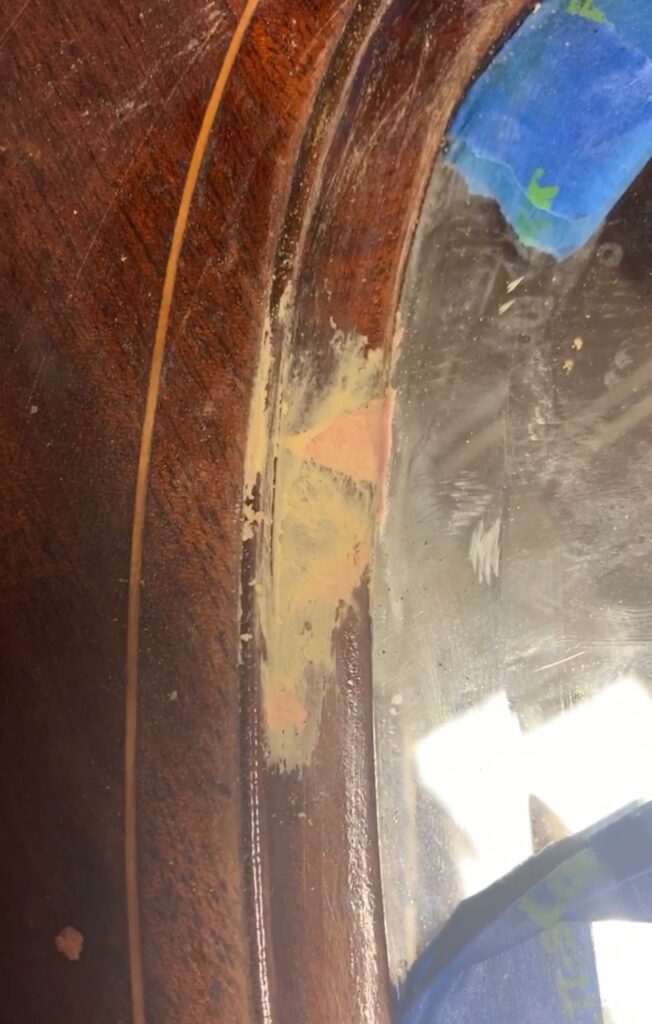
Step 3: Priming the surface (the step I missed)
Now that your mirror frame is smooth and clean, it's time to add a coat of primer. Using a foam brush, apply a coat of white primer to the entire surface of the frame. Once the first coat is dry, use a piece of fine grit sandpaper to lightly sand any rough areas. Afterward, wipe the frame down with a microfiber cloth to remove any dust particles. I missed this step because I felt pretty confident that by stripping and sanding I would not have a problem with bleed through. I was wrong. Rule of thumb, if your piece is old and/or dark stained always use a primer. The best one to use is BIN Shellac primer. You can find more tips for tackling stain bleed-through in my guide to painting furniture white, where five experts share what really works. And if you're unsure which primer to use, this post on choosing the best primer for cabinets breaks down the options so you can make the right choice for your project.
Step 4: Painting the mirror frame
Now comes the fun part! Choose a paint color for your mirror frame that complements your home decor. You can opt for a flat or satin acrylic paint for a smooth finish, or go with a chalky or furniture paint for a distressed finish I went with Fusion Mineral paint in the color, Casement. Apply the first coat of paint using a bristle brush or foam brush, making sure to use thin layers. Allow the first coat to dry completely before applying the second coat of paint. Repeat this process until you achieve the desired color and coverage. Here is how it looked after the first coat:

Here is how it looked after the second coat, better but still bleeding through.

Three coats of Fusion mineral paint finally did the trick.

Step 5: Finishing touches
Once the paint is dry, remove the painter's tape and any other masking materials. Wipe down the glass of the mirror with a paper towel and some glass cleaner. If you want to distress the frame, use some fine grit sandpaper to create some wear and tear in certain areas. If you are using chalk paint and want to wax the piece visit my The Best Furniture Wax for Your Chalk Painted Pieces post. Fushion mineral has an excellent top coat however I find mineral paint to be a very strong sturdy finish and since this was going to be hung I did not add a top coat.
And voila! You now have a beautiful, refreshed mirror frame that looks like a brand-new piece.

Optional Step: Adding some gold
If you're feeling extra fancy, you can add a gold finish to your mirror frame for a touch of glam. Use a tape measure to mark off where you want to apply the gold paint. Then, using a gold acrylic paint or spray paint, apply the paint to the edge of the frame or other areas you wish to accent. Allow the paint to dry completely before removing the painter's tape.
Hanging the mirror
We added some picture hooks to the back of the frame that was rated for heavy items as this is a large heavy mirror. We decided where we wanted it hung and my husband put some heavy-duty screws into the overmantel to hang the mirror.

I choose white paint for this mirror because I wanted it to blend well with the white overmantel we built on our painted brick fireplace. The reason for this is I wanted this neutral background so I could change the mantel decor as often as I want and in whatever colors I want.
Refinishing an antique mirror with a dark-stained frame is an easy and fun project that can add a unique vintage flair to any home decor. Despite the challenges that may arise, such as repairs and dealing with bleed-through, the end result can be beautiful and satisfying. With a little bit of time and effort, you can have a whole new look for your living room or dining room that will make a big impact.
Projects That Breathe New Life into Old Pieces


From this Antique mirror makeover to full room updates, I've gathered all my favorite home projects right here.
Thanks for stopping by the blog for this refinishing antique mirror with a dark-stained frame post. If you plan to paint a dark piece of furniture white, please make sure to use primer! To find more furniture DIY projects, be sure to check out my furniture refinishing page.
Keep creating friends!