How to Make a Layered Bow for a Wreath (Step-by-Step with Photos)
Learning how to make a layered bow for a wreath involves creating three separate bows with ribbons of different widths. Begin with the widest and thickest ribbon to make the largest bow. Form loops and leave tails, then secure the center with floral wire or a twist tie. Next, make a second bow with a medium-width ribbon, slightly smaller than the first, following the same steps. Finally, create a third, smaller bow with the narrowest ribbon to serve as the front or featured layer. Stack the three bows on top of each other, securing them together at the center. Adjust the loops and tails until the bow looks full, balanced, and ready to attach to your wreath.

This post may contain affiliate links. When you shop the links, we receive a small commission at no cost to you. Thanks for supporting my small business.
As a floral designer, I have learned that the secret to a magazine-worthy wreath often comes down to the bow. If you have ever wondered how to make a layered bow for a wreath, the good news is that it is easier than you think once you know the right techniques. From simple single-ribbon bows to multi-ribbon layered designs, this style (sometimes called a stacked bow or farmhouse bow) creates depth, texture, and drama. The key is all in the materials and step-by-step process.
In this guide, I'll walk you through everything from choosing the best ribbon to creating loops that hold their shape, plus tips for choosing the right bow size to match your wreath and troubleshooting common problems. Whether you are new to bow making or ready to try more advanced layered designs, this tutorial will help you craft bows that make your wreaths, gifts, and holiday decor truly stand out.
Jump to:
- Bow making basics
- Choosing Your Ribbon
- Choosing the perfect bow-tying material
- Determining the right bow size for your wreath
- Choosing the perfect bow placement
- Tailoring your bow tails: Tips and techniques
- Supplies to make a layered wreath bow
- How to make a layered bow for a wreath
- Troubleshooting
- Other uses for layered bows
- Frequently asked questions
- Creative projects to show off your handmade bows
Bow making basics
When it comes to bow making for wreaths, there are two main styles: simple bows and layered bows. Simple bows, made with a single ribbon, are quick, classic, and perfect for beginners. But in this guide, our main focus is layered bows - the more detailed style that combines multiple ribbons for a fuller, more professional look.
Layered bows let you mix different ribbon widths, textures, and colors to create dimension and impact. They may take a little more time to build, but the results are worth it. Whether you want an elegant holiday wreath or a bold year-round design, layered bows instantly elevate your decorating.
In this tutorial, I'll walk you step by step through how to make a layered bow for a wreath, with plenty of tips to ensure your finished bow looks polished and holds its shape.

Linking a similar wreath.
Choosing Your Ribbon
For a simple bow
When selecting ribbon for a simple bow, focus on one ribbon that complements your wreath or decor. Choose a width that fits the size of your project. Wider ribbons (2 to 3 inches) work well for larger wreaths, while narrower ribbons (1 to 1.5 inches) are better for smaller arrangements. Wired ribbons are especially helpful since they hold their shape and are easier to style.
For a layered bow
When making a layered bow, variety is key. Using three ribbons with different widths and patterns adds interest and texture. Start with one ribbon that matches your color scheme. Then choose two additional ribbons with different prints or textures to make the bow stand out.
Patterns such as plaid, stripes, paisleys, or florals work beautifully when layered together. The trick is to create contrast so each ribbon shows clearly. If you prefer a more subtle look, try a monochromatic design by using ribbons in similar colors but with different textures.

Next, I'll discuss the difference between wired and non-wired ribbons and how that impacts working with them. But first, have fun collecting three gorgeous ribbons in an array of widths and designs! This is your chance to showcase your unique style.

Wired ribbon vs. Non-wired Ribbon
When bow making for wreaths, I recommend using a ribbon that's wired. The wire allows you to really shape the loops and tails, bending them to your will. It makes it easy to fluff and style a structured base bow.
Non-wired ribbons can be a bit more challenging to work with since they're so soft and floppy. But don't count them out! The key is getting the "pinch" at the center of the bow just right to add volume. And you may need to make additional loops so it's not too droopy.
The beauty of a layered bow is that each layer supports the next. So even if one ribbon is thin and non-wired, placing it over a sturdy wired base bow helps it keep its shape.

In this photo, the black and cream striped ribbon is not wired and appears a bit floppy, but it is supported by the wired ribbon layers beneath it.
When shaping non-wired ribbon, it likely won't hold crimps or a curly tail shape. But you can still notch the ends for a pretty look. The options are endless when combining different textures!
The wired ribbon, my favorite ribbon, will allow you to bend the loops to perfection and really control the look. But don't be afraid to get creative with softer ribbons too. Just focus on pinching each loop tight and making fuller bows. Together, the layers will support each other and create a showstopping finished product!

In the stack of ribbon rolls above the green and beige striped ribbon are wired, but the red is not.
To determine if a ribbon is wired, you can follow these steps:
- Examine the Edges: Gently bend the ribbon's edge. If it holds its shape and feels slightly rigid or firm, there's a good chance it contains a wire.
- Look for Wrinkles: Wired ribbons often have a slightly wrinkled appearance along the edges due to the wire inside.
- Check for Flexibility: Non-wired ribbons are generally more flexible and don't hold shapes as well as wired ones.
- Read the Label: If you have the ribbon's packaging or label, it might indicate whether it's wired or not.
- Consult the Seller: If you're unsure, consider reaching out to the seller or manufacturer for information on the ribbon's construction.
Remember that wired ribbons are commonly used in crafts, floral arrangements, and gift wrapping because they can be shaped and styled easily.

Choosing the perfect bow-tying material
When it comes to tying a handmade DIY wreath bow, you've got a few options: wire, string, or even a spare piece of ribbon can do the trick. Personally, I'm a fan of using flocked wired for this job. What's that, you ask? Well, flocked wired is like regular wire, but with a nifty fuzzy coating that gives it a bit of extra grip. This means it holds onto the ribbon like a pro, making your bows look even more fabulous. A pipe cleaner will have the same effect.

Determining the right bow size for your wreath
Are you wondering how to choose the perfect bow size for your Christmas wreath? It's a common question, and we have a simple method to help you get it just right based on your wreath's dimensions.
Step 1: Measure Your Wreath
Start by measuring the diameter of your wreath. This is the width of the wreath across its widest point, from one side to the other.
Step 2: Calculate the Bow Size
A beautifully proportioned bow typically ranges from ¼ to ⅓ of the wreath's diameter. To determine your bow size, use the following formulas:
- For a Smaller Bow: Multiply the wreath's diameter by 0.25. This will give you a bow size that's modest yet charming.
- For a Slightly Larger Bow: Multiply the wreath's diameter by 0.33. This is perfect if you want a bow that stands out a bit more.
Example: If your wreath measures 12 inches in diameter:
- For a Smaller Bow: 12 inches x 0.25 = 3 inches
- For a Slightly Larger Bow: 12 inches x 0.33 = 4 inches
Following this formula ensures your bow complements the wreath's size harmoniously, neither overshadowing it nor appearing too small. Keep in mind that personal style preferences and the overall design of your wreath can also influence your choice of bow size. This guideline serves as a helpful starting point, allowing you to customize your bow size based on your wreath and aesthetic preferences. This formula works for all kinds of wreaths.
Remember, A beautifully proportioned bow typically ranges from ¼ to ⅓ of the wreath's diameter.

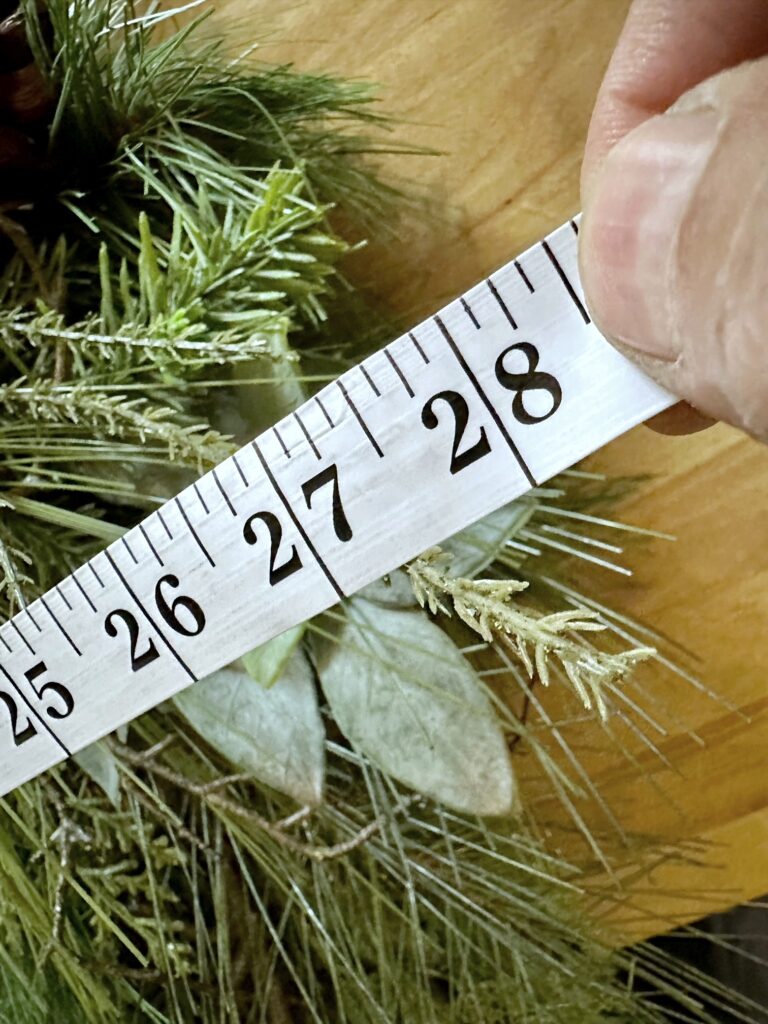
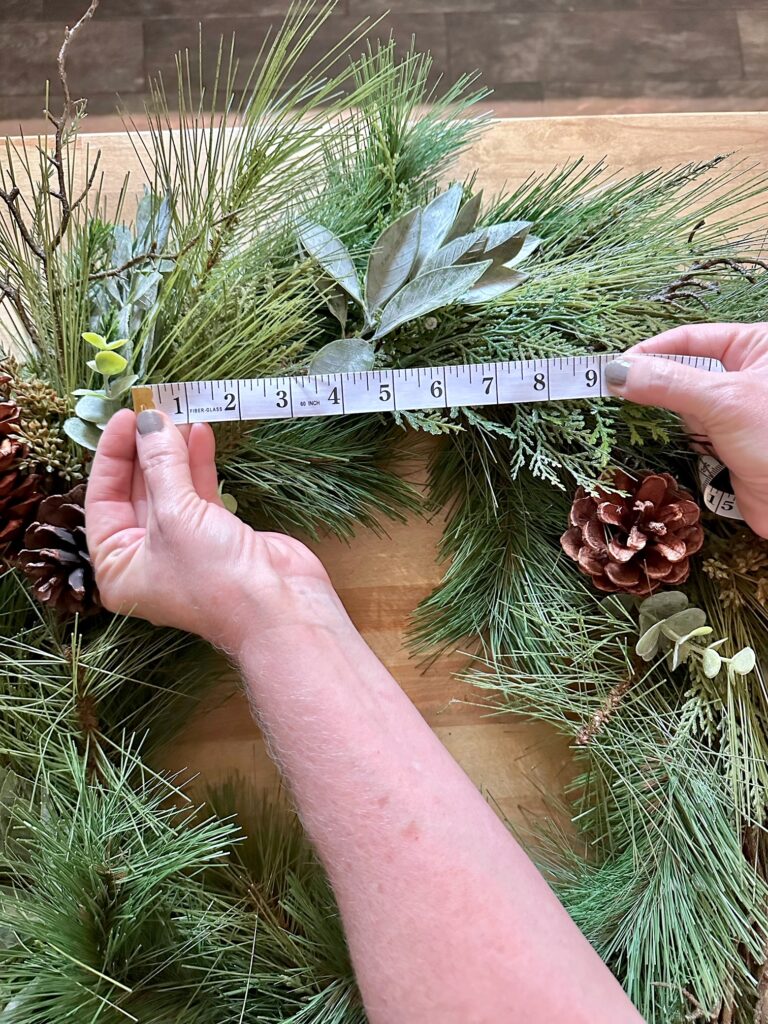
In the sample above, the wreath measured 28" across. One-third of 28" is 9.3", which should be your starting point for the bow size.
Choosing the perfect bow placement
Once you've created your beautiful bow, the next step is deciding where to place it on your wreath. While there's no strict rule, here are some popular options to consider:
Top of the wreath
This is the traditional placement and often creates a classic, balanced look. It makes the bow a focal point and allows for cascading tails to elegantly frame the wreath.
Bottom of the wreath
For a unique, modern twist, try placing your bow at the bottom. This can be especially effective if you have other decorative elements at the top of your wreath.
Side of the wreath
An asymmetrical design with the bow on one side can create an interesting, eye-catching look.
Remember, the best placement often depends on your wreath's overall design and your personal style. Don't be afraid to experiment with different positions to see what looks best with your specific wreath!
Tailoring your bow tails: Tips and techniques
Measuring for perfect tails
Creating beautiful tails for your DIY wreath bow is all about precision and style. To measure the tails accurately, hold a length of ribbon against your gift or decoration, allowing for some extra length to create the desired tail length.
Cutting techniques for stylish ends
When it's time to cut, you have a choice to make. Cutting the tails diagonally provides a classic and elegant look, while experimenting with other shapes, such as V-shaped or fishtail tails, can add a unique twist to your design.
Creating extra-long tails
If you're aiming for very large loops, make a loop with your ribbon, cut it at the desired length, and then separate the loop into two tails.
Adding "fake tails" for extra flair
And if you want to add "fake tails" for an extra flourish, simply tie in a long strand of ribbon after creating the bow. This versatile approach allows you to have tails of any length and style you desire, adding a touch of elegance and creativity to your bow-tying expertise.
Layered by tails
For this layered bow, you will have 3 sets of tails. You will be able to cut the ends of the ribbon so the tails are different lengths.
Adjusting tail length for different bow placements
When placing your bow at the bottom or side of the wreath, consider shortening the tails. Long, cascading tails that work beautifully for top-placed bows may overwhelm the design when positioned elsewhere. For bottom-placed bows, shorter tails prevent them from dragging or looking untidy. Similarly, for side-placed bows, asymmetrical tail lengths (shorter on one side) can create a more balanced look. Remember, you can always trim the tails after placing the bow on your wreath to achieve the perfect proportion for your specific design.

Supplies to make a layered wreath bow
- 3 types of ribbon:
- 1 roll Green wide wired ribbon (2.5" wide)
- 1 roll Cream wired stripe ribbon (1.5" wide)
- 1 roll Red grosgrain ribbon (⅝" wide)
- Scissors
- Flocked Wire (or other wire or pipe cleaners)
- Wreath form (optional)
Ribbon Length:
For a standard 24-inch wreath, you'll need about 3-4 yards of each ribbon for a basic bow. If you're making a fuller, more elaborate bow or working with a larger wreath, plan on using 5-6 yards or more of each ribbon. It's always better to have a little extra ribbon than to run short.
How to make a layered bow for a wreath
Description: Learn how to create a stunning layered bow using three different ribbon widths. This method works for both simple single-ribbon bows and show-stopping multi-layered designs.
Supplies needed
- Equipment:
- 1 pair of scissors
- 3 pieces of floral wire (about 16 inches each) or pipe cleaners
- Materials:
- 1 roll 2.5" wide wired ribbon (main base ribbon)
- 1 roll 1.5" coordinating ribbon
- 1 roll ⅝" coordinating ribbon
- 1 artificial or fresh wreath (24-30 inches recommended)
Steps
- Measure the first tail
Pull the widest ribbon (2.5 inch) down to the bottom of the wreath. This will determine the tail length. Pinch the ribbon where you want the bow to begin.

- Create base loops
Bring the ribbon up, loop it to the back, and pinch. Then bring it forward again, make the same size loop, and pinch. Repeat this motion - up and pinch, down and pinch - until you have 7 loops total. Leave a second tail the same length as the first.

- Secure the base bow
Slide a piece of floral wire through the pinch and wrap it tightly around the back of the bow. Twist to secure. Cut a second tail to match the first one. You now have a simple single-ribbon bow.

- Make the medium bow
Repeat the process with the 1.5 inch ribbon, this time making slightly smaller loops (about 5). Wrap wire around the center, then attach it on top of the first bow.
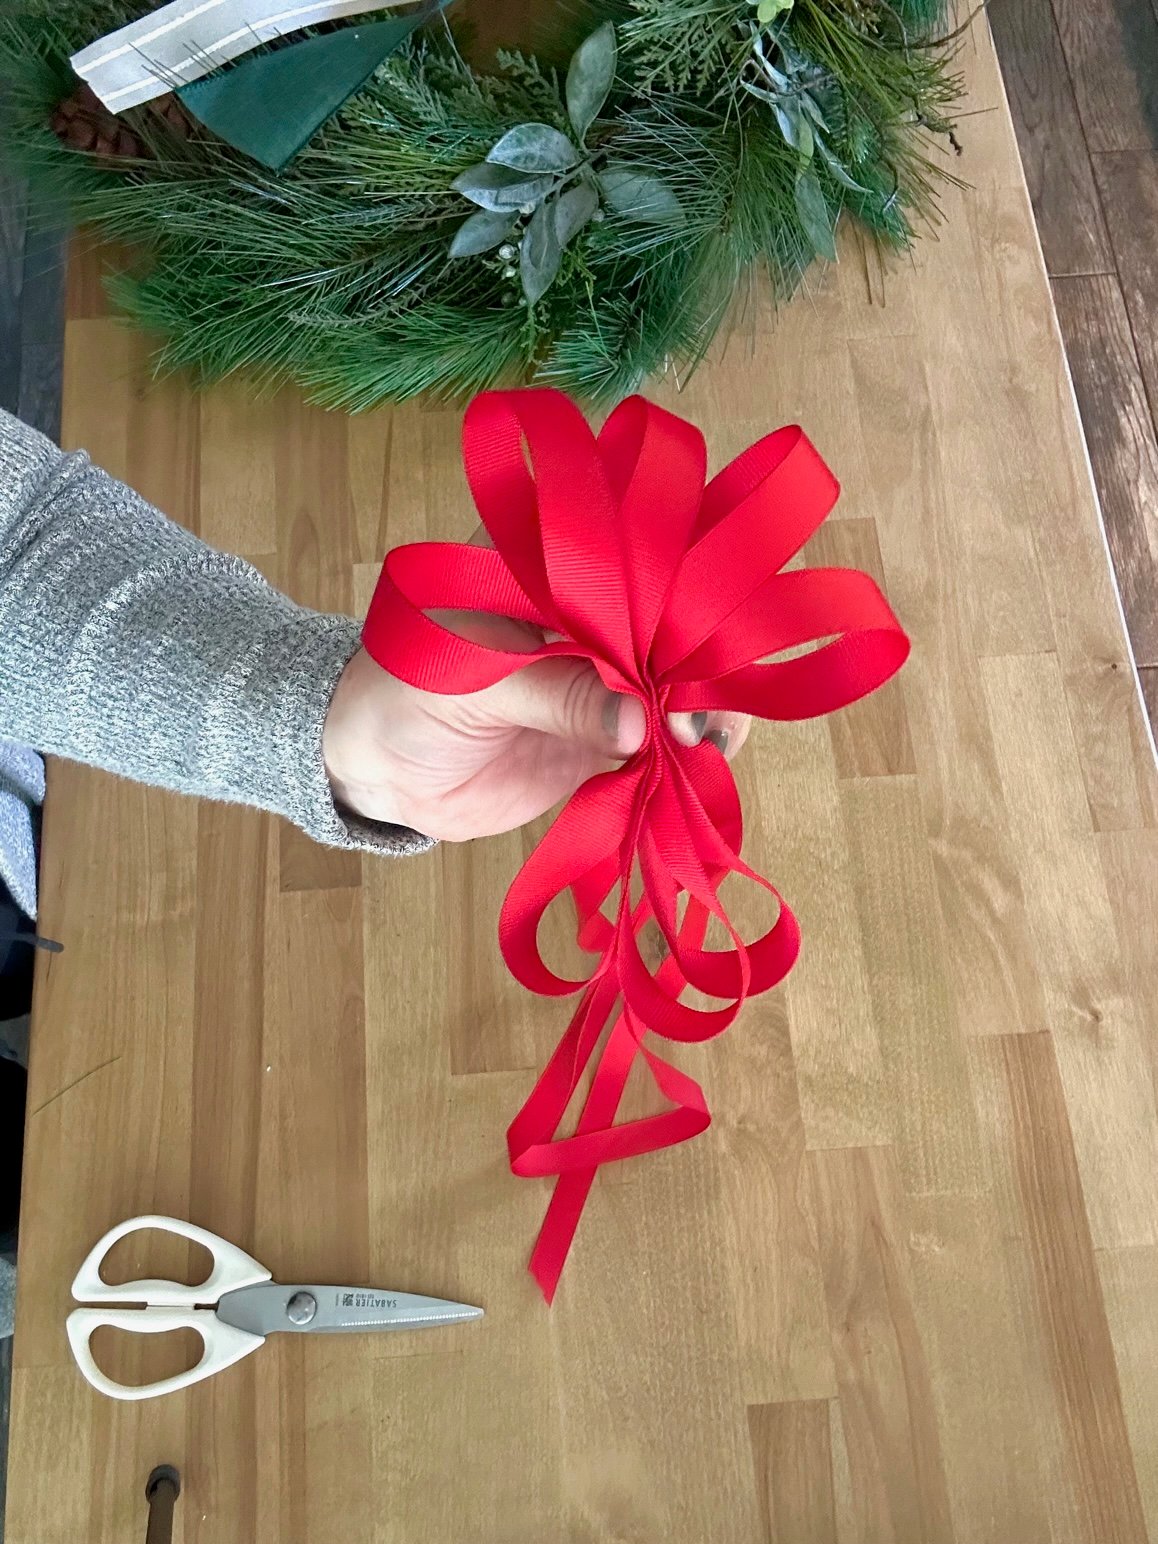
- Make the top bow
Do the same with the ⅝ inch ribbon, creating 3 small loops. Wire it securely to the center of the layered bow.
- Attach the bow to the wreath
Using the extra wire from the center of the bow, wrap it around the wreath base. Twist tightly on the back to hold it in place.
- Trim and finish
Cut all ribbon tails to the same length, either at a diagonal or in a fish-tail cut. Fluff the loops by pulling and adjusting until your bow looks full and balanced.


Notes
- Wired ribbon is highly recommended because it holds shape and fluffs beautifully.
- You can stop after Step 3 for a simple bow or continue layering for a dramatic look.
- Choose ribbons with coordinating colors or mix textures and patterns for added interest.
Still need help? Try this easy way to create amazing bows: use an Ez bow maker. This bow-making tool helps you craft your own bows effortlessly. With practice, you'll be making a stunning, professional-looking perfect wreath bow in no time.
Troubleshooting
Even seasoned bow makers encounter occasional hiccups in their crafting journey. Don't worry; here are some common issues and expert tips to help you get your bow back on the path to perfection:
- Limp, Floppy Bow: If your DIY wreath bow lacks the desired structure, consider using wired ribbon, which offers excellent support. Alternatively, adding starch to your ribbon can help it hold its shape better. Make sure your initial loops are sufficiently large, secure the center knot tightly with wire or a zip tie, and don't hesitate to add more loops to enhance fullness and fluffiness.
- Uneven Loops: Achieving uniform loop sizes is crucial for a well-balanced bow. Start by carefully cutting your ribbon lengths evenly. Take your time to fluff and shape each loop, adjusting any that appear too large or small. Maintain precision in forming knots and pinching centers. If needed, you can trim uneven loops to create stylish "in bow" tails, often cut short and in a dovetail shape.
- Tails Not Staying Curled or in Place: To maintain beautifully curled tails, especially with wired ribbon, try wrapping the ribbon ends around a pencil and shaping them as desired. When using glue to secure the ends, apply only a small dot and avoid flattening the curl. For added durability, consider inserting florist wire into the ribbon ends. This extra reinforcement ensures your tails stay in their elegant curls.
- Bow Won't Stay On Wreath: To keep your DIY wreath bow securely in place on a wreath, double-check that the wire or pipe cleaner is tightened firmly. If using hot glue to attach the back of the bow to the wreath's surface, ensure a thorough application on both the wreath and the bow's back. For added stability, you can even consider inserting pins into the wreath form to provide extra hold, ensuring your bow remains the centerpiece of your creation.
With some small adjustments, you can troubleshoot any bow frustrations. Just focus on tightening centers, evening out loops, stiffening limp ribbons, and properly securing the bow for long lasting beauty.

Other uses for layered bows
Layered bows may be the star of your wreath, but the same technique works beautifully across all your holiday decorating. A few of my favorite ways to use them include:
- Garlands - Tie layered bows evenly along a staircase banister or mantel garland for a polished look.
- Christmas Tree Toppers - Create one large, layered bow to crown your decorated Christmas tree and cascade ribbons down the branches.
- Swags and Mailboxes - Add bows to outdoor swags or mailbox greenery for curb appeal.
- Gift Wrapping - Dress up oversized packages with a layered bow for a show-stopping presentation.
- Holiday/winter Decor - Use smaller bows to accent candlesticks, Christmas lanterns, decorated vintage sleds or grouped winter arrangements.
A single bow-making method gives you endless possibilities for adding charm and cohesion to your holiday decor.

Shop Lanterns Here
Frequently asked questions
TTo make a layered bow, combine ribbons of different widths, colors, and textures. Start with the widest ribbon as your base, then stack medium-width and narrow ribbons on top. Create loops with each ribbon, layering them as you go. Secure the center tightly with floral wire, then fluff the loops so each ribbon shows clearly. Layered bows add depth and make your wreaths or decor look more professional.
A simple bow uses one ribbon, making it quick and easy. Cut a length of ribbon and create two or three loops on each side, holding them in the center as you go. Pinch the center tightly, secure it with floral wire or a pipe cleaner, and then spread out the loops. Simple bows work well for smaller wreaths or when you want a clean, classic look.
A stacked loop bow is created by making several loops of ribbon in different sizes, stacking them on top of each other. Begin with the largest loops at the bottom, then gradually make smaller loops for the top layers. Once stacked, pinch and secure them in the center with wire. This style gives you a full, rounded bow that looks great on both wreaths and gifts.
To make a 3 loop bow, cut a ribbon length of about 24 inches. Form one large loop in the center, then create a smaller loop on each side. Pinch the center, secure it with floral wire, and spread out the three loops evenly. This bow style is simple but adds a pretty touch to smaller wreaths or tabletop arrangements.

Creative projects to show off your handmade bows


Inspire Your Next DIY Display: Looking for decorating ideas that make a statement? Take a look at my post on our fireman Santa collection for tips on designing a fun and eye-catching holiday display.
A layered bow instantly takes a wreath from simple to stunning. With just a few ribbons, some floral wire, and a little shaping, you can create a bow that looks professional and polished. Once you master this step-by-step process, you can use it on wreaths, garlands, gifts, or even as a Christmas tree topper. Keep experimenting with colors and textures, and soon you'll have a signature bow style that makes all your seasonal decor shine.
Happy crafting friends!