

DIY Fireplace Cover Board You Can Make in an Afternoon
A DIY fireplace cover board is an easy, low-cost way to cover an unused fireplace and improve how it looks year-round. It can be made by cutting a tri-fold foam display board to fit the fireplace opening, then covering it with peel-and-stick wallpaper for a decorative finish. The board stays in place with a snug friction fit, requires no hardware, and can be completed in an afternoon. In addition to hiding an open firebox, a fireplace cover board can help reduce drafts during colder months while remaining fully removable when the fireplace is in use.
Content may contain affiliate links. When you shop the links, we receive a small commission at no cost to you. Thanks for supporting my small business.
Post updated for clarity, improved formatting, and fresh images in 2025. This DIY project has been a reader favorite for years, and I've updated it to make it even easier to follow.
A few years ago, I decided our living room fireplace needed a little refresh, a DIY fireplace cover board! I originally designed this DIY fireplace screen during the summer since we weren't using our brick fireplace during the warm summer months. I wanted something light and bright to cover the deep black hole that is our fireplace.
Our previous free-standing metal fireplace cover (which I didn't really love) was gladly folded up and put away to clear the path for this new addition. Initially, the plan was to use this new screen during the summer and then switch back to our less attractive fireplace screen for the colder months. But I loved the look of this DIY screen so much that even three years later, it's still proudly in place!
Jump to:
Why you will love this easy project
- Instant transformation: This DIY fireplace cover board quickly brightens and updates an unused fireplace.
- Budget-friendly and simple: It costs far less than fireplace screens or doors and uses just a few basic supplies.
- Easy to customize: Peel-and-stick wallpaper lets you choose a look that fits your style and swap it out later if your decor changes.
- Fast and beginner-friendly: The project can be completed in an afternoon with no special tools or experience.
- Fits snugly without hardware: The foam board creates a friction fit, so there's no drilling, glue, or permanent installation.
- Works year-round: Use it as a decorative screen in warmer months and a draft-reducing cover during colder seasons.
- Reader-approved: This project has been a longtime favorite and continues to work beautifully years later.

Functional benefits of this cover board
I always get excited when a great idea comes to life! I wanted a simple solution to change the look of the front of our updated fireplace for our family room. This screen has become the focal point of the room. While it was not the main reason, we do find that the best part about this fireplace cover is it acts as a draft stopper and reduces the amount of cold air that seems to sneak in through the open fireplace, resulting in reduced heating bills. Our winter months here in Massachusetts get pretty cold!
This is by no means an unused fireplace, in fact behind the screen sits the fireplace grate holding birch logs ready to go with our own fireplace screen close by because who doesn't love a toasty fire on a cold winter night?

How to make a DIY fireplace cover board
Supplies
- Elmer's tri-fold foam display board (Note: This display board has a thin layer of foam between 2 pieces of poster board, the thickness is what holds it in place)
- X-Acto Blister-Carded knife
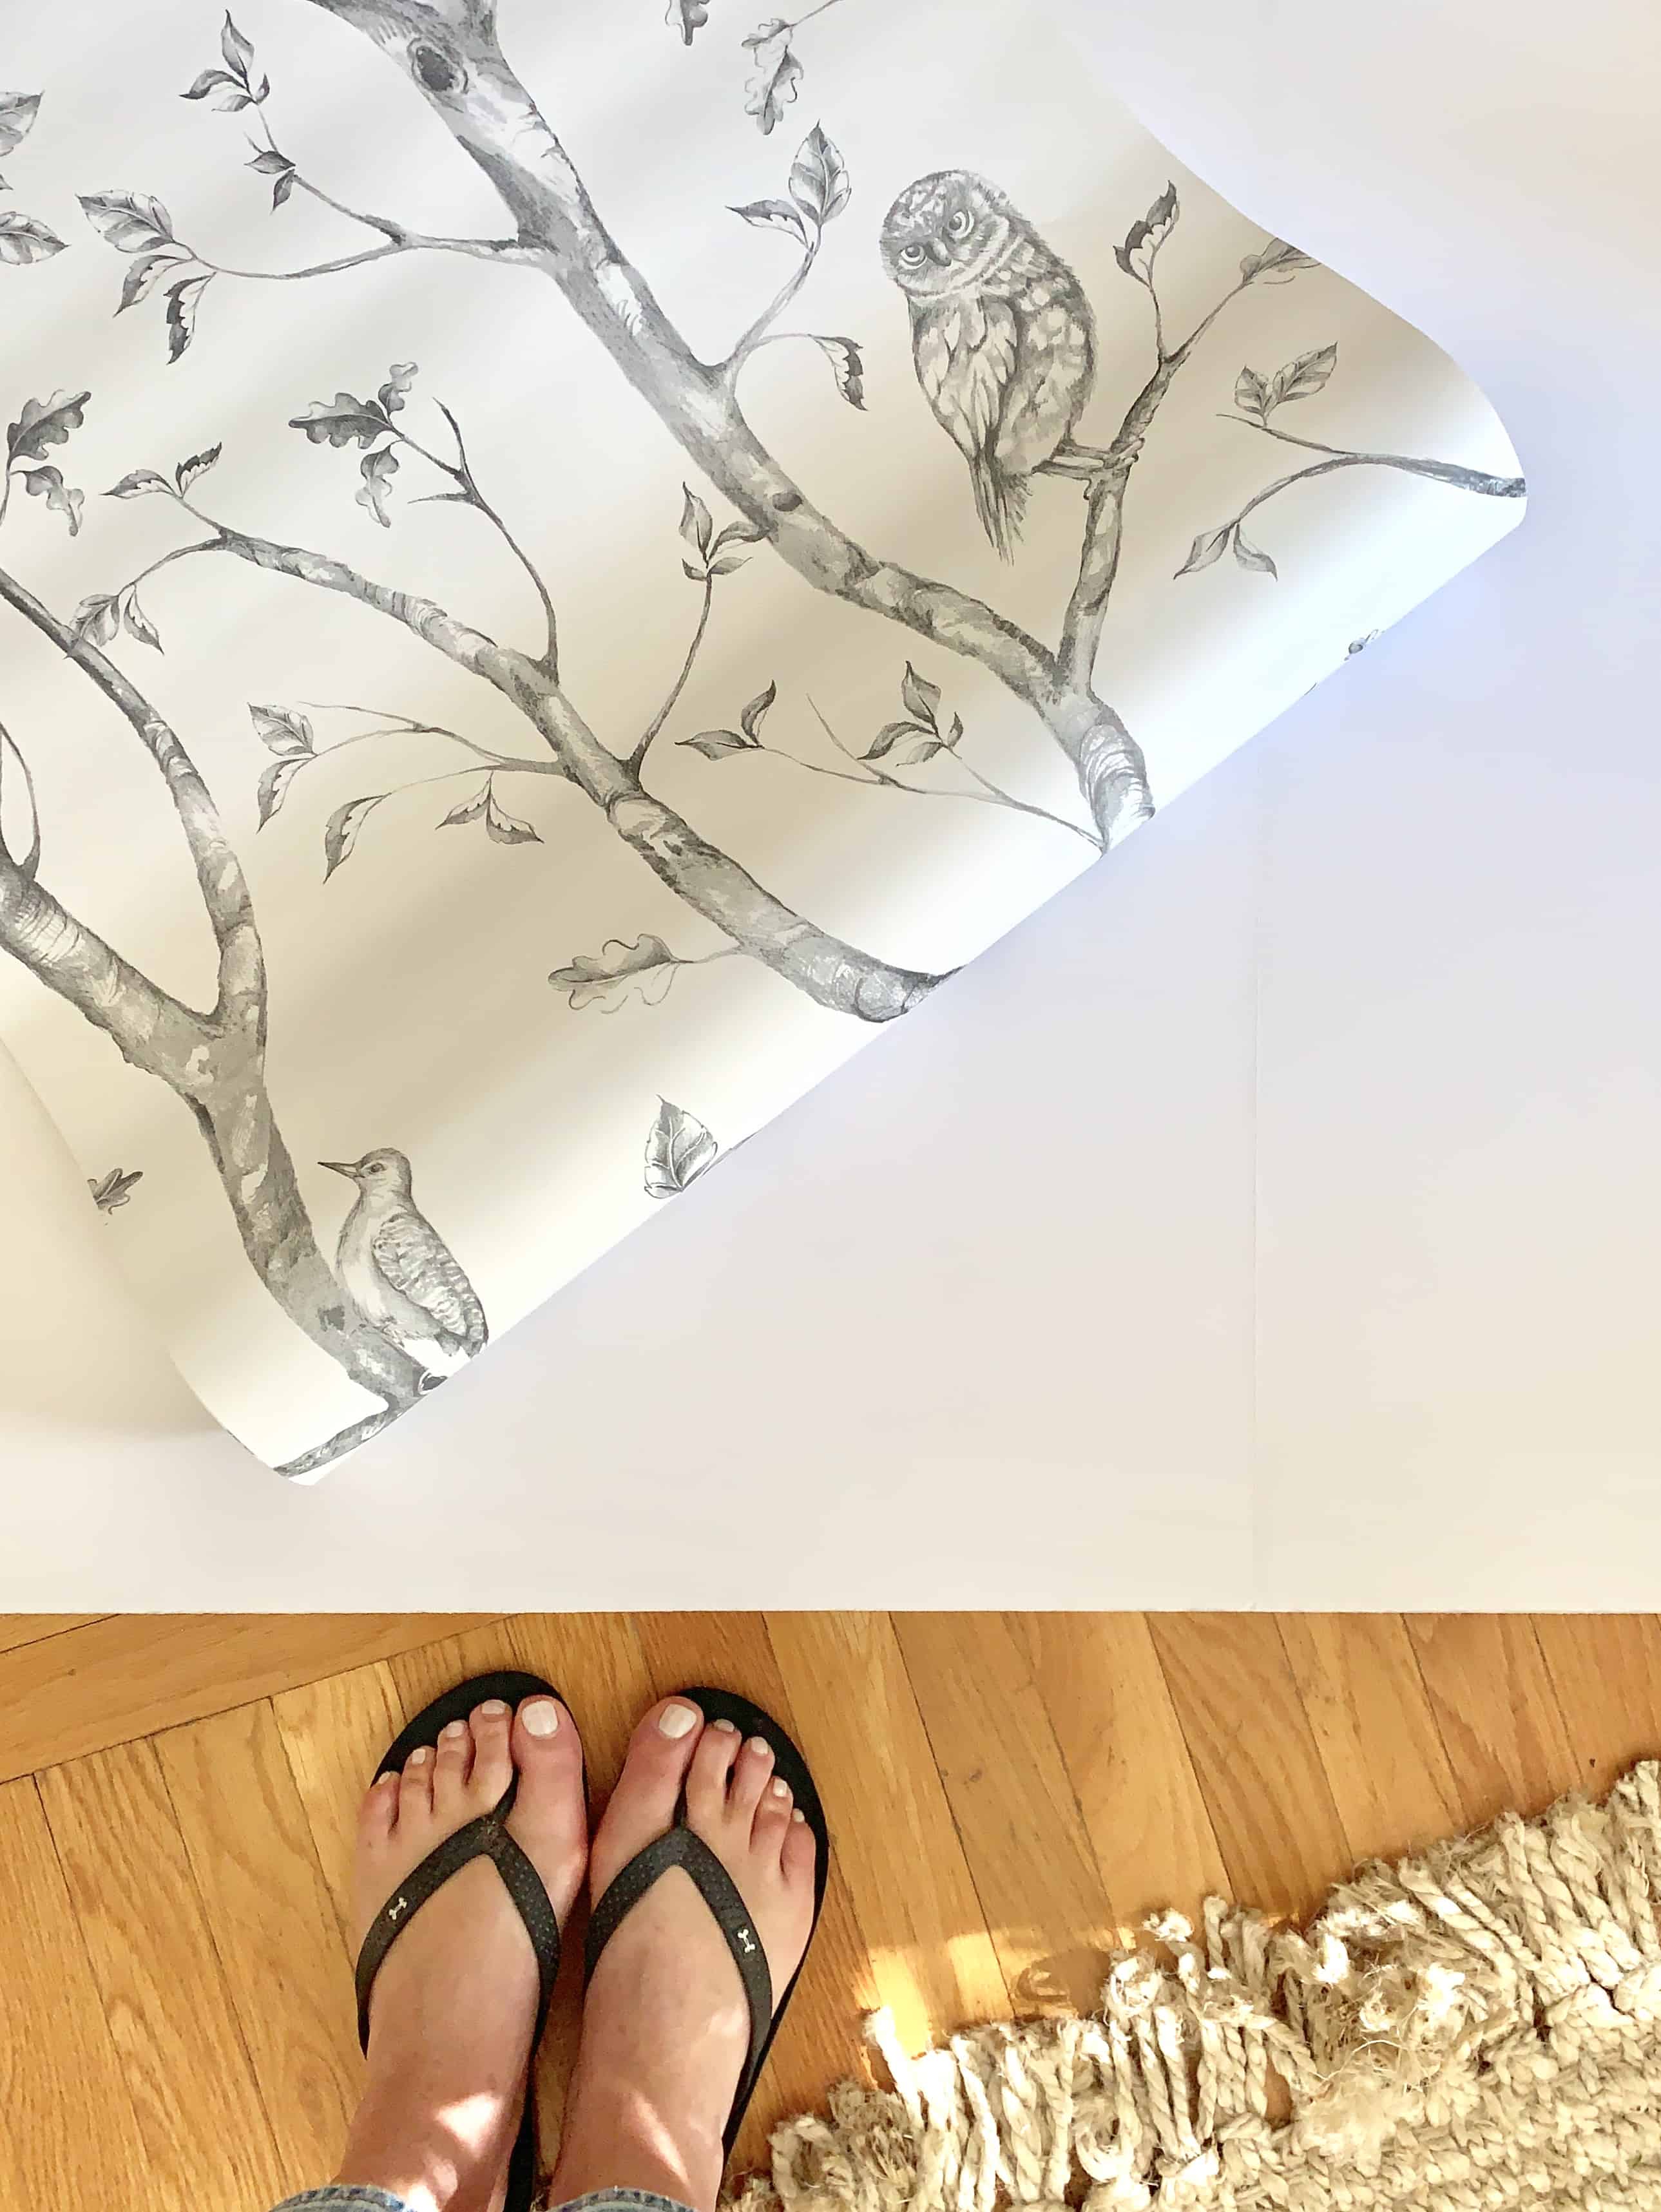
- Peel and Stick Wallpaper ( I used this one)
- Sharpie
- Scissors
Step by step instructions
- Choose and position your display board
Purchase an Elmer's tri-fold foam display board from Walmart or a craft store. Choose a size that fits your fireplace opening. Stand the board in front of the fireplace with the front panel flat against the opening.

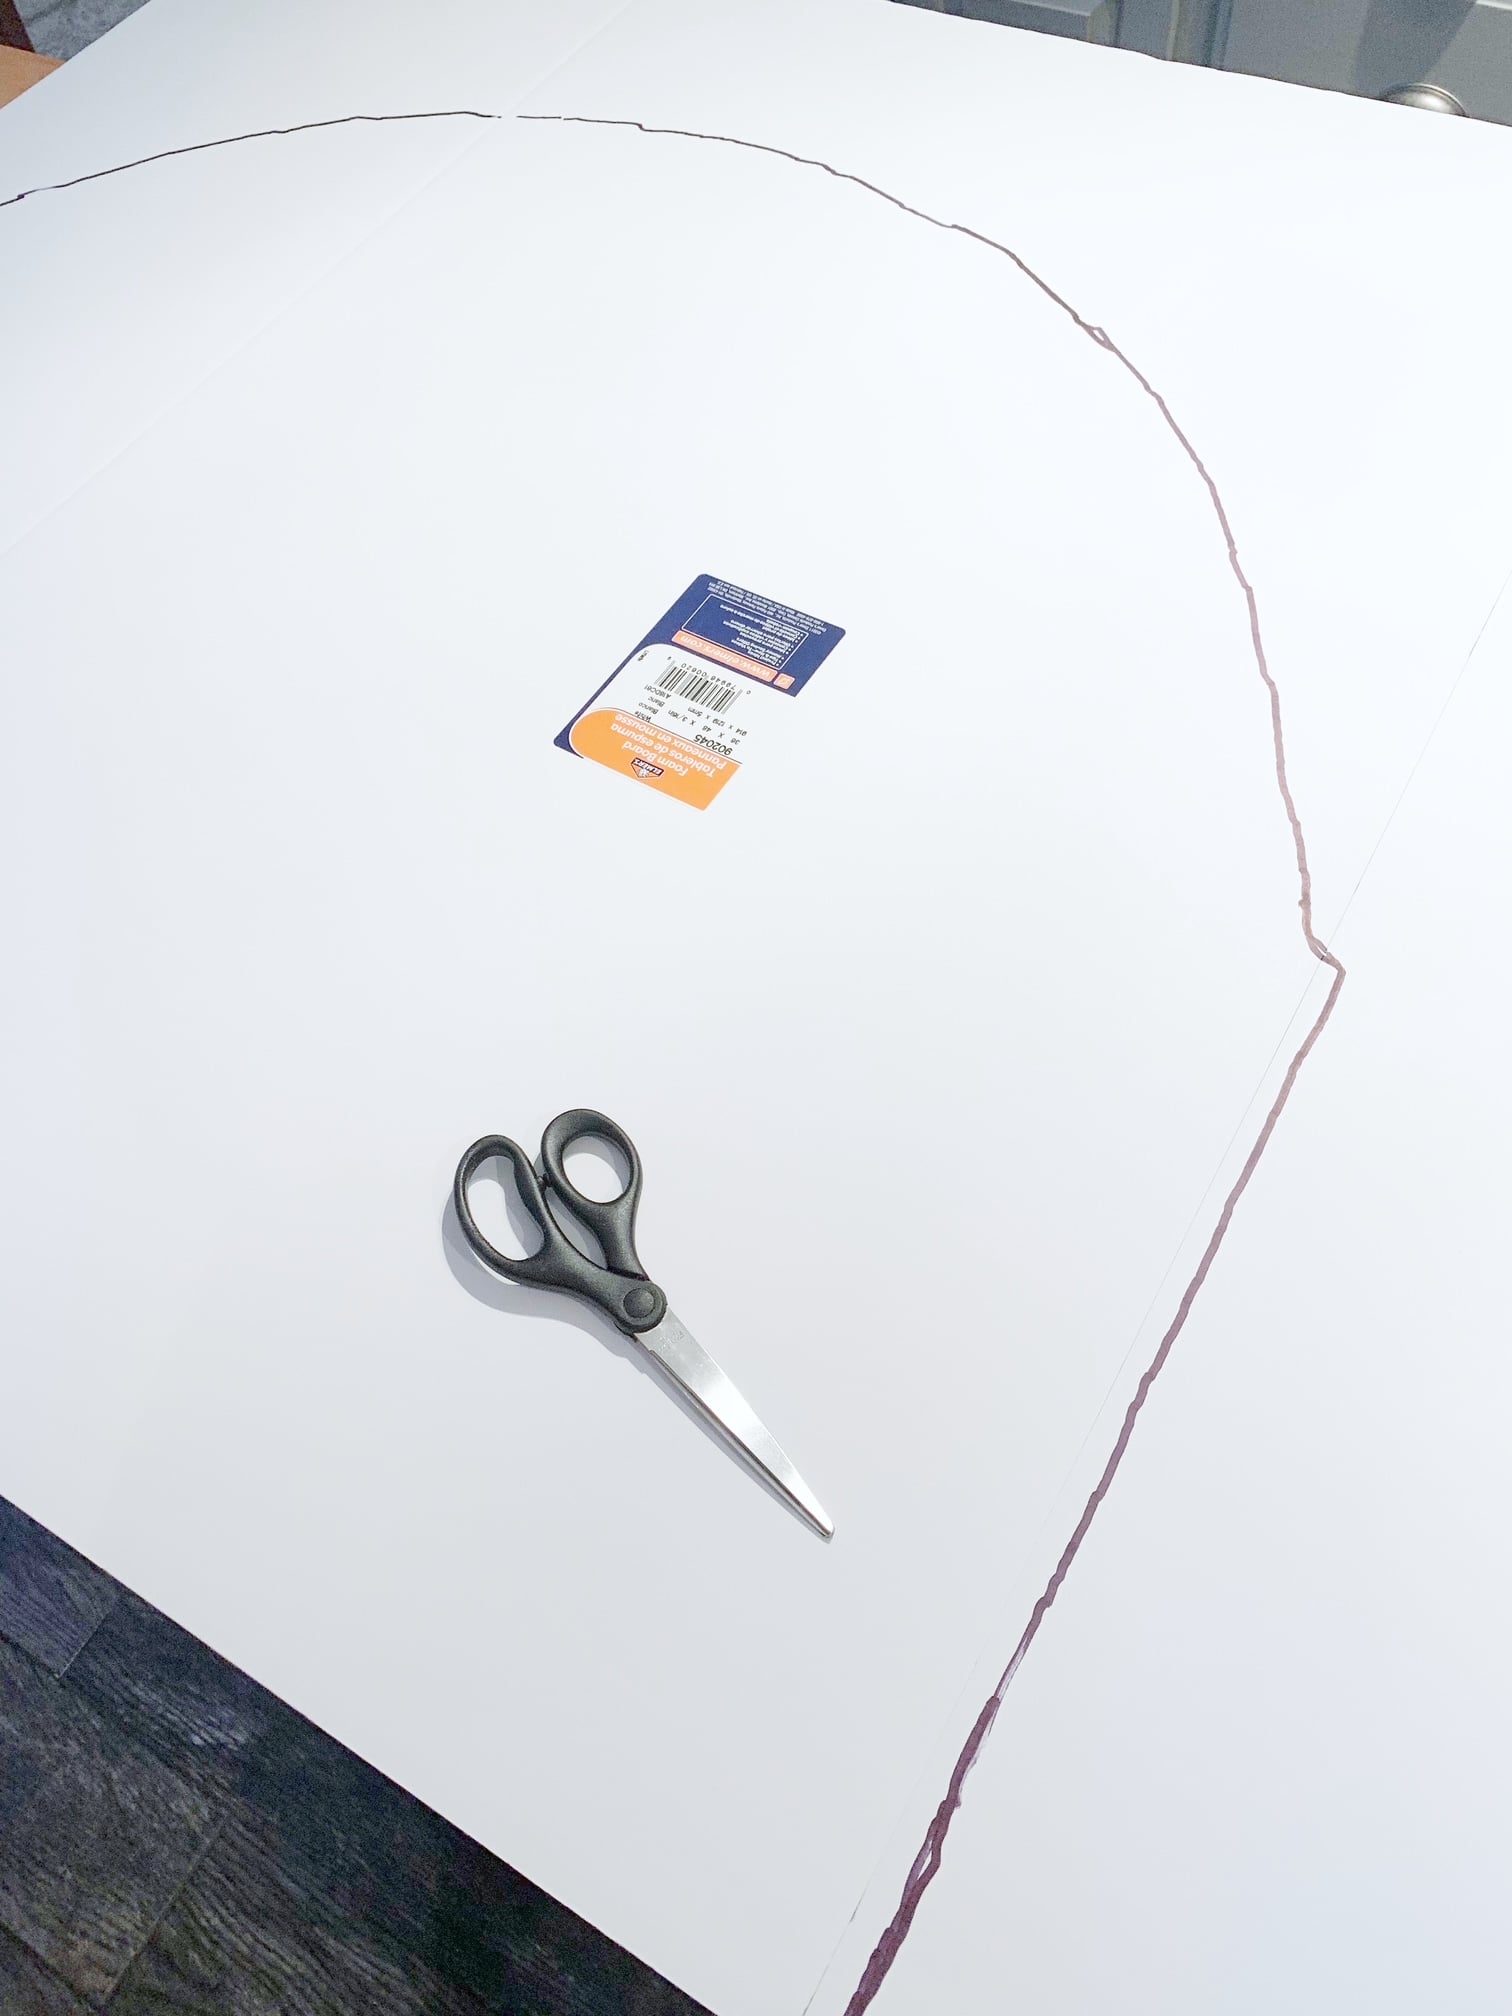
- Trace the fireplace shape
While holding the front panel in place, fold in one of the side panels and trace the brick edge using a Sharpie. Repeat with the opposite side. For arched fireplaces, freehand tracing works best. For square openings, take measurements for accuracy.

- Cut out the traced shape
Use an X-Acto knife to carefully cut along the traced lines. This creates a snug, custom fit that will stay in place without additional fasteners.

- Apply peel and stick wallpaper
Peel off the backing from your wallpaper and apply it to the foam board. Smooth it out with your hands as you go to avoid any air bubbles. Take your time - it's worth it.

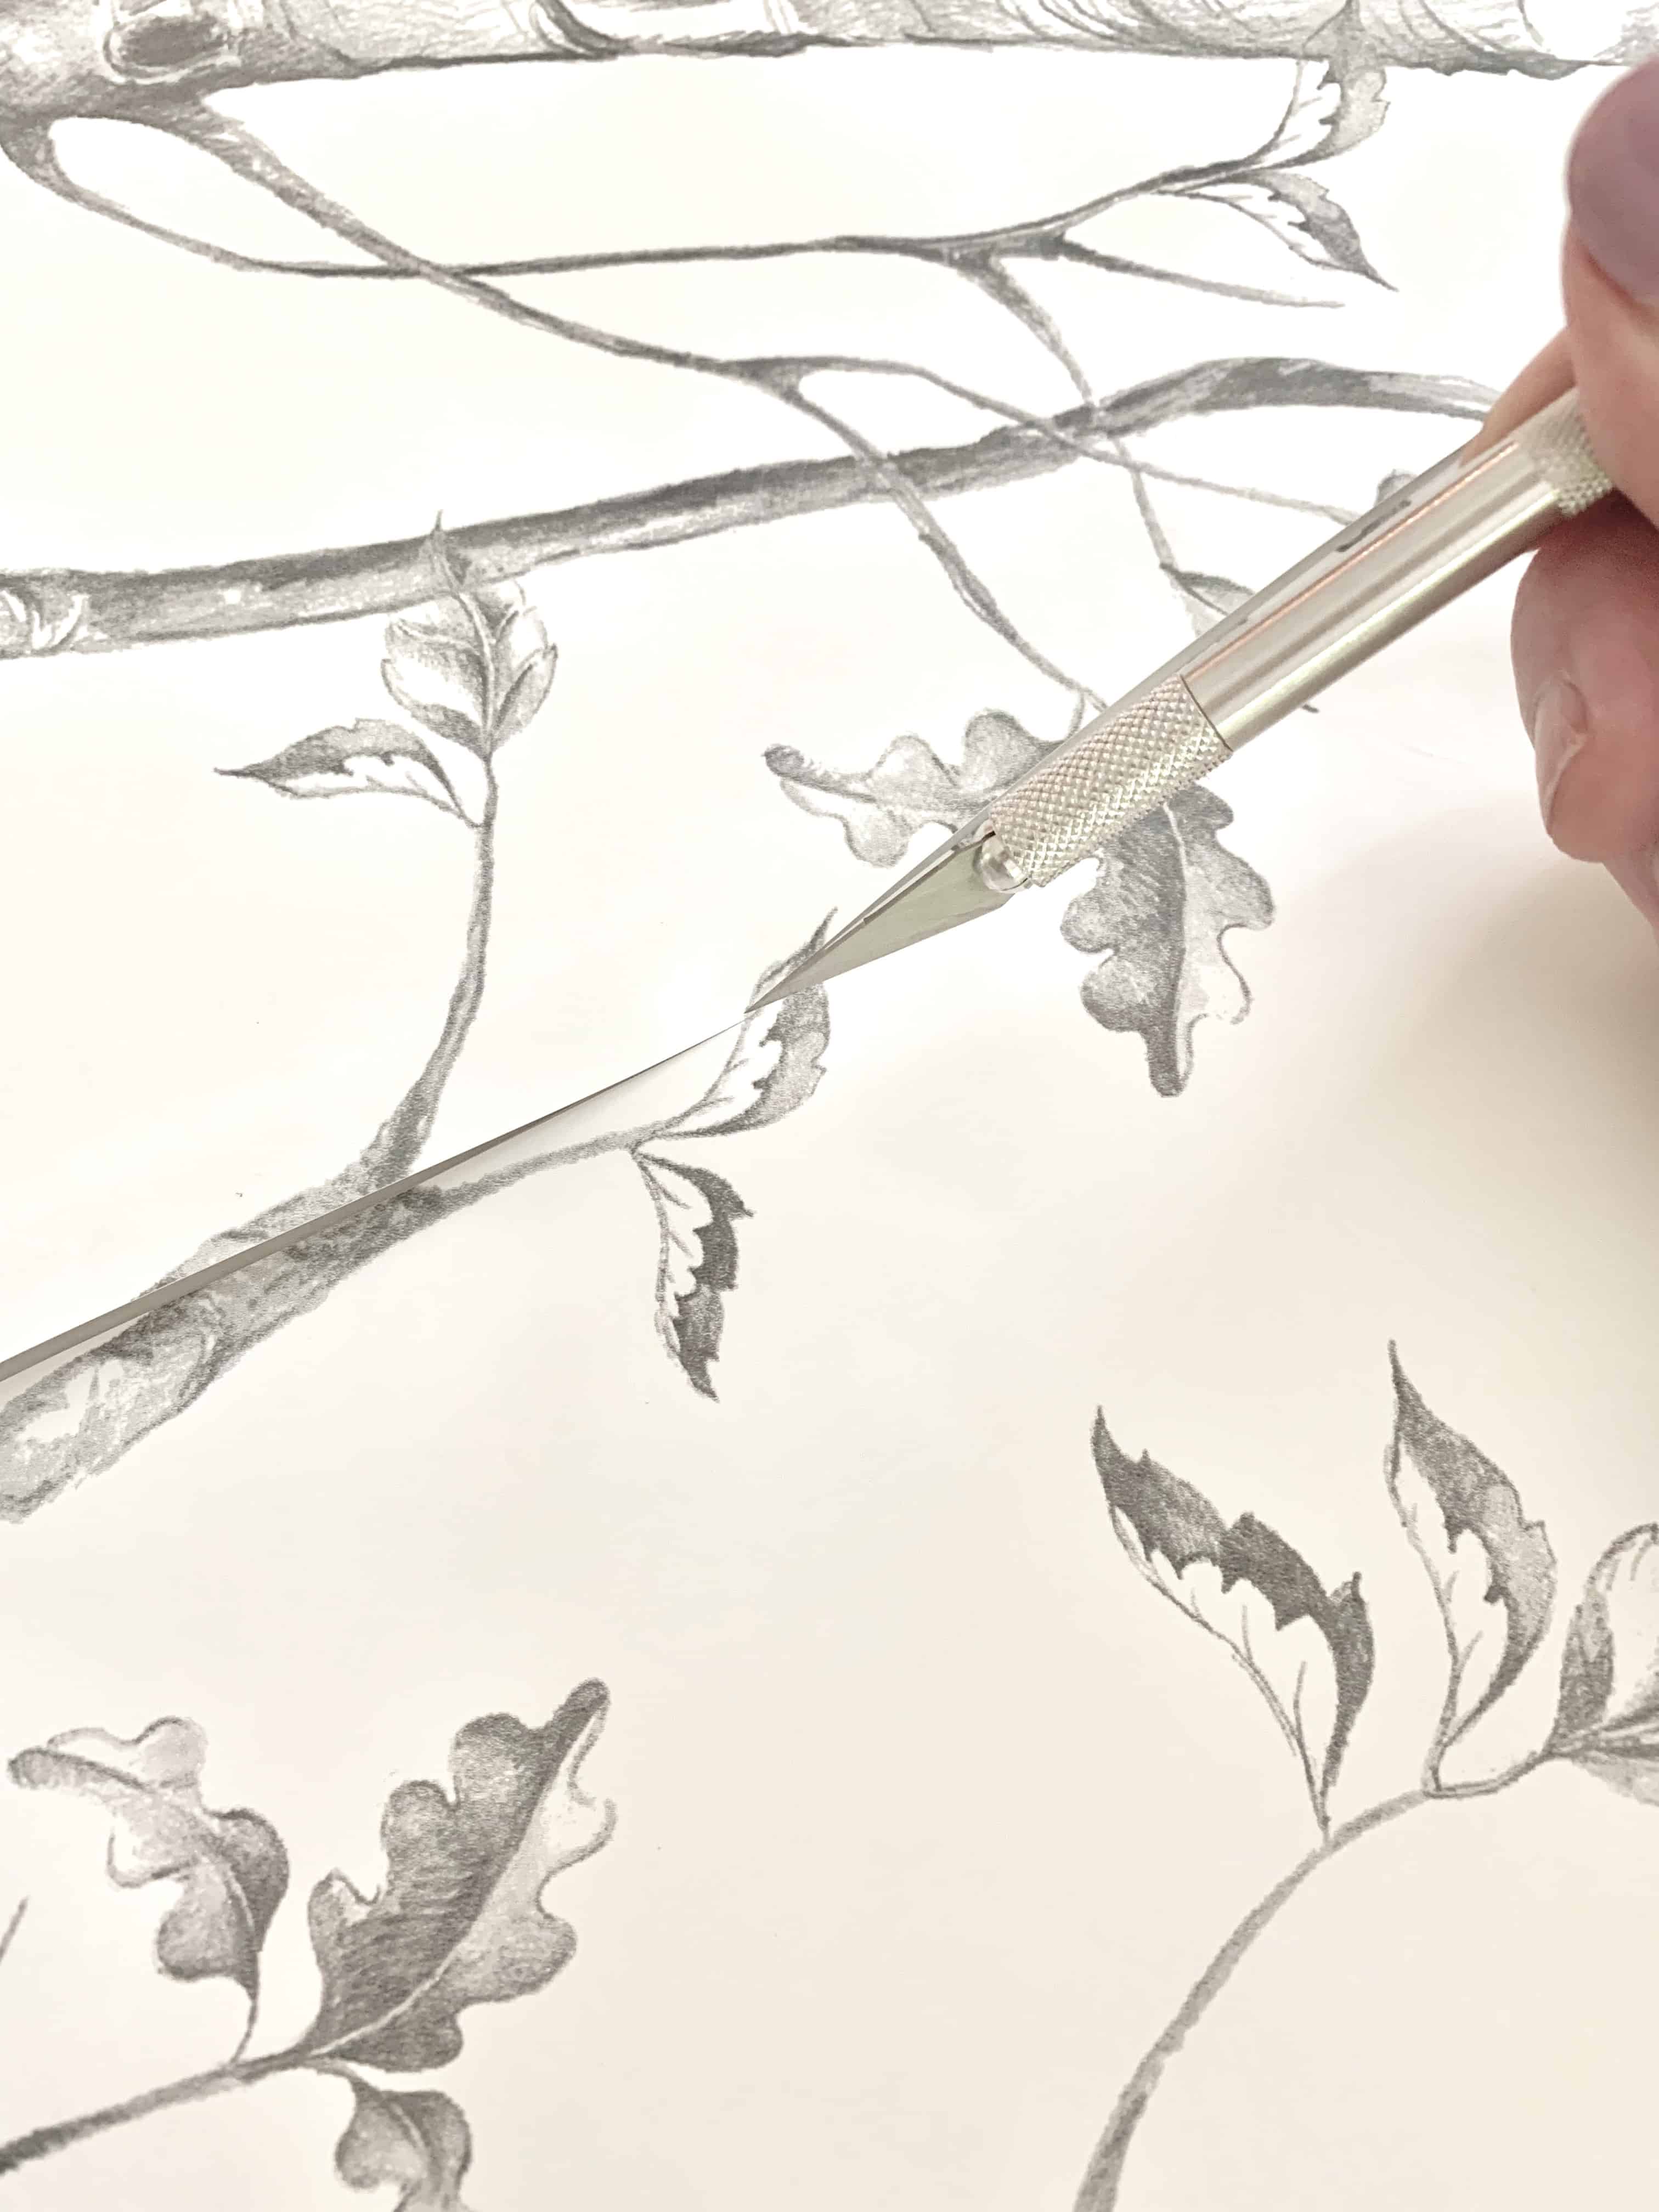
- Trim the edges
Use scissors to do a rough trim around the edges. Then use your X-Acto knife for a clean, finished cut right along the board's edge.

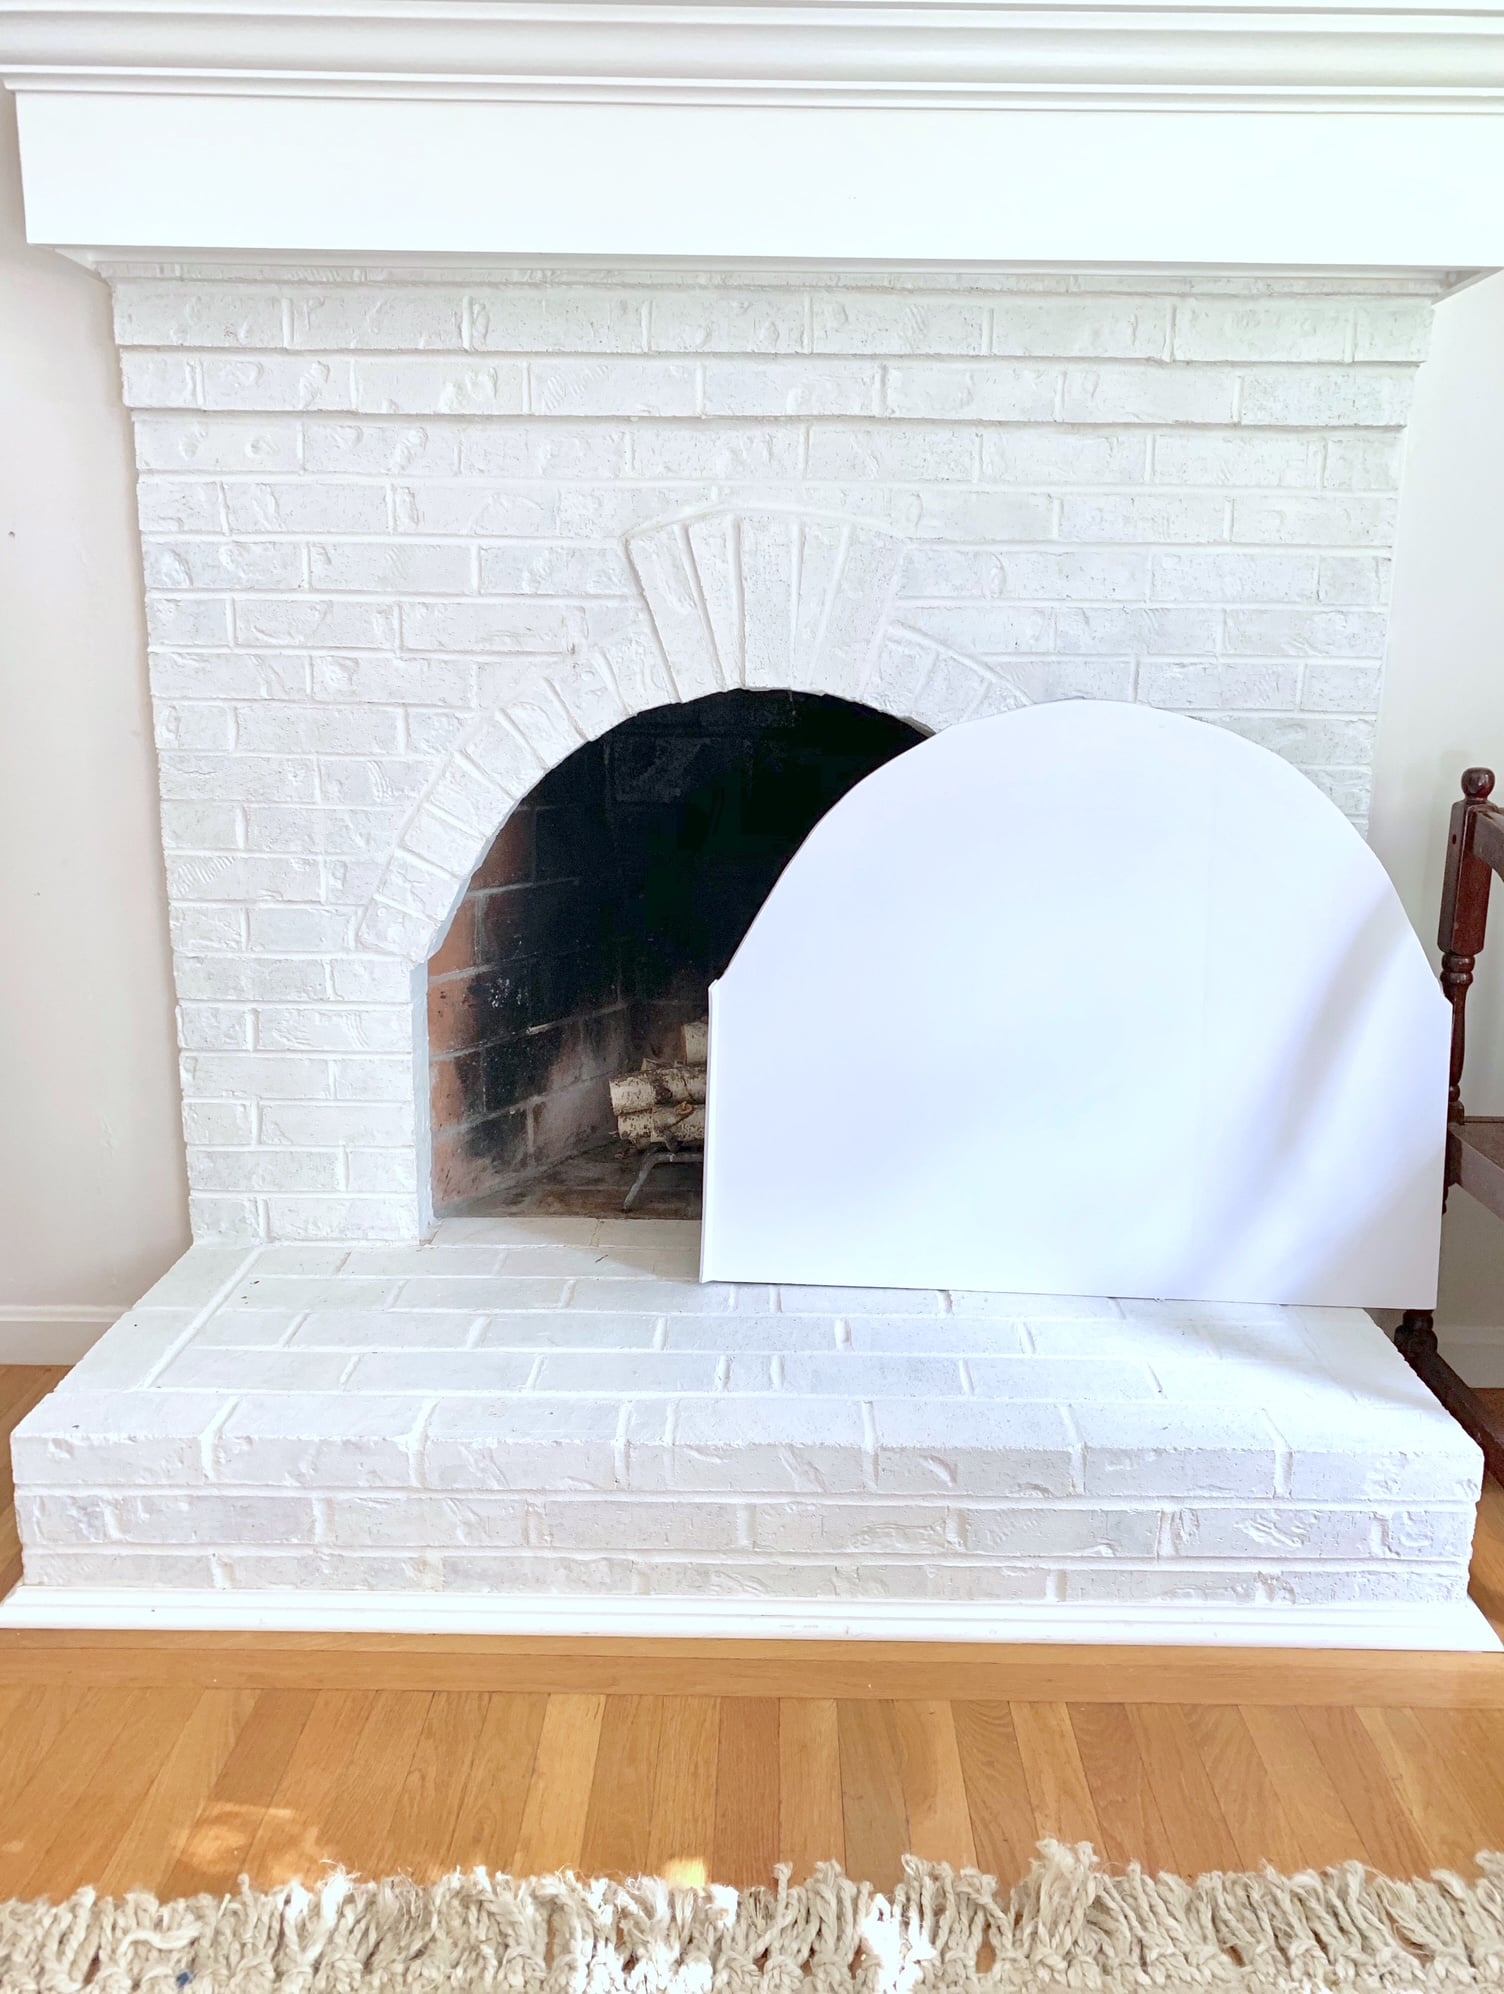
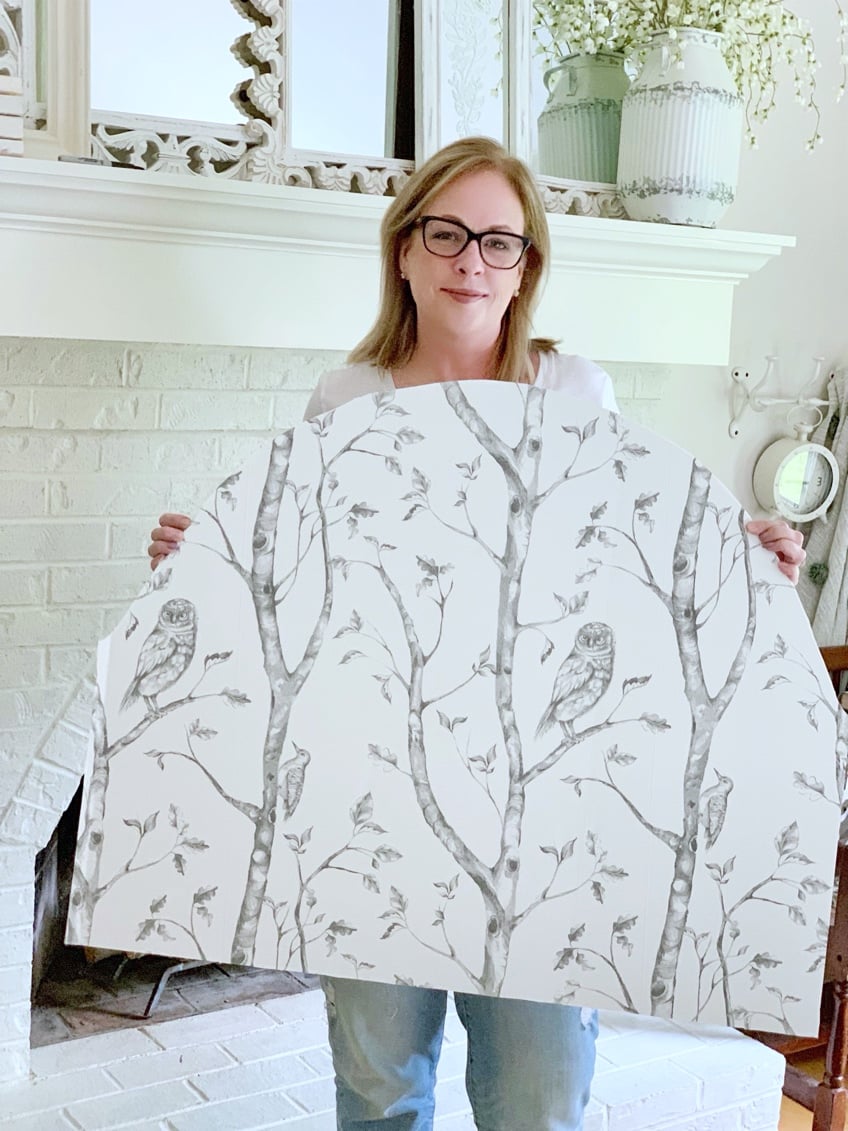
- Insert the finished board
Once covered, place the board back into the fireplace opening. It should fit snugly, with the side panels folded slightly inward for support.


Tips for success
Use a snug fit for support: The thickness of the foam display board helps it stay put without hardware. Just be sure to trace carefully so the screen fits tightly within the fireplace opening.
Wallpaper choice matters: Choose a peel and stick wallpaper with a little stretch and a matte finish for easier application and a more natural look. Avoid super glossy finishes unless you're going for a modern vibe.
Watch for air bubbles: Smooth as you go to avoid air pockets. A credit card or wallpaper smoothing tool works great to press the paper flat as you apply it.
Keep the board lightweight: Avoid adding embellishments or heavy layers that could make the board tip forward. The goal is a secure, snug, but easily removable cover.
Make it seasonal: Want a cozy winter look or a fresh summer vibe? You can easily swap the wallpaper or add seasonal accents around the fireplace like garlands, pumpkins, or fairy lights.
Repositioning the board: If your board gets bumped out of place (thanks, kids or pets), just slide it back in. It's light and easy to reset in seconds.
Good for drafts too: While this project is mostly decorative, it also helps reduce cold air coming through an unused fireplace. That's a win in the winter months.
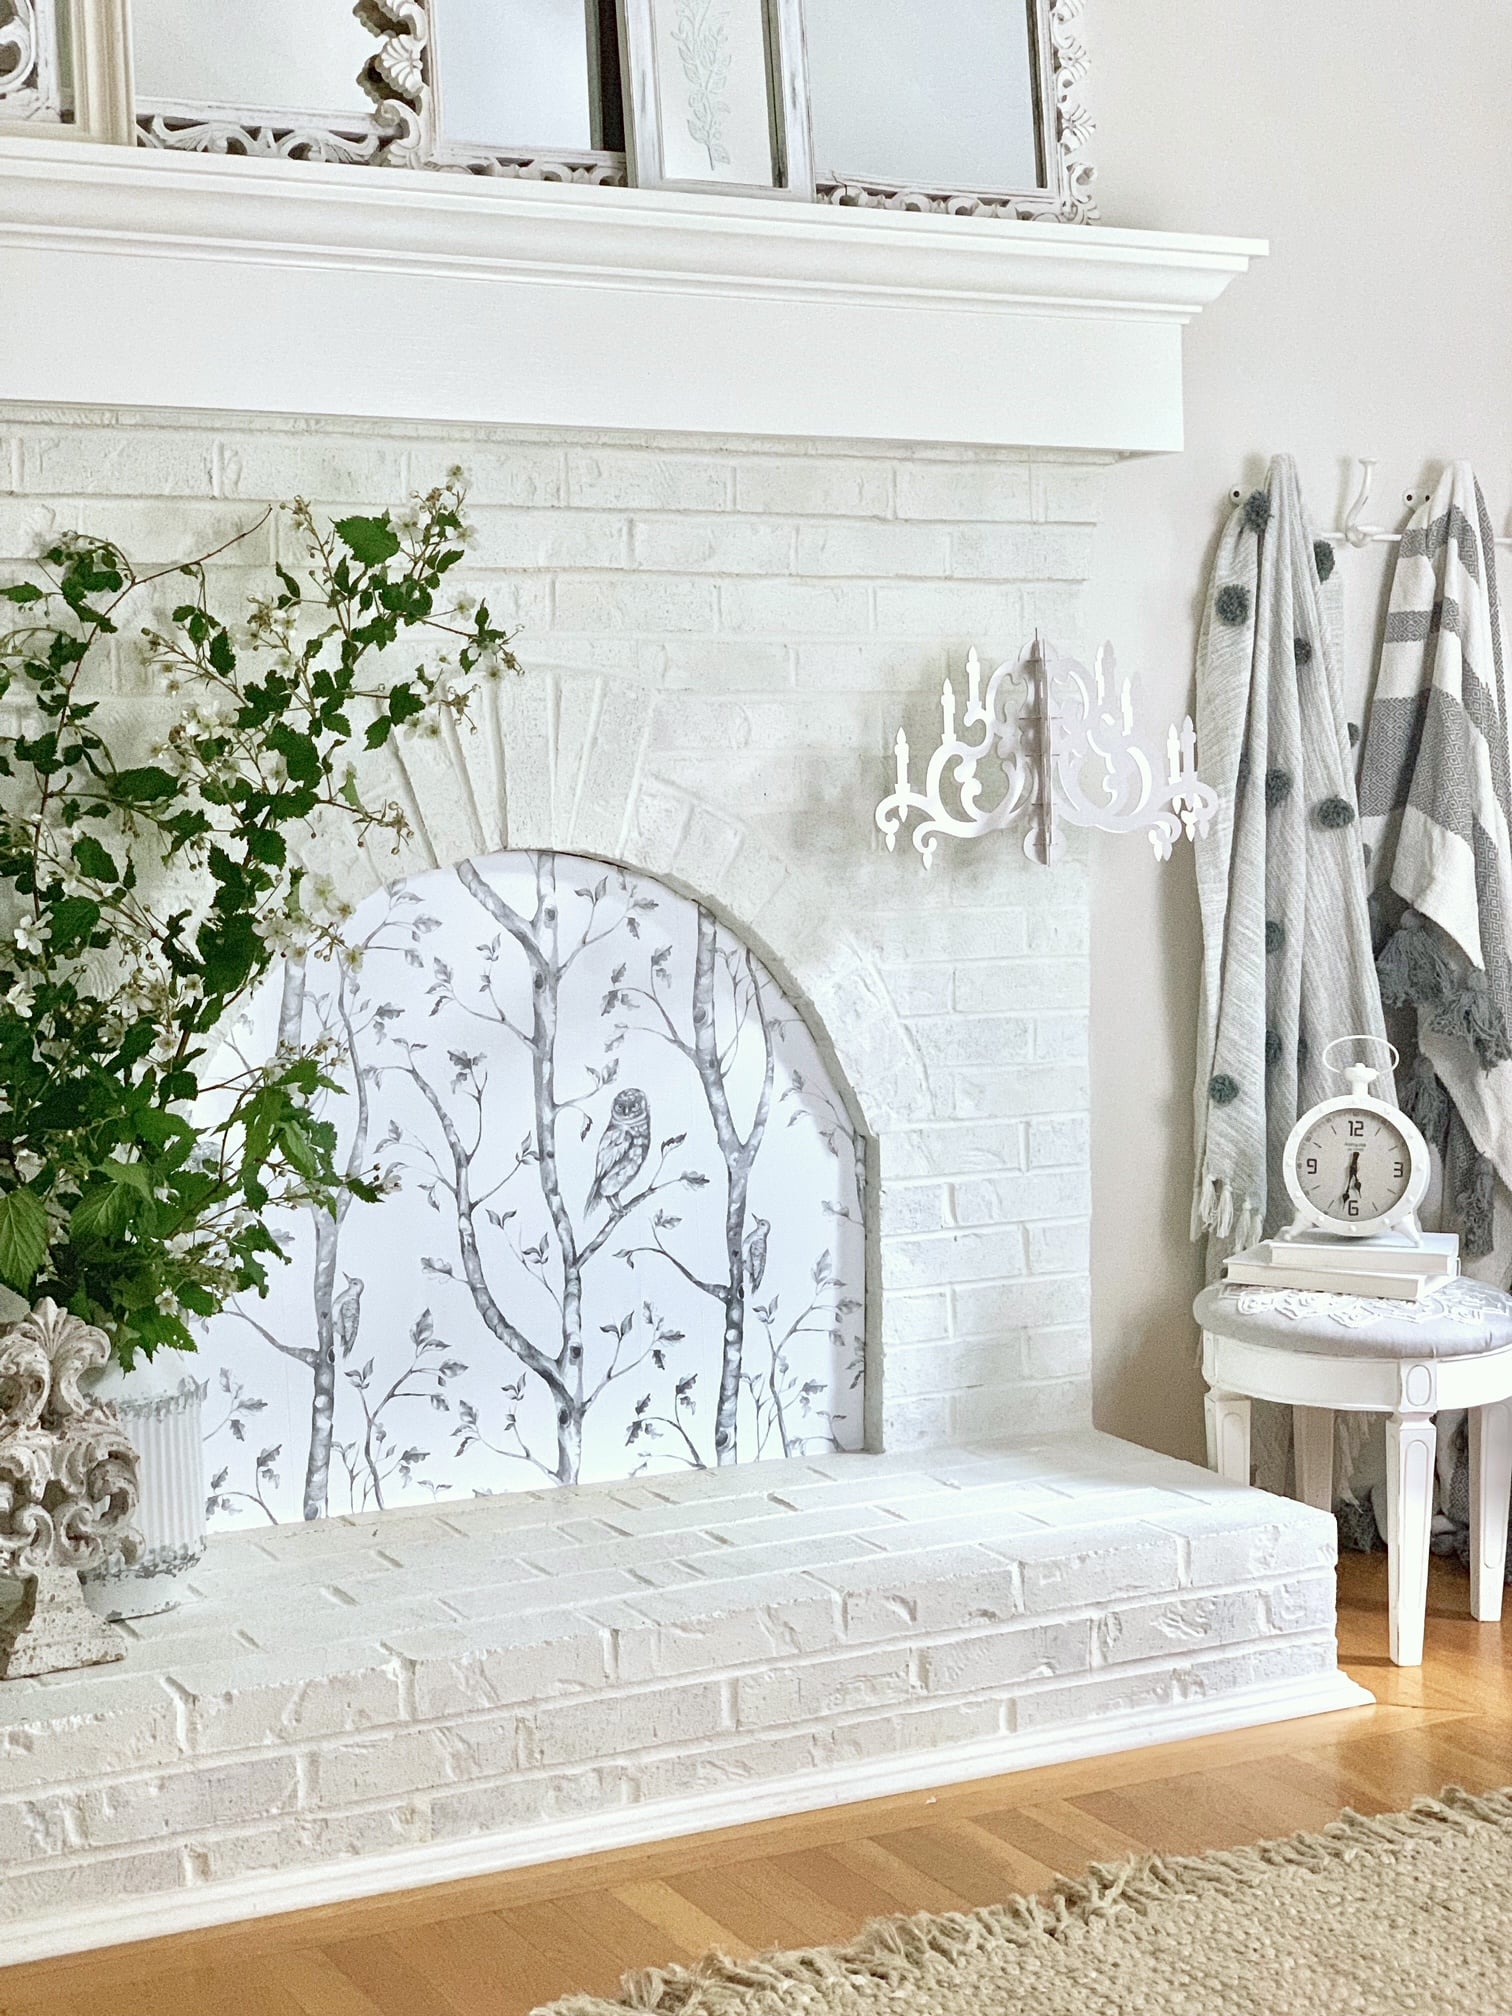
Styling around the fireplace cover
To style, I simply placed the new fireplace screen in the fireplace opening and had fun styling the space! I layered a few mirrors and empty picture frames with some added blooms on our new mantel. I love how it looks and how this simple addition just brightens up this whole space. Click here for more ideas for using empty picture frames in decor. For the front of the fireplace, I added a large vase of beautiful branches from our yard. I also hung a fun paper chandelier!

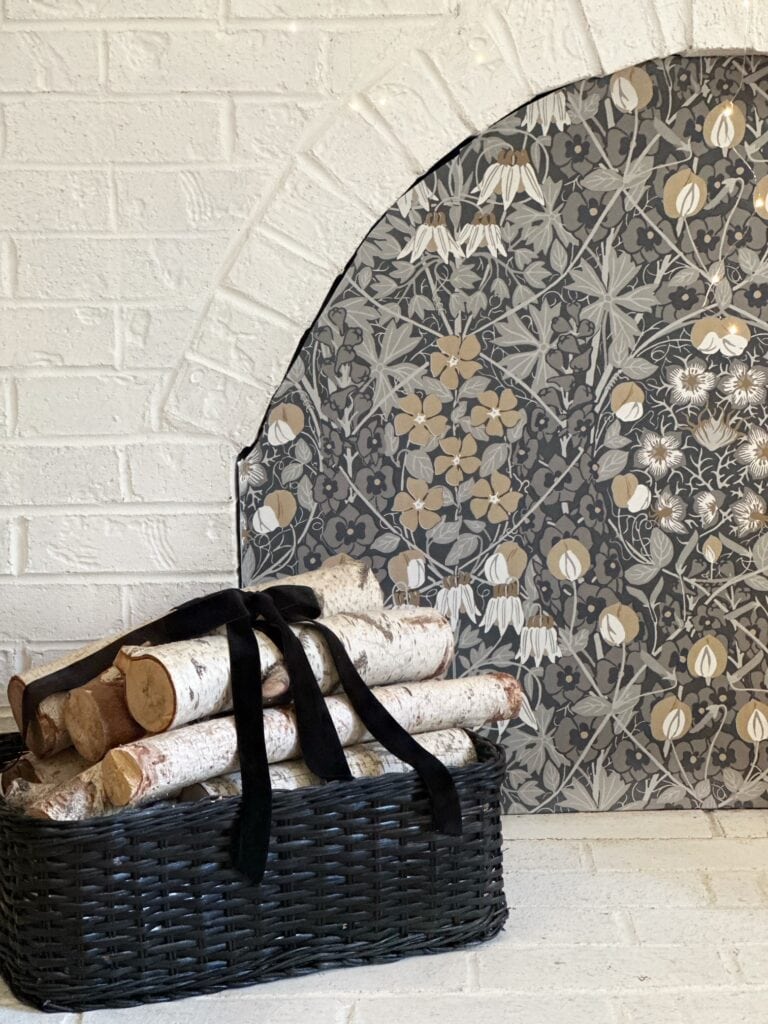
Updated style for 2025
I decided it was time for a new look! I love this tulip garden wallpaper which seems to match with my warm minimalist vibe I've been loving lately.
Frequently asked questions
Yes, many readers have found that the DIY fireplace cover board not only enhances the aesthetics of their fireplace but also reduces cold air infiltration during winter months, potentially leading to lower heating bills.
For irregularly shaped fireplace openings, tracing the shape of the opening onto the foam board while it's folded can help ensure a snug fit. For square or rectangular openings, using a tape measure will ensure accurate measurements.
Peel-and-stick wallpaper and foam board are not designed to be heat-resistant. While it should be fine for covering a fireplace opening, avoid direct exposure to flames or excessive heat.
To achieve a smooth application, make sure to carefully remove any air bubbles as you stick the wallpaper onto the foam board. Using a flat edge, like a credit card, can help smooth out the paper and eliminate wrinkles. For more information and tools to help get a smooth finish visit my Quick and Easy China Cabinet Makeover Using Wallpaper post.
While the specific brand and type of foam display board used in this tutorial is recommended for its sturdiness and size, you can experiment with other brands as long as they are of similar quality and dimensions and have a foam filling.
Due to the pattern on the wallpaper, the seam is barely visible.

For more fun Wallpaper projects, visit my Wallpaper Decor Ideas You Can Implement in a Day post.
More simple DIY projects to warm up your space


Thank you for visiting the blog today for this fireplace makeover, one of my favorite DIY projects! This easy DIY fireplace cover board is a fantastic solution to elevate your fireplace from drab to fab with just a little bit of effort.
This simple screen was one of the final pieces to pull together our cozy white living room. If you'd like to see the full room and other home decor projects like my popular no sew, no rod drop cloth curtains that made it feel finished, you'll find them all in my White Living Room Ideas Guide.
Keep creating friends!


How does it stay in place? Is the fit so tight that it just fits snugly inside the frame of the fire place or do you have it braced from behind in some way?
Great idea!
Thanks!
Hi Skip, the foam board has a bit of thickness to it, id say 1/8" which helps it grab on to the brick. There just enough room for my fingers to slide it in place and the foam board/bricks do the rest. It is also fairly light so between the bricks holding it and its weight it simply just sits in place - unless one of our dogs bumps into it (which happens!) Hope this helps!
LOvely! don't the folds of foam core show? Not quite sure how you traced it and got rid of the folds.
Thank you!
Hi there, There is just one fold and it really doesn't show with the pattern of the wallpaper. Hope this helps!
Love this idea and made my own fireplace cover using the same wallpaper! Thank you! Would you please share what type of flower you have in the vase on the mantle? If it is artificial is there a place to purchase? Thanks again!
Hi Desiree, Thank you for visiting the blog! the stems in the vase are from our yard, I'm not sure what they are.
I love & plan to do this. Was it hard to get the foam to sit right up in place on its own?
Hi Christy, yes a bit challenging especially over time. We got a puppy and she bumps into it often - so it has gotten looser over time.
Beautiful!
Thank you Madeline!!!