DIY Tulip Wreath: Craft Your Own Springtime Showstopper
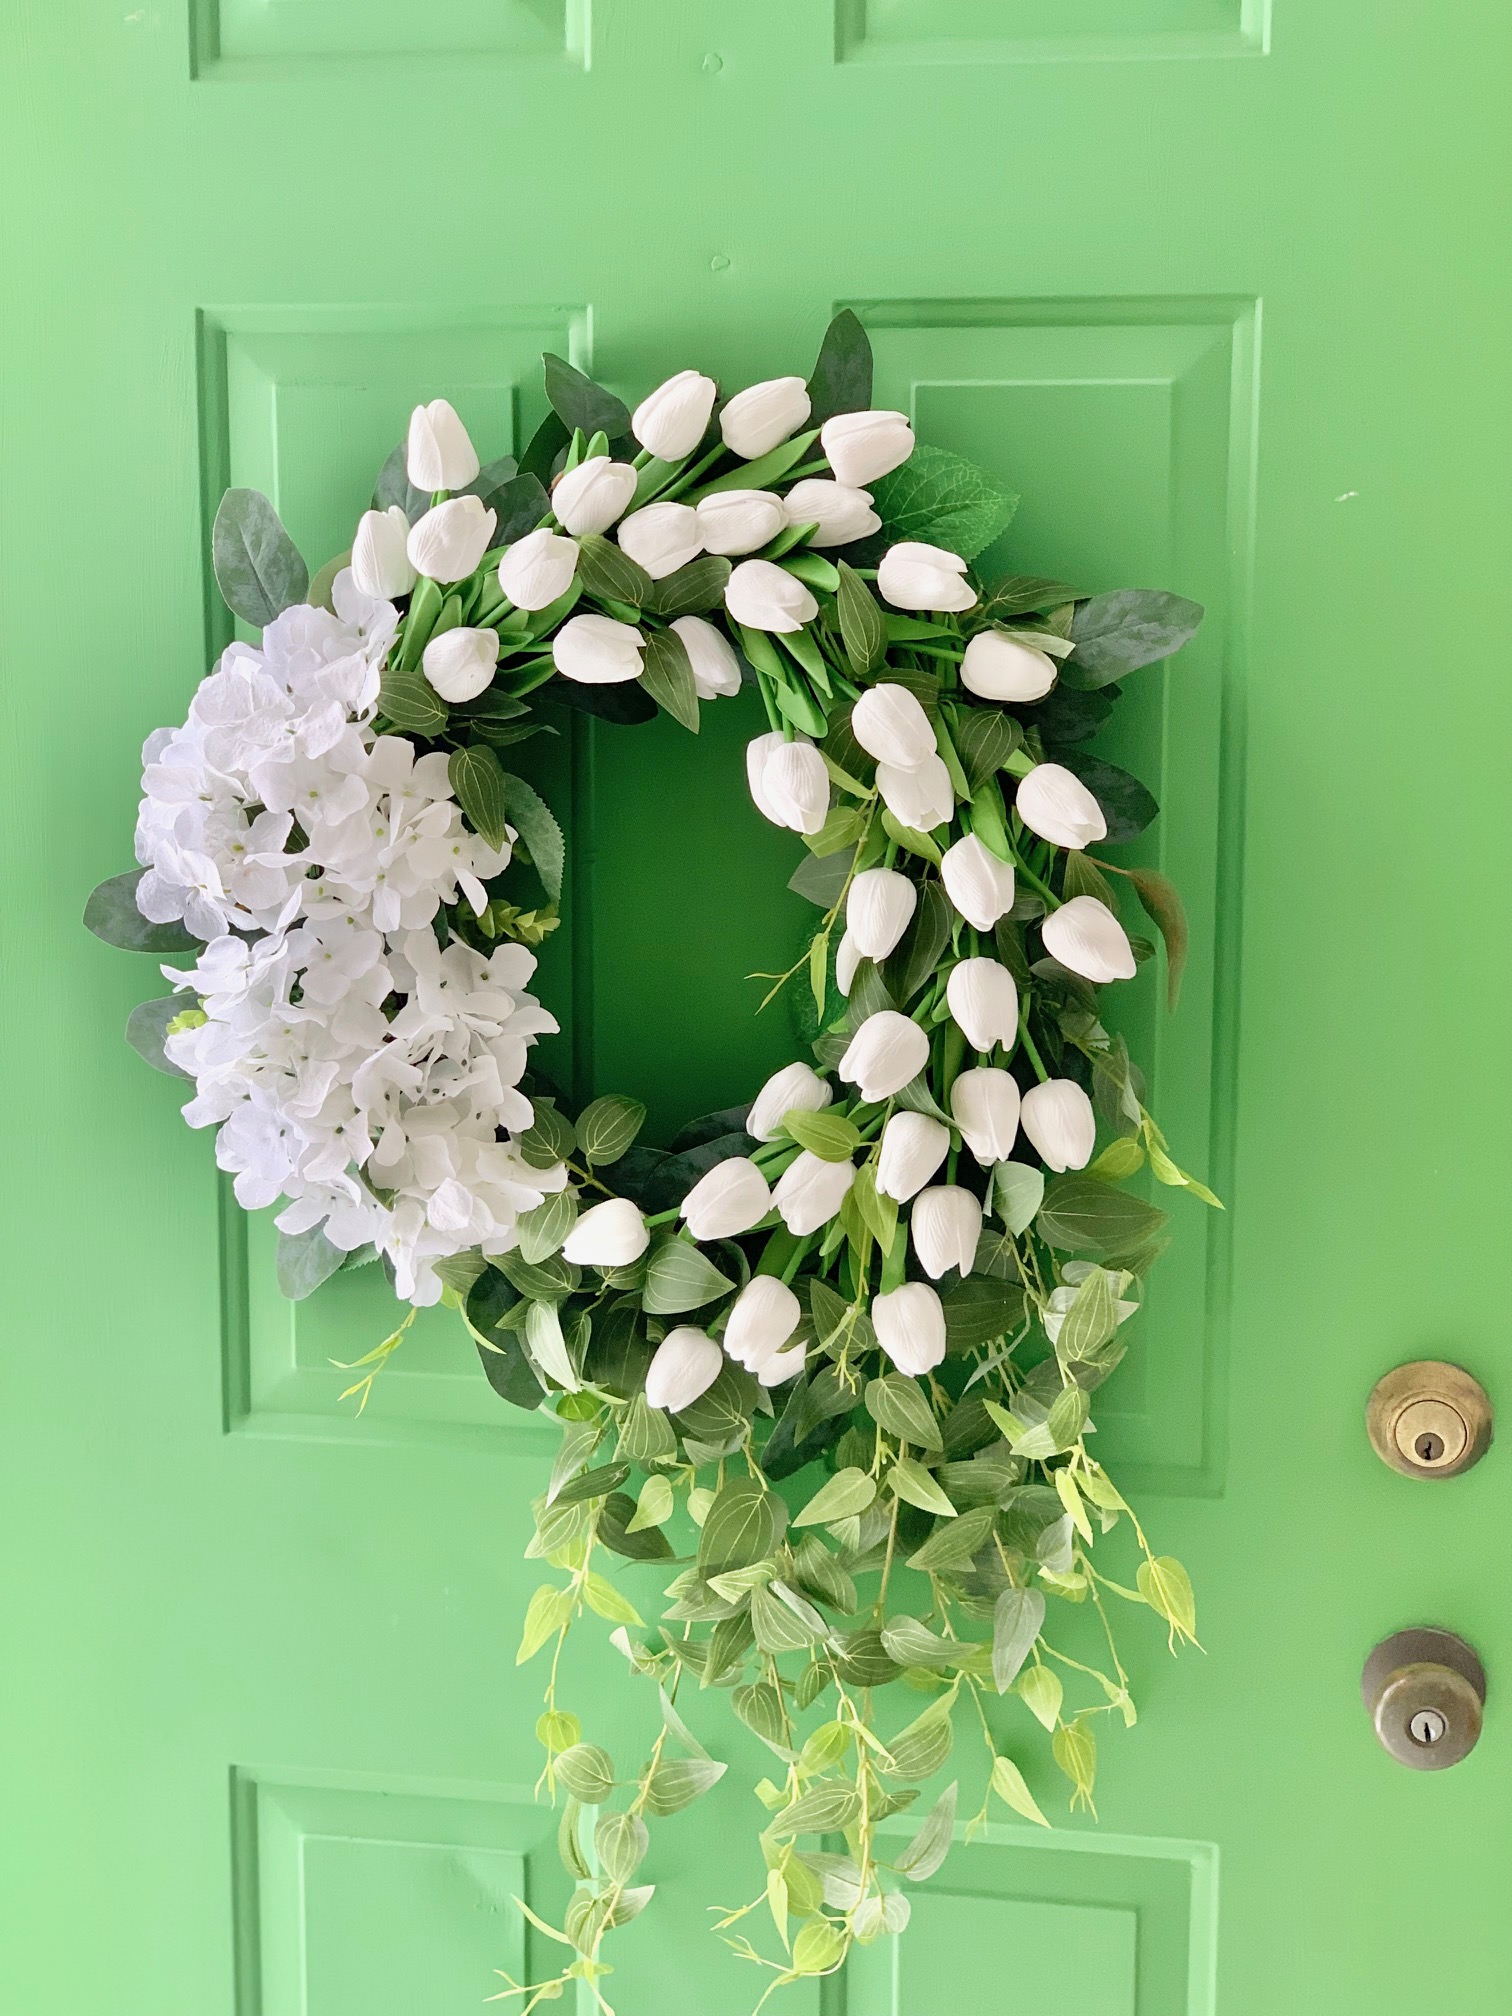
A gorgeous spring wreath on your front door is such a fun way to celebrate the new season. While I love the stunning white blooms and green leaves in Grandin Road's tulip wreath, their $189 price was out of budget. Still, I wanted to create a sweeping DIY tulip wreath with magnolia stems, vines and white hydrangea for the upcoming spring season.
Last year instead of overspending, I decided to make my own beautiful wreath using quality, affordable faux florals. For just $79, I achieved a high-end designer look through DIY creativity - saving over 55%! Making it myself meant scoring magazine-worthy style at a fraction of the costs.


Content may contain affiliate links. When you shop the links, we receive a small commission at no cost to you. Thanks for supporting my small business.
Jump to:
Why I made my own DIY tulip wreath
Along with major cost savings, I really enjoyed the entire wreath DIY process - picking materials and assembling an eye-catching focal piece. I also appreciate selecting exact florals and greens that perfectly match my spring decor vision.
While Grandin Road sells a version for $189 online, by sourcing my own real-touch stems rather than the completed designer wreath I made a near-identical one for only $79. And you can't beat a custom creation blending your favorite textures and blooms!
Gear up for this charming DIY tulip wreath with these key supplies. You'll be surprised what you can create from just a few beautiful stems!

Here's what you'll need:
Supplies for this project
- 18 inch grapevine wreath form or a hydrangea base like this preassembled option
- 2 bunches of faux tulips (white - around 40 tulips)
- 4-5 realistic white hydrangea blooms (if using the grapevine wreath)
- 1 package of floral greens like magnolia leaves or eucalyptus stems
- 1 package of trailing floral vine stems
- Hot glue gun with glue sticks
- 18-inch flocked wire
- Scissors
- Wire Cutters
- Ribbon for hanging or Wreath hanger
Step by step tutorial
Let's turn simple stems and hot glue into something magical. Follow along as I transform basic supplies into a professional masterpiece.
- Plug in the hot glue gun to warm up. Then organize materials - cut excess stem lengths, and arrange florals and greens by type.
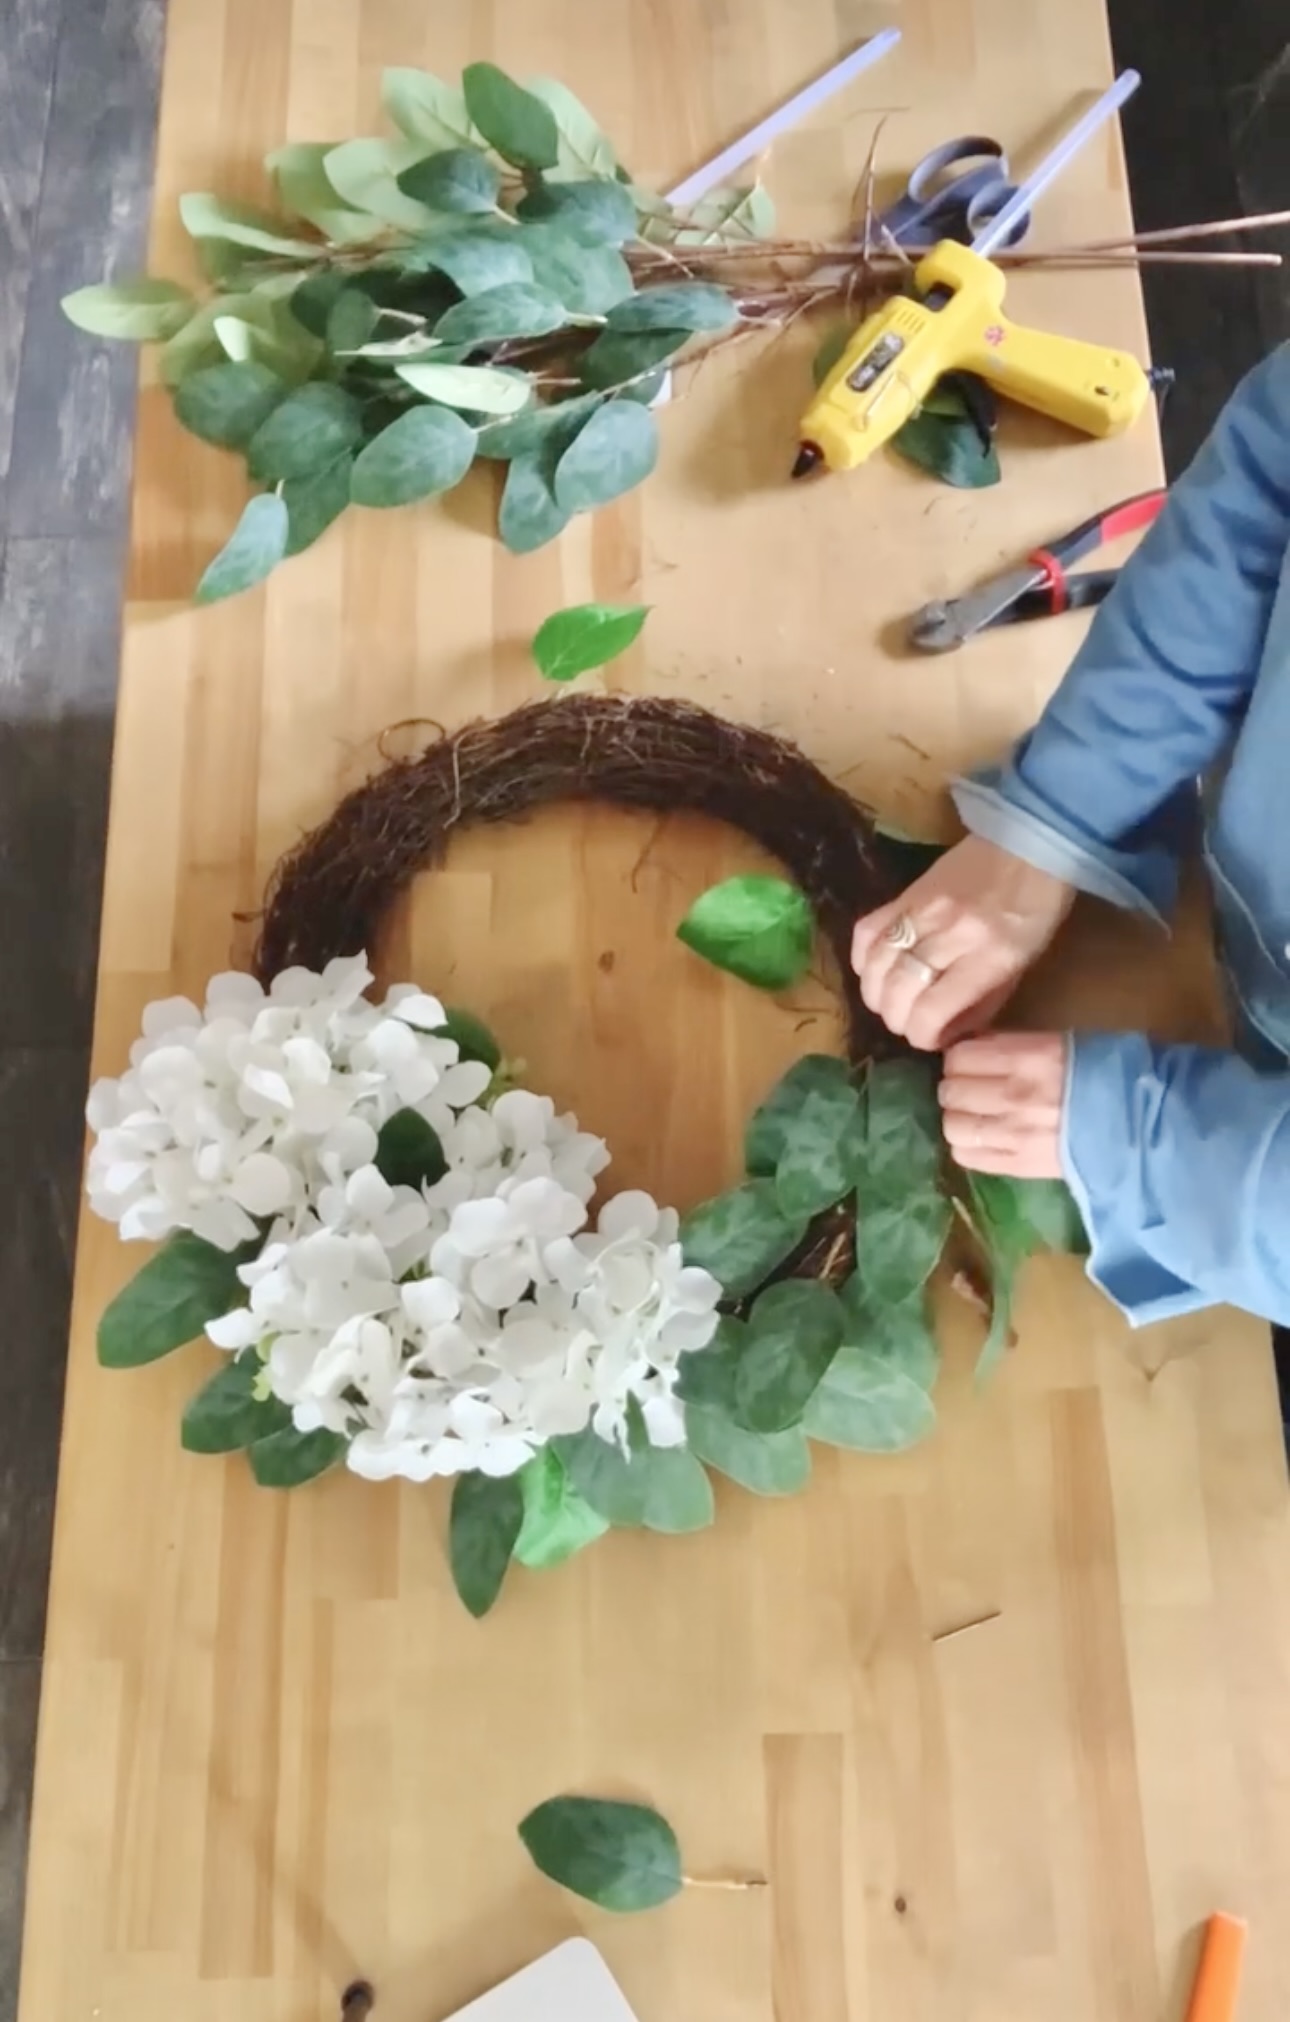
- Plan out the wreath design. Group hydrangeas to the left ⅓ side of the wreath and glue in place. If you use a full hydrangea wreath simply remove other blooms using clippers. This creates a clean left-side focal point.

- Use wire cutters to cut small clusters of magnolia leaves or eucalyptus stems. Position the cut foliage clusters onto the grapevine base, clustering them together. Sweep and angle the leaves in a clockwise direction as you glue them in place around the top and outer edge of the wreath. The sweeping magnolia foliage beautifully disguises any show-through while filling out the wreath with dimensional greens.

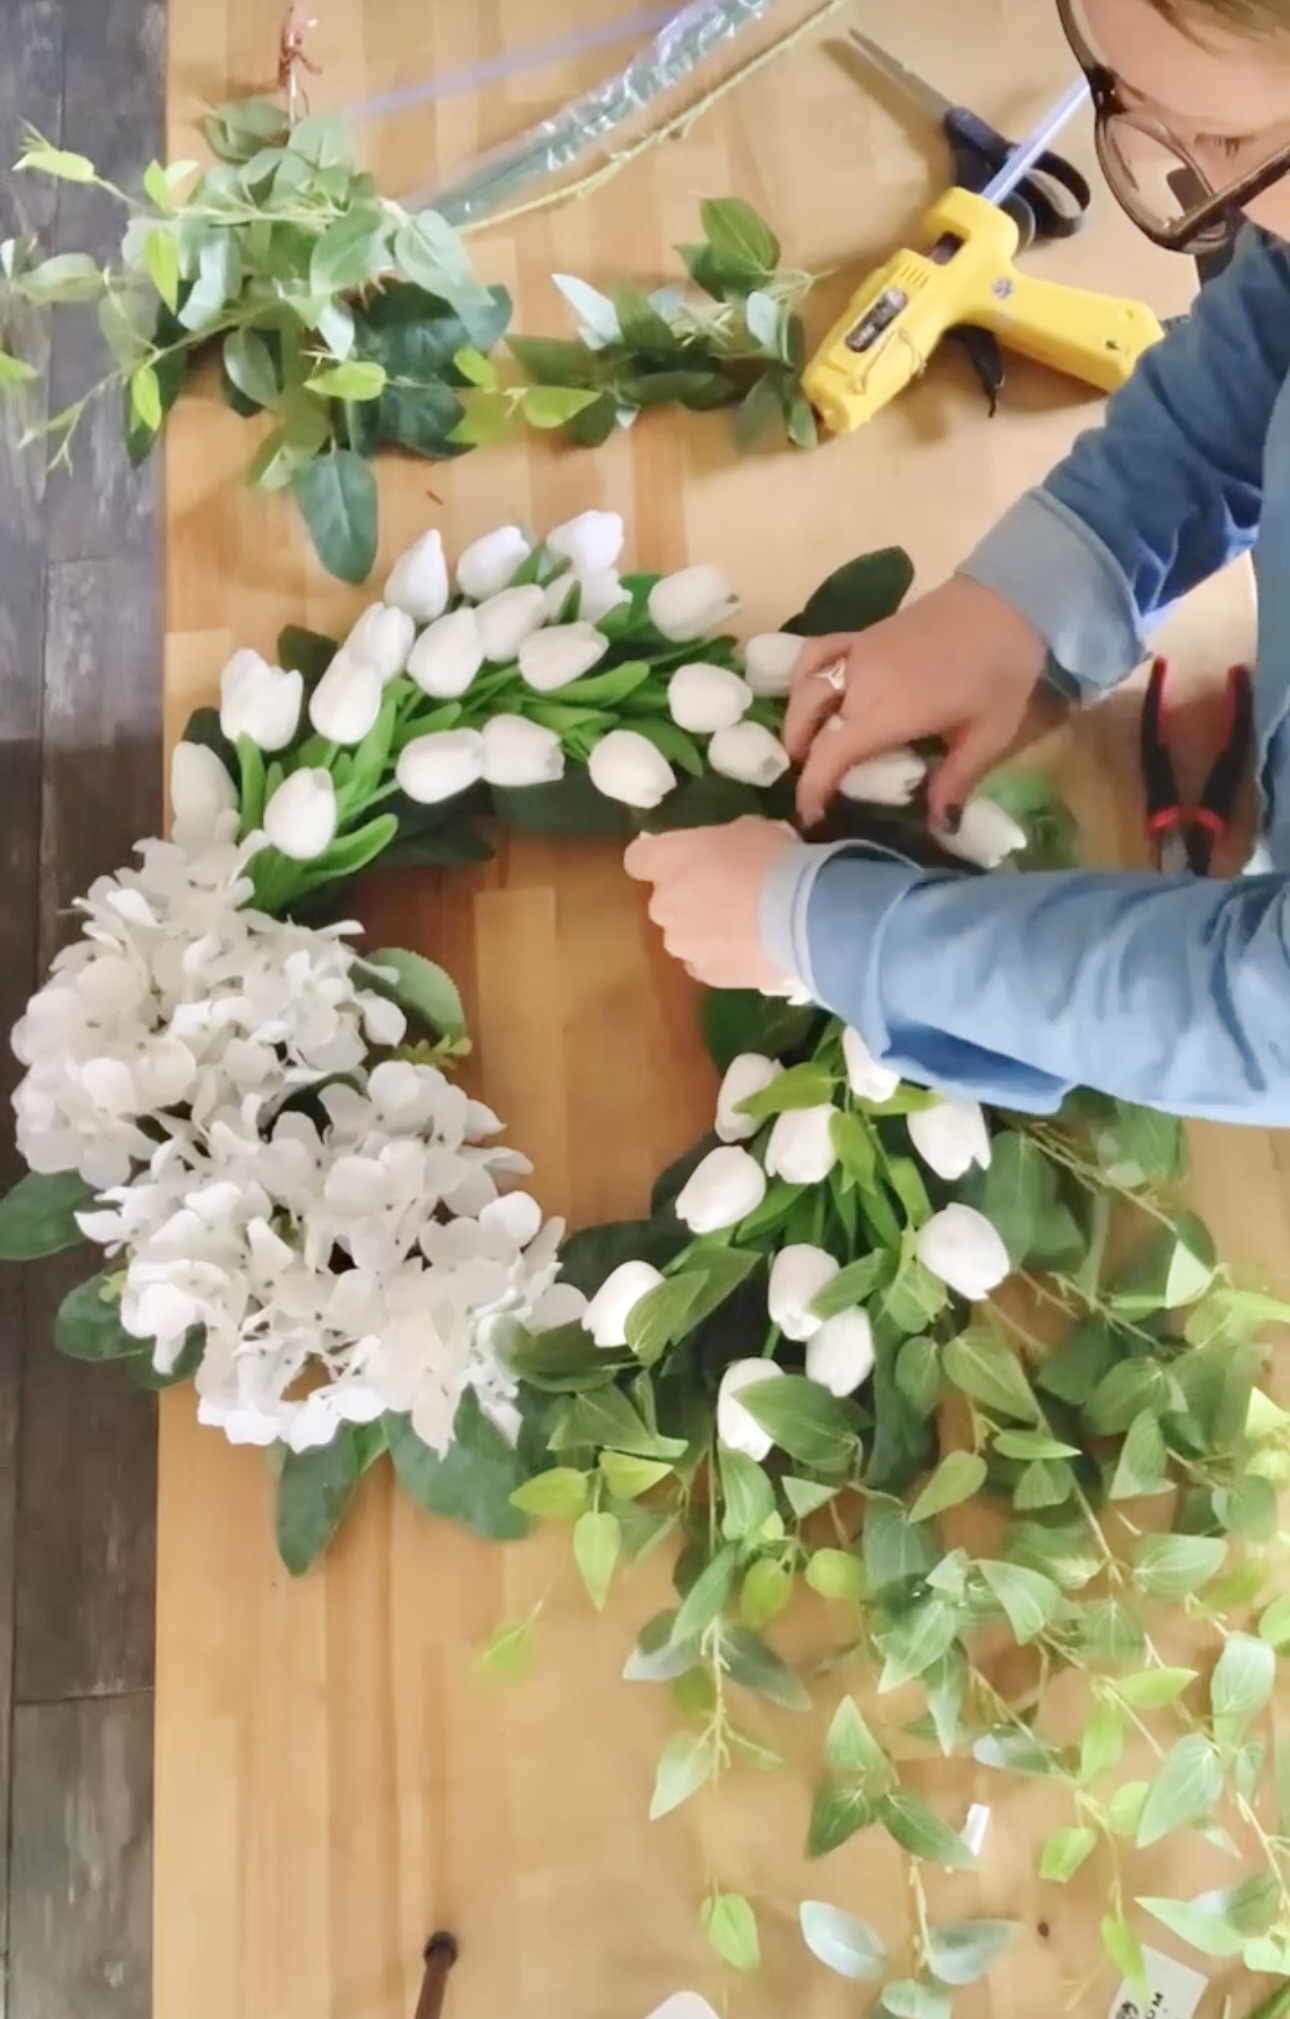
- Next, add little bunches of tulips. To do so make a flat tulip bundle - by staggering about 6 stems. Wrap stems together using 18-inch flocked wire. Cut away the excess length of tulip stems with wire cutters. Leave the long wire.

- Start affixing the tulip cluster on the bottom of the wreath using the wire that was used to cluster the tulips. Simply wrap the wire around the wreath and twist on the back. The tulip blooms should be pointed down.

- Continue wrapping a second cluster of tulips, layering the next group slightly higher. Repeat to bring the tulips to the hydrangea.

- Take the trailing vine stems and affix them to the bottom using hot glue. Add vine pieces sporadically throughout the tulips. Fill in any visible gaps with additional eucalyptus or magnolia stems.

- Flip the wreath over cut the extra wire from the back of the wreath and tuck the ends into the wreath. This will keep the wire from scratching your door.

- Finish by securely attaching the ribbon to the wreath's backside. Or use a wreath hanger.


Now your fresh spring masterpiece is ready to welcome the season! Time to style this beauty on your door.
Hanging your gorgeous DIY wreath
- Choose a wreath hanger that complements the touch of spring in your gorgeous tulip wreath or opt for hanging it with a wide ribbon.
- Position the hanger or loop the ribbon around the top ⅓ of the door for a great way to showcase your seasonal decor.
- If using a ribbon, secure it around the storm door's open/close mechanism, ensuring the wreath is beautifully displayed.

Styling your fabulous wreath
Ready to boldly show off your beautiful handmade wreath?
The classic option is your front door, but hang one in your outdoor entertaining space for a cheerful focal point. Or accent a wall inside with an artsy floral piece sure to spark conversation.
These also make thoughtful handmade gifts. Pair with a candle for a nice surprise.
For an ongoing project, make wreaths for each season to swap out. It's fun to refresh your space with a new wreath! With a dazzling repertoire, you'll be the talk of the neighborhood.
The possibilities are endless when you tap into your creative spirit! Decide where this unmistakable custom wreath would draw ideal oohs and ahhs, then make it the talk of the town!
Frequently asked questions
Apart from tulips, hydrangea, magnolia, and vines, you could use other faux florals in white colors like roses, lilies, orchids, etc. You can also mix these with eucalyptus, seeded branches, fern fronds, or other faux greenery.
A high-temperature hot glue gun and glue sticks are ideal for faux stem projects, as the thick glue holds well and dries fast. Floral wire can also be used to tie stems together for extra hold.
Use an 18" grapevine or hydrangea base for an appropriately sized door design. Larger wreaths can be made using 24-inch bases or beyond.
Absolutely! Grandin Road sells this gorgeous monochromatic wreath using a single hue in white, yellow, or pink. Sticking to a single saturated shade provides a bold, vibrant impact. If committing to one color family, make sure to incorporate plenty of dimensional elements through varied foliage textures and trailing accents. And don't be afraid to load up on stems for lush fullness!
Check your local craft store in the floral sections for colorful tulips or white tulips and individual stems. Craft stores carry grapevine wreaths and other bases to start your own wreath. Build upon that by picking complementary blooms and greens sold individually for a custom creation.

Well there you have it, friends! We transformed an ordinary grapevine wreath and a few faux stems into an incredible showstopping beautiful spring tulip wreath for under $80. Way better than dropping almost $200 online if you ask me!
I hope my play-by-play gives you the creative spark to craft your own sensational spring wreath. Choose your own color palette or floral textures - I can't wait to see your gorgeous variations!
More faux floral design inspiration
Explore our collection of DIY floral projects:
- Create a romantic Valentine's Day wreath using lush faux hydrangeas for a door display that combines elegance with long-lasting beauty
- Transform a rustic dough bowl into a stunning spring centerpiece with our arrangement techniques and seasonal element suggestions
- Craft your own realistic cherry blossom branches that bring the beauty of spring indoors without the limited blooming period
- Design eye-catching artificial peony flower balls perfect for hanging decor or tabletop arrangements with our step-by-step tutorial
These creative projects offer beautiful ways to celebrate the changing seasons while adding custom decorative touches to your home that will impress guests and bring you joy year after year.
Thank you for visiting the blog today! Please tag me if you post pics of your own tulip wreath or comment below with any questions as you design. I love it when we all share project photos and inspire each other to keep creating.
I love the flexibility of faux flowers for styling - see more of my tried-and-true designs in the full Floral Index.
What will you make next? Let the wreath DIY adventure continue! I think a summer wreath is in order. Until next time!
Happy Crafting Friends!