Craft Your Own Holiday Decor Beads: Adding a Seasonal Twist
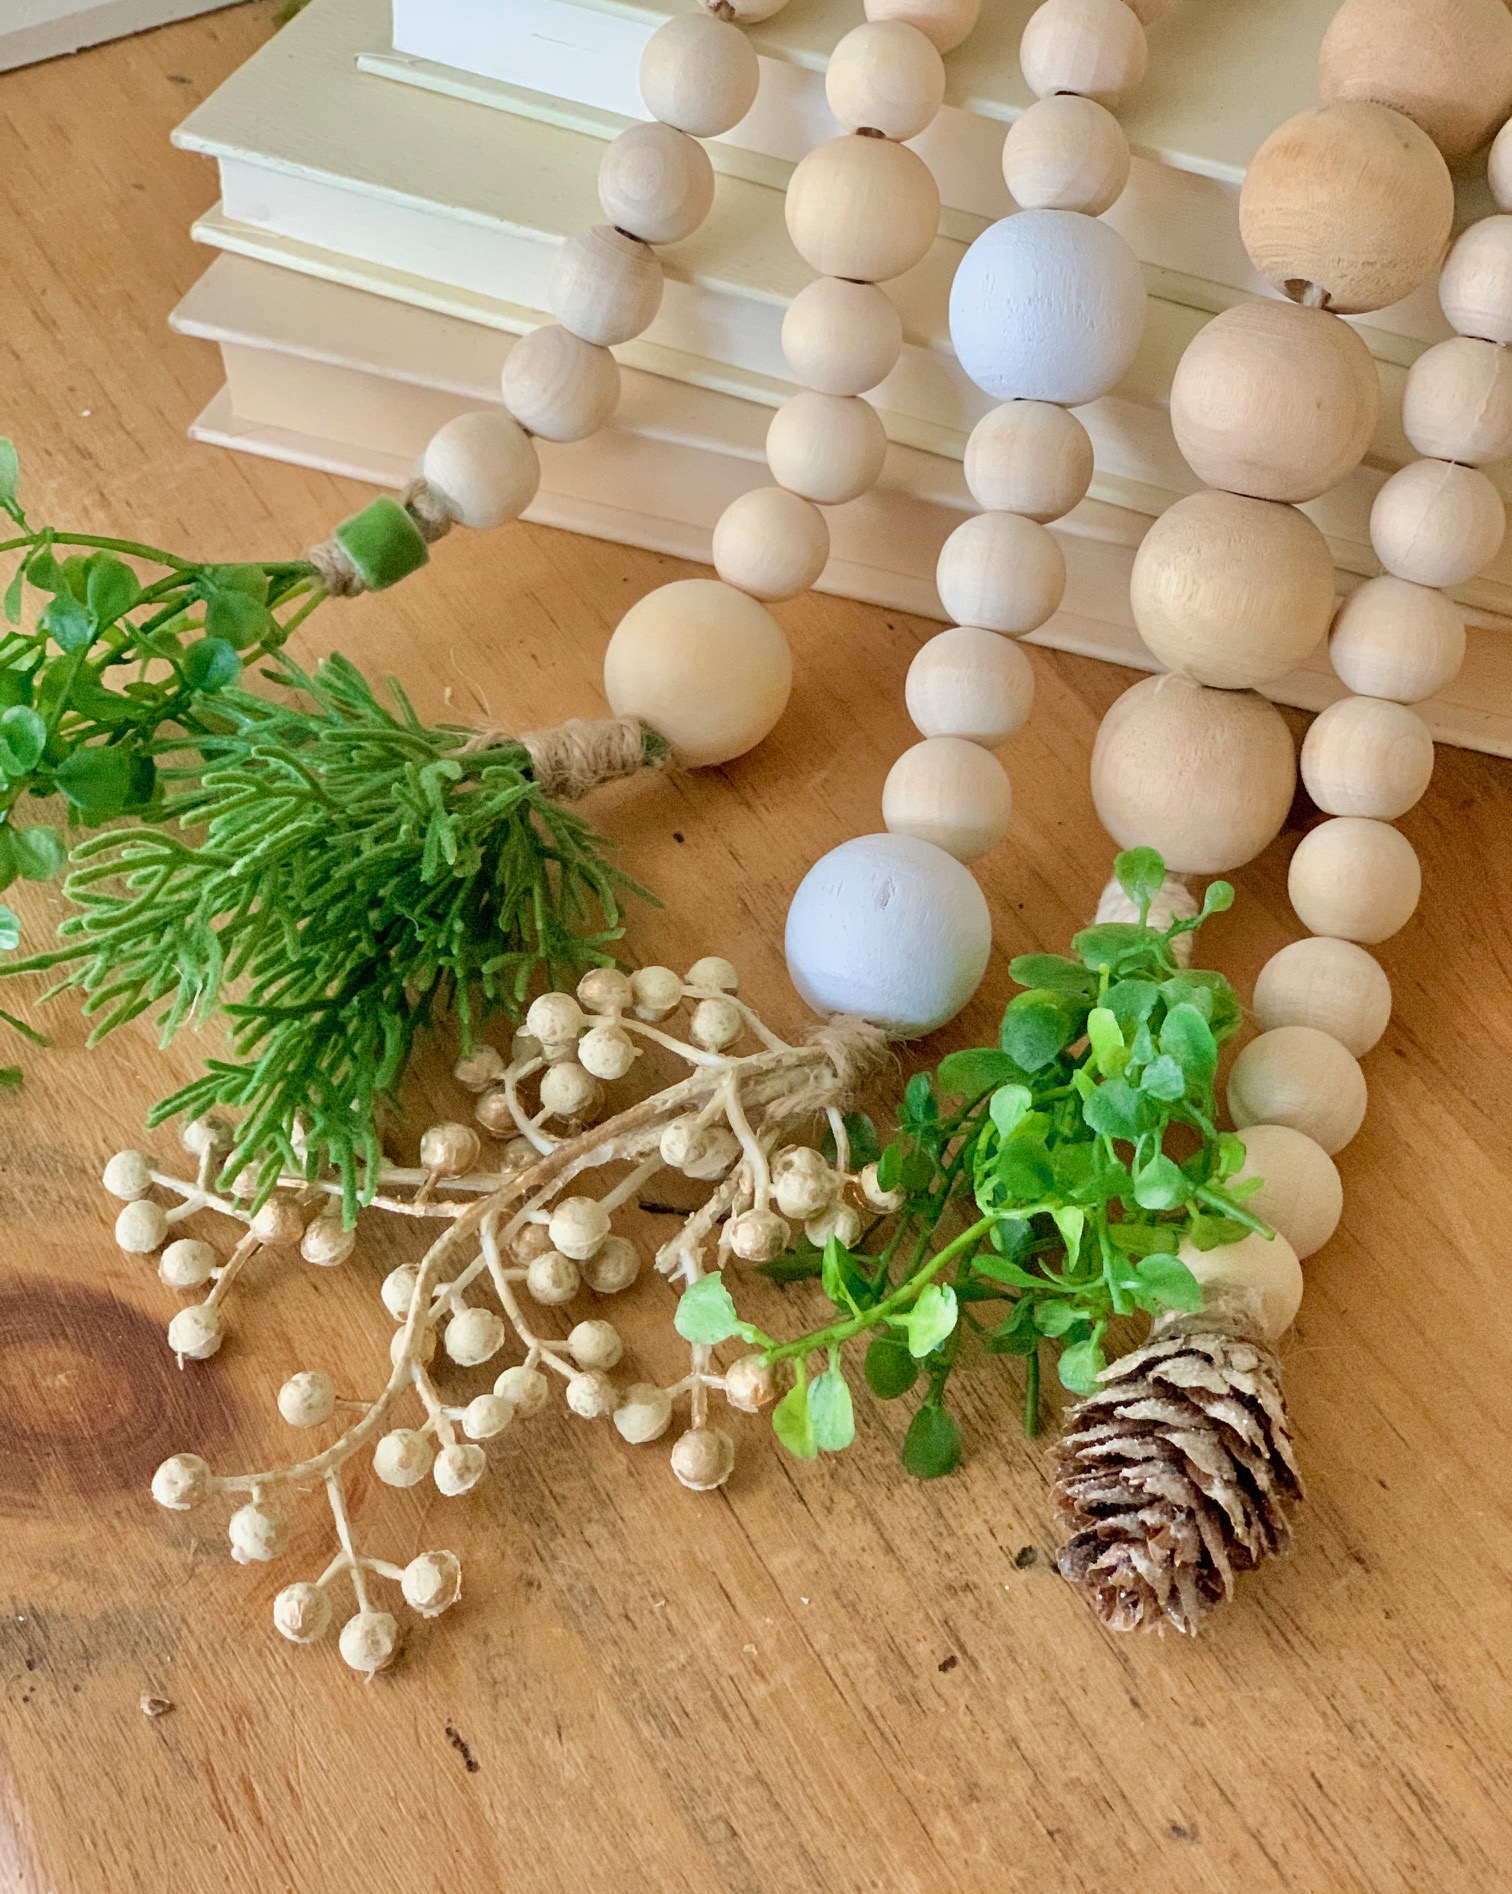
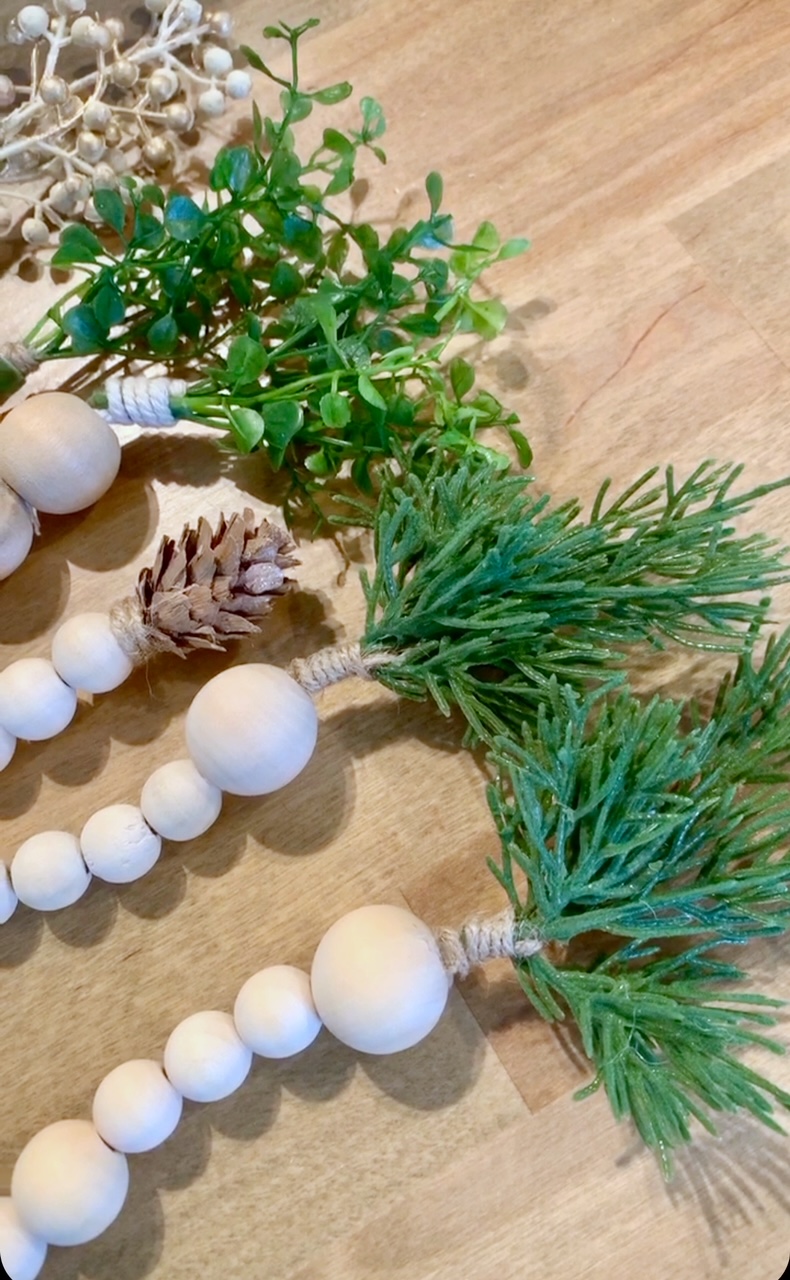
Hear me out...what if we ditched the tassels on our farmhouse decor beads for let's say... a puff of greenery...or berries...or pinecones? Well, that's what I did for these DIY Christmas Beads and I'm in love! Dive into this easy Christmas DIY project and discover how to create your very own festive garland! I'll show you how in this Craft Your Own Holiday Decor Beads: Adding a Seasonal Twist post! Sharing both Christmas inspired and fall home decor beads!

*This post includes affiliate links, for more info on affiliate links visit here
Jump to:
- Decorative wooden beads: A versatile home decor staple
- Where to source wooden beads
- Playing with bead sizes and patterns
- Twine and cluster creations
- Crafting the perfect finish
- Step by step instructions
- Embrace the seasons: Fall-inspired beads
- Explore 10 creative variations with wooden beads
- Discover more inspiration
- Curious About Tassels? Check This Out!
- Holiday Crafting Inspiration
Decorative wooden beads: A versatile home decor staple
Wooden beads have been a beloved element in home decor for years. In fact, wood bead blog posts have been circulating since as early as 2016! These versatile pieces have found their way into countless farmhouse-style homes, and it's easy to see why. Whether draped across your mantel, hanging gracefully from shelves, or coiled around a cherished vase, they add a touch of rustic charm. They perfectly complement your coffee table tray and offer a cozy ambiance to any space.

Where to source wooden beads
For this project, I grabbed a great bead kit from Amazon (or a craft store), featuring various sizes of wooden beads and twine. Some of the beads received a coat of white chalk paint, while others remained in their natural state. To facilitate the stringing process, I relied on a small piece of tape to secure the twine to a toothpick. This ingenious trick ensures the beads slide on effortlessly.

Playing with bead sizes and patterns
Creating your own DIY wood bead garland offers a world of creativity. Mix and match bead sizes to craft captivating patterns. I often alternate between larger beads and smaller beads, planning out different arrangements. This results in bead strands measuring around 20" - 24" in length. And don't hesitate to add your personal touch through paint or stain to match your desired aesthetic.

Twine and cluster creations
When it comes to twine, I typically opt for jute or sometimes even cooking string. For those charming holiday clusters at the end, I've chosen faux Christmas greens, berries, and even petite pinecones. This step is where your creativity shines! Look for items that can be transformed into delightful clusters.
Crafting the perfect finish
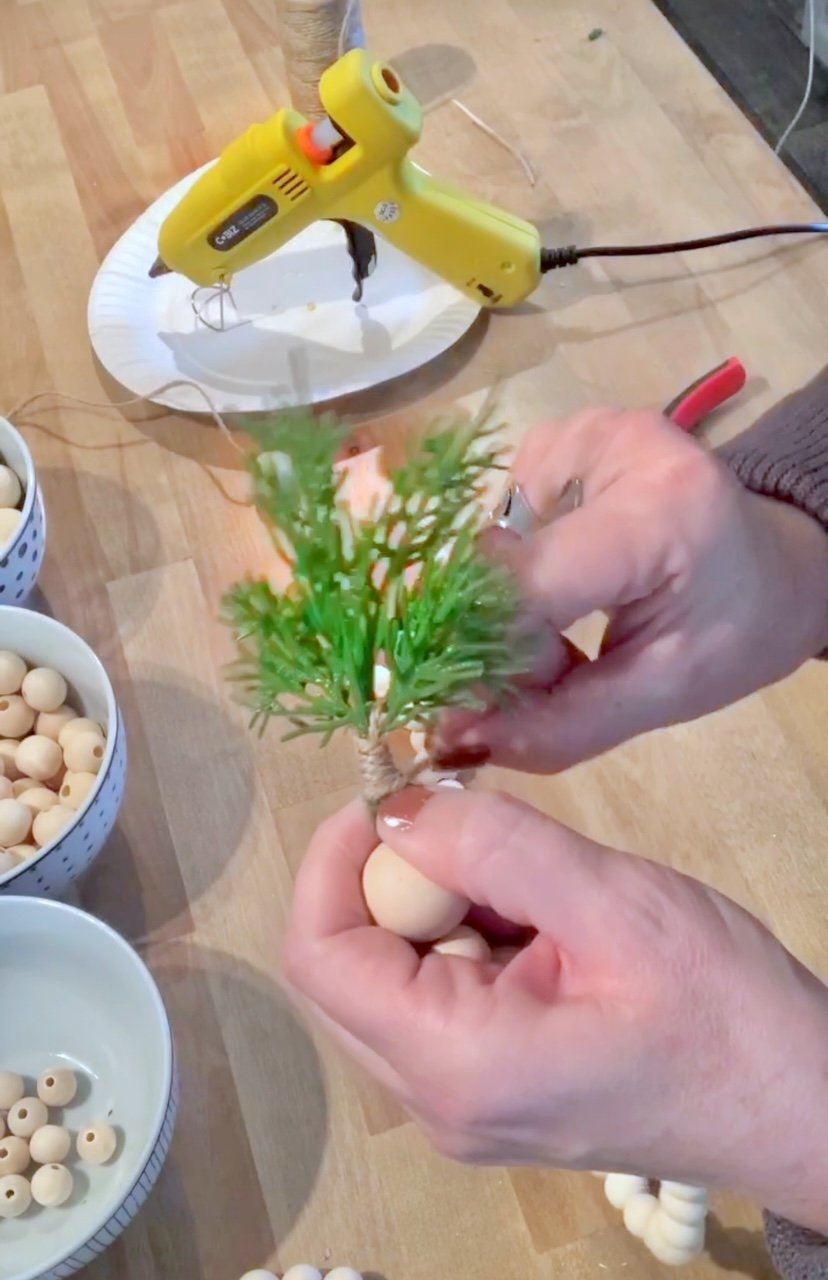
With your beads strung and approximately 6" of twine left on both ends, it's time to add those eye-catching clusters. Trim the stems of your chosen greens or berries and position them within the last bead's hole. Wrap the twine through the cluster and use a glue gun to secure it, ensuring a polished look. You can find a helpful video demonstration of this process here.
Step by step instructions
Follow these simple instructions to craft charming and versatile wood bead decorations that will add a rustic touch to your home decor.
Materials you'll need:
- Unfinished wood beads in various sizes
- Baker's twine, jute, cooking string, or your choice of string (you may also use thin floral wire)
- Toothpick
- Tape
- Paint or stain (optional)
- Faux Christmas greens, berries, pinecones, or other decorative elements (best purchased at a craft store in stems - you do not need a lot!)
- Glue gun and glue sticks
- Scissors
- Wire cutters (optional)
1: Prepare your beads:
- If desired, paint or stain your wooden beads to match your color scheme. Allow them to dry completely before proceeding.
2: Stringing the beads:
- Cut a length of twine or jute to your desired garland length, leaving a few inches of extra length on each end for tying knots.
- Secure one end of the piece of string by tying a knot or attaching it to a toothpick using a small amount of tape. This will help the beads slide on more easily.
- Begin stringing the wooden beads onto the twine, alternating between different size of beads and creating patterns as you go. You can create a pattern, such as large-medium-small or any arrangement that appeals to you.
3: Adding clusters:
- Once you've strung your desired number of beads, leave approximately 6 inches of twine on both ends. This will allow space for adding decorative clusters.
- Gather your faux Christmas greens, berries, or other decorative elements into small clusters.
- Trim the stems of the cluster with scissors or wire cutters to your desired length, making sure they fit within the hole of the last bead.
- Position the cluster in the hole of the last bead and wrap the extra twine up through the cluster.
- Use your glue gun with hot glue to secure the twine and hold the cluster in place. Carefully wrap the twine around the stems to cover them completely.
- Allow the glue to dry completely before moving on and decorating with your holiday decor beads.
Embrace the seasons: Fall-inspired beads
Inspired by the success of these Christmas beads, I ventured into crafting fall-inspired versions. Using the same method, I swapped the Christmas clusters for delightful fall elements such as wheat, leaves and fall greenery.
Explore 10 creative variations with wooden beads
- Wood Bead Ornaments: Create charming wood bead handmade ornaments by stringing beads in various sizes and patterns, and adding a twine loop for hanging. Paint or stain the beads to match your holiday theme and personalize your Christmas tree ornament.
- Wooden Bead Wreaths: Fashion a rustic wreath using a wire frame and stringing wood beads around it. Add greenery, berries, or a bow for a festive touch.
- Wood Bead Star: Form a decorative star shape using larger wooden beads. Paint or stain them to your desired color and hang it as a rustic accent on your tree or wall.
- Wood Bead Garland with Felt Balls: Incorporate colorful felt balls into your bead garland for a playful and vibrant twist. Alternate between wood beads and felt balls or try different patterns for a fun pop of color.
- Pom Pom and Wood Bead Garland: Combine the charm of pom poms with wood beads to create a whimsical pom pom garland. String alternating pom poms and beads for a delightful texture.
- Snowflake Wooden Bead Garland: Craft a winter-themed garland by adding wooden snowflake ornaments to your beaded garland. Use a mix of wood beads and snowflakes for a frosty look.
- Beaded Napkin Rings: Transform smaller wooden beads into elegant napkin rings. Paint or stain the beads to match your table setting and secure them around folded napkins with twine.
- Wood Bead Candle Holders: Glue wood beads onto the surface of glass or ceramic candle holders to add texture and interest. The result is a unique and charming candle centerpiece.
- Wood Bead Tassel Garland: Combine the best of both worlds by incorporating tassels along with wood beads in your garland. Alternate between tassels and beads for a boho-chic effect.
- Wood Bead Plant Hangers: String larger wooden beads onto twine or jute to create stylish plant hangers. Hang your favorite potted plants from these rustic hangers for a natural look.
Tip: mix and match these variations, experiment with different sizes and colors of beads, and let your creativity flow as you customize your wood bead projects to suit your style and preferences.
Discover more inspiration
If you're in search of beautifully made bead strands featuring exquisite tassels, I highly recommend visiting my talented friend Angie's website, Ruffled Nest Decor. She offers an array of bead styles at fantastic prices.
Curious About Tassels? Check This Out!
For those intrigued by the art of tassel-making, I've got you covered right here in this great tutorial! Dive into the world of tassels and explore yet another avenue of creativity.

Holiday Crafting Inspiration
Transform your home into a festive wonderland with these creative DIY holiday projects from my collection:
- Create stunning natural beauty with a dried fruit garland that adds both visual interest and delightful seasonal aromas to your space
- Master the simple technique for crafting yarn Christmas trees that bring a touch of handmade charm and cozy texture to mantels and tabletops
- Elevate your holiday décor with an elegant Pottery Barn-inspired pinecone garland that looks designer but costs significantly less
Each of these budget-friendly tutorials includes easy-to-follow instructions that will help you create professional-looking decorations to enjoy all season long. Get crafting and make this holiday your most creative yet!
Thank you for joining me for this Craft Your Own Holiday Decor Beads: Adding a Seasonal Twist post. As you embrace this easy tutorial, feel free to explore different bead patterns, bead sizes, and seasonal variations. Let your imagination run wild and create unique pieces that perfectly match your home decor. And remember, whether adorned with tassels, clusters, or your preferred embellishments, these wooden bead garlands are a fantastic addition to your festive decorations.
I'd love to see your beautiful creations. Share your DIY wood bead ornaments, garlands, and other fun projects in the comments below. Happy crafting, and may your holiday season be filled with joy and creativity! And if you're looking for more festive diy projects and inspiration, don't miss my Mod Podge Photo Transfer: An Easy Laser Printer Method post that I use on some holiday breadboards-it's brimming with Christmas magic!