

One-Day DIY Updated Fireplace With Shiplap Overmantel
We put off this fireplace makeover for way too long! I had to do some serious convincing when I first suggested painting the red brick, but once my husband saw how a simple white paint job gave this dated focal point new life, he was totally on board! From there, an upgraded shiplap overmantel to play up the farmhouse charm took things to the next level.
In just ONE day using materials from the home improvement store and my step-by-step DIY guide, see how we created a showstopping, modern-yet-cozy new heart of the home overmantel for only $225. I'm so in love with this transformation and you will be too!
Dive into the details and prepare to get inspired to DIY your own fireplace fabulousness faster than you can imagine!

*This post includes affiliate links, for more info on affiliate links visit here
Jump to:
- About this Post
- Why choose a shiplap overmantel for your one-day fireplace update?
- Our fireplace dilemma: Too much wall, not enough wow
- About overmantels
- Building our shiplap overmantel for this DIY updated fireplace
- Quick tips to nail your one-day fireplace makeover
- Tools and materials
- One-day DIY process: Installing your overmantel
- Frequently asked questions
- Decorating our fireplace update
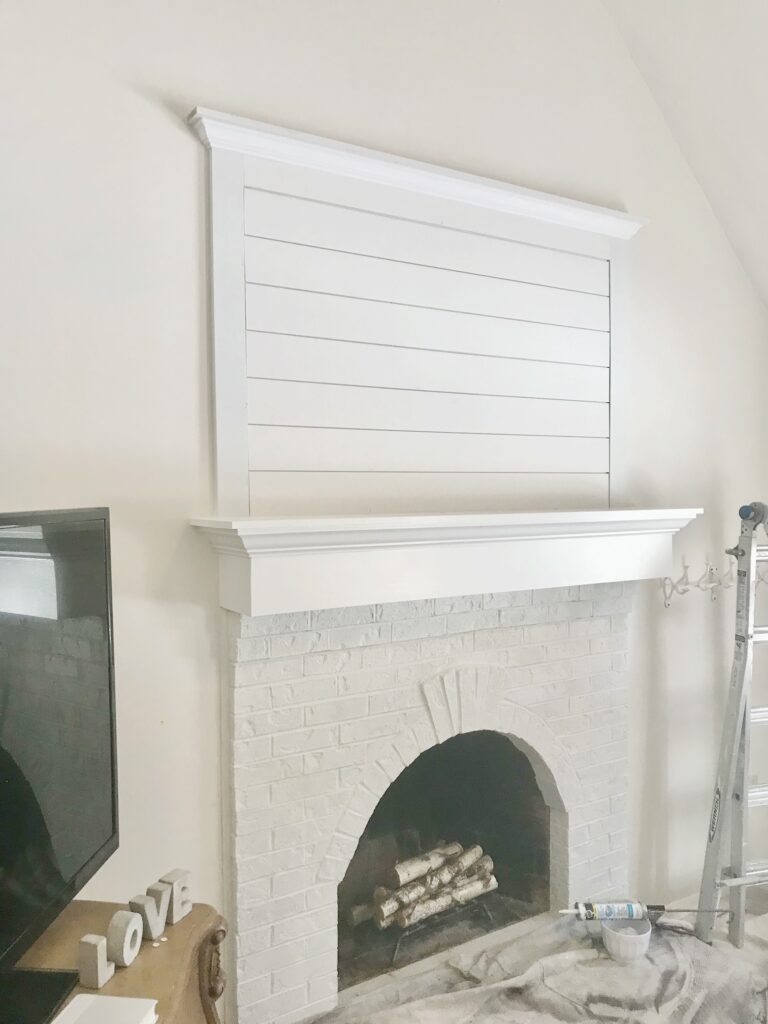
In its original state, the space featured a conventional brick fireplace with a modest mantel (first photo). Our revamped version unfolded across two projects: painting the brick and expanding the mantel. The second project, highlighted in this post, showcases the addition of a shiplap overmantel in just one day.
About this Post
In a previous post, DIY Painted Brick Fireplace Before and After (with new DIY Mantel) I covered painting the brick and how we built a new mantel. In this post, One-Day DIY Updated Fireplace With Shiplap Overmantel, I'm focusing on our one-day shiplap overmantel build which was the last step in one of my favorite DIY projects to date!

Why choose a shiplap overmantel for your one-day fireplace update?
Let's talk about why shiplap is such a great choice for a quick fireplace makeover. First off, it's super trendy right now. Shiplap has that modern farmhouse look that everyone's loving, but it's also classic enough that it won't go out of style anytime soon.
But looks aren't the only reason to go with shiplap. Here's why it's perfect for a one-day project:
- Easy to install: Shiplap boards are designed to fit together easily. Even if you're not a DIY pro, you can get the hang of it pretty quickly.
- Instant character: Those horizontal lines add instant texture and interest to your fireplace. It's like an instant facelift for your living room.
- Versatile: Shiplap works with all kinds of decor styles. Paint it white for a clean, modern look, or go with a wood tone for a more rustic vibe.
- Affordable: Compared to some other fireplace updates, shiplap is pretty budget-friendly. You can get a big impact without spending a ton.
- Quick to paint: If you're using pre-primed shiplap (which I totally recommend), it's super quick to paint. One or two coats and you're done.
- Covers imperfections: Got an old, not-so-pretty wall above your fireplace? Shiplap is great for covering up those little flaws.
- Makes the room feel bigger: The horizontal lines can actually make your room feel wider. Bonus!
In our case, we were dealing with a big blank wall above our fireplace. The shiplap overmantel filled that space perfectly and tied the whole fireplace together. It took our fireplace from "meh" to "wow" in just a few hours.
So if you're looking for a way to update your fireplace that's quick, easy, and looks amazing, a shiplap overmantel might be just the ticket. Trust me, you'll be so glad you did it!
Our fireplace dilemma: Too much wall, not enough wow
This mantel sits on the outside wall of our living room. Our cozy white living room has a cathedral ceiling that at its highest point measures approximately 18 feet high. Due to the high ceiling, the builders of our home built a fireplace that sits higher than the norm. According to this informative article by www.pickHvac.com the average mantel height is 52-56 inches from the floor. Our mantel was built 66 inches off the floor to assist in making the fireplace in scale with our high ceilings.
Even with this higher-than-usual fireplace, there was still a significant amount of wall space above the mantel that looked off and was quite frankly hard to fill. This is where our idea to add a panel - or overmantel came in. We wanted to extend the fireplace with a more substantial, decorative look that would fill in the odd empty wall space and put the finishing touches on our previous outdated fireplace.

About overmantels
I'll be the first to admit that I had never heard the term "overmantel." I had always described ours as an over-the-mantel panel but overmantel makes sense. The basic definition of an overmantel is "a decorative structure or an ornamental panel situated above a mantelpiece" and with a little research, I learned these date back to Europe where they were seen in more ornate homes.
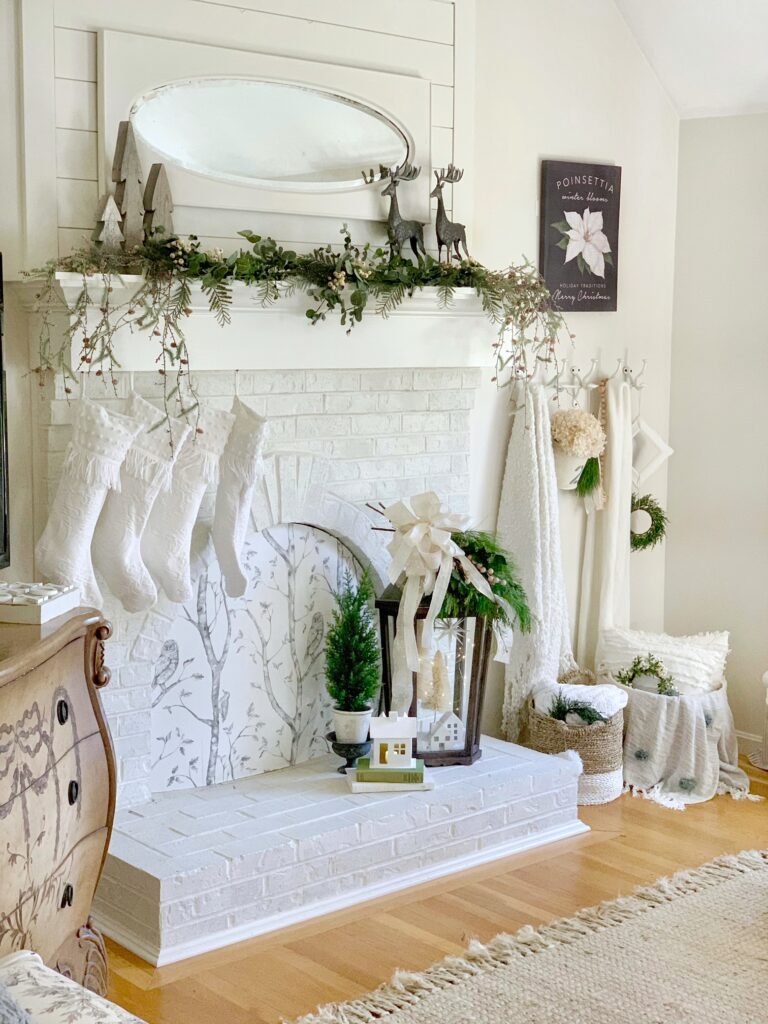
Overmantels can be made of wood like ours, stone or tile, or plaster. Some are elaborate, and some are simple with a smooth finish which gives a more contemporary look. All are made to enhance a home and become a beautiful focal point of your living space. Mirrors continue to be a popular choice to add to an overmantel as they match everything and can make a space look larger.

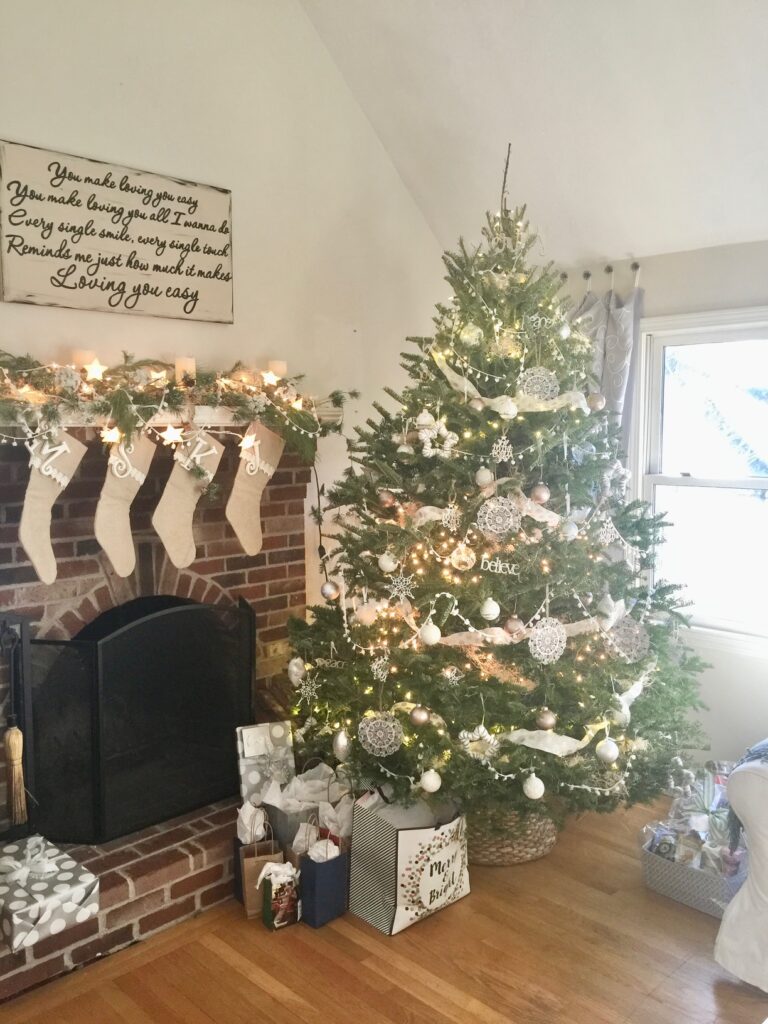
Paintings are another common choice and in today's age, many have flat-screen TVs hung from overmantels. Sconces are often added to overmantels as well. Below is our fireplace decorated for Christmas with my DIY candle sconces.

Regardless of what you choose to hang on your overmantel, the fact remains overmantels help make your mantel more decorative and define the space.
Building our shiplap overmantel for this DIY updated fireplace
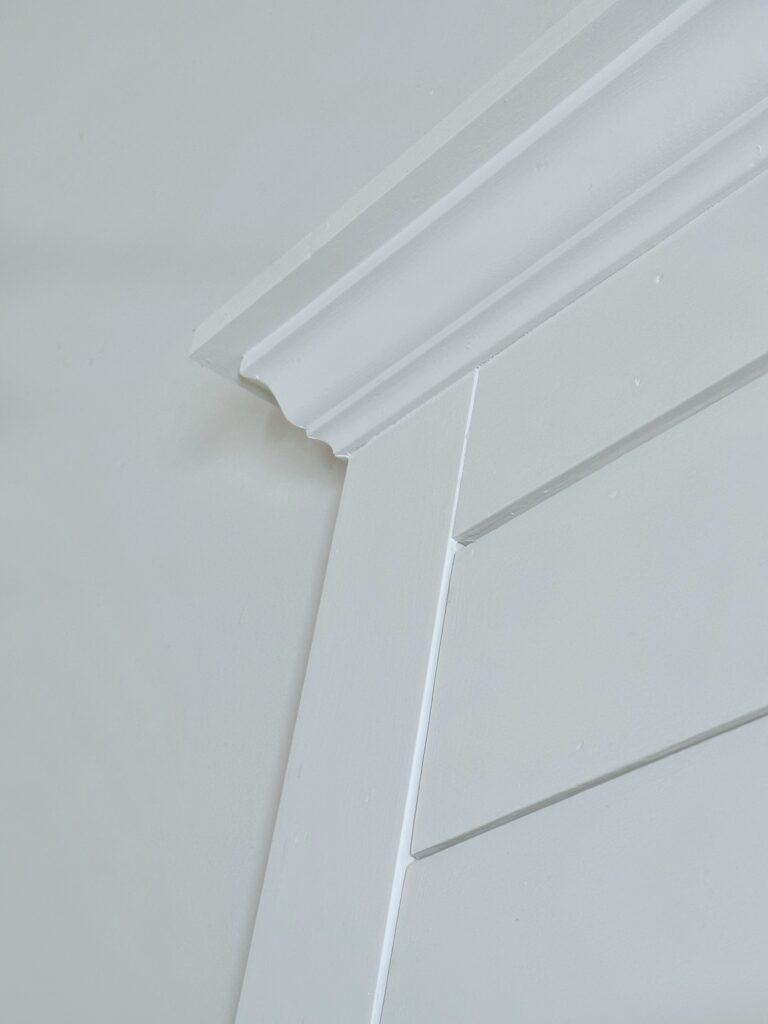
With our red brick fireplace painted and the extended mantel done, we moved to the overmantel starting with shiplap. We decided we wanted the width of the panel to match that of the mantel base (box below the decorative top). To do so the first step was to plan the width of the panel frame and then cut the shiplap to fit that frame. Below is a photo of the finished overmantel to show how the overall width aligns with the box and the top of the mantel extends beyond both the box and the panel. You can also see we designed the decorative crown molding on the top of the panel to line up with the mantel top.

The width of the frame is 3.5″ (x's 2) and the length of the shiplap boards measures 56″ resulting in the entire panel measuring 63″ (frame +shiplap+frame). The crown molding with the decorative flat piece is 69" long.
Quick tips to nail your one-day fireplace makeover
Alright, let's talk about keeping this project to one day. Trust me, it's totally doable, but a little prep goes a long way. Here are some tips to keep you on track:
- Measure twice, buy once: Nothing slows you down like realizing you're short on materials. Double-check those measurements before you hit the store.
- Pre-paint your shiplap: If you can, paint your shiplap boards the day before or buy already primed boards. It'll save you drying time on project day.
- Clear the area: Move furniture and lay down drop cloths the night before. You'll thank yourself in the morning.
- Fuel up: Make sure you've got snacks and drinks on hand. Coffee is a must!!!
- Charge those tools: Nothing's worse than a dead battery mid-project. Charge everything the night before.
- Have a helper: An extra set of hands can be a game-changer. Bribe a friend with pizza if you need to.
- Do a tool check: Make sure you've got everything you need before you start. A last-minute hardware store run is a real time-suck.
- Plan for pizza: Seriously, order delivery for dinner. You won't want to cook after a day of DIYing.
- Accept "good enough": Don't get hung up on perfection. Remember, caulk and paint hide a multitude of DIY sins!
- Start early: The earlier you start, the more relaxed you'll feel. Plus, you'll have better light for most of the day.
Follow these tips, and you'll be admiring your new fireplace with a cold beverage in hand by sundown. You've got this!
Tools and materials
Tools:
- Ladder (we used a gorilla ladder)
- Drop cloth
- Tape measure
- 48" level
- Miter Box Saw
- Safety goggles
- Nail gun (finish)
- Finish Nails
- Paintable Caulk
- Caulking gun
- Painters putty
- Quart of paint ( we used Benjamin Moore latex paint - Chantilly Lace)
- Paint can opener
- Painters bucket tray
- Paint brush
Materials:
(note: We recommend you go to your local lumber store to hand select the best boards you can find)
- 7- 1 x 6 x 8ft Primed Shiplap
- 2 - 1 x 4 x 8ft Primed pine boards
- 1 -2 ¾" x 8ft Crown molding
- 1- 1 x 4 x 8ft Primed pine boards top piece
Tip: if you decide to buy boards that are not primed, plan to prime them before painting.
One-day DIY process: Installing your overmantel
Prepping your fireplace for a one-day shiplap makeover
- Clear the mantel and lay down a drop cloth to protect the floor.
- Set up your ladder and gather your tools.
- Set up the miter box (we tend to cut outside. Be sure to remember your safety goggles)
- Measure and make your cuts on the Miter box starting with the shiplap. You may decide to cut in sections (ie first shiplap, then frame, then crown molding). Our mantel and the overmantel crown molding measure 69" across. The shiplap panel (with the frame) measures 63". The overall height of our overmantel is 42".

Building your overmantel:
- Using your level as a guide and starting directly on the mantel, begin installing the shiplap. Attach the shiplap to the wall using your finish nail gun. Place a nail through the top and bottom of each shiplap board. Below you can see the progression of the shiplap installation.


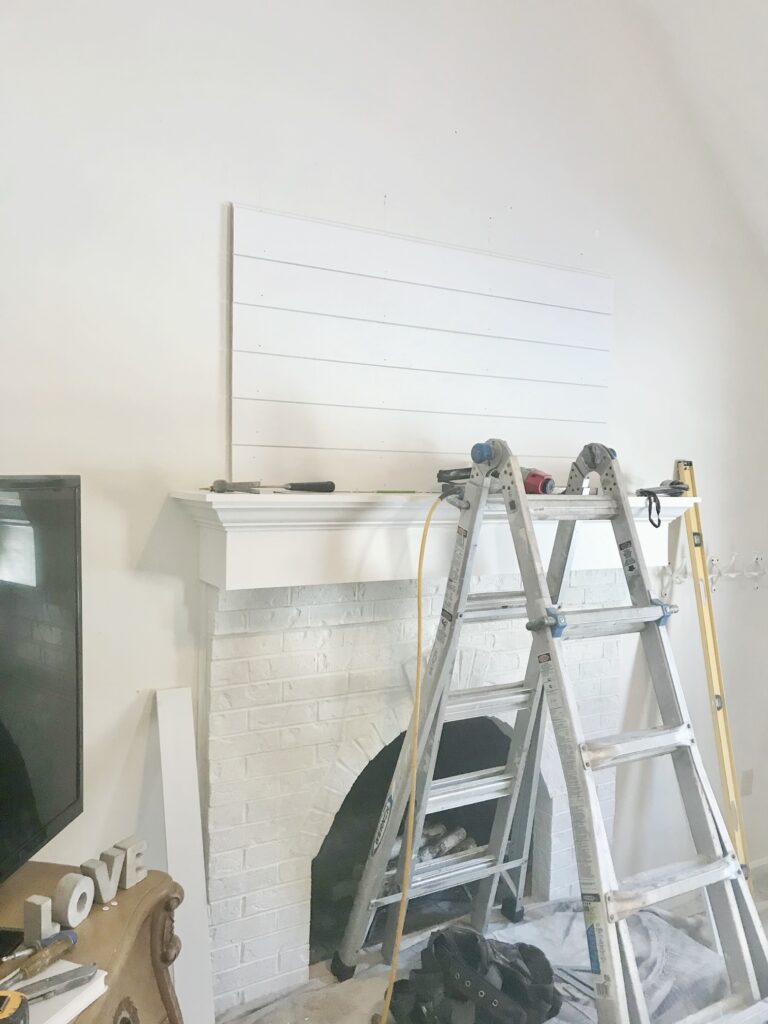
- Once the shiplap has been installed move to the frame. Use the 1 x 4 x 8ft Primed pine boards and cut them to fit around the shiplap panel. Extend the top portion of the frame to have a base to attach the crown molding. We used scrap pieces of 1 x 4 x 8ft Primed pine boards to build this extension to cut costs. (see the second photo below)


- Next move to the crown molding. We plan to devote an entire post to DIY crown molding. In the meantime, Home Depot has you covered in this post that includes videos.


Time to paint:
- Fill the nail holes with painter's putty, and use a wet rag to wipe off the excess. If needed sand the putty once it has dried.
- Seal the seams and around where the overmantel meets the wall with caulk. We use a caulking gun and a wet rag to remove the excess. Let dry.
- Using a paint brush paint the overmantel with two coats of latex paint, allowing the first coat to dry before moving on to the second coat. We used Benjamin Moore interior latex paint in semi-gloss. This is the same paint we used on the brick and new mantel. It is also the same paint that is on our living room woodwork.

Frequently asked questions
This overmantel cost us roughly $225.00. I find the best way to save a lot of money is to get creative with your supplies. You could create a very cool overmantel with simple stick tiles, they come in so many patterns. You could also do a very simple frame for your fireplace facelift. Another idea is to do a wallpaper or paint accent wall above your mantel. Even a small change can have a big impact and the end result will be beautiful!
Well, Pinterest of course! There's tons of inspiration and lots of overmantel design options. Visit my fireplace makeover ideas board for inspiration.
You can choose a different color than white paint. We have off white walls in our living room but a wall color that pops would make the fireplace stand out more. For ease, you could use a paint sprayer to apply your paint. Learn more about paint options in my painted brick fireplace post.
Shiplap is a great option because it adds just enough texture without being too busy. I love the overmantels which are simple panels with an open space in the middle for a mirror or art. You could also install bead board for a cottage style look. Regardless of the style and design element, adding an overmantel can give a big impact on your existing fireplace.
Decorating our fireplace update
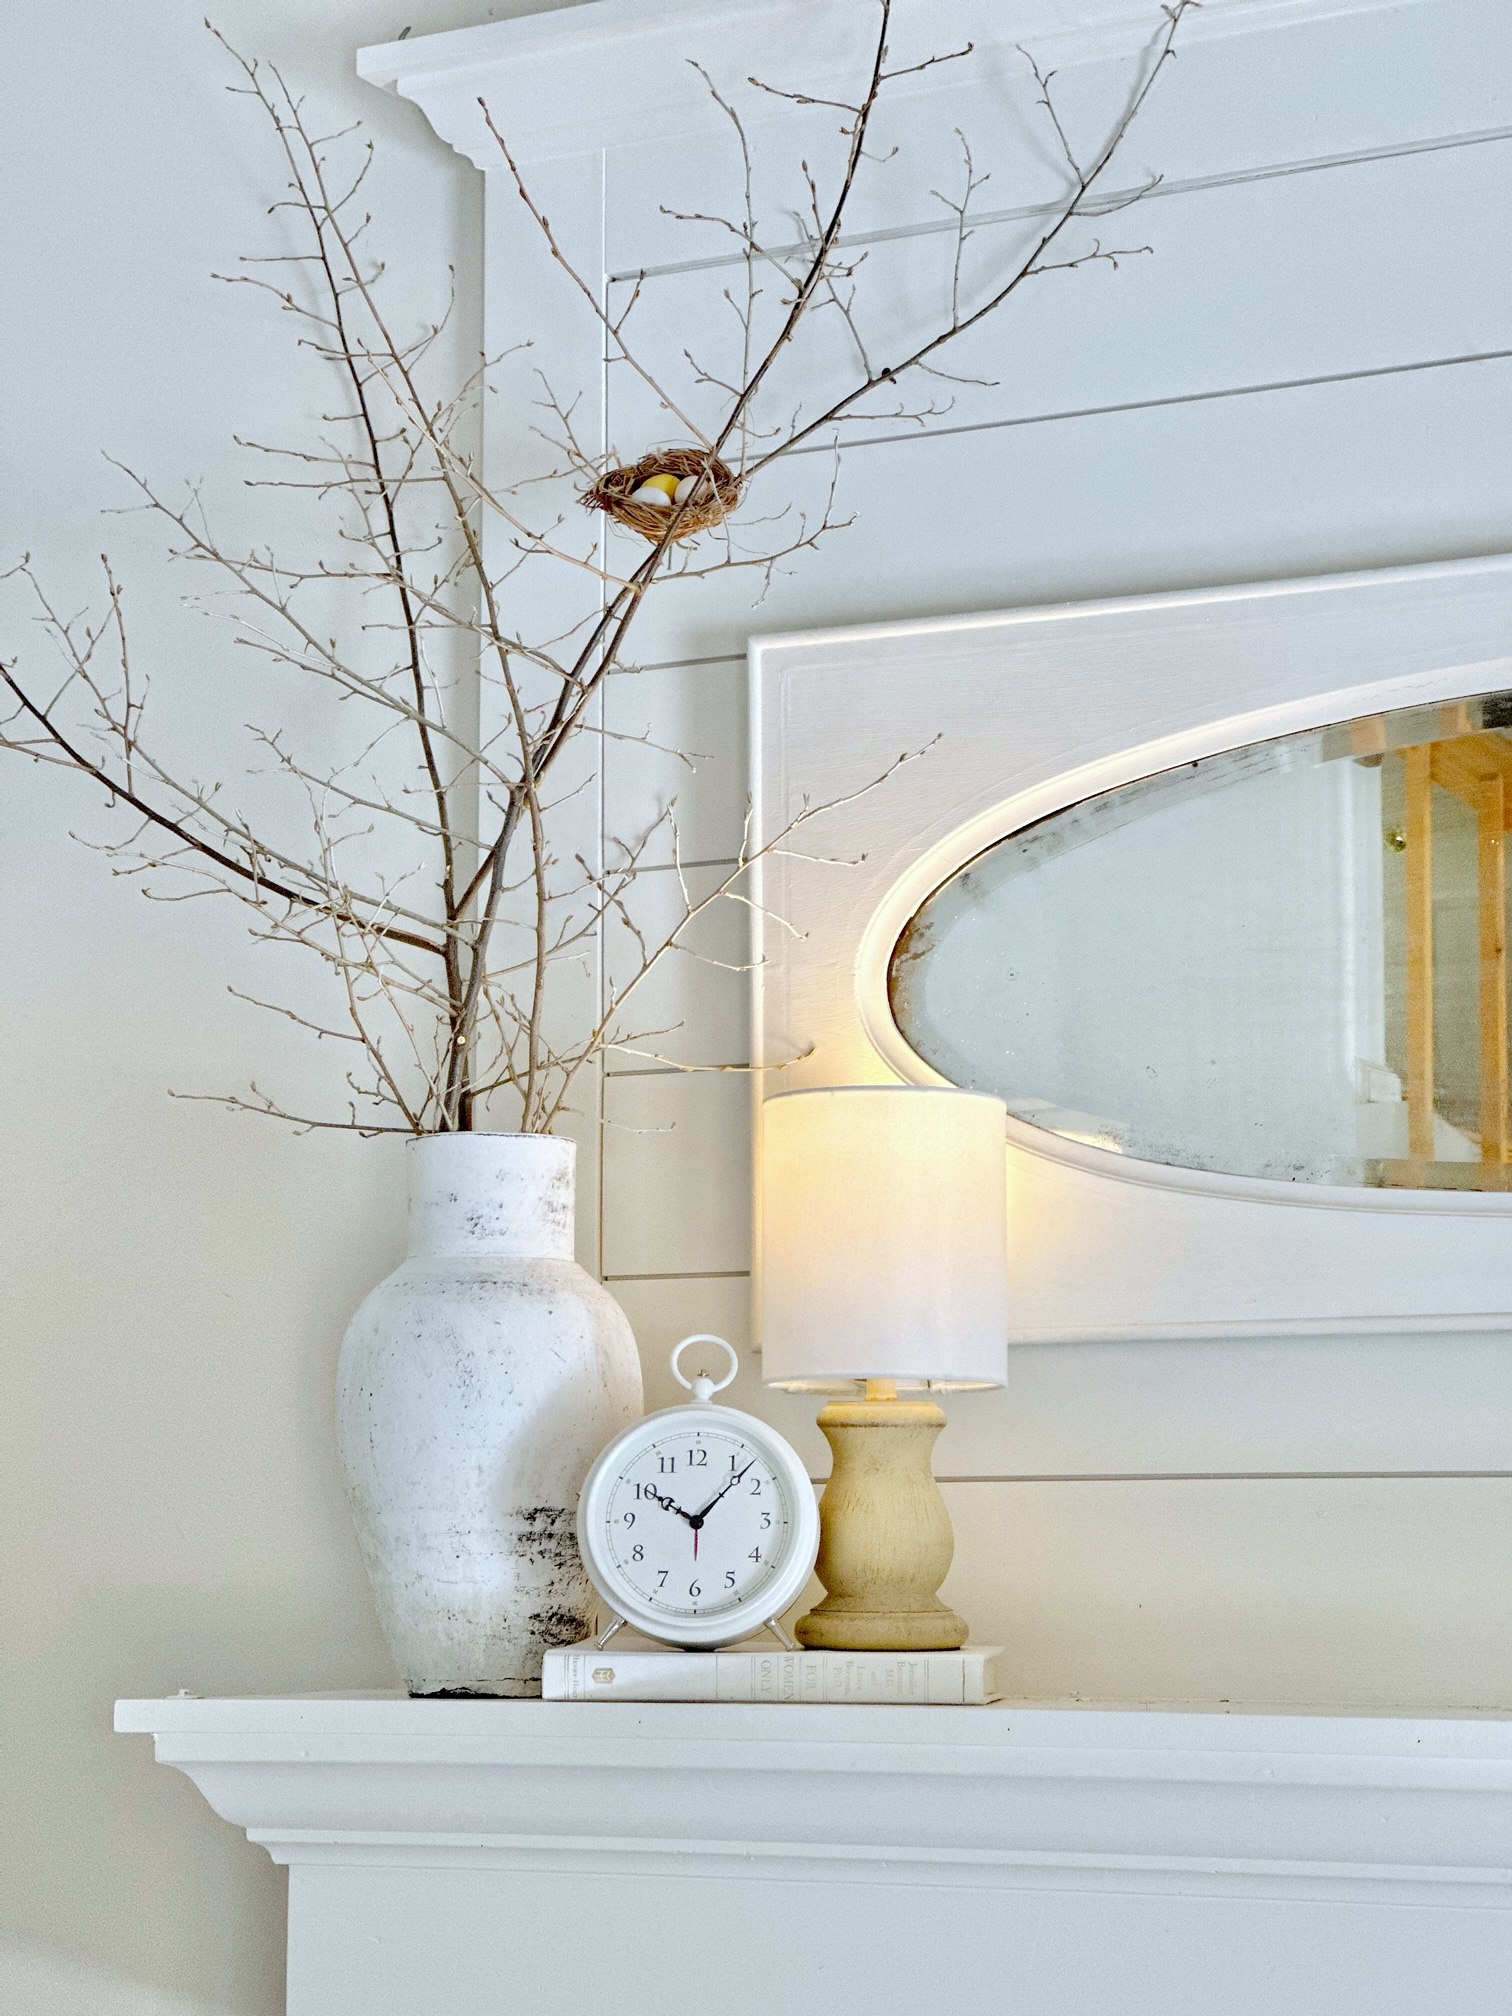
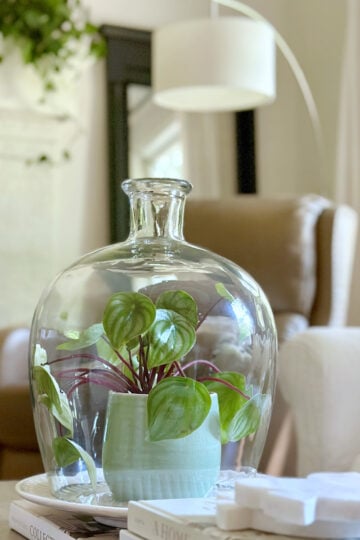
This newly revamped fireplace is one of my favorite places to decorate. I DIY'd this fireplace cover board with wallpaper and love the way it looks. Don't worry it slides right off for when we want to use the fireplace! On the raised hearth I typically put fun storage baskets holding firewood and our dog's toys. On the mantel, I will often use a collection of candles, book stacks and plants or flowers. This heavy antique mirror stays put and I have fun decorating around it.

Make sure to explore these additional posts crafted to cultivate a cozy living room:
Creating a Cozy and Inviting White Farmhouse Living Room:
Explore the art of crafting a warm and inviting white farmhouse living room with expert advice and decor inspirations shared on Celebrated Nest. Delve into practical tips and creative ideas to create the perfect cozy atmosphere for your home.
12 Of The Best DIY Blanket Storage Ideas to Keep Your Living Room Cozy and Organized: Discover 12 of the Best DIY Blanket Storage Ideas to Keep Your Living Room Cozy and Organized! From blanket ladders to cabinet storage, explore creative solutions that not only add style to your space but also ensure easy access to your favorite blankets. Get tips on choosing the right throw blankets for your decor and learn how to keep them fresh while in storage.
Thanks for following along as we revamped our builder grade fireplace and gave it a whole new look. This space has come a long way and with a few simple changes we have made a huge difference to this space! This ugly duckly fireplace has transformed into a beautiful fireplace and we couldn't be happier!
Thanks for visiting the blog today for this One-Day DIY Updated Fireplace With Shiplap Overmantel post! Please leave any questions you have in comments.
Keep creating friends!


Where can I get that cordless lamp? I went to Amazon, they all look like they have cords.
Thank You
Paula
Hi Paula,
You can buy any lamp and just remove the cord!