

Laser Print Onto Wood: How to Transfer Images (No Special Paper Needed)
Want to transfer a laser print onto wood without buying special supplies? This simple method uses a regular laser printer, Mod Podge, and printer paper to create a vintage-style image transfer on wood. I'm also sharing tips for smoother results and common mistakes to avoid.
Content may contain affiliate links. When you shop the links, we receive a small commission at no cost to you. Thanks for supporting my small business.
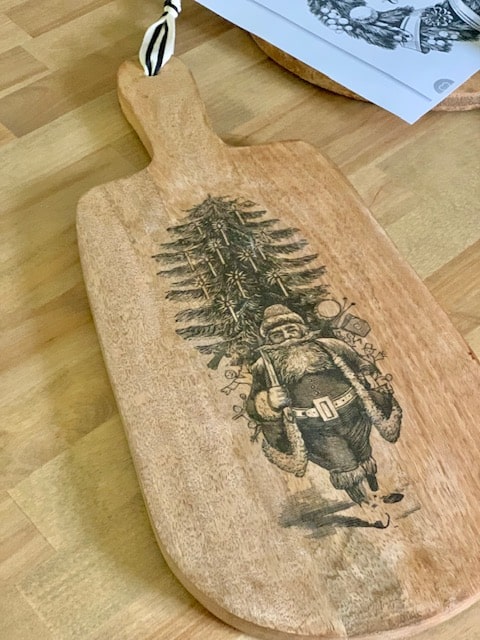
I'm excited to share with you a surprisingly simple way to transfer images from paper to your project using an easy laser print onto wood method. This straightforward technique has completely changed my approach to image transfers, allowing me to create stunning projects like vintage Christmas breadboards.
For the longest time, I shied away from image transfers, thinking they required specialized transfer paper and a complicated process. Then, I discovered this easy laser printer image transfer method, and it was a game-changer!
In this project, I chose to transfer vintage-inspired Christmas images onto breadboards. These breadboards with holiday image transfers, were on my crafting agenda and are a perfect addition to my holiday vintage booth.
At a Glance: Laser Print onto Wood
_______________________
- No special transfer paper needed
- Uses a regular laser printer and standard printer paper
- Mod Podge helps bond the image to the wood surface
- Best results come on smooth, sanded wood
- Let the transfer dry fully before removing paper
- Remove paper gently with a damp sponge or cloth
- Great for signs, decorative boards, gifts, and DIY projects
- Troubleshooting tips can help if part of the image lifts off
Summarize and Save this content on:
Jump to:
- At a Glance: Laser Print onto Wood
- Why you will love this image transfer project
- About Mod Podge
- Supplies needed for this bread board project
- Discovering budget-friendly breadboards
- Selecting images
- Printing with a laser printer
- Preparing the images
- Applying the image to the breadboard
- Removing the paper
- Sealing the transfer (optional)
- Adding a finishing touch
- Ideas for decorating with breadboards
- Frequently asked questions
- More Creative Holiday Craft Ideas
- More easy holiday DIY's to try
Why you will love this image transfer project
- No Iron or Heat Needed: Unlike some image transfer methods that require heat or ironing, this technique doesn't involve any complicated equipment or potential hazards.
- Home Printer and Regular Paper: You can create stunning image transfers using your regular home laser copier and standard copy paper. No need for laser printer transfer paper or special equipment or materials.
- Quick and Easy: This image transfer method is refreshingly quick and hassle-free. You can achieve impressive results with a few simple steps, without spending hours on the process.
- Beginner-Friendly: Whether you're a crafting newbie or an experienced DIY enthusiast, this technique is accessible and suitable for all skill levels.
- Versatile Surfaces: This method works on a variety of surfaces, from breadboards to wooden trays and beyond, allowing you to explore different projects with ease.
- Minimal Supplies: With just a few basic supplies like Mod Podge, a laser printer, and some copy paper, you can dive right into this project.
- No Need for Fancy Transfer Paper: You don't have to hunt for or invest in special transfer paper; the beauty of this method lies in its simplicity.
- Cost-Effective: This technique doesn't require expensive materials or tools, making it a budget-friendly way to enhance your home decor.
About Mod Podge
Mod Podge is one of those craft supplies I always keep on hand. It works as both a glue and a sealer, which makes it perfect for all kinds of DIY projects. Think of it as the go-to for decoupage, image transfers, and anything that needs a smooth, protective finish. It comes in a bunch of finishes like matte, satin, and glossy, so you can choose the look that fits your project best. Whether you're sticking paper, fabric, or photos to wood or glass, Mod Podge gets the job done. It's affordable, easy to use, and honestly feels a little like crafting magic. I use it all the time, from simple decor projects to fun seasonal crafts like my decoupage pumpkins.
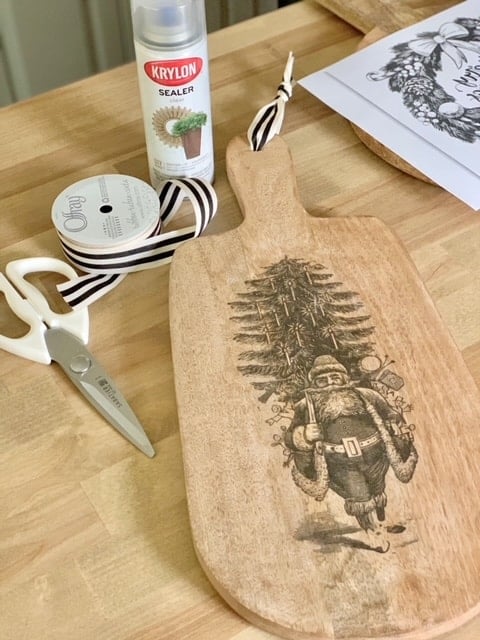
Supplies needed for this bread board project
Here's what you will need:
- Breadboard (Similar)
- Laser printer (This is the model I have)
- Copy paper (regular paper)
- Free black and white graphic (see resources below)
- Mod Podge (also available at your local craft store)
- Krylon sealer (optional)
- Kitchen sponge
- Paintbrush or foam brush
- Scissors
- Ribbon
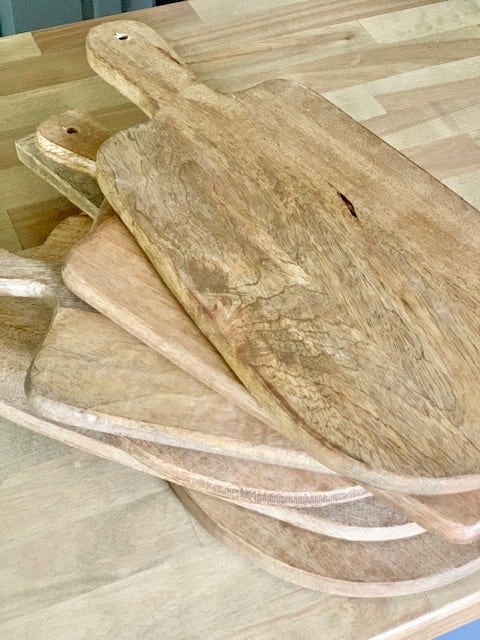
Discovering budget-friendly breadboards
I stumbled upon these breadboards at a local surplus store, and they came at a fantastic price. Crafted from wood, these boards were already cut, sanded, and had a poly finish. After drilling a hole in the handle using a ⅜" drill bit, they were ready for my creative touch. With three different styles available, I decided to get two of each, offering a variety of six options in my booth.
Selecting images
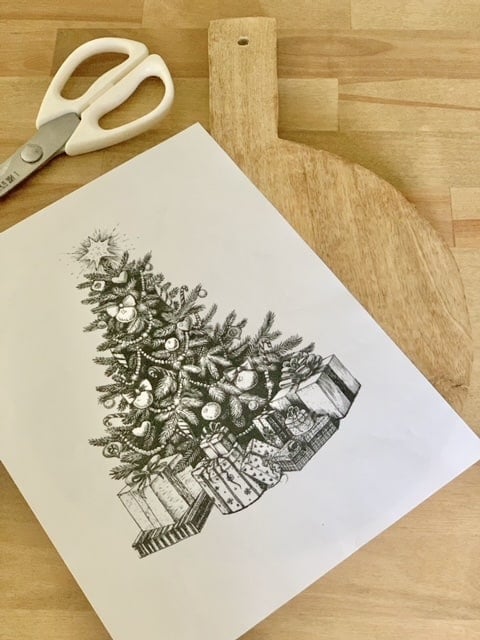
To find suitable images, a quick Google search for "Free black and white vintage Santa image" provided plenty of options. I wanted an old look for each board so I did the same for Christmas trees and wreaths. I also recommend checking out Karen at The Graphics Fairy for fabulous free images. Etsy is another excellent source for beautiful paid images. You can even explore Pinterest for more inspiration.
Tip: Look for images that are black and white and have very clear lines. These seem to transfer best.

Printing with a laser printer
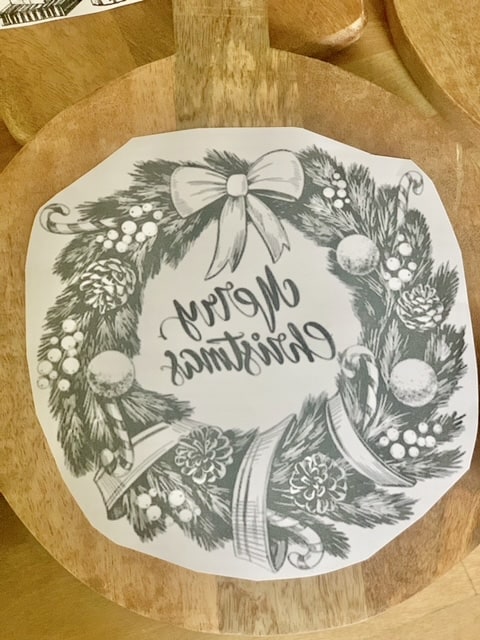
For this method, I used my trusty laser printer and general copy paper. What's fantastic about this technique is that you don't need fancy laser printer transfer paper or trips to a copy center; you can do it right from home. One crucial step to remember is that if your image contains text (like the wreath image I used), you must reverse it. Failing to do so would result in backward text on the breadboard. Here's an article on creating mirror images. I find it quite easy to achieve on my iPhone.
Note: I had originally read that this application only works with a laser printer, however, I have since learned you may use an inkjet printer as well.
Preparing the images
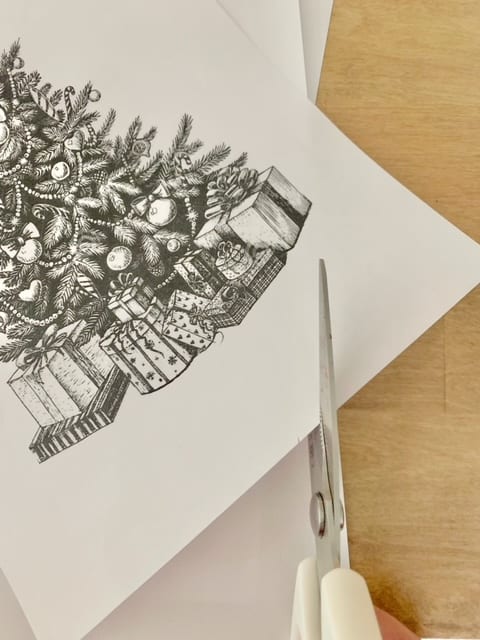
Once your photocopied image is printed, carefully trim the excess paper around the entire image using scissors.
Applying the image to the breadboard
With a regular Mod Podge and a paintbrush (or sponge brush), coat the image itself. Next, flip the image face and center it on the breadboard, using your fingers (or a credit card works well!) flatten the print and remove any bubbles. The goal is to ensure full contact between the image and the board's surface. Afterward, let the Mod Podge-covered image dry on the breadboard overnight.
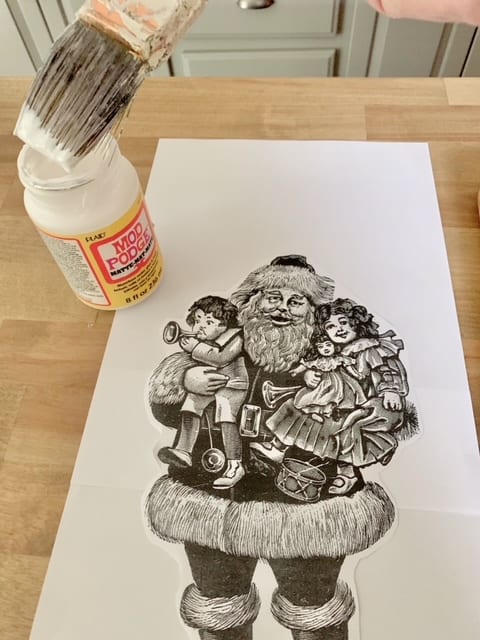
After the transfer has been cut, place it on a protective surface to avoid damaging your work area. I'm using an extra piece of copy paper.
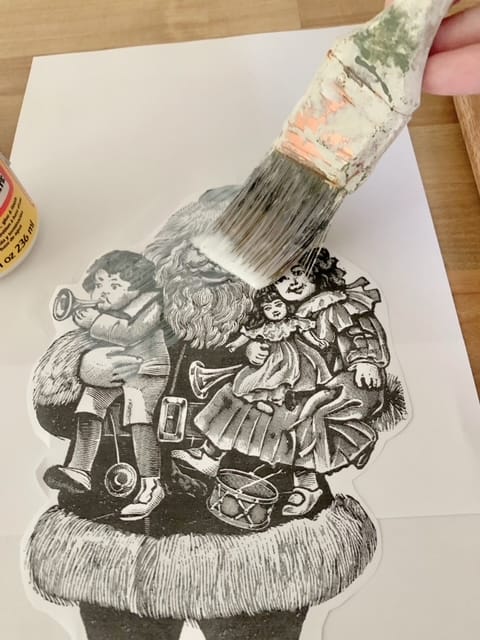
Paint a light and even layer of Mod Podge directly on the image.

Here is the image covered with thin cost of Mod Podge ready to be applied to the bread board.

Flip the image and apply it to the bread board. With you Fingers (or a credit card) smooth to get the air bubbles out.
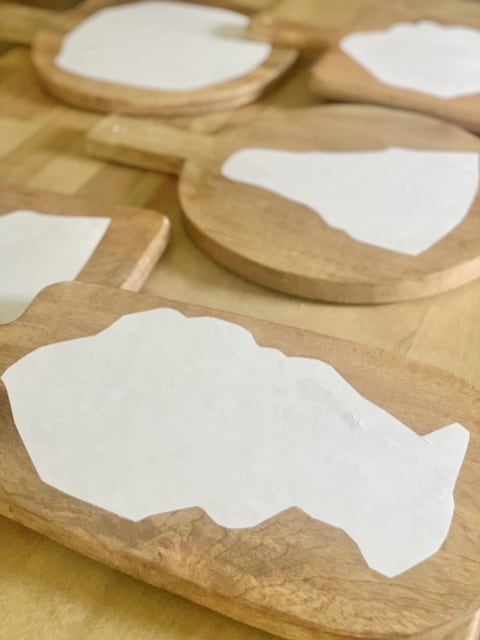
Once the images have been applied, leave them overnight to dry.
Removing the paper
After the paper has dried overnight, we move onto removing the paper leaving just the image on the boards. Removing the paper is simpler than you might think. Start by wetting a kitchen sponge and pressing it against the back of the image to soak it. As you soak, the image becomes clearer.
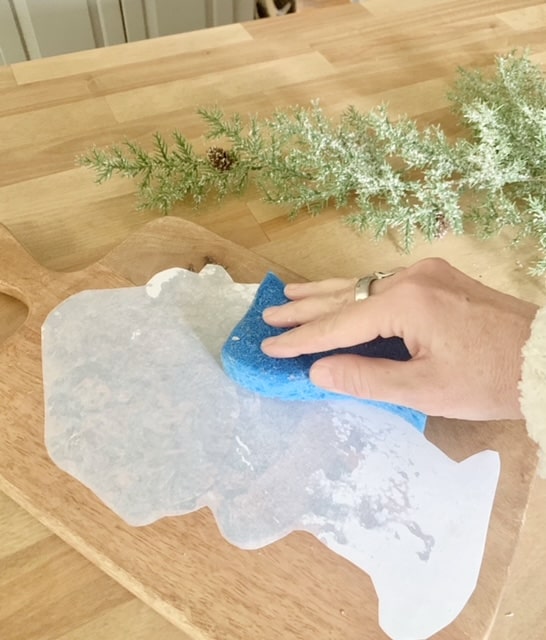
After the image is soaked, the next step is to flip your sponge to the scrub side and lightly and I mean LIGHTLY run the sponge over the paper in a circular motion. You will find that the paper comes off in tiny rolls while the image stays. Be very careful to not push too hard or the image may lift with the paper. You can also use a dry paper towel or just your fingers to roll the paper off.

After the image is wet and you can see it through the paper, flip the sponge over to the scrub side.

Wet the transfer and gently rub it using the rough side of a sponge. As you do this, you'll notice the paper backing starting to come off. Use your fingers or a paper towel to carefully remove any loose paper bits. Continue rubbing gently, focusing on areas where paper remains. Keep at it until all the paper is gone, leaving only the transferred image behind. Remember to be patient and gentle throughout the process to avoid damaging the transfer.
After all the paper is removed, you'll find the image perfectly transferred onto the bread board. Did I mention that Mod Podge is magical?
Tip: You can repeat the wet sponge and rub process again if need be.
Sealing the transfer (optional)
For added protection, you can seal the image transfer using Krylon spray Sealer in clear. Give it a quick sweep, wait for it to dry (approximately 30 minutes), then applied a second coat. Since the can doesn't indicate its food grade/food safe, I marked these breadboards as "For decorative purposes only - not food safe."
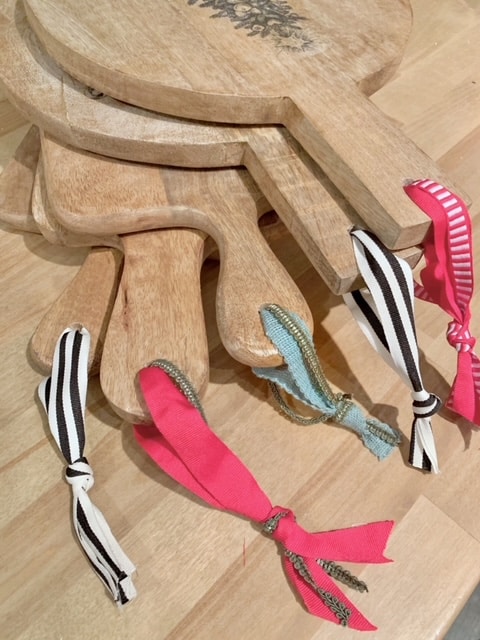
Adding a finishing touch
To complete these decorative breadboards, I attached various ribbons to the handles. By slipping the ribbon through the hole and tying a slip knot, a charming finishing touch!
Ideas for decorating with breadboards
There are endless creative ways to display your charming breadboards, each offering a unique and captivating way to showcase their rustic allure in your living space.
- Place them against the backsplash of your kitchen counter.
- Stack a collection of breadboards against your backsplash.
- Style kitchen shelves with breadboards.
- Use them as risers to hold vases or plants.
- Display them on a wall for a beautiful decor statement.
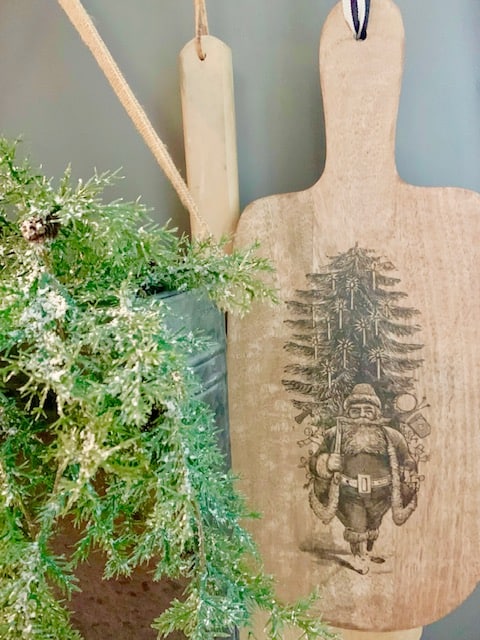
- Hang them from hooks, as shown below as decor for the end of my kitchen island.
Frequently asked questions
No, while a laser printer is commonly used, you can also use an ink jet printer for this process.
Nope! Just regular printer paper works perfectly fine for this technique. More than likely you have the right materials in your home!
While the method is most effective with black and white images, you can experiment with colored images as well.
If your image contains text or needs to appear in the correct orientation, it's important to reverse it before transferring, if there's no special orientation you can just lay the paper image side down.
You can repeat the wetting and rubbing process until the paper residue is fully removed.
Absolutely! This versatile technique can be applied to various hard surfaces, including wood, ceramics, glass, and more. See this image transfer on some chalk-painted clay pots below.
Absolutely! For best results use a special formula called Mod Podge Photo Transfer Medium, specially designed for transfer photocopies of special photos to various surfaces.
For those who follow me on Instagram, you might recognize this process, as I used it to transfer French-inspired prints onto chalk-painted clay pots. The transferred image on this paint finish gives these pots a vintage feel! You can watch the process for these french-inspired clay pots here.

More Creative Holiday Craft Ideas
Looking for more festive DIY projects to brighten your home this holiday season? Check out these popular craft tutorials from my blog:
- Make a unique and whimsical book tree using old pages and a simple folding technique - perfect for mantels, bookshelves, or gifting to your favorite book lover
- Create a meaningful advent wreath centerpiece with candles, greenery, and decorative accents - a beautiful and symbolic addition to your holiday table
- Follow step-by-step instructions for making charming yarn Christmas trees that add cozy texture and warmth to any holiday display
- Find out how to transform ordinary dried fruits into a stunning natural garland that fills your home with subtle seasonal fragrance
These beginner-friendly projects use affordable materials while creating beautiful results that will impress your holiday guests.
More easy holiday DIY's to try


I hope you've found this easy laser printer image transfer guide helpful and easy to follow, it's one of my favorite projects. With a few simple steps you can create your own timeless artwork. If you have any questions, please leave them in the comments below. Don't forget to explore my White and Green Christmas home tour for more holiday inspiration and for more craft projects visit my Handmade Home Accents Page.
Happy crafting friends!


I've followed your directions to a tee and the paper is removed only so much before it takes the image with it.... I've tried various mediums like acrylic medium and still nothing. I'm transfering laser print to wood. Please advise...
Hi Tony, thank you for sharing this, and I’m sorry it’s been frustrating.
You’re definitely not alone, this part of the process can be a little nuanced, especially on wood surfaces. In many cases, when part of the image lifts, it usually comes down to one of a few things: the wood being too porous or rough, the transfer not drying long enough, too much moisture at once, or rubbing a bit too firmly during paper removal.
Wood can be trickier than painted surfaces because it tends to absorb product differently.
A few things I’d suggest trying:
Make sure the wood is sanded smooth first
Let the transfer dry a full 24 hours if possible
Use a barely damp sponge instead of a wet one
Remove paper slowly in light passes instead of all at once
Let it dry again between passes if needed
I’m also adding a short video to the post that shows exactly how I do it, which may help a lot.
If you'd like, feel free to email me directly and I’d be happy to troubleshoot with you one-on-one and help figure out what’s happening with your specific project. Stephanie@celebratednest.com
Hi Tony, I just added a short step-by-step video to the post that shows exactly how I do the transfer process, including the paper removal stage. You should now see it in the article (2nd video that is sitting under the "Jump to" box) In this video I am putting the transfer on a flower pot. I hope that helps, and if you still run into trouble, feel free to reach out and I’d be happy to help troubleshoot further.
I'm confused, you said to modpodge the image ,lay down and take out all bubbles ,then you say take the image and put it in a safe place and modpodge the front ?
Hello, Sorry for the confusion! The steps are:Paint a light coat of Mod Podge on the image, flip the image onto the bread board and smooth the back of the image to get any bubbles out. Once the image is on the board and the bubbles smoothed out, thats when you put the board aside to dry overnight. Please let me know if you have any other questions!
I was wondering if this transfer is still possible using an inkjet printer? Love how easy this is and how it turns out, but I thought I have read no with inkjet because ink sits on top and smears off.
Hi Debbie, I have yet to try it with an ink jet but my research says yes! If you try it let me know!