How to Distress Furniture with Chalk Paint: The Only Technique You Need!
Looking for an easy way to get that perfectly aged, vintage finish? This simple method uses wax as a resist under chalk paint to create a naturally distressed look. Whether you use distressing wax or grab a candle from the junk drawer, this approach is beginner-friendly and surprisingly effective. No harsh sanding, no complicated steps, just a beautiful timeworn finish made simple.

Content may contain affiliate links. When you shop the links, we receive a small commission at no cost to you. Thanks for supporting my small business.
Jump to:
- What is distressing and why do people do it?
- Essential tips
- Why chalk paint for distressing?
- Unveiling waxes
- Keeping the underlying color in mind
- Beware of bleed-through: Tackling common painting woes
- Step-by-step guide
- Tools and supplies with this easy wax technique
- Step-by-step instructions
- Mastering the sanding process
- Placing distressing marks
- Post-distressing waxing
- Troubleshooting tips
- Maintaining your distressed furniture
- Frequently asked questions
- More furniture painting techniques and inspiration
What is distressing and why do people do it?
Distressing furniture is a technique used to make new or refinished pieces appear older and well-used. This process involves intentionally creating wear and tear on the furniture's surface, often by sanding away paint or stain in specific areas. People choose to distress furniture for several reasons: it adds character to a piece, creates a vintage or antique look, and can help new items blend with older decor.
Distressing is particularly popular in farmhouse, shabby chic, and rustic design styles. It's a practical way to add visual interest to plain furniture or to make a new piece look like it has a history. Additionally, distressing can be an effective method to camouflage minor imperfections in second-hand or well-used furniture.
Essential tips
In this brief overview, we present the one foolproof technique for distressing chalk paint furniture, offering simplicity and effectiveness. For those seeking a straightforward approach, this section provides the essential details, while the full post explores each aspect in greater depth.
- This foolproof technique for distressing chalk paint furniture is the only one you need.
- Distressing chalk paint furniture involves using distressing wax or candle wax as a resist medium beneath the chalk paint.
- Chalk paint is preferred for distressing due to its matte finish and ease of distressing compared to other paints.
- Consider the underlying color of the piece when distressing; painting the entire piece or just the desired areas can achieve the distressed look.
- Using a lower grit sandpaper or sanding block gently helps distress chalk paint, with a less-is-more approach being ideal.
- Focus distressing on areas prone to wear and tear, such as edges and corners, for a natural look.
- Applying wax or a clear coat after distressing provides protection and enhances the finish of the distressed furniture.
- Troubleshooting tips address common issues encountered during distressing, such as uneven distressing or sticky wax.
- Bleed-through, caused by tannins in wood, is common when painting with white or light colors and can be addressed through proper techniques.
- Proper preparation and techniques are crucial for successful distressing and achieving the desired vintage look.
Why chalk paint for distressing?
Why does chalk paint reign supreme when it comes to distressing furniture? Well, chalk paint isn't just any old paint - it's practically made for distressing. Its unique composition and texture lend themselves perfectly to achieving that coveted weathered look. You see, chalk paint has this magical quality that allows it to distress with ease, creating those charming imperfections that give furniture character.
What sets chalk paint apart is its matte finish, which acts as the perfect canvas for distressing techniques. Unlike glossy paints that can be stubborn and unforgiving, chalk paint welcomes distressing with open arms, making the process smoother and more enjoyable. So, if you're looking to distress furniture like a pro, chalk paint is your trusty sidekick.

Tip: While chalk paint is the preferred choice for distressing due to its matte finish and ease of sanding, you can also use other paint types for a distressed look. Latex paint, milk paint, or even regular acrylic paint can work, though they may require different techniques or additional steps. For latex or acrylic, you might need to sand more aggressively or use a paint stripper in some areas. Milk paint naturally chips and flakes, creating a unique distressed effect. Remember, regardless of the paint type, always test your distressing technique on a small, inconspicuous area first to ensure you achieve the desired effect before tackling the entire piece.
Unveiling waxes
You don't always need fancy specialized waxes for distressing. A good old wax candle can work wonders, believe it or not. But if you're in the market for something extra special, there's one standout: the wax from Country Chic Paint.

Crafted from beeswax, this eco-friendly marvel not only smells delightful but also boasts a chemical-free formula that's gentle on both you and the environment. Plus, it won't break the bank, making it a practical choice for your distressing adventures.
But here's the real magic: These waxes form a barrier between your piece and the chalk paint, creating the perfect foundation for distressing. With this resist medium in place, distressing with sandpaper becomes an absolute breeze. So, whether you opt for a classic candle or indulge in the Country Chic Paint wax, you're in for smooth sailing on your distressing journey.

Keeping the underlying color in mind
When it comes to distressing furniture, the underlying color becomes your ace in the hole. Picture this: You desire the natural wood stain to shine through in the distressed areas. What's the plan? Leave the piece as is, embracing its natural beauty. It's as simple as that.
You see, the original color of the piece plays a pivotal role in the distressed finish. If your furniture piece is currently red and you decide you want to paint it navy blue, keep in mind when you distress it the red will show through. Whether you prefer the authenticity of the wood grain or crave bold contrasts, the initial hue sets the tone for your creation. So, before you reach for that paintbrush, consider the beauty of the piece in its raw state. With a thoughtful approach to color, your distressed furniture will radiate charm and allure every time. See below as I add black paint to the furniture piece featured in this post that is painted gray.
Pro tip: You can either paint the entire piece in the tone you want to show through or focus solely on the edges where you plan to distress. Not only does this approach save you time, but it also helps you save on materials and costs!

Beware of bleed-through: Tackling common painting woes
Sometimes I feel like I'm going to be warning people about bleed-through until the end of time, possibly because I myself have been traumatized by stained wood bleeding through my beautiful white finishes in the past. But it's important!! Bleed-through, often caused by tannins in the wood, can be a real headache when painting with white paint or light colors. It's a common problem that many DIYers encounter, but fear not! I've got you covered.
If you want to dive deeper into this topic and learn how to tackle bleed-through effectively, check out my dedicated post on Painting Black Furniture White. It's packed with tips and tricks to help you achieve a flawless finish, free from the woes of bleed-through. Trust me, it's a game-changer for your painting projects!

Step-by-step guide
A. Preparation:
- Choose and Clean the Furniture Piece: Begin by selecting the furniture piece you wish to distress. Ensure it's thoroughly cleaned and free of any dust or debris. A simple wipe-down with a damp cloth should suffice.
- Decide on the Under Color (Optional): Assess whether an undercolor is needed to achieve the desired distressed effect. If so, choose a durable, adhesive paint that won't sand off easily with the chalk paint. Apply the undercolor to either the entire piece or just the areas you plan to distress. Allow the undercolor to dry completely before proceeding to the next steps.
- Select Distressing Wax, Chalk Paint Colors, and Necessary Tools: Gather your supplies. Choose your distressing wax-whether it's a traditional wax or the eco-friendly option from Country Chic Paint. Select your preferred chalk paint colors to bring your vision to life. Don't forget to procure the necessary tools, such as brushes and sandpaper, to ensure a seamless process.

B. Application:
- Begin by applying a thin layer of distressing wax or candle wax onto the furniture surface. Ensure the wax is evenly distributed across the piece for optimal distressing results.
- Once the wax is applied, it's time to paint the furniture with chalk paint. Coat the surface evenly, whether you're painting the entire piece or just the areas designated for distressing. Ensure complete coverage and a smooth finish.
C. Distressing:
- After painting, allow the chalk paint to partially dry. This stage is critical for achieving the desired distressed appearance.
- Once the paint has partially dried, proceed to distress the surface. Using the appropriate sandpaper grit, gently distress the areas where natural wear and tear would typically occur over time. This step adds character and depth to your piece, infusing it with the vintage charm you're seeking.
Tools and supplies with this easy wax technique
- Distressing wax or candle wax
- Chalk paint in your desired color (I used Dixie Belle in Driftwood)
- Sandpaper (lower grit) or Sanding block
- Brushes for wax and paint application
- Chalk paint wax
- Lint-free cloths for wax buffing
- Furniture piece to distress
- Cleaning supplies (damp cloth)
- Optional: Undercolor paint for distressing base coat
Step-by-step instructions
- Prepare the Surface:
Clean the furniture piece to remove any dirt or debris. (Optional) Lightly sand the surface with a lower grit sandpaper to create a smooth base for painting.

- Apply Base Color for Distressing (Optional)
Choose the color you want to show through the distressed areas.
Paint the entire furniture piece or specific areas where distressing is desired with the chosen base color. Below I simply painted the edges of the piece (you can be messy about it since it will be painted over.) - Apply Distressing Wax
Use distressing wax or candle wax to create a resist medium beneath the chalk paint. Simply rub a thin layer of wax evenly across the surface of the furniture piece you plan to distress.
- Paint with Chalk Paint
Use chalk paint in your desired color to paint the furniture piece.
Apply the paint evenly, ensuring complete coverage over the wax layer. You will more than likely need a second coat of chalk paint. - Allow Drying:
Allow the chalk paint to fully dry before proceeding. This stage is crucial for achieving the desired distressed look.
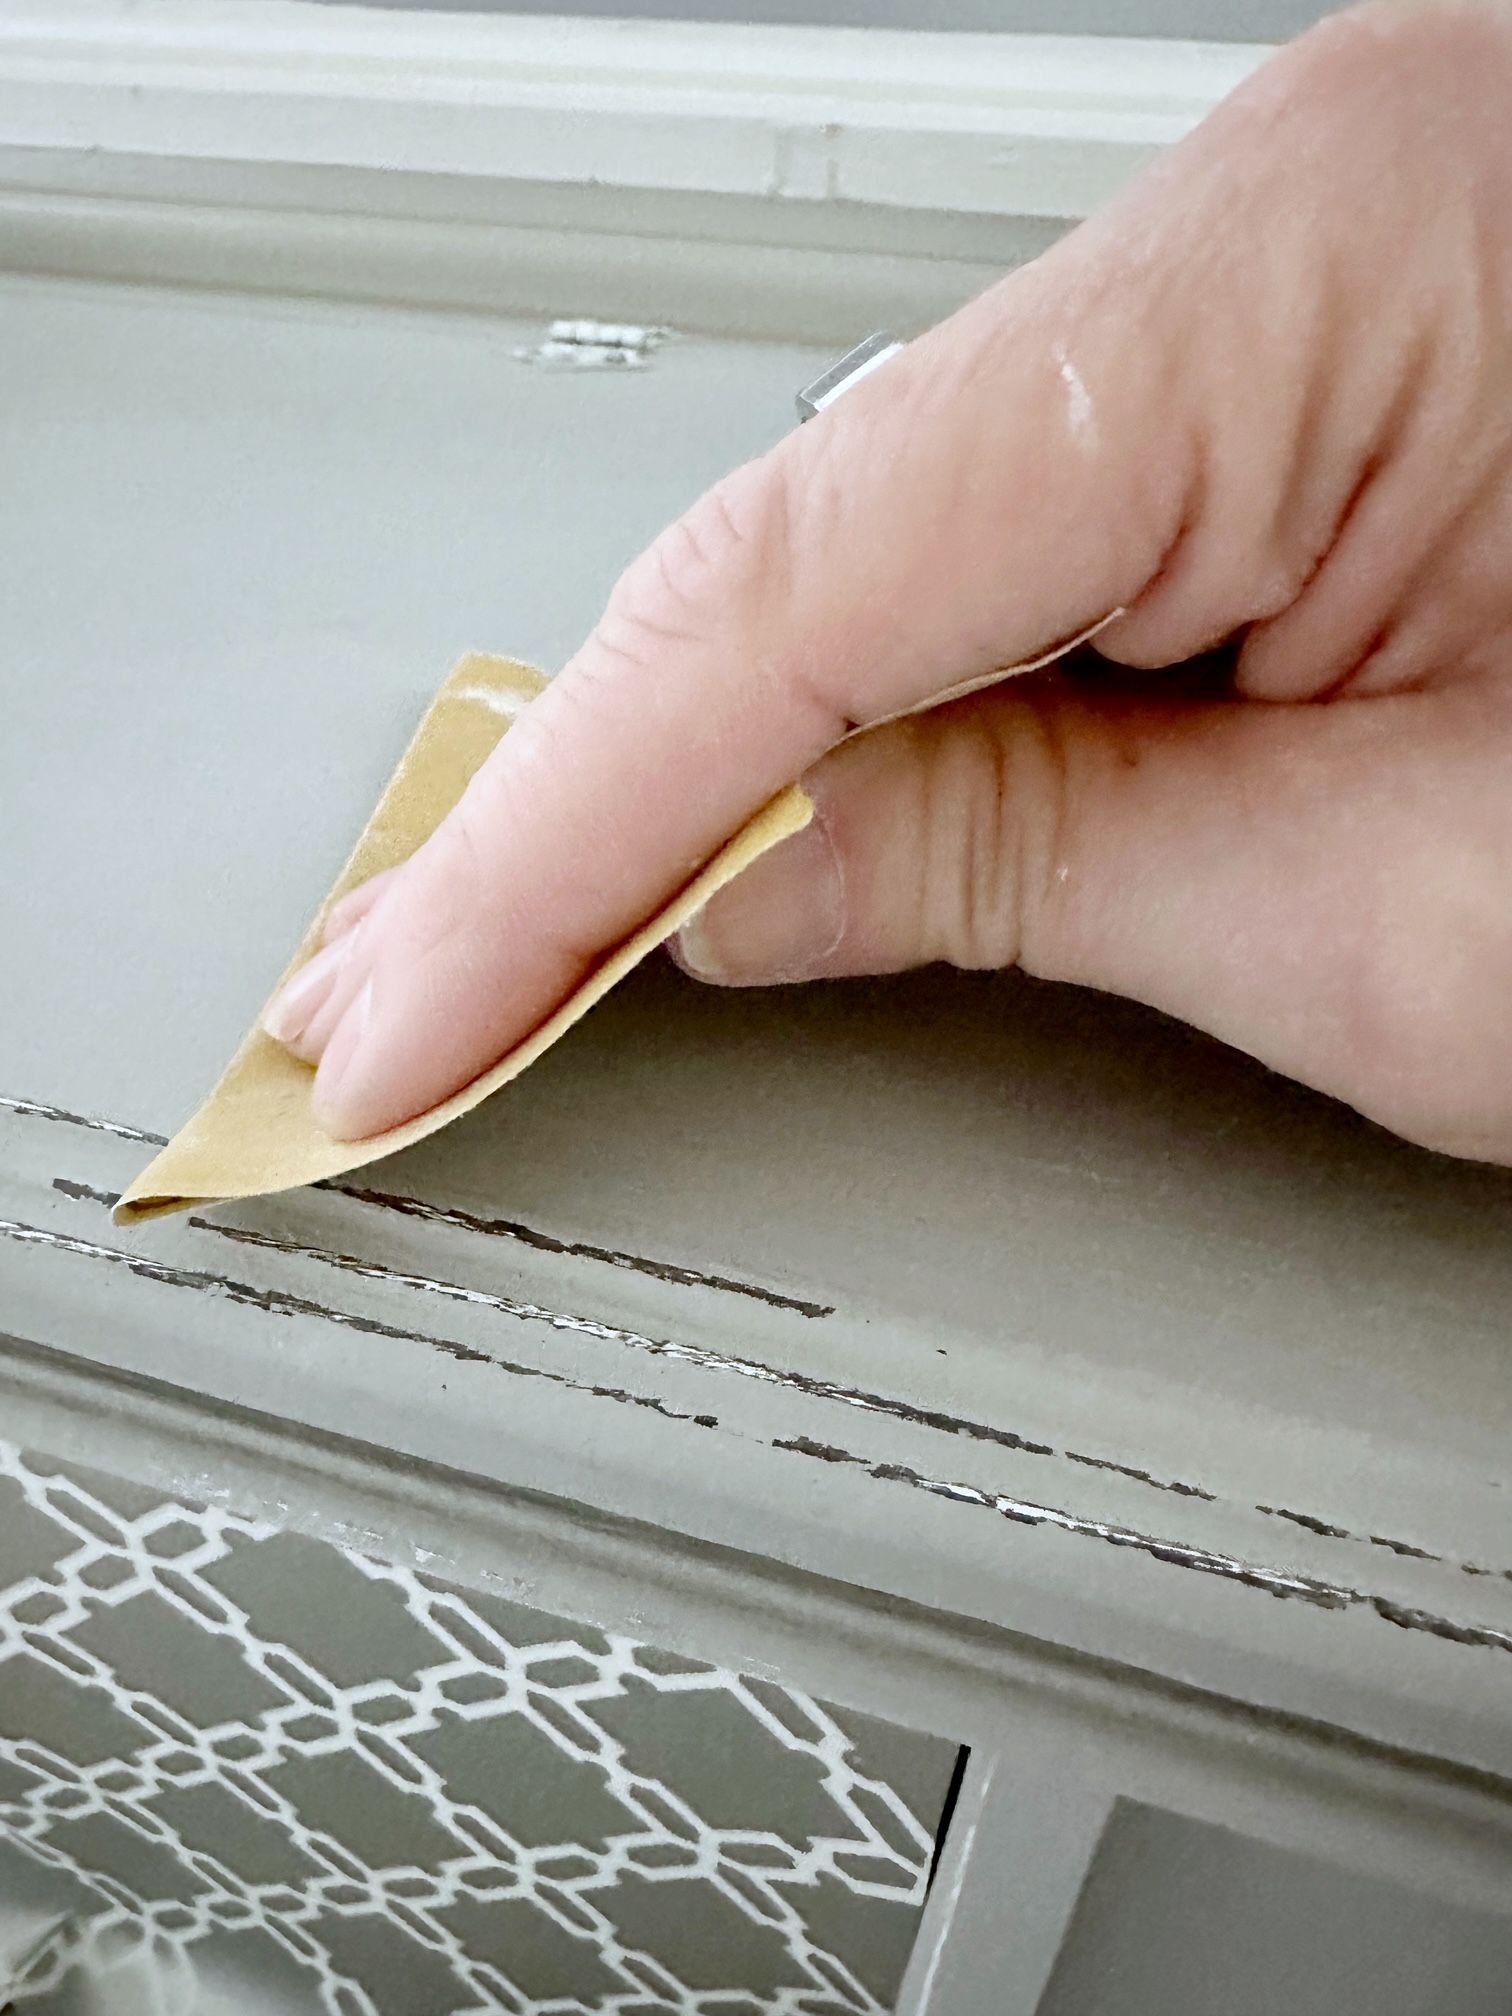
- Distress the Surface
Use a lower grit sandpaper or sanding block to gently distress the surface. Start with light pressure and build to more pressure as needed. Focus on areas that would naturally experience wear and tear, such as edges and corners.
- Buff and Seal (Optional)
Optionally, apply a clear coat or wax to seal the distressed finish and protect the painted surface. Use a lint-free cloth to buff the wax or clear coat for a smooth, finished look.
- Enjoy Your Distressed Furniture
Once the wax or clear coat has dried, your distressed furniture piece is ready to use and enjoy!


Mastering the sanding process
Sanding is a pivotal step in the distressing journey, where finesse and patience yield remarkable results. Opt for a lower grit sandpaper or a sanding block to gently coax the chalk paint into revealing the underlying beauty of your piece. Remember, it's a delicate dance, easy does it until you grasp how the chalk paint responds. In distressing, less is often more; allow the process to unfold gradually, unveiling the character of your furniture with each careful stroke.
Placing distressing marks
When it comes to distressing furniture, placement is key to achieving that natural, balanced appearance you're after. Here's your guide to getting it just right:
- Strategic Placement: Focus on areas that would naturally experience wear and tear over time. Think edges, corners, and areas where hands or objects would frequently make contact. By targeting these spots, you'll create a distressed look that feels authentic and lived-in.
- Balanced Approach: Distribute distressing marks evenly throughout the piece. Avoid concentrating too heavily on one area, as this can result in an uneven, unnatural appearance. Instead, aim for a balanced distribution that enhances the overall aesthetic of the furniture.
- Tips for Desired Effects: Experiment with different techniques to achieve your desired distressing effects. Whether you prefer subtle hints of distress or bolder contrasts, adjusting the pressure and angle of your sanding can make all the difference. Don't be afraid to get creative and trust your instincts; after all, distressing is as much an art as it is a technique.
By following these guidelines and trusting your intuition, you'll be well on your way to mastering the art of distressing furniture like a pro.

Post-distressing waxing
Now that your furniture has been painted and distressed to perfection, it's time to seal the deal with wax. Here's your step-by-step guide to post-distressing waxing:
- Choose Your Wax:
- Clear Wax: Provides a subtle sheen and enhances the natural color of the chalk paint.
- Dark Wax: Adds depth and richness, perfect for creating an antique or aged look.
- White Wax: Creates a soft, whitewashed effect, ideal for achieving a beachy or coastal vibe.
- Time to Cure:
- Allow your chalk paint to fully cure before waxing. This typically takes around 24 hours, but check the manufacturer's recommendations for specific drying times.
- Application:
- My go-to wax is Annie Sloan wax for its quality and reliability. Using a waxing brush, apply the wax in circular motions, working in small sections at a time.
- Ensure thorough coverage, especially in the distressed areas where the paint has been exposed.
- Buffing:
- After applying the wax, use a lint-free rag to gently buff the surface. This helps remove any excess wax and creates a smooth, velvety finish.
- Take your time and buff in circular motions until the wax is evenly distributed and the desired sheen is achieved.
- Curing Time:
- Allow the wax to cure for at least 24 hours before using or handling the furniture. This gives the wax time to harden and provide maximum protection to your painted surface.
Waxing isn't just about aesthetics-it also provides a protective barrier that helps prolong the life of your painted furniture. By sealing in the paint and distressing, waxing ensures a durable finish that withstands the test of time. You can learn about furniture waxing in my The Best Furniture Wax for Your Chalk Painted Pieces post where I share my favorite product and techniques.
So, grab your wax of choice and let's seal in that stunning distressed finish for a piece that's sure to turn heads!

Troubleshooting tips
Navigating the art of distressing furniture comes with its share of challenges. Here are some troubleshooting tips to help you overcome common issues encountered during the distressing process.
- Uneven Distressing:
- If your distressing looks patchy or uneven, don't panic! Simply go back and add more distressing in the areas that need it. Remember, imperfections add character.
- Excessive Sanding:
- Accidentally went overboard with the sandpaper? No worries! Use a damp cloth to wipe away excess dust and paint. Then, lightly sand the area again until you achieve the desired level of distressing.
- Overly Abrasive Sanding:
- If the distressing looks too harsh or unnatural, you may have used sandpaper with a grit that's too coarse. Switch to a finer grit sandpaper and use lighter strokes to achieve a more subtle distressing effect.
- Sticky Wax (Waxing Stage):
- If your wax feels sticky or tacky after application, it may be due to applying too much wax or not buffing it out thoroughly. Grab a clean lint-free cloth and buff the wax in circular motions until it feels smooth to the touch.
- Uneven Wax Coverage (Waxing Stage):
- If the wax appears uneven or blotchy, try reapplying a thin layer of wax using circular motions. Buff the surface gently until you achieve a consistent sheen.
- Inconsistent Distressing Depth:
- If some areas of the furniture appear more distressed than others, it could be due to uneven pressure or sanding technique. Try to maintain consistent pressure and strokes across the surface for a uniform distressing depth.
- Visible Sanding Marks:
- If you notice visible sanding marks or scratches on the surface after distressing, try sanding in a circular motion rather than back and forth. This can help blend the distressing marks more seamlessly into the surface.
By troubleshooting these issues during the distressing process, you can ensure a smoother and more consistent outcome for your distressed furniture piece. Happy distressing!
Maintaining your distressed furniture
You're done with your masterpiece and she's beautiful! But the work doesn't end there. To keep your distressed furniture looking its best, it's essential to implement proper maintenance practices. Here's how to ensure your cherished one-of-a-kind piece retains its beauty for years to come.
- To maintain your distressed furniture piece, avoid using harsh chemicals or abrasive cleaners that may damage the distressed finish.
- Instead, regularly dust the piece with a soft cloth or feather duster to remove any accumulated dust or debris.
- If necessary, gently wipe the surface with a damp cloth and mild soap solution, then dry thoroughly.
- Consider applying a fresh coat of wax or clear sealant periodically to protect the distressed finish and keep your furniture looking its best for years to come.

Frequently asked questions
To distress furniture after applying chalk paint, use medium (150) to fine (220) grit sandpaper or a sanding block. Apply light pressure to areas that would naturally wear over time, such as edges, corners, and high spots. Start with gentle sanding and increase pressure as needed to achieve the desired aged look.
It's best to start distressing about 15-20 minutes after applying chalk paint. The paint should be dry to the touch but not fully cured. If the paint comes off too easily, allow it to dry for a bit longer. Remember, the longer you wait, the harder the paint becomes, making it more difficult to distress.
To create an antique look with chalk paint, use Dark Chalk Paint® Wax. Apply it over your painted surface to instantly age the paint. For a more nuanced effect, use Clear Chalk Paint® Wax to wipe back areas that appear too dark, allowing you to control the level of aging. I share a great technique for making furniture look antique in my Best Furniture Wax for Your Chalk Painted Pieces post.
After chalk painting, seal your furniture with either wax or lacquer. This protective layer not only enhances the paint's durability but also helps preserve the color. Sealing allows for easier cleaning and protects the finish from everyday wear and tear.
Yes, you can distress chalk paint without sanding. One method is "wet distressing," where you use a damp cloth to rub away paint in select areas before it fully dries. Another option is to use a distressing medium (as shared in this post) before painting, which creates a resist effect when you wipe the paint away.
The first step is crucial: ensure the piece is clean and free of any dirt or grime. Light sanding with steel wool or a sanding block can help create a smooth surface for painting.
Yes, layering paint adds depth and dimension to your distressed piece. Start with a base coat of chalk paint, followed by additional layers in different colors for a more dynamic finish.
Absolutely! Raw wood provides an excellent canvas for distressing. Apply your first coat of paint directly onto the bare wood for a rustic, shabby chic look. This $15 Wooden stool makeover was stained wood.
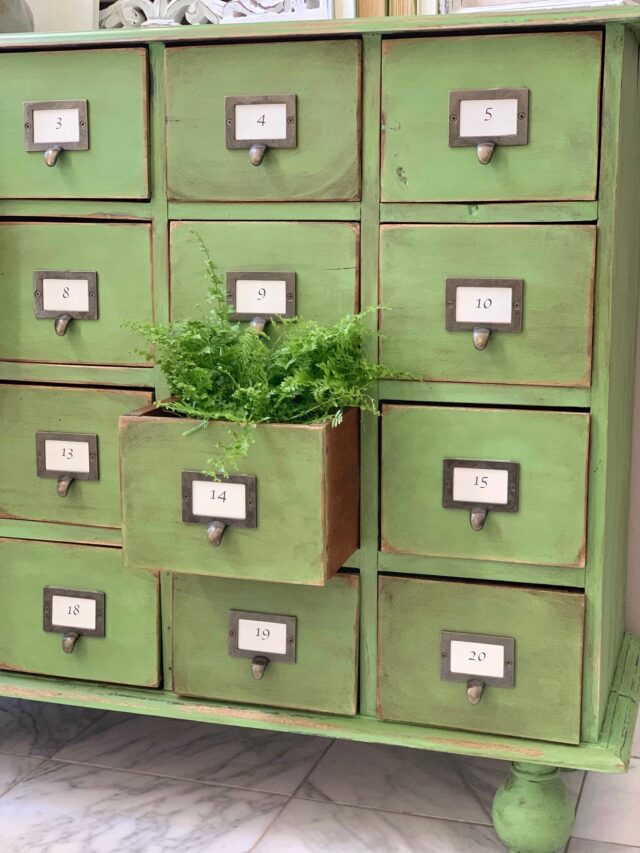
Focus your distressing efforts on areas that would naturally wear over time, such as edges, corners, and areas with much use. Use light sanding or a damp rag to reveal the underlying layers of paint. My green painted card catalogue is a great example of distressing on the edges and corners.
Yes, chalk spray paint can be distressed in the same way as traditional chalk paint. Apply light coats and distress as desired for a farmhouse-style finish. For more tips on Using chalk spray paint for a perfect finish, visit my Best Black paint for Furniture post.
More furniture painting techniques and inspiration


Remember, painting furniture is as much about the journey as it is about the destination. Embrace the challenges, learn from them, and watch your skills grow with each stroke of the brush. Happy painting, and may your furniture transformations bring joy and beauty to your space!
Happy Painting Friends!