Easy Wooden Stool Makeover for Less than $15
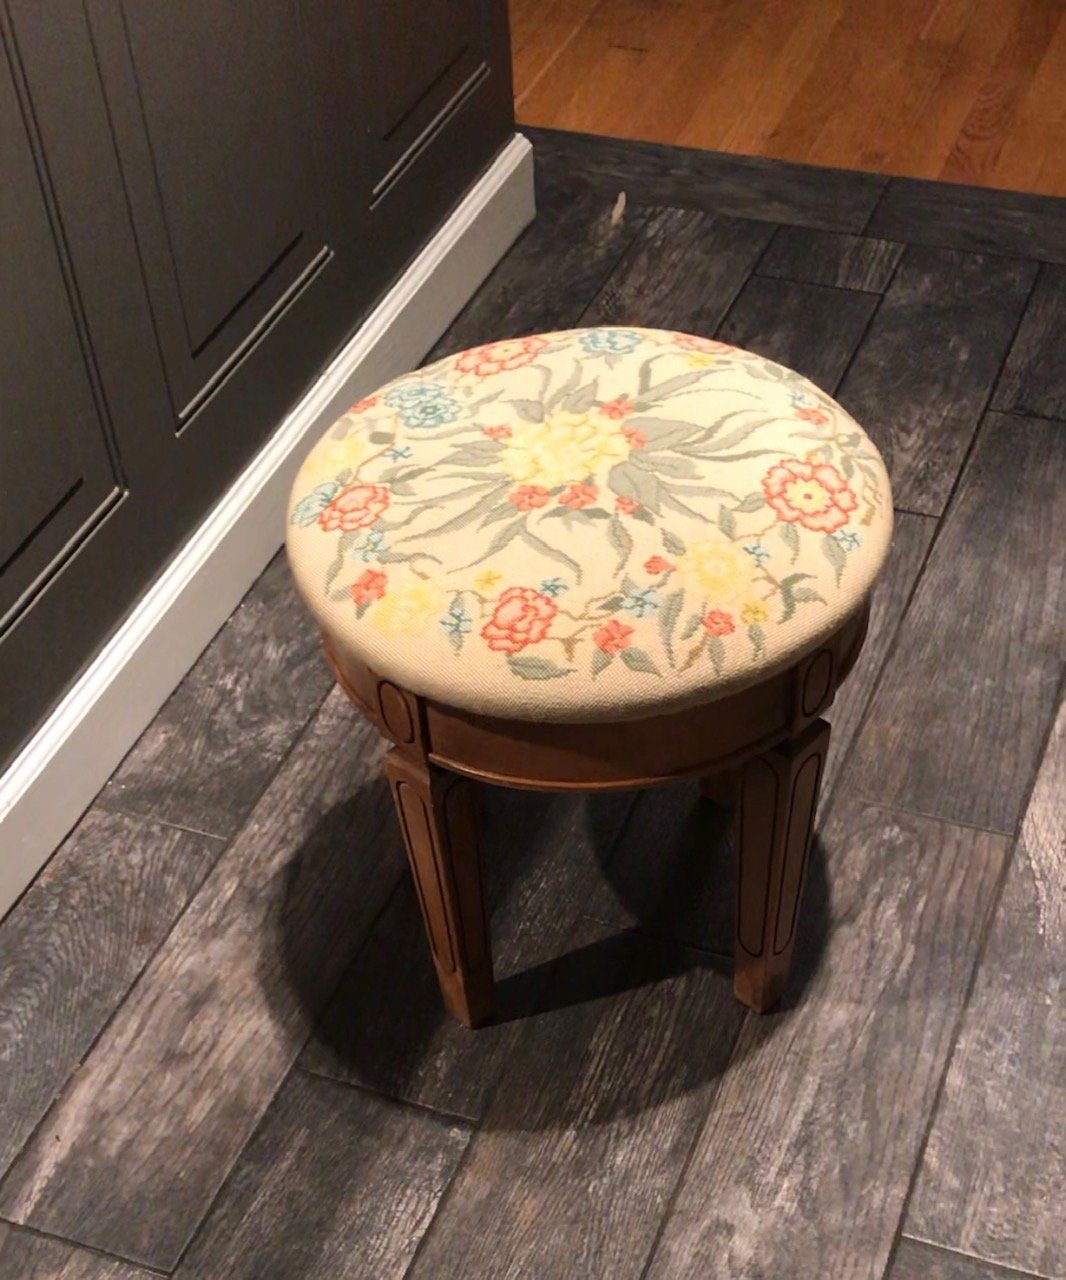
My love for yard sales and thrift stores runs deep, you just never know what you will find! I bought this vintage wooden stool for just $5 at a local yard sale and just knew with a few changes I could take it from drab to fab. Read below in this Easy Wooden Stool Makeover for Less than $15 post and see how I saved on this clever new cushion cover! (hint I did not do that stitching!)
*This post includes affiliate links, for more info on affiliate links visit here
Jump to:
Before and after
What is a project post without a good before and after photo? As you can see below this stool had potential (was in good condition) and I loved the shape of it as well as the detail on the legs. I wasn't digging the dark stain or the old fabric cross stitch cushion cover so it was in need of a makeover!
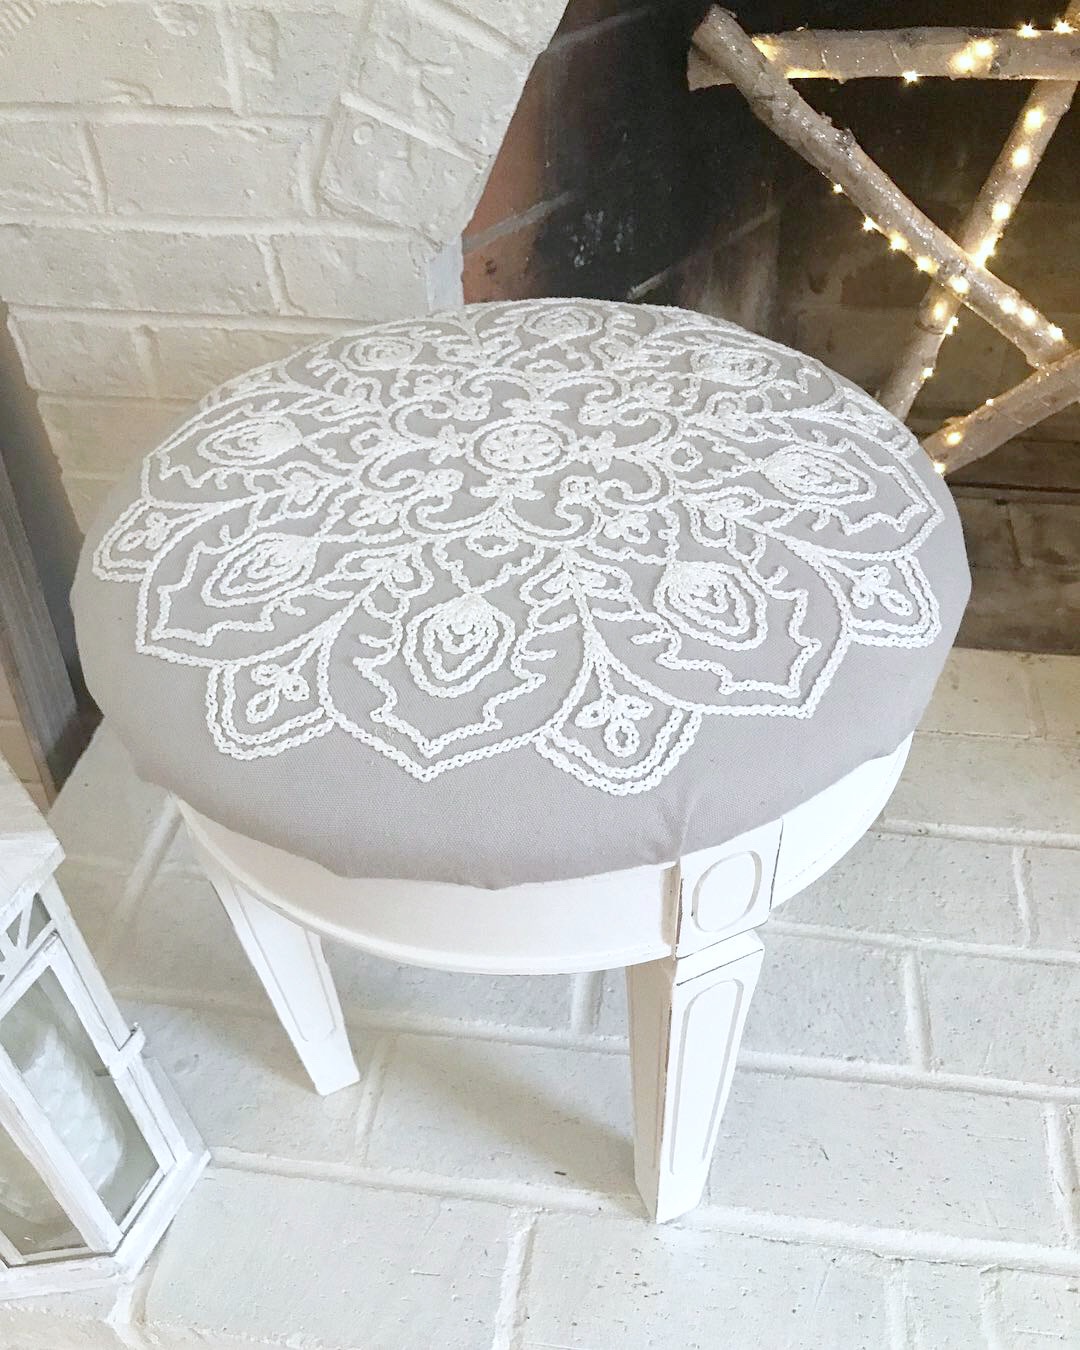
Since I'm about to list the supplies for this makeover I need to share my creative cushion cover. This cushion measures 15" which made for the perfect size to use an 18" throw pillow cover. More on this choice below, but let's start with the supplies list.
Supplies for makeover
- Stool with a round cushion top (I found mine at a yard sale)
- White chalk paint (I used this one from Home depot)
- 1 ½" - 2" Paint brush
- Sand paper
- Clear wax
- waxing brush
- cut up T-shirt
- 18" throw pillow cover
- Small Screw driver
- Staple gun

Step by step instructions
- Set up a work area and put down paper or a drop cloth for painting.
- Make sure the base of the stool is clean. I simply wiped it down with a wet towel to remove the dust.
- Remove the cushion top. This top was screwed onto the base with 4 screws and came off easily with a screw driver.
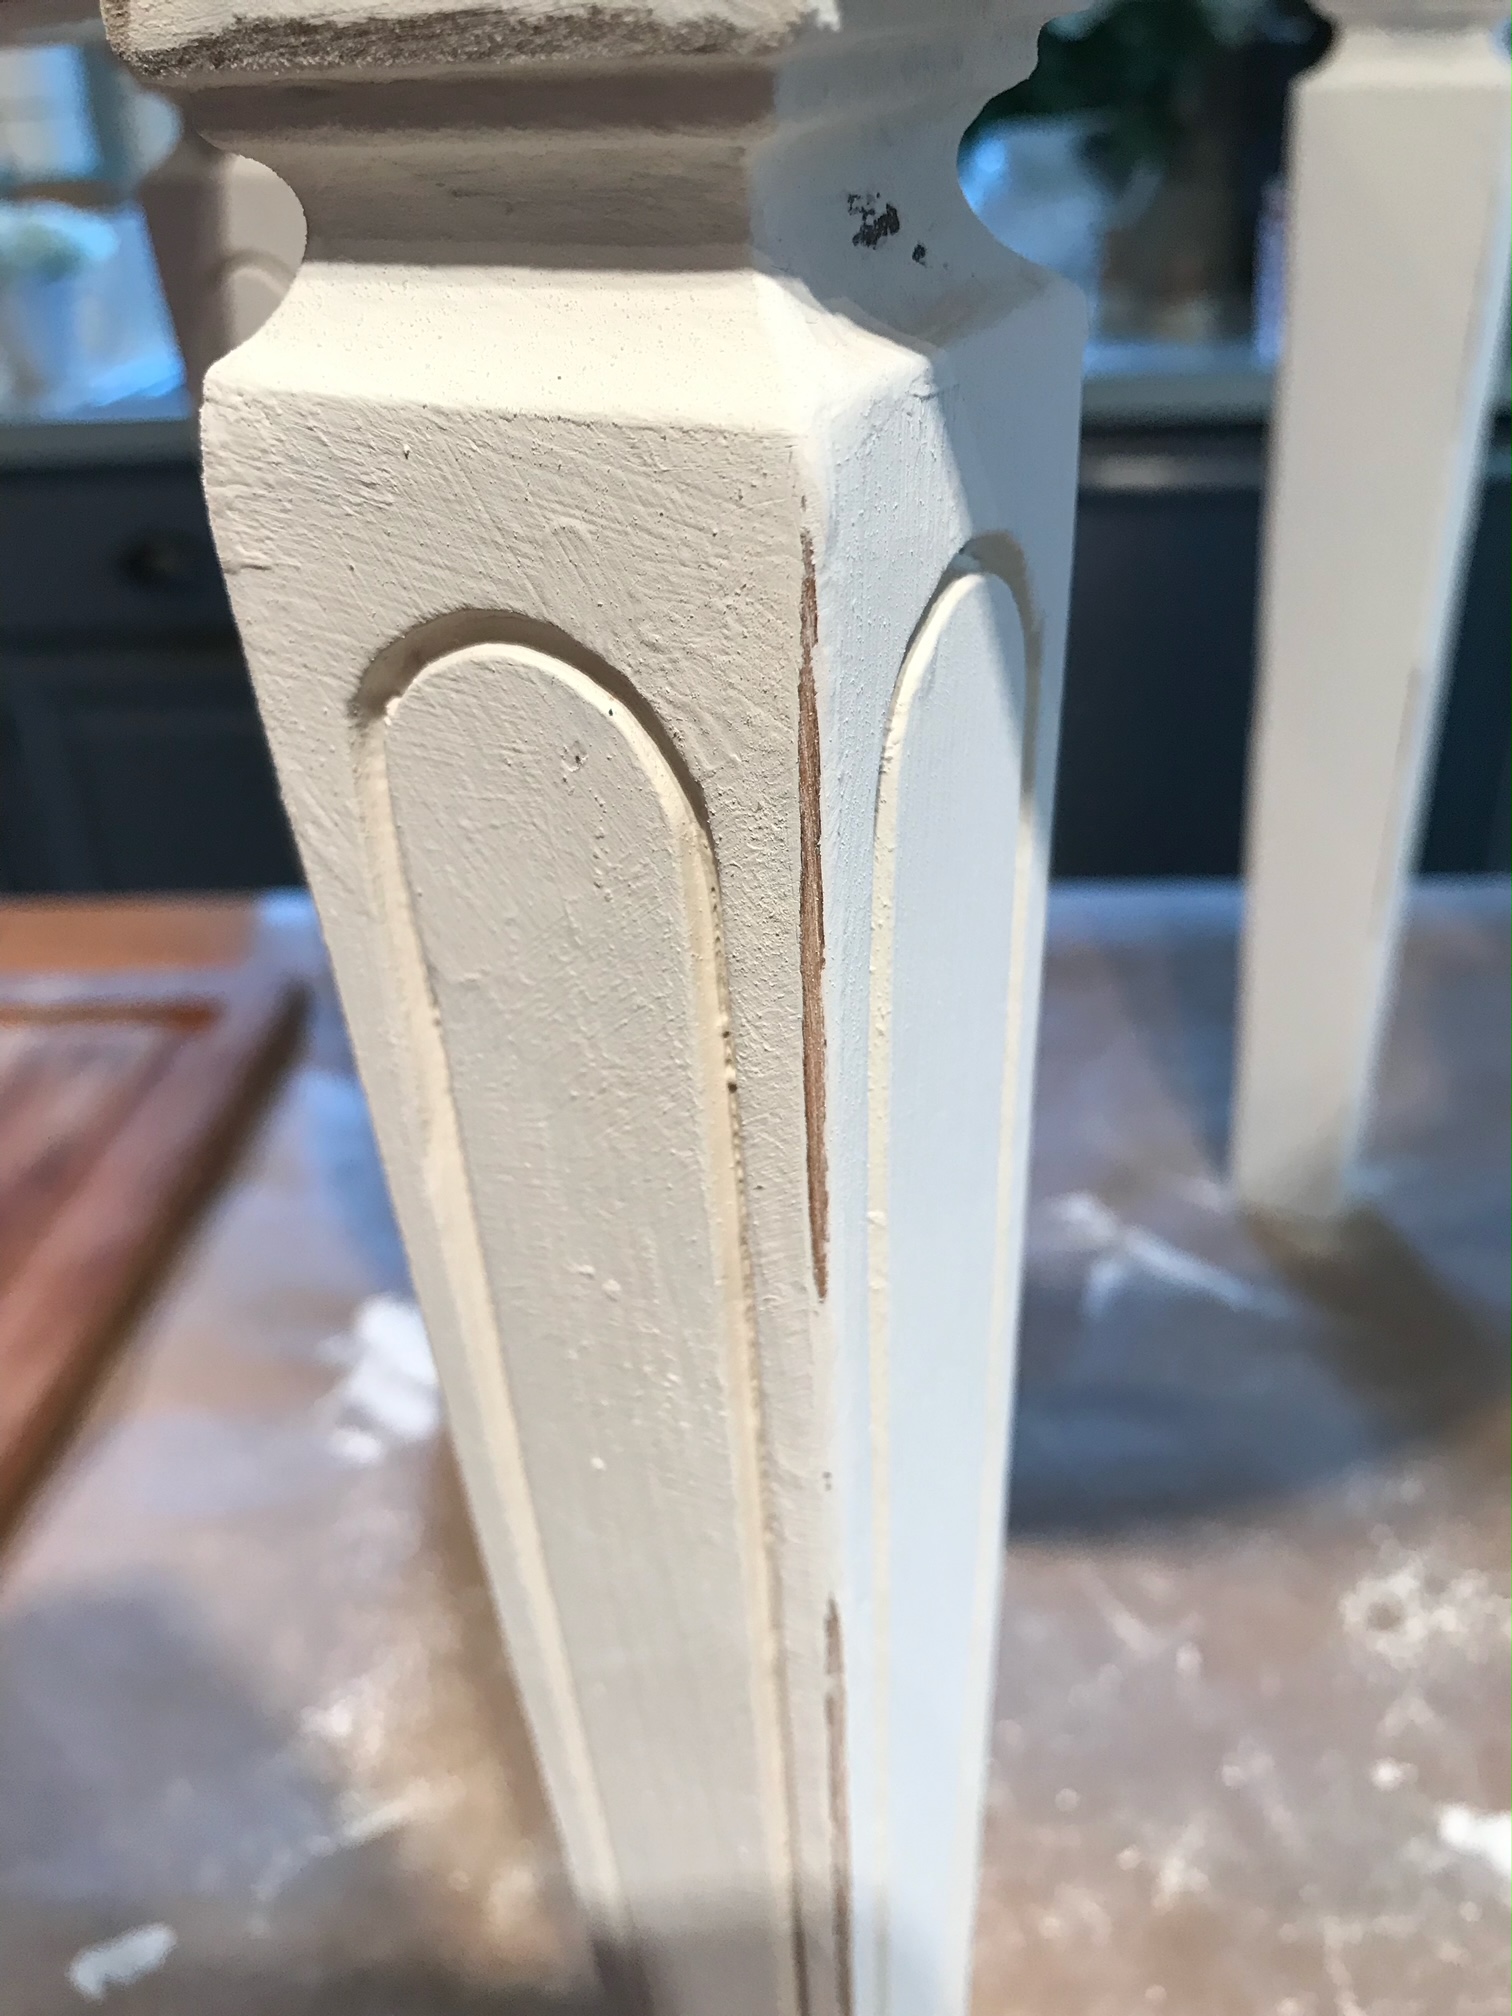
- Paint the base with the first coat of white chalk paint, let dry then paint a second coat. (Note: I did not sand, strip or use BIN Primer for this small project)

- With a piece of sand paper or small electric sander, sand the corners and the edges for a distressed look.

- Take a waxing brush and wax the base of the stool with clear wax. Apply the wax in a circular motion working the wax into the stool. Wipe any excess with an old cut up cotton t-shirt. Let wax dry overnight.
- Fit the throw pillow cover on the cushion and cut off the excess fabric leaving enough to staple to the back of the cushion. (I did not remove the old fabric before adding the new fabric. I just placed it right over the old fabric)
- Wrap the throw pillow tightly on the cushion, flip and staple the fabric to the back side of the cushion using a staple gun.
- For the final finishing step, flip the chair seat over and place it on the base and screw in place.
Frequently asked questions
You do not have to use chalk paint. You could use spray paint, household paint, acrylic paint or mineral paint. For ease you could use a paint sprayer as well. For a chippy look you may want to use Milk paint.
Pro tip: If your original stool has very dark stain you may want to apply a coat of primer first to keep the piece from bleeding through. I recommend BIN Primer for this purpose. I share this process in my DIY apothecary cabinet with hutch post. After the primer drives you can add a couple of coats of paint.
Yard sales, estate sales, thrift stores and antique markets are all great places to start. With a little bit of searching you may also find wooden stools that are in great shape on the Facebook Marketplace.
Yes you can use any fabric, decorators fabric or upholstery fabric would work well. I found the throw pillow cover to be a great inexpensive option that just happened to be the right size.
Pro tip: I opted to place the throw pillow cover over the existing fabric essentially adding second layer of fabric. If you want to remove the fabric you may need needle nose pliers to remove staples or tack remover tool if the fabric is fastened by upholstery tacks. If you don't have access to a staple gun you could adhere the fabric with a bit of hot glue or fabric glue, then attach it to the base.

Choosing the right fabric
When planning this stool upcycle I tried out several fabric options before I landed on the gray with white stitching throw pillow cover. This was the most challenging part of the entire project! I knew I wanted to choose from neutral colors and felt a little interest and texture would make for a fabulous piece. Several of the options were fabric store leftovers I had from previous projects, some were throw pillow covers that I had on hand.
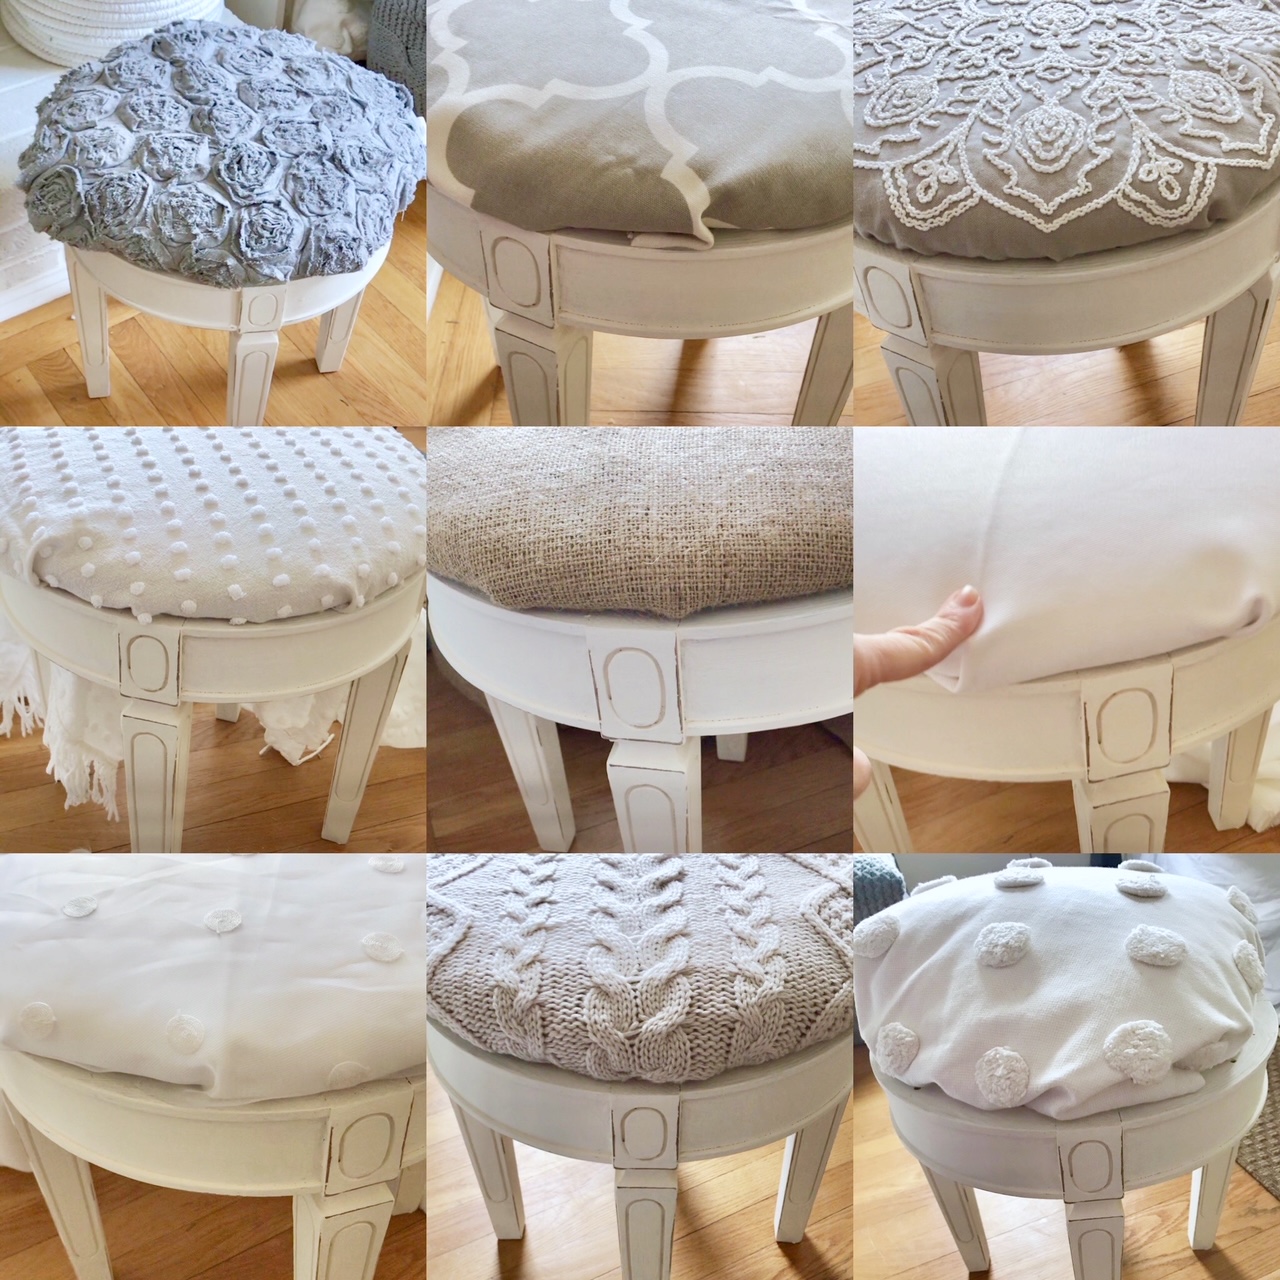
Throw pillow cover options
Keep in mind you will have to measure your stool cushion to determine if using a throw pillow cover is an option for you.

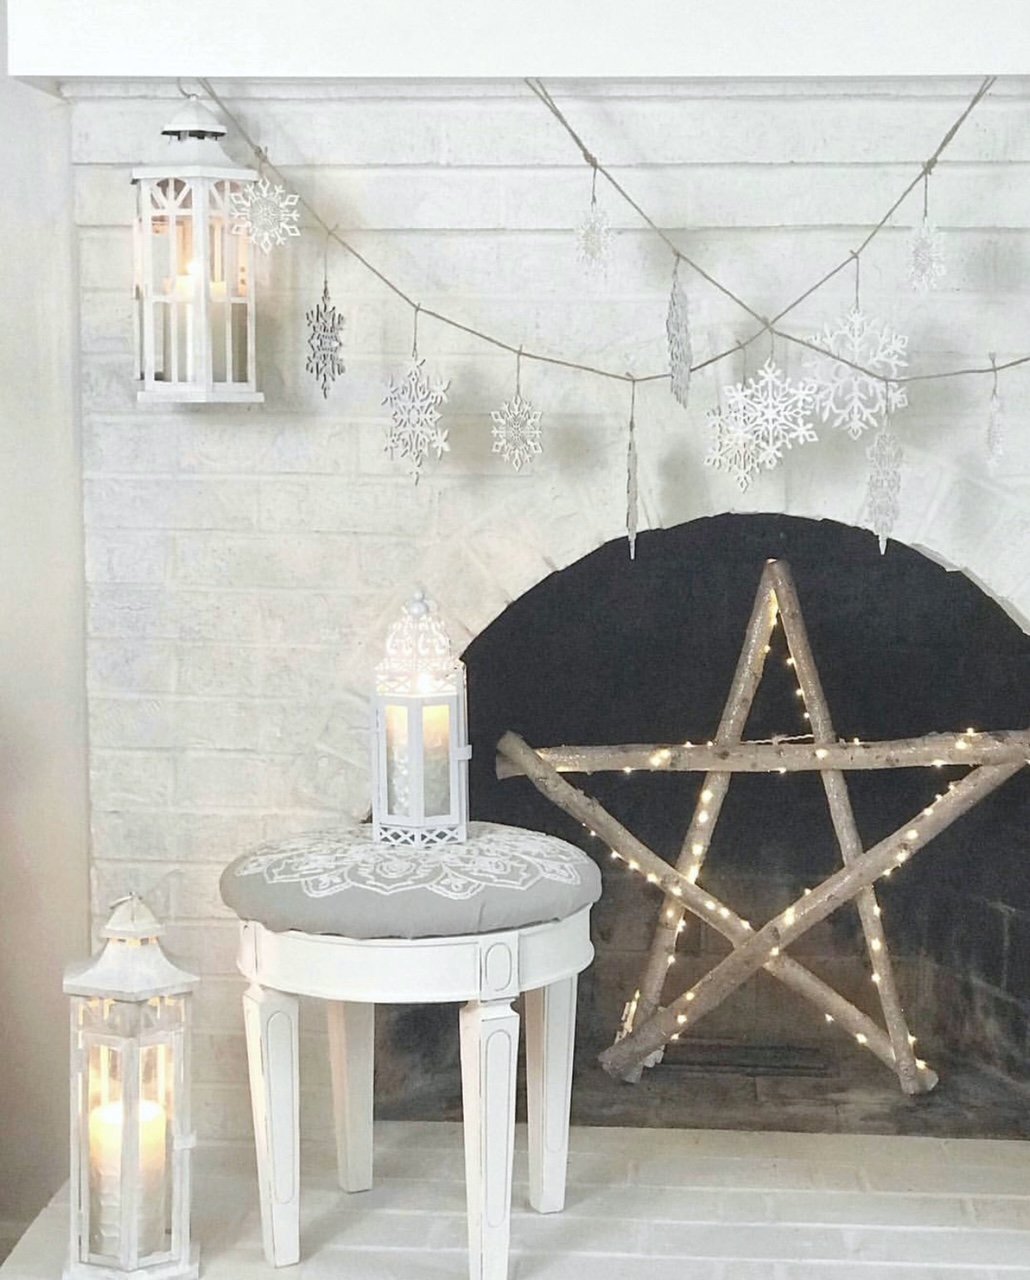
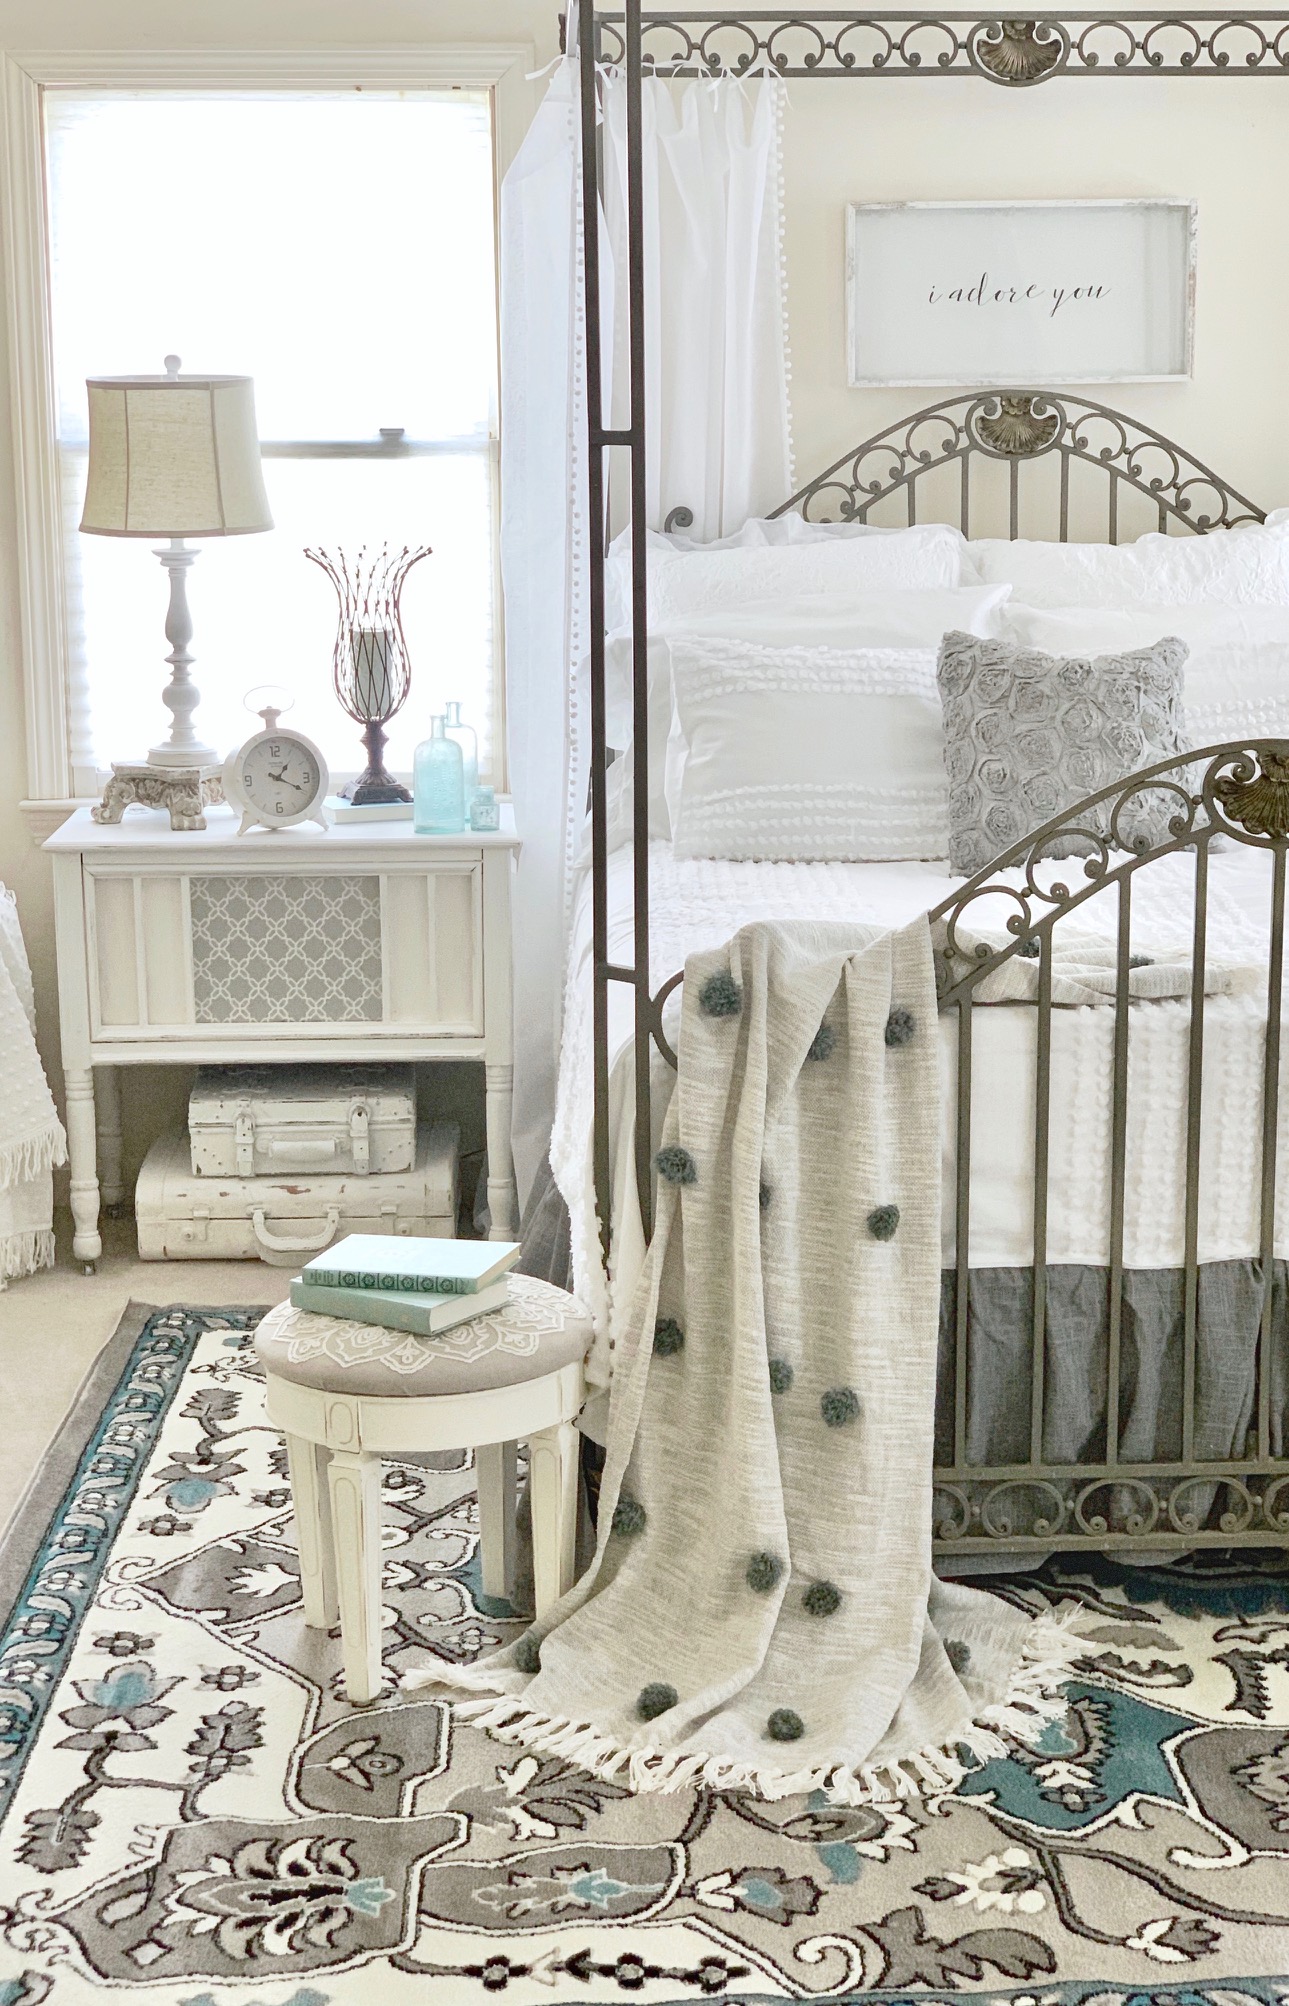
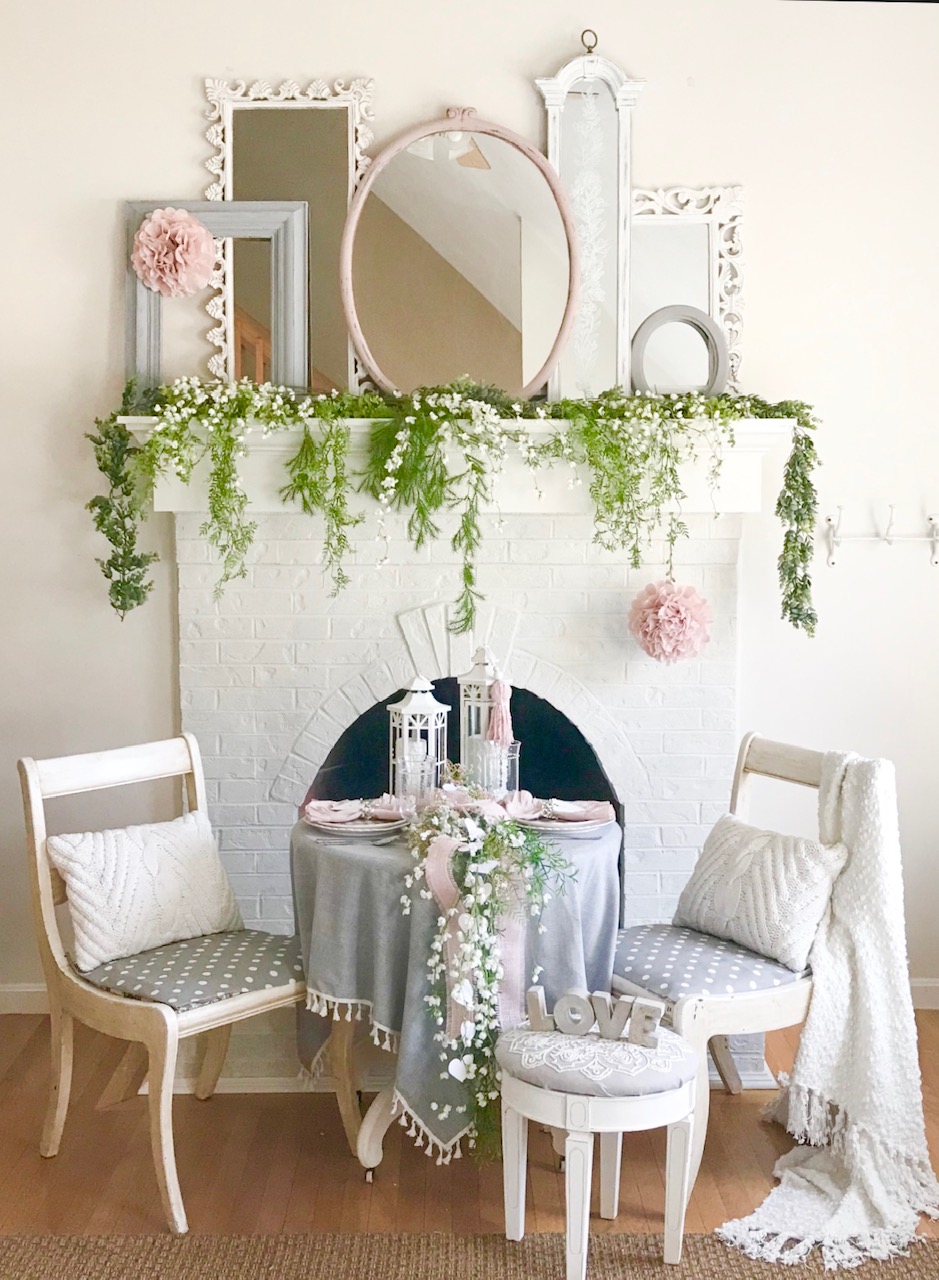
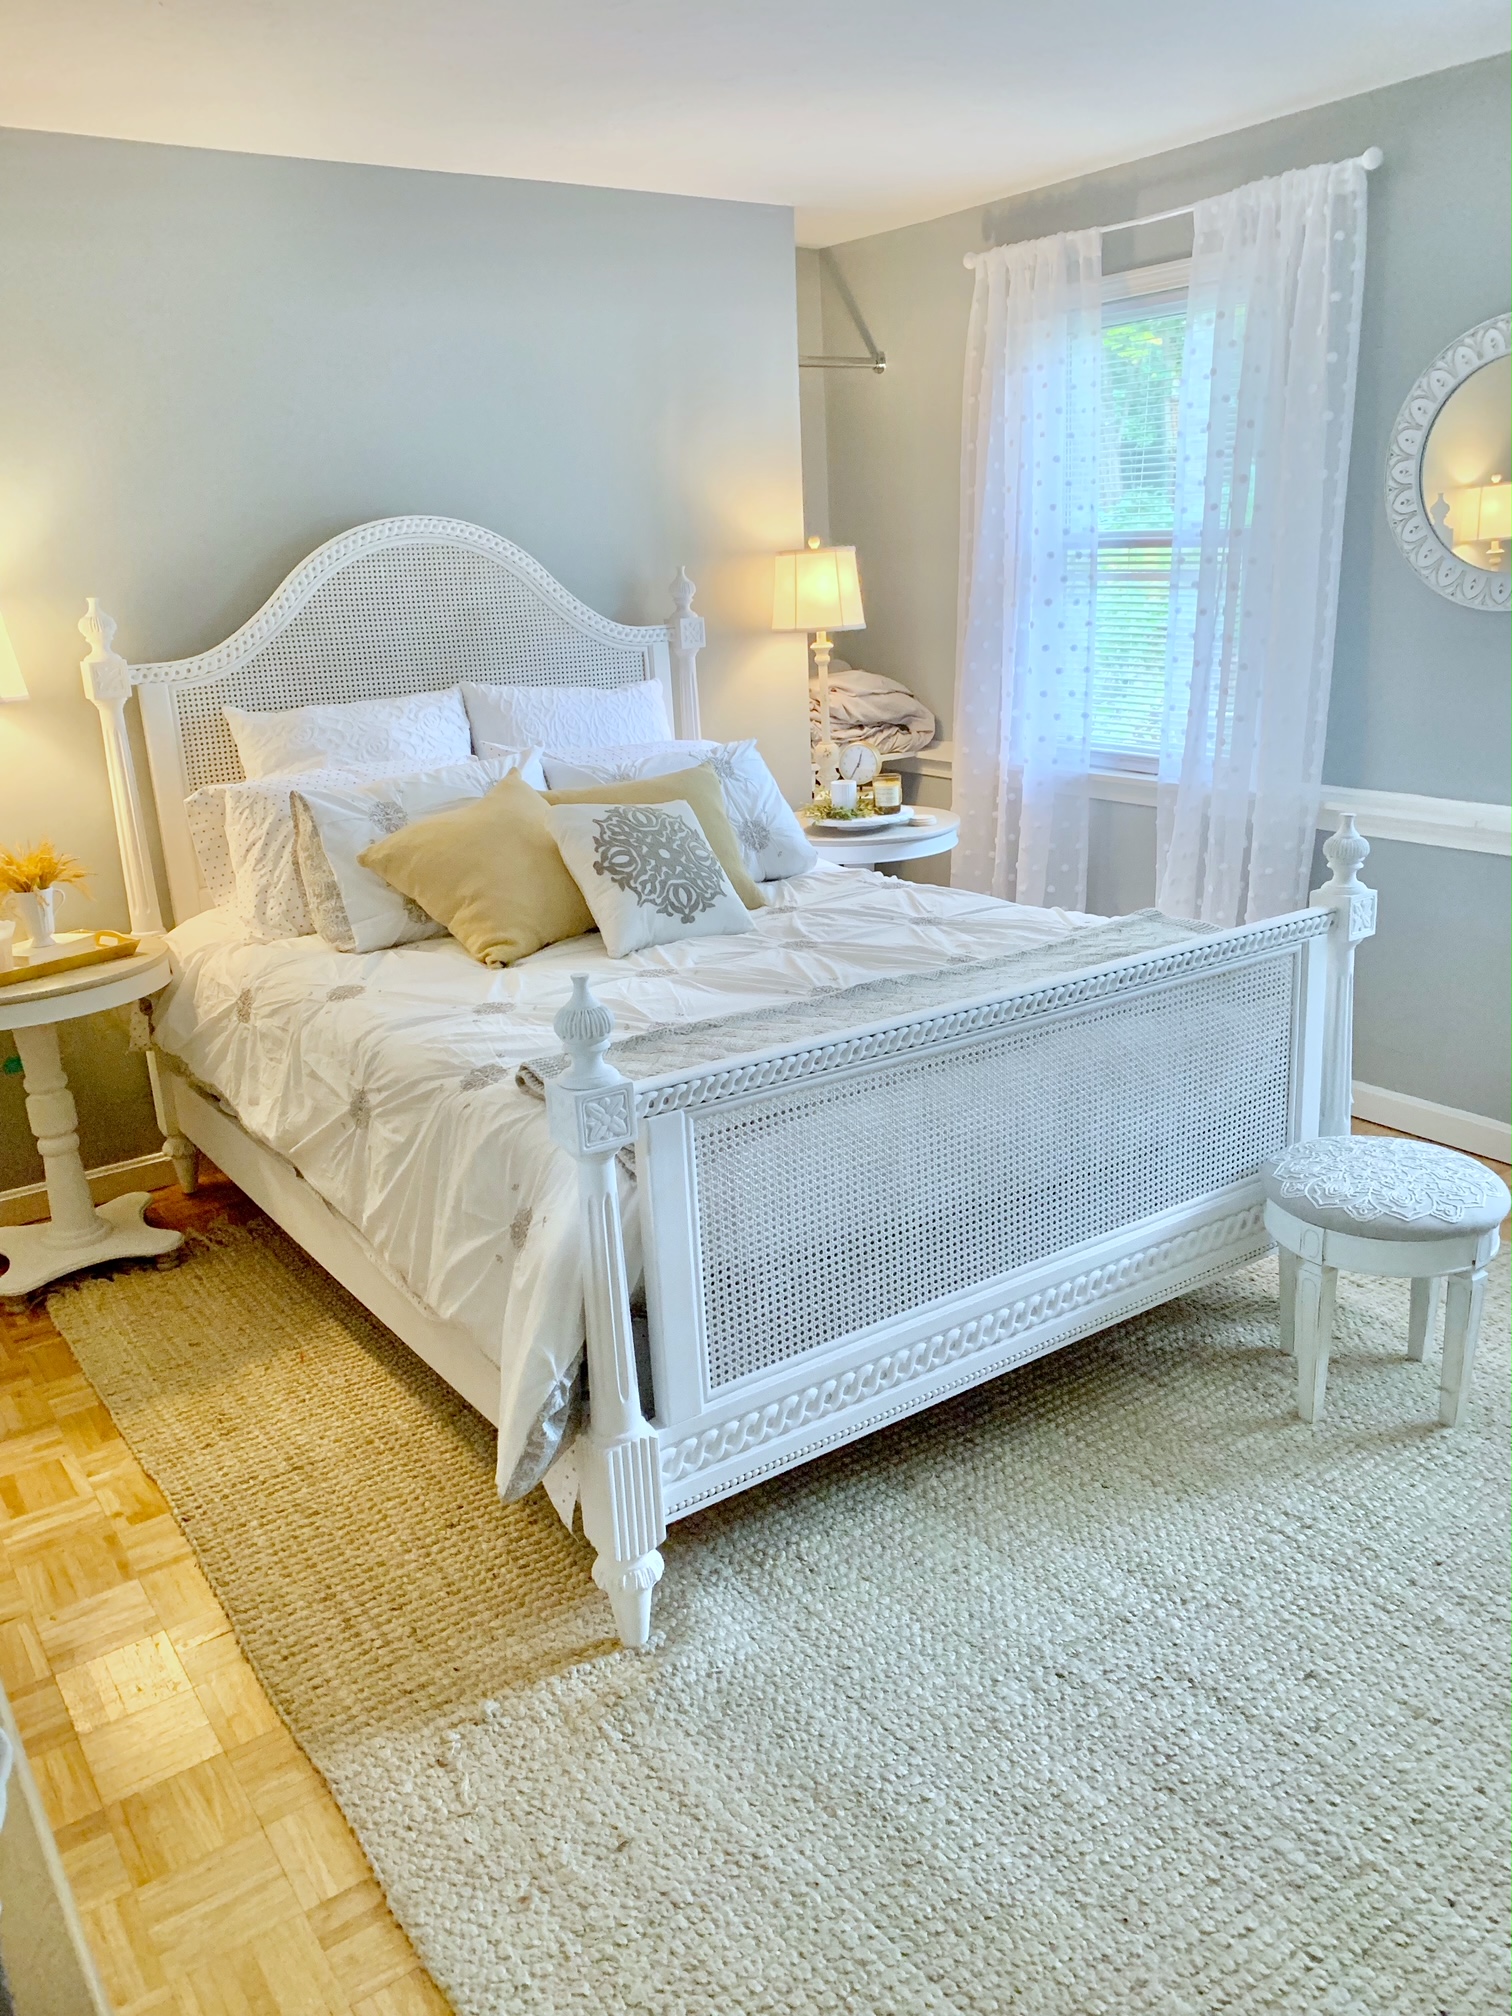
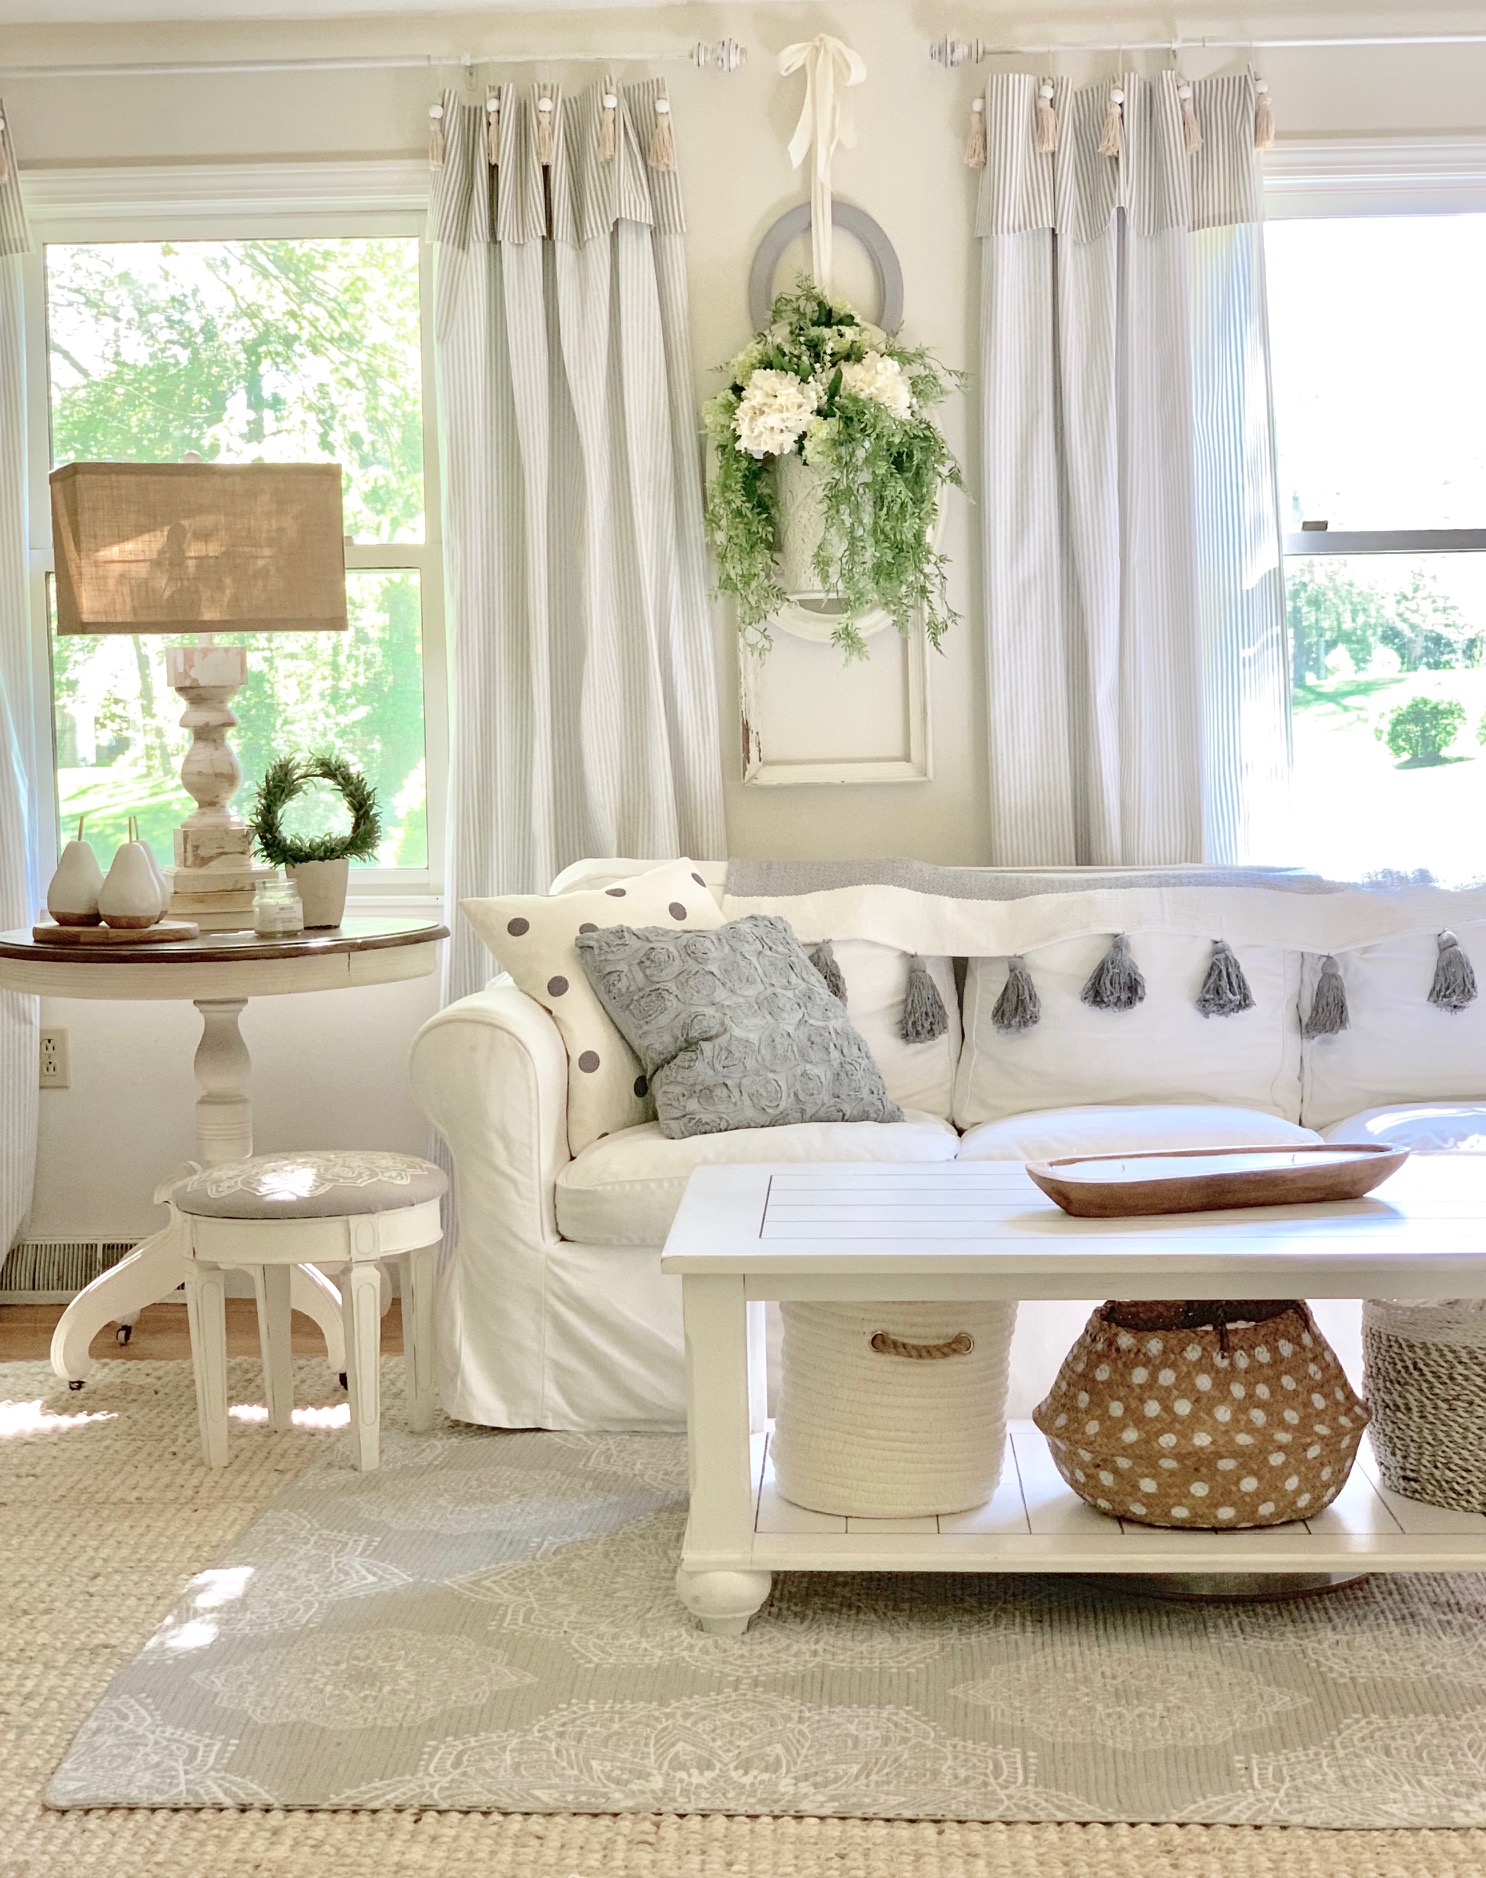
With so many choices I could have gone a number of ways with this stool. I have a fair amount of gray in my house and I since finishing her I have coined this stool "Run around Sue" because she gets around in our home! Take a look at a few of the places she has landed!
More creative furniture transformations
Explore our collection of budget-friendly makeovers:
- Convert an ordinary dresser into a stunning faux apothecary cabinet with our simple sectioning technique that creates high-end appeal
- Transform an outdated china cabinet into a beautiful linen storage solution perfect for bathrooms or hallways
- Create a cozy, stylish pet bed using a vintage drawer without any sewing skills required
- Repurpose an antique mantel into a charming wall shelf that provides both architectural interest and functional display space
- Revitalize dark wooden mirrors with our refinishing method that preserves vintage character while updating the look
These furniture upcycling tutorials will help you breathe new life into old pieces while creating custom, one-of-a-kind items that add character to your home without breaking the bank.
As you can see by adding a little paint and fabric to a wooden stool you can give it a whole new look. I love upcycling thrift store finds and often look for ways to make changes without breaking my budget! This entire piece cost just $15 and a couple of days of work to give it life. Thank you for visiting the blog today for this Easy Wooden Stool Makeover for Less than $15 post! For more furniture upcycles visit my furniture makeovers page.