DIY Full Wall Board and Batten Wall for a High-End Look
Creating a full wall board and batten can transform any room with a high-end look. This guide walks you through each step, including planning, cutting, and installing boards, and offers tips for working around windows, outlets, and other obstacles to achieve a flawless finish.
Content may contain affiliate links. When you shop the links, we receive a small commission at no cost to you. Thanks for supporting my small business.
Learn how we made our own custom upholstered box spring seen here, plus our favorite dog-friendly rug.
To shop this bedroom makeover visit my LTK shop.
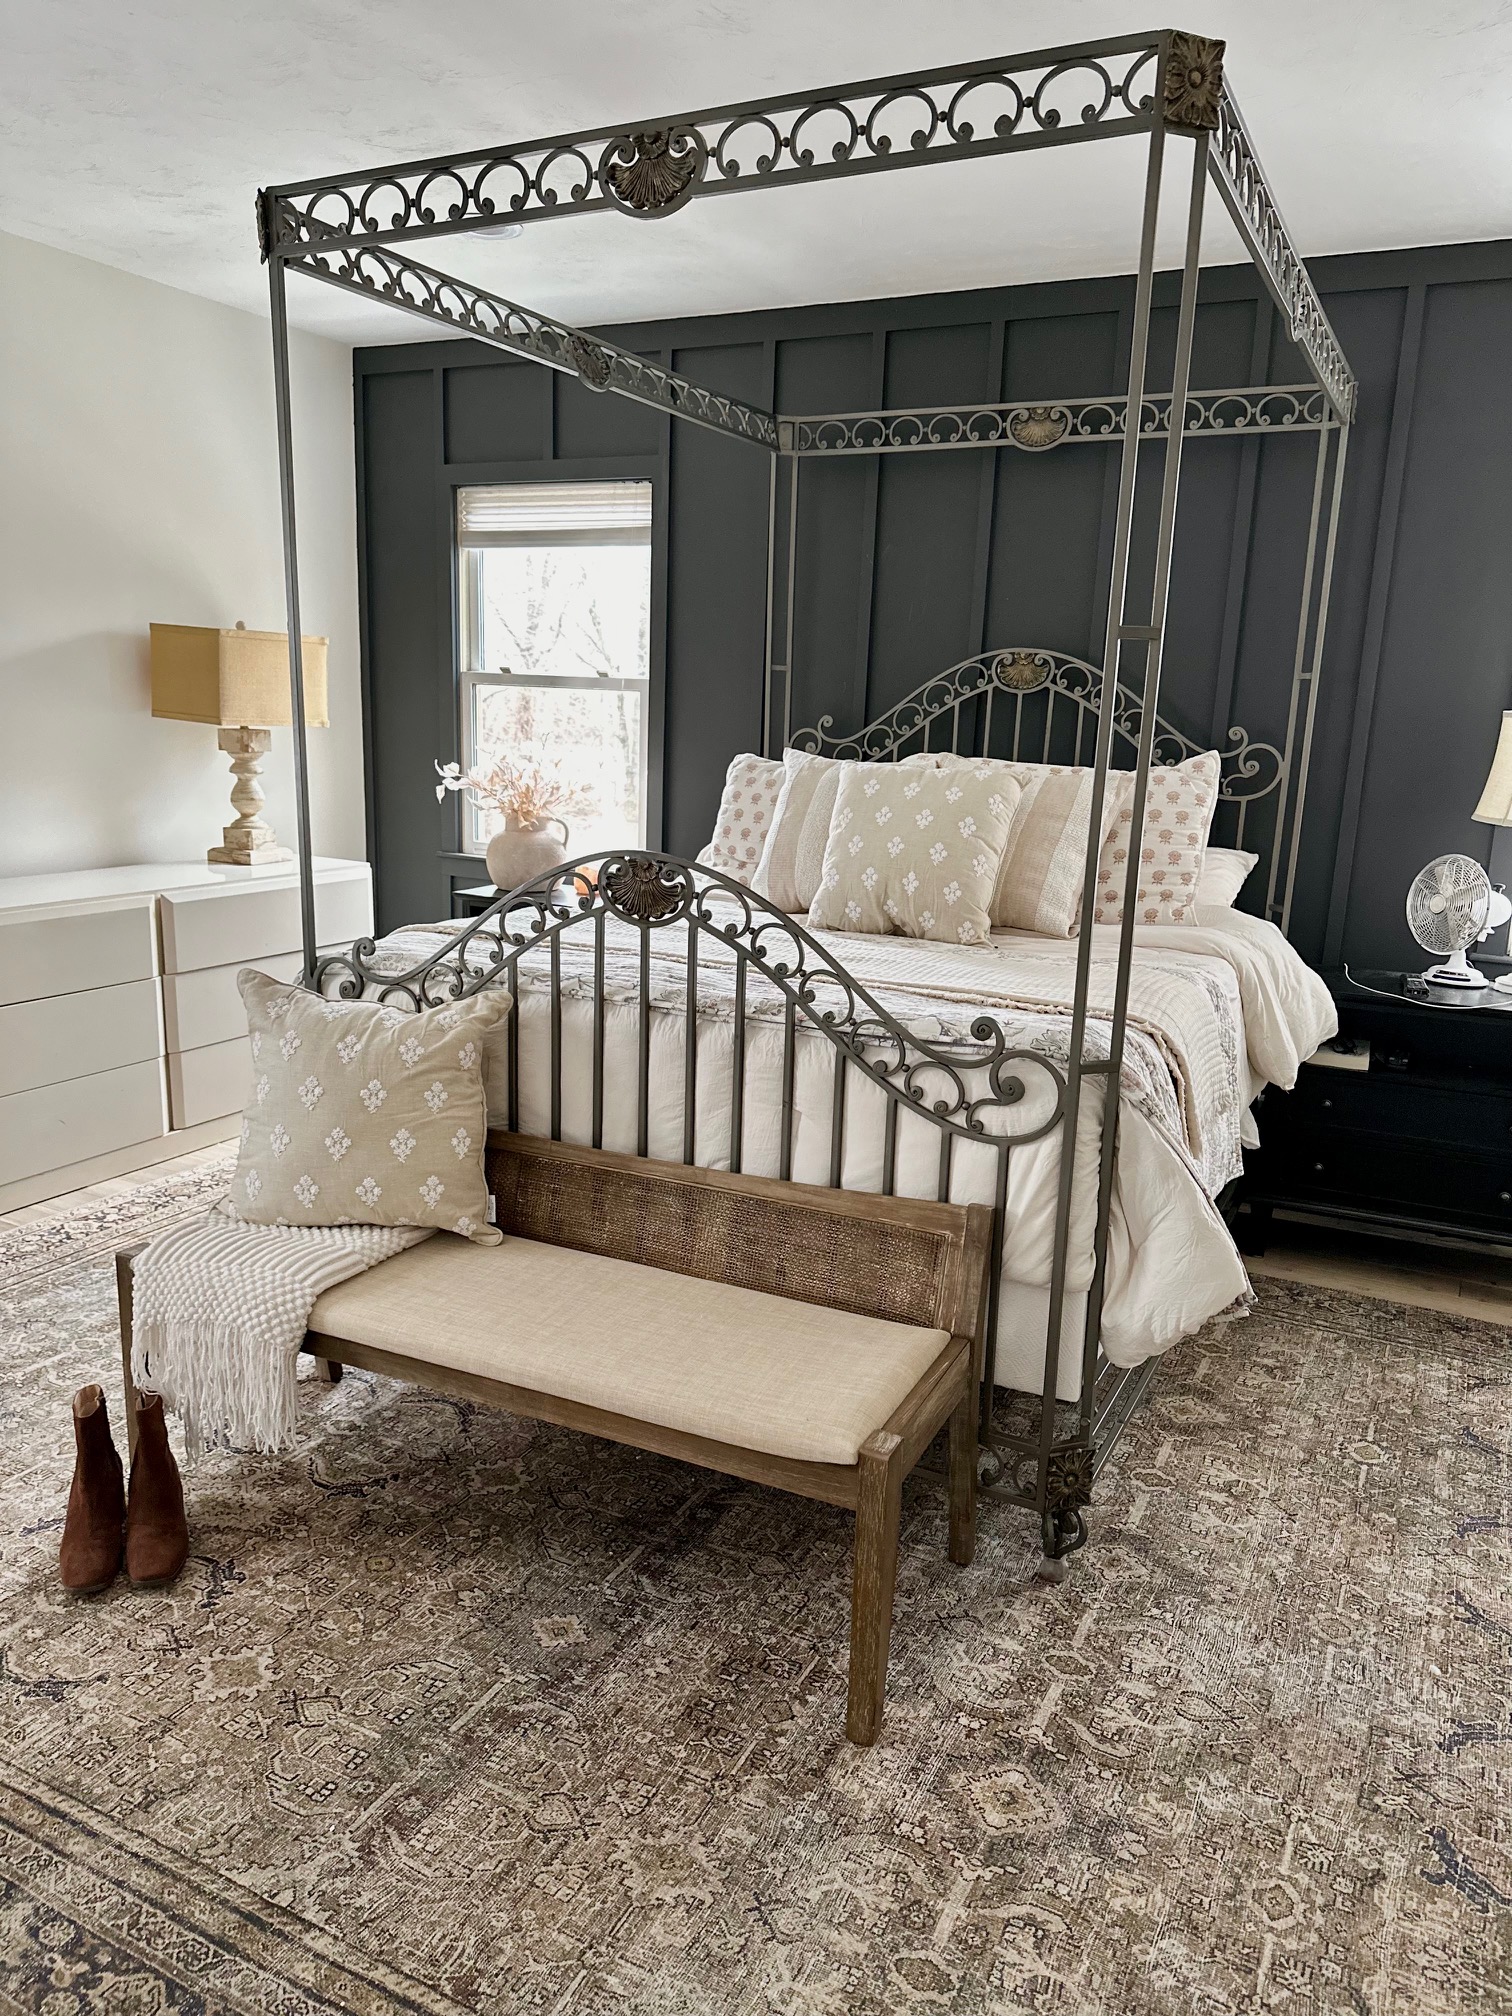
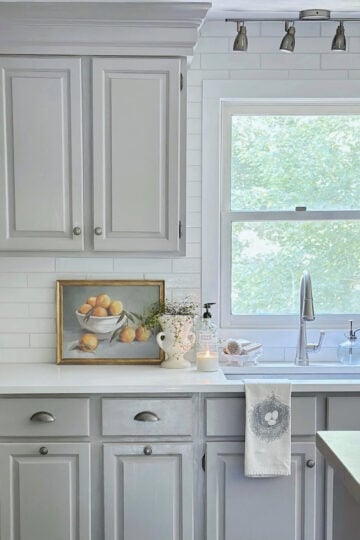
It was time for a bedroom refresh! We started by removing the old carpet and prepping for new hardwood floors, but first, a fresh coat of paint on the ceiling, walls, and trim set the stage. For a bold focal point behind the bed, we decided on a DIY full wall board and batten wall, a simple way to add a high-end, custom look.
We chose Benjamin Moore Chantilly Lace for the ceiling and trim, Cloud White for the walls, and a dramatic Benjamin Moore Wrought Iron for the board and batten accent. The vertical battens give dimension and make the dark color feel built-in and sophisticated.
After removing baseboards and window trim, framing, and spacing the boards to work around outlets, we created a feature wall that transforms the room. Here is a step-by-step guide to building your own DIY full wall board and batten wall.
Jump to:
- Glossary of elements for board and batten wall treatment
- Incorporating windows
- Adapting outlets and light switches
- Baseboards, headers, and vertical battens
- Dimensional planning
- Choosing batten widths
- Additional design decisions
- Window integration and design consistency
- Materials and tools required for this project
- Step-by-step instructions
- Determining the cost of materials
- Our cost for this project
- Troubleshooting tips for installation
- More DIY home improvement inspiration
Glossary of elements for board and batten wall treatment
In preparation for the exploration of board and batten wall treatments, it's essential to establish a comprehensive glossary outlining the key elements involved. This glossary serves as a reference point for understanding the components that constitute a board and batten design, laying the foundation for a detailed examination of this popular interior design technique.
| Element | Description |
|---|---|
| Overall "Board and Batten" | The combination of wall panels, vertical battens, window trim, sill, apron, and header, creating a cohesive and visually appealing wall treatment known as "board and batten." This treatment adds texture, depth, and character to interior spaces, enhancing their aesthetic appeal. |
| Existing Wall | The current surface of the wall, which may be textured or smooth, serving as the foundation for the treatment. |
| Wall Panels | Additional panels that can be added to the existing wall to create a smoother surface for the treatment, especially if the existing wall is textured. |
| Batten (Vertical Boards) | Vertical batten board that is installed over the wall panels or directly onto the existing wall to create the "board and batten" effect. These boards typically run vertically and provide the structural and aesthetic foundation of the treatment. |
| Window Trim | The trim surrounding a window, including the header (top horizontal board), side trim, and apron (under the sill). Each component frames the window and complements the overall design of the wall treatment. |
| Window Sill | The horizontal surface below the window opening, serving as both a functional and decorative element in the window trim. |
| Header | Similar to crown molding, the header aligns along the top of the wall, just below the ceiling. It provides a finishing touch to the wall treatment and adds architectural interest to the space. |

Incorporating windows
We knew we wanted board and batten, but we were concerned about dealing with a window wall. Most accent walls don't include windows or doors. However, this wall was the best choice for our bed placement, so we set out to figure out how to incorporate the windows into this DIY accent wall. We removed all the 2" colonial casing from each side of the window, leaving the window sill intact. Then, we installed 1" x 3" vertical boards vertically along the sides of the window, and 1" x 3" boards along the top and bottom (under the sill) of the window.

Adapting outlets and light switches
In dealing with the outlets, sigh...we had to get a bit creative. One of them was partially covered by a batten, so we had to figure out how to make it work without sacrificing the look. We decided to bring the outlet forward to match the front of the batten, sticking a block on the left side to match the batten's thickness. Then, on the right side, we carefully cut out a section from the batten to fit the outlet. It took some careful planning, but in the end, it blended right in with the rest of the design while keeping everything functional. Luckily our light switches are across the room but you would handle them the same way.


Important: A word of caution regarding electrical outlets and light switches when installing board and batten: It's crucial to prioritize safety measures. If there's any need to relocate or modify an outlet, it's highly recommended to consult with a licensed electrician to ensure proper handling and compliance with electrical codes. Additionally, if the outlet doesn't require adjustment, be sure to turn off power to that outlet at the breaker panel before proceeding with any work near it. This precautionary step helps minimize the risk of electrical accidents or injuries during the installation process. Safety should always be the top priority when working with electrical components in home improvement projects.
Baseboards, headers, and vertical battens
We removed the original baseboard and installed 1" x 5" square edge boards, then 1" x 4" square edge boards as a header along the ceiling. As mentioned above the vertical boards - battens are 1" x 3". These widths coincide with recommendations to have your baseboard height be 5% 7% of the wall height. Additional recommendations for header/crown molding and window casing are approximated at 50% of the height of the baseboard.
Here's a helpful comparison chart for baseboard, window trim, and header/crown sizes based on professional recommendations:
| Element | Recommended Size |
|---|---|
| Baseboard | 5% - 7% of the wall height |
| Window Trim | Approximately 50% of the height of baseboard |
| Header/Crown Molding | Approximately 50% of the height of baseboard |
These recommendations are general guidelines and may vary based on individual preferences and the overall aesthetic of the space. Adjustments can be made to suit specific design preferences and architectural styles.

Dimensional planning
In the pursuit of achieving visual harmony and proportionality within the board and batten design scheme, careful consideration was given to the specific dimensions of key elements. With a wall length measuring 196" (16' 3") and a ceiling height of 8',
Careful planning ensured that the treatment would fit well with the room's dimensions.
The decision to space the vertical battens 12" apart was deliberate, offering uniformity and balance across the expanse of the wall. This spacing began with the first batten along the inside window trim, ensuring a consistent layout while preserving the visual balance.

Choosing batten widths
Choosing 1" x 2" boards for the battens was a practical decision based on our available space and the interrupted layout due to two windows. The 1" x 2" dimensions provided a more uniform look across the wall, especially with the windows breaking up the space. We appreciated the simplicity the 1" x 2" boards brought to the wall, which felt fitting considering the bold statement of our rather over-the-top canopy bed.
When considering batten widths, it's essential to think about the overall aesthetic you're aiming for and the dimensions of your space. Longer walls can handle wider boards, adding substance and visual interest. However, narrower battens like 1" x 2" can create a sleek and streamlined appearance, which might be preferable in smaller rooms or areas with interruptions like windows or doors. Additionally, the style of your furniture and decor can influence your batten width choice, as well as your personal preference for simplicity versus complexity in the overall design scheme.
Keep in mind: Lumber dimensions are labeled based on rough measurements before planing and surfacing. For example, a 1" x 3" board starts thicker and wider, but after processing, it typically ends up closer to ¾ inch thick by 2 ½ inches wide. Understanding these nominal dimensions helps in planning projects accurately.

Additional design decisions
When it comes to crafting your board and batten wall, there's more than just choosing batten widths. Let's dive into some other exciting design decisions you'll want to mull over:
- Horizontal Boards: Some board and batten designs incorporate horizontal boards, known as rails, between the vertical battens. These horizontal elements can add depth and visual interest to the wall treatment. Consider whether you want to include horizontal boards and how many you'd like to incorporate.
- Picture Ledge: Another option to enhance your board and batten wall is adding a picture ledge. Picture ledges provide a convenient way to display artwork, photographs, or decorative items without the need for nails or hooks. Think about whether a picture ledge aligns with your aesthetic preferences and functional needs.
- Height of the Treatment: Determine how far up the wall you want the board and batten treatment to extend. Traditionally, board and batten treatments cover the lower portion of the wall, typically one-third or two-thirds of the wall height. Consider the proportions of your room and how the treatment will visually impact the space.
- Spacing Between Battens: Decide on the spacing between vertical battens. Closer spacing can create a more intricate and textured look, while wider spacing offers a cleaner and more minimalist appearance. Experiment with different spacing options to find the balance that best suits your design vision.
- Color Scheme: Explore various color options for your board and batten wall. You can choose to paint the battens and wall panels the same color for a cohesive look, or opt for contrasting colors to make the battens stand out. Consider how different color combinations will complement your existing decor and furniture.
- Trim and Molding: Selecting the right trim and molding can enhance the overall look of your board and batten wall. Consider incorporating crown molding at the top of the wall or adding a chair rail to delineate between the board and batten section and the upper wall.
By carefully considering these design decisions, you can create a board and batten wall that perfectly suits your style preferences and enhances the aesthetic appeal of your space. Experiment with different options to find the combination that best reflects your personal taste and complements your home's interior design.

Window integration and design consistency
Incorporating the dimensions of the window area into the overall layout presented a challenge. Two wall sections, each 15" wide, were designated over the window to fit its size. Additionally, 12" of space was left between the outside window casing and the adjacent wall on each side to ensure a cohesive look.
The decision to only use vertical boards, without horizontal elements or picture ledges, was made to maintain visual simplicity, especially considering the presence of a large canopy bed. This choice helps keep the space uncluttered, allowing the board and batten treatment to serve as a backdrop without overwhelming it.
Adhering to recommended height proportions for baseboards, headers, and window casings guided the implementation process. The original baseboards were removed, and square edge boards were installed as headers, demonstrating a commitment to detail and craftsmanship. These efforts resulted in a board and batten treatment that melds seamlessly with the room's architectural elements, adding to its overall ambiance.
Materials and tools required for this project
- Wood Boards:
- Vertical battens (1" x 2" or preferred size)
- Baseboards (1" x 5" square edge)
- Headers (1" x 4" square edge, 45-degree angles at joints)
- Additional boards for window trim (1" x 3" for apron and header and sides)
- Nails: Brad nails or finishing nails appropriate for your nail gun
- Liquid Nails (Optional): While not essential, Liquid Nails can be used as a construction adhesive for securing the vertical batten boards to the wall.
- Caulk and caulk gun: Paintable caulk without latex or silicone for seamless finishing
- Paint and Primer: Primer suitable for wood surfaces, Paint in your desired colors for the walls, trim, and battens ( we used Benjamin Moore - Wrought Iron - Flat)
- Sandpaper: Medium-grit sandpaper for smoothing surfaces and edges
- Level: A reliable level for ensuring straight installations
- Measuring Tape and Pencil: Essential for accurate measurements and marking
- Shims: Used to level uneven surfaces, particularly for baseboards and headers
- Leveling Compound (if needed): For correcting uneven floors or ceilings before installation
- Saw: Miter saw or circular saw for cutting boards to size
- Nail Gun: For quicker and more efficient installation of boards
- Oscillating Multi-Tool Kit: This tool facilitated the cutting of the board to accommodate the outlet
- Safety Gear: Safety glasses and gloves for protection during cutting and installation
- Stud Finder: Handy for locating studs to ensure secure attachment of boards
- Wood Filler: For filling nail holes and any imperfections in the wood
- Paintbrushes and Paint Roller: For applying primer and paint to the walls and boards or use a paint sprayer.
- Drop Cloths or Plastic Sheeting: To protect floors and furniture from paint and debris
- Ladder or Step Stool: Necessary for reaching higher areas during installation and painting
- Prybar and Hammer: For removing existing baseboard and window casings and making adjustments as needed
- Extension Cord (if using power tools): Provides flexibility and reach for powered equipment
- Cleaning Supplies: Rags or sponges for wiping down surfaces before painting

Step-by-step instructions
- Take Measurements:
Measure the length and height of the wall where you plan to install the board and batten treatment. Note any obstacles such as windows or doors.
- Determine Sizes of Boards:
Decide on the width and spacing of the vertical battens (boards). Consider the dimensions of the wall and the aesthetic you want to achieve. Typically, battens are spaced evenly apart, but you can adjust based on your preferences.

- Buy Stock:
Once you've taken your measurements and decided on the sizes of your boards, it's time to gather your materials. Purchase the required supplies, including wood boards for the battens, baseboards, and headers, along with any additional items like nails, caulk, paint, and primer. Double-check your measurements and ensure you have enough stock to cover the entire wall.
- Prep the Area:
Clear the wall of any furniture or decorations. Protect the floor with a drop cloth to catch dust and debris.
- Remove Baseboard and Window Trim:
Carefully remove the existing baseboard and window trim using a pry bar and hammer. Set them aside for later reuse or replacement.
- Fill Holes and Repair Walls:
Inspect the wall for any holes or imperfections. Use spackle or joint compound to fill holes and cracks. Allow time for drying, then sand the wall smooth.
Note: If the existing wall has a textured surface or if you want to create a smoother surface, consider adding wall panels. Secure the panels to the wall following the manufacturer's instructions. - Replace Baseboard with Square Edge Boards:
Install square edge 1 x 5 boards along the bottom of the wall. Cut 45-degree angles at the joints to allow for movement and swelling. Use a nail gun to secure the boards to the wall.
- Install Header Boards Along the Ceiling:
Affix square edge 1 x 4 boards horizontally along the ceiling. Cut 45-degree angles at the joints to facilitate proper alignment and accommodate potential movement or swelling. Use a nail gun to securely attach the boards, ensuring they fit snugly against the ceiling.
- Frame Windows:
Construct frames around the windows using 1" x 3" boards. Align the boards carefully to ensure they fit precisely around the window frame. Secure the boards in place with a nail gun, ensuring they are level and flush with the surrounding wall surface. Adjust as needed to achieve a seamless and polished look around the windows.
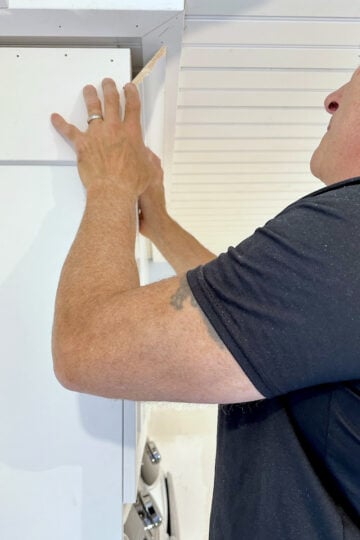
- Measure and Cut Battens:
Take measurements from the baseboard to the ceiling headers for each batten. Mark the measurements on the battens and cut them accordingly using a saw.
- Install Battens:
Use a level to ensure the battens are straight. Secure each batten to the wall using a nail gun, starting from the baseboard and working your way up to the ceiling headers.
- Cut Shorter Battens for Windows:
Measure and cut shorter battens to fit below the window apron and above the window headers. Install them in the same manner as the vertical battens on the wall.

- Final Batten:
Install the final batten against the adjacent walls to complete the board and batten treatment.
- Adjust Outlets:
If necessary, make adjustments to outlets following safety guidelines, such as consulting with an electrician or turning off power to the outlets.
- Caulk and Fill Nail Holes:
Caulk along the edges where the boards meet the wall and ceiling to create a seamless finish. Fill any nail holes with wood filler and sand them smooth.
- Paint:
Apply paint to the entire wall, including the battens and boards. Use a paintbrush for cutting in along the edges and a roller for the larger areas.


Determining the cost of materials
Before diving into your board and batten wall project, let's talk dollars and cents. Understanding the cost of materials upfront sets the stage for a smooth and budget-friendly journey. Keep in mind, the total expense can fluctuate depending on the size of your wall, the quality of materials you opt for, and any extra supplies needed to prep and polish your project.
Here's a breakdown of potential expenses to help you estimate the cost:
- Wood Boards: The primary expense will likely be the wood boards for the battens, baseboards, headers, and any additional framing around windows or doors. The cost will depend on the type and quality of wood selected, as well as the dimensions needed to cover your wall adequately. We suggest primed pine boards!
- Nails and Fasteners: You'll need nails or fasteners to secure the boards to the wall and to each other at the joints. The cost will depend on the type and quantity of fasteners required for your specific project. We used a nailing gun to make the job go faster.
- Caulk and Adhesive: Caulk is essential for filling gaps between boards and ensuring a seamless finish. Additionally, adhesive may be necessary for attaching panels to cover textured walls or securing boards in place. Purchase caulk that is paintable and free of latex or silicone.
- Paint and Primer: Don't forget to budget for paint and primer if you plan to finish the wall with a painted surface. The cost will vary depending on the brand, quality, and quantity of paint needed to cover your wall effectively.
- Miscellaneous Supplies: Consider any other miscellaneous supplies you may need, such as sandpaper for sanding down rough surfaces, wood filler for patching holes, and brushes or rollers for painting. If you're an avid DIY'er more than likely you already have these items!
To estimate the total cost, research prices for each item at your local hardware store or home improvement center. Be sure to factor in any taxes or delivery fees that may apply. Additionally, consider purchasing slightly more materials than you think you'll need to account for any mistakes or unexpected issues that may arise during the project.
By carefully assessing the cost of materials upfront, you can create a realistic budget and ensure that you have everything you need to complete your board and batten wall project successfully.

Our cost for this project
We had just about everything except the lumber and paint. The lumber for our board and batten wall was $200.26. The Benjamin Moore paint was $46.00. (Total $246.26)
Troubleshooting tips for installation
- Uneven Floors or Ceiling: If your floors or ceilings aren't playing nice, it's crucial to fix them before installing your board and batten wall. Use shims or leveling compounds to even out floors and ensure a smooth surface for your baseboards. For uneven ceilings, add shims or extra framing to help the header boards sit flush against the top.
- Non-Flush Walls: Dealing with textured or bumpy walls? Don't worry - you have options! Embrace the wall's character and adjust your board placement to work around imperfections. Alternatively, consider covering textured walls with paneling before installing the board and batten treatment, ensuring the seams align with where the battens will be installed.
- Selecting Straight, Quality Boards: When choosing boards, inspect them carefully to ensure they're straight and free of defects. Avoid warped or bowed boards, as they can cause installation issues and affect the finished look of your wall. Invest in good-quality boards to ensure durability and a professional finish.
- Insufficient Board Quantity: If you realize you haven't bought enough boards, don't panic. Most stores allow returns on unused materials. To avoid running short, calculate the quantity of boards needed based on your wall measurements and add a buffer to account for any mistakes. Once you're in the groove and making progress, the last thing you'll want is to halt your momentum and head out to buy more boards!
- Cutting Boards Incorrectly: Measure accurately and cut each board to fit the dimensions of your wall. Avoid cutting all boards at once, as this can lead to inconsistencies. Cut one board at a time, measuring and adjusting as needed for a precise fit. Pay attention to stud locations to ensure proper support.
- Skipping Caulking: Caulking is a must for this project! Don't skip if you want to achieve a seamless finish. Caulk all joints and seams where the boards meet the wall and ceiling to fill any gaps and create a smooth transition. Skipping caulking can result in unsightly gaps and compromise the overall appearance of your wall.
By addressing these common problems and taking proactive measures to ensure proper installation, you can overcome challenges and achieve a beautiful and well-executed board and batten wall in your space.

Curious how we've tackled other rooms? See more of our home updates in the Home Decor Project Hub.
More DIY home improvement inspiration


And there you have it, your very own board and batten masterpiece! From liquid nails to brad nailers, we've covered it all in this DIY project. Now, grab your favorite paint colors, fire up that nailer, and let your creativity flow. Whether it's a guest bedroom or your living room, this batten project adds a touch of charm to any space. Don't forget to fill those nail holes, smooth out rough areas, and admire your handiwork. Thanks for joining us on this batten tutorial journey. Please leave any questions you have in comments.
Happy building friends!