

Make Grocery Store Flowers Look Expensive: A Floral Designer Shows You How
I spent years as a professional florist, working with everything from luxury imported blooms to simple grocery store bouquets. You know what? Some of my favorite arrangements came from supermarket flowers. Last week, I grabbed a few bunches while picking up groceries at my local store and created a centerpiece that had my dinner guests asking which florist I used.
The trick with supermarket and grocery store flowers isn't just knowing what to buy - it's understanding how to transform those standard bunches into something special. After making thousands of arrangements over the years, I've learned exactly what works and what doesn't when it comes to selecting and styling these flowers.
In this guide, I'm sharing my tested tips for choosing the freshest blooms, preparing them properly, and arranging them like a pro. These are the same techniques I used in my flower shop, just adapted for the flowers you'll find in your grocery store's floral department.

Jump to:
Essential tools for arranging
I've written an entire blog post about my must-have flower arranging tools (you can check out "8 Must-Have Flower Arranging Supplies for Your Home" for the complete guide), but here are the basics you'll need to get started:
The right cutters make all the difference
Sharp floral shears or scissors are essential. I keep two pairs - one for stems and one for wire or tape. Regular kitchen scissors work in a pinch, but proper floral shears make clean cuts without crushing stems.
Cleaning tools
- Clean bucket or large container for prepping flowers
- Flower food packets (save extras from previous bouquets)
- Paper towels or a clean cloth for spills and stem cleanup
Design tools
- Clear waterproof floral tape for making grids
- Clean clear vase (or one of your favorite vessels)
- Floral foam (optional, but handy for complex arrangements)
- Pruning snips for woody stems and tough greens
Nice-to-have extras
- Rose strippers (if you work with roses often)
- Small garden pruners for thick stems
- Flower frogs or pin holders for special arrangements
Tip: Keep these tools clean and dedicated to flower work - it helps prevent bacteria from building up and makes your flowers last longer. I store all my flower tools in a plastic bin under my sink, ready whenever inspiration strikes.

Choosing your flowers: Mixed bouquets vs. single-variety bunches
Mixed bouquets: The quick option
When I walk into the supermarket floral section, I see two clear options: those ready-made mixed bouquets and bunches of single flower varieties. Mixed bouquets are perfect when you want a quick arrangement. The flowers are already coordinated for color and variety, which takes the guesswork out of combining flowers.

The Secret to Better Mixed Bouquets: these bouquets often skimp on greens. I usually grab an extra bunch of eucalyptus or ferns to bulk up the arrangement and give it that professional touch.
My favorite hybrid approach
My go-to method? I start with a mixed bouquet, then add 2-3 bunches of single varieties I love. Just last month, I picked up a pretty mixed bunch with roses and lilies, then added extra white spray roses as accent flowers and some fresh eucalyptus. The extra flowers gave the arrangement more impact, and the added greens made it look fuller and more polished.

Working with single-variety bunches
For single-variety bunches, I stick to this simple formula that works for me:
- One type of large, showy flower (like lilies, roses, or hydrangeas)
- Two types of smaller flowers (filler flowers) or textural elements
- One or two types of greens
Get my complete list of filler flowers in my 30 Fillers for Flower Arrangements: From Basics to Pro Tips post!

Budget-friendly tips
Single-variety bunches often give you more flowers for your money. When I'm making arrangements at home, I can usually create two medium arrangements from individual bunches for the same cost as one pre-made bouquet. Just last week, I split three bunches of lilies and some eucalyptus into two lovely arrangements - one for my kitchen and one for a friend. Plus, buying single-variety bunches gives you complete control over the final look of your design.
Need Inspiration? Look at those pre-made mixed bouquets for inspiration - they'll show you which flowers typically pair well together.
My Go-To Flower Source: Of all the grocery stores I shop for flowers, Trader Joe's is my favorite source for creating beautiful flower arrangements. Their floral selections are consistently fresh, well-priced, and often include unique seasonal varieties.
How to select the freshest flowers
Look for firm, crisp stems
I always check the stems first. They should feel crisp and sturdy, not soft or bendable. Working in my flower shop taught me that stems tell you a lot about the overall health of the flower. Give them a gentle squeeze - mushy or hollow spots are red flags.
Check the water
Take a peek at the flower bucket water. Clean, clear water is a good sign. If it's cloudy or has floating debris, those flowers have probably been sitting there a while. I've passed up many beautiful-looking bouquets just because the water looked questionable.

Signs of fresh blooms
Fresh roses should have tight centers and firm petals. For flowers like mums and carnations, gently touch the flower head - it should feel dense, not loose or falling apart. Lilies are best bought when they're still mostly closed, with just one or two blooms starting to open. For my tips on buying the best lilies visit my How to Design a Lily Flower Arrangement like a Pro post.
What to avoid
Skip flowers with:
- Brown or slimy stem ends
- Drooping heads
- Petals that look transparent or papery
- Leaves turning yellow or brown
- Pale, limp greens
- Flowers dropping petals in the bucket
Ask about delivery days
Last winter, I started chatting with the floral manager at my local store and learned they get deliveries every Tuesday and Friday. Now I try to shop on those days for the freshest selection. Don't be shy about asking when deliveries come in - most stores are happy to share this information.
Shop smart
I learned this trick years ago: reach toward the back of the flower buckets. Just like with milk in the dairy section, newer flowers are often placed behind older ones. Also check the flowers in the middle of bundled bouquets - sometimes less fresh flowers are hidden there.

Preparing your supermarket flowers
First steps at home
The moment I get home with grocery store flowers, I head straight to my kitchen sink. These first few steps make a huge difference in how long your flowers last. I learned this routine during my first week as a florist, and I still do it exactly the same way thirty years later.
Clean those stems
Take each stem and strip off any leaves that would sit below the water line in your vase. Those submerged leaves rot quickly and make the water dirty. I run my fingers down each stem, removing leaves as I go. For roses, remove the thorns too - they'll just tear up your hands later when you're arranging.

The right way to cut stems
Always cut your stems at an angle. I use a sharp floral knife, but clean kitchen scissors work fine too. That angled cut creates more surface area for water uptake and keeps the stems from sitting flat against the bottom of the vase. Make your cuts under running water if you can - it prevents air bubbles from blocking water flow.

About that flower food packet
Those little packets of flower food really do help. But using too much can do more harm than good. Here's my method:
- Fill your vase with the right amount of water first
- Add one packet per quart of water
- Stir until completely dissolved
I take flower prep seriously (in fact, I have a whole guide about making tulips last longer on the blog). These basic preparation steps work for most flowers you'll find at the supermarket.

Extra step: Give them a drink
Before arranging, let your prepped flowers stand in clean water with flower food for about an hour. This lets them drink up and perk up before you start designing. I learned this trick after watching too many arrangements wilt faster than they should have.
Preparing your vase
Clean vases last longer
A clean vase isn't just about looks - it really affects how long your flowers last. I always wash my vases with hot, soapy water and a splash of bleach, even if they look clean. Rinse thoroughly - any soap residue can harm your flowers.
Loose water or floral foam?
For most supermarket flowers, loose water works great. I use floral foam mainly for complex floral arranging or flowers with heavy heads like sunflowers. If you do use foam, soak it properly - drop it in water and let it sink on its own. Never push it down, or you'll get dry spots that can kill your flowers. To learn more about designing with floral foam visit my How to use Floral Foam post!

The tape grid trick
Here's a simple trick that changed my design game: make a grid across the top of your vase with clear tape. Space the tape about 2 inches apart in both directions, creating squares. This grid holds flowers exactly where you want them and stops them from flopping over. I use this method when the mouth of the container is wide like the soup tureen below - my favorite vintage vessel!


Quick guidelines
For loose water:
- Fill vase ⅔ full for most arrangements
- Use room temperature water
- Keep vases away from heating vents and direct sun
For foam:
- Secure foam with tape or a pin holder (if needed)
- Cut foam to sit ½ inch above vase rim
- Always pre-soak completely
Remember to check water levels daily - I lost count of how many arrangements I've saved just by keeping the water topped up.
My basic design process
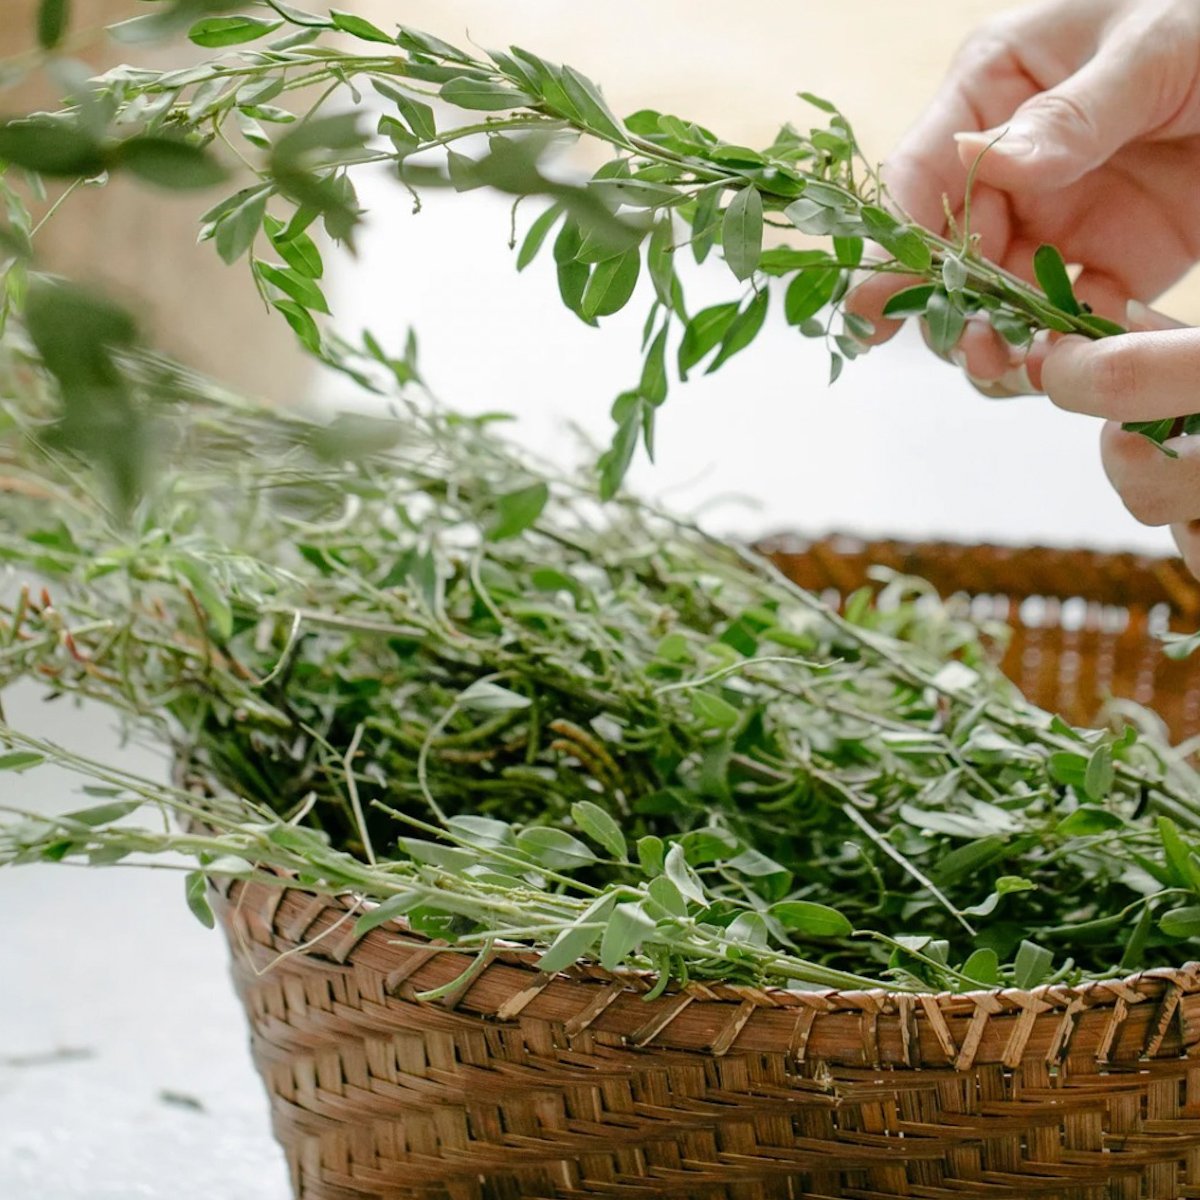
Start with your greens
I always begin with greens - they're the backbone of any good arrangement. Start by cutting your greens in varying lengths. I cut some short for the edges, medium lengths for filling, and keep a few longer pieces for height. Working as a florist taught me that greens aren't just filler - they create structure and hold other flowers in place.
Tips for working with greens: Before adding any greens, strip the bottom leaves and cut stems at different angles. For leafy greens like eucalyptus or ruscus, I remove any damaged leaves and cut some pieces shorter to create layers. When using foam, really pack those greens in - they hide the foam and give you a lush base to work with.

Adding focal flowers
Next come your show-stoppers - those big, beautiful focal flowers. I lay out all my flowers by type on my counter first (a trick I picked up in my shop days). This lets me see exactly what I have to work with. Start placing your largest flowers at different heights - some low, some high. This creates depth and keeps your arrangement from looking flat.

Building with smaller flowers
Now's the time for your smaller flowers and fillers. Keep working with one flower type at a time - it helps you space things evenly. I learned early on that jumping between flower types usually leads to unbalanced designs. Place some flowers deeper in the arrangement, others closer to the edge. This creates that professional-looking depth that makes people think you bought it from a florist.

Creating movement and depth
Remember to step back occasionally and look at your arrangement from all sides. Are some areas too flat? Do you need more depth? Don't be afraid to push some flowers deeper into the arrangement or pull others forward. When I'm designing, I often turn my vase a quarter turn after adding each type of flower - it helps ensure the arrangement looks good from every angle.

Final touches
Once everything's in place, I fill any gaps with leftover greens or smaller flowers. Take one last look - this time from slightly above, which is how most people will see your arrangement on a table.

Professional design tips
Why multiple bunches matter
One bunch of flowers often looks skimpy in a vase. For a standard-sized vase, I buy at least two bunches of the same flower type of a coordinating mix of flowers. This gives you enough flowers to create beautiful bouquets that full, professional look. For roses especially, I'll often grab three bunches - they open up quite a bit, and you want the arrangement to look full even after they bloom.

The right height for your space
Here's a trick I used to teach in my floral design classes: for dining table centerpieces, bend your elbow and rest it on the table (the arm wrestle tip). Your flowers shouldn't be taller than your bent forearm. This ensures guests can see each other across the table. Nothing ruins dinner conversation like having to peer around a too-tall arrangement. You can learn more about this trick in my Easter Flowers to Brighten Your Table post!

Spacing secrets
Space your flowers like they're climbing stairs - some high, some medium, some low. In my shop, we called this "creating valleys and hills." When you look at the arrangement from the side, you should see different layers, not just a wall of flowers. Leave some breathing room between blooms - packed-too-tight arrangements look stiff and unnatural.
Getting proportions right
A good rule I've always followed: your arrangement should be about 1.5 times the height of your vase (unless you're making a low centerpiece). For width, aim for the arrangement to be about 1.5 times the width of your vase at its fullest point. These proportions work in nearly every situation.

Working in layers
Think about your arrangement in three layers:
- Bottom layer: shortest stems, flowers facing slightly outward
- Middle layer: medium stems, flowers facing slightly upward
- Top layer: tallest stems, some straight up, some leaning out
Specific flower combinations that work
The lily look
My customers always loved when I paired lilies with smaller flowers - they're real show-stoppers. Start with 3-5 stems of lilies (remember to remove those pollen-covered stamens). Mix in spray roses or waxflower for softness, then add some Italian ruscus or eucalyptus. The small flowers fill spaces between the lilies as they open. Last month, I made this combo using white lilies, pink spray roses, and silver dollar eucalyptus - this floral arrangement made my kitchen smell amazing for days.

Perfect peony pairings
When peonies are in season at the grocery store, I grab them fast as they are one of my favorite blooms. They pair beautifully with garden roses, stock and lisianthus. The trick is choosing companions that don't compete with the peonies' fluffy texture. I like adding delicate flowers like Queen Anne's lace or million star baby's breath - they float around the larger blooms without overwhelming them. Add some salal or pittosporum greens to frame everything.

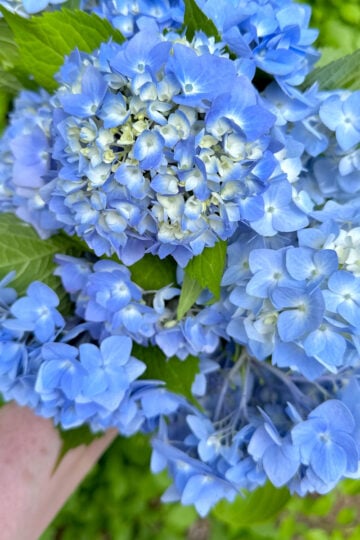
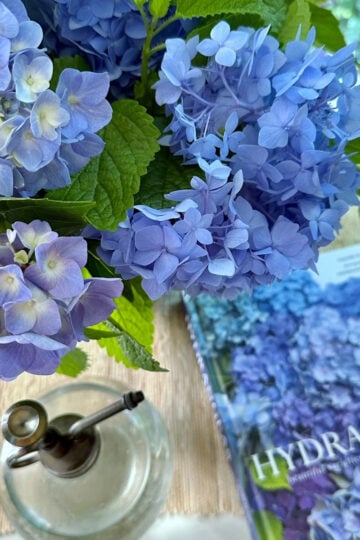
Hydrangea magic
Hydrangeas take up lots of space, which makes them perfect base flowers. Last summer, I made dozens of arrangements using white hydrangeas mixed with pink tulips and purple stock. The tulips filled empty spots between hydrangea heads, while the stock added height and fragrance. Just remember hydrangeas drink tons of water - check the water level twice a day.
A money-saving mix
Here's my favorite budget-friendly floral selections from the grocery store: carnations (they last forever), alstroemeria (you get lots of blooms per stem), and leather leaf fern. Buy two bunches of carnations in the same color family, one bunch of alstroemeria, and lots of greens. This combination of budget flowers gives you a full arrangement that can last two weeks or more.

Looking for more inspiration? The Floral Design Index is full of approachable ideas for flower lovers of all skill levels.
Creating gorgeous arrangements from supermarket flowers isn't complicated once you know the basics. After years of working with flowers, I still get excited walking into the grocery store's floral department. It's almost always my first stop! Some of my favorite arrangements started as simple bunches from my local supermarket.
Remember the basics: check for freshness, prep your flowers properly, and build your arrangement one type of flower at a time. Those little steps - stripping leaves, cutting stems at angles, using fresh clean water - make all the difference between an arrangement that lasts three days and one that lasts two weeks.
Don't worry if your first few arrangements aren't perfect. My first arrangements definitely weren't winning any awards. Just keep playing with different combinations and heights. Take photos of your store-bought bouquets to track what works and what doesn't.
Start simple. Try a mixed bunch with some extra stems of greenery, or combine different types of flowers you love. A great way to start is to build your confidence with easy floral selections before tackling more complex designs.
The best part about working with supermarket flowers? If something doesn't turn out quite right, you haven't spent a fortune. Next time you're grocery shopping, grab some beautiful flowers and give your own bouquet a try. Your home deserves fresh cut flowers, and you can definitely create something beautiful.
Happy arranging friends!


Hello Mrs LeBlanc! I am beyond happy to learn of celebrated nest! I received a beautiful small bouquet from a friend and needed to learn the name of a purple flower filler. Upon using Google lens, results showed a photo of handheld statice and I clicked on your link. I was fascinated by everything I was reading. The post which caught my eye was “the best fillers.” From there, I clicked on other posts. I am looking forward to reading more and more of your material. Thank you very much for sharing all your knowledge and experiences! I constantly look for inspiration to make our home beautiful with flowers as they really do transfer me to a relaxing state when I look at and/or smell them.
Hello Cindy, thank you so much for your kind note. I’m so glad you found Celebrated Nest, and it makes me happy to hear that the filler post helped you identify your flower. It’s such a wonderful filler and one of my favorites to work with.
Flowers really do have a way of changing the mood of a room, don’t they? I feel the same way. Even a small bouquet can make a space feel calmer and more welcoming.
I’m so glad you’re enjoying the posts, and I hope you continue to find ideas and inspiration here. Thank you again for taking the time to say hello.