Best Primer for Cabinets (How to Choose the Right One for a Lasting Finish)
This guide to the best primer for cabinets explains how to choose between bonding and stain-blocking primers for a durable, professional finish. Whether you are working with slick factory surfaces or wood that bleeds tannins, you will learn which primer to use, such as Stix for adhesion or BIN shellac for stain protection, and how to prep for a long-lasting paint job.

Content may contain affiliate links. When you shop the links, we receive a small commission at no cost to you. Thanks for supporting my small business.
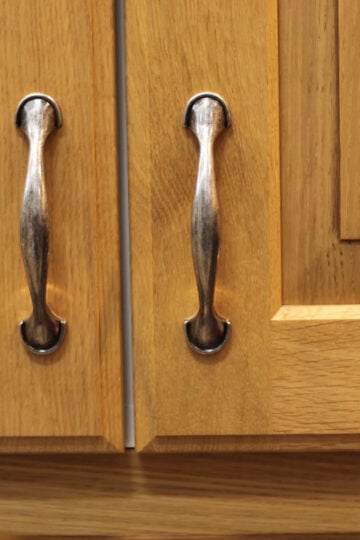
If you have been dreaming of painting your kitchen cabinets, you have probably already heard that primer can make or break the project. That is absolutely true. Choosing the right primer is not just a step, it is the foundation of a finish that lasts.
Here is something most people do not realize: there is no single "best primer for cabinets." The right choice depends on your situation. Some cabinets need strong adhesion to grip slick factory surfaces, while others need stain-blocking power to stop tannin bleed from wood. In this post, I will walk you through both options, explain when to use each, and help you choose with confidence before you ever open a paint can.
Jump to:
- Choosing the best primer for cabinets: Two proven options
- Understanding the role of primer
- Types of primers for kitchen cabinets
- Choosing which primer is right for your cabinets
- Exploring Zinsser B-I-N shellac-based primer
- Application techniques
- Using Stix primer
- Application techniques
- Preparing cabinets for priming
- Mistakes to avoid when priming cabinets
- Frequently asked questions
- More kitchen design inspiration
Choosing the best primer for cabinets: Two proven options
When it comes to the best primer for cabinets, there is no single one-size-fits-all product. The right choice depends on what your cabinets need most - strong adhesion or stain blocking. These are the two professional-grade primers trusted by painters and DIYers:
- Stix Bonding Primer
Best for slick surfaces like laminate, factory finishes, or previously painted cabinets. It grips when regular primers fail. - BIN Shellac-Based Primer
Best for wood cabinets that bleed tannins or have dark stain. It blocks stains, knots, and discoloration for a clean, even finish.
Some cabinet projects need only one of these. Others may benefit from using both - Stix for bonding, followed by BIN for stain protection. In the next sections, I will show you exactly how to choose between them.
Understanding the role of primer
Primer is not just another coat of paint. It is what makes your cabinet makeover last. Think of it as the bond between your cabinets and your paint. If that connection is weak, the paint can peel, chip, or scratch off over time, no matter how good the paint is.
While paint gives you the color and finish, primer prepares the surface and helps the paint grip properly. It creates a smooth, sealed base so your cabinets can handle daily use without showing wear. Once you understand what primer actually does, you are already halfway to a finish that looks professional and holds up for years.

Types of primers for kitchen cabinets
Navigating the realm of primers for kitchen cabinets reveals two standout contenders, each tailored to specific project requirements
- BIN Shellac Based Primer emerged as a front-runner, offering unique advantages tailored to distinct project needs. BIN Shellac Based Primer by Zinsser excels in tackling issues like bleed-through and tannin blocking, making it an indispensable choice for transitioning from dark to light paint colors. Its rapid drying time and unparalleled stain-blocking capabilities make it a top choice for challenging surfaces.
- Conversely, Stix Primer by Benjamin Moore boasts remarkable bonding capabilities, making it ideal for non-porous surfaces such as laminate. When aiming for darker paint colors or painting surfaces less susceptible to bleed-through, Stix Primer proves to be the go-to option. While Stix offers superior bonding, BIN reigns supreme for its unmatched stain-blocking properties.
Note: "Bleed-through" refers to the phenomenon where stains or colors from underlying surfaces seep through layers of paint or primer, impacting the final finish. This issue is commonly observed when painting previously stained cabinets white or another light color.


Choosing which primer is right for your cabinets
Selecting between BIN and Stix hinges on the specific demands of your project. For scenarios involving bleed-through concerns or transitioning between light paint and dark stain colors, BIN Shellac Based Primer stands as the optimal choice. Conversely, when dealing with surfaces like laminate or opting for darker paint hues, Stix Primer emerges as the prime solution, delivering exceptional bonding prowess without compromising on quality. In challenging situations where bleed-through is a risk and bonding is a concern, employing a combination of both primers (Stix first, then BIN) can provide comprehensive adhesion and protection.
Here's a helpful chart to help you decide which primer is best for your kitchen cabinets:
| Type of Cabinet | Paint Color Choice | Recommended Primer |
|---|---|---|
| Wood (stained or raw wood) | Light | BIN Shellac |
| Wood (stained or raw wood) | Dark | Stix |
| Laminate | Light or Dark | Stix |
| MDF | Light or Dark | BIN Shellac |
This chart outlines the recommended primers based on the type of cabinet material and the color of paint being applied. For light-colored wood cabinets, BIN Shellac primer is suggested, while Stix primer is recommended for dark-colored wood cabinets and both light and dark-colored laminate cabinets. For MDF cabinets, BIN Shellac primer is advised for both light and dark paint colors.
Now that you've determined which primer suits your cabinets best, I'll outline each one below.

Exploring Zinsser B-I-N shellac-based primer
Congratulations! You've decided that BIN Shellac is the primer for your cabinets. In this section, we'll delve into the world of BIN Shellac Primer, uncovering its unique properties, benefits, and application techniques. Join us as we explore the ins and outs of this remarkable primer and learn how to achieve outstanding results in your cabinet painting project.
Unveiling properties and benefits
Zinsser BIN Shellac Primer emerges as a formidable solution for priming kitchen cabinets, offering a robust array of properties and benefits. This primer stands out for its exceptional adhesion, swiftly creating a firm bond between the surface and the paint. Its stain-blocking capabilities make it a reliable choice, particularly when dealing with surfaces prone to bleed-through or tannin-rich wood. Moreover, BIN Shellac Primer's fast drying time ensures efficiency without compromising on quality, facilitating quick recoating and finishing of cabinets.
Comparison with other oil-based primers: Odor, dry time, and smooth finish
When juxtaposed with other oil-based primers, Zinsser BIN Shellac Primer showcases distinct advantages. While its strong odor might pose a temporary inconvenience during application, its rapid drying time compensates by expediting the overall painting process. Furthermore, BIN Shellac Primer dries to a smooth, hard finish, providing an ideal foundation for the subsequent layers of paint. In terms of stain blocking and adhesion, BIN Shellac Primer often outperforms its counterparts, ensuring a durable and flawless finish for kitchen cabinets.
Tips for effectively applying on kitchen cabinets
To maximize the efficacy of Zinsser BIN Shellac Primer when priming kitchen cabinets, consider the following tips:
- Surface Preparation: Ensure that the cabinet surface is clean, dry, and free from any dust, grease, or debris before applying the primer.
- Ventilation: Due to its strong odor, adequate ventilation is essential during application to minimize discomfort and facilitate proper drying.
- Application Technique: Use a high-quality brush or roller to apply BIN Shellac Primer evenly across the cabinet surface, working in smooth, overlapping strokes.
- Recoating: Allow sufficient drying time between coats as per the manufacturer's instructions, typically around 45 minutes to 1 hour.
- Cleanup: Utilize appropriate solvents such as denatured alcohol or ammonia for cleaning tools used with BIN Shellac Primer, ensuring thorough cleanup and maintenance of equipment.
By adhering to these guidelines, you can achieve optimal results when using Zinsser BIN Shellac Primer to prime kitchen cabinets, paving the way for a successful painting endeavor.
Pros and cons
Pros:
- Excellent Adhesion: BIN Shellac primer provides superior adhesion to various surfaces, including wood, metal, plastic, and even glass, ensuring that the paint adheres firmly to the cabinet surface.
- Stain Blocking: It effectively blocks stains, including water stains, smoke stains, and wood tannins, preventing them from bleeding through the paint and ruining the finish.
- Fast Drying: BIN Shellac primer has a fast drying time, allowing for quick recoating and finishing of the cabinets.
- Smooth Finish: It dries to a smooth, hard finish, providing an ideal base for the paint and ensuring a professional-looking result.
- Seals Odors: BIN Shellac primer seals in odors, making it particularly suitable for cabinets in areas prone to strong odors, such as kitchens.
Cons:
- Strong Odor: One of the main drawbacks of BIN Shellac primer is its strong odor, which can be overpowering and require adequate ventilation during application.
- Cleanup Challenges: Cleanup of tools used with BIN Shellac primer can be more challenging compared to water-based primers, as it requires special solvents such as denatured alcohol or ammonia.
- High VOC Content: It contains volatile organic compounds (VOCs), which can contribute to indoor air pollution and may pose health risks if inhaled in large quantities.
Overall, while BIN Shellac primer offers excellent adhesion, stain blocking, and fast drying properties, its strong odor and cleanup requirements should be taken into consideration when choosing a primer for kitchen cabinets.
Application techniques
Comparison of spraying versus rolling/brushing techniques
When applying BIN Shellac Primer, you have the option to use either spraying or rolling/brushing techniques. Spraying generally provides a more even application and smoother finish, especially for large surfaces, while rolling or brushing allows for better control and precision, particularly in tight or detailed areas.
Spraying: Using a paint sprayer, apply BIN Shellac Primer in thin, even coats, maintaining a consistent distance from the surface to avoid oversaturation or drips. This method ensures uniform coverage and minimizes brush marks or roller stippling.
Rolling/Brushing: For smaller areas or intricate details, rolling or brushing the primer can be more effective. Use a high-quality brush or roller to apply the primer in smooth, overlapping strokes, working systematically to prevent uneven buildup or pooling.

Tips for achieving a thin, even coat of primer
To achieve a thin, even coat of BIN Shellac Primer and minimize the risk of drips or brush marks:
- Stir the primer
Stir the primer thoroughly before application to ensure uniform consistency and distribution of pigments.
- Apply in thin coats
Apply the primer in thin layers, avoiding heavy saturation or over-application, which can lead to drips and uneven drying.
- Work Methodically
Work methodically, starting from one corner and gradually moving across the surface in overlapping strokes to ensure consistent coverage.
- Maintain a Wet Edge
Maintain a wet edge to blend each section seamlessly with the previous one, preventing visible brush marks or roller lines.
- Attend to Intricate Areas
Pay attention to areas with intricate details or recesses, ensuring that the primer reaches into all crevices for thorough coverage.
Recommendations for sanding between primer coats
Sanding between BIN Shellac Primer coats is essential for achieving a smooth, flawless finish:
- Use fine-grit sandpaper (typically between 220 to 320 grit) to lightly sand the surface after each primer coat has dried completely.
- Sand in the direction of the wood grain or surface texture to avoid creating scratches or visible marks.
- Wipe away any sanding dust with a clean, dry cloth or tack cloth before applying subsequent primer coats.
- Inspect the surface for imperfections or rough spots, addressing them as needed with additional sanding or spot priming.
- Repeat the priming and sanding process until you achieve the desired level of smoothness and coverage, ensuring each coat is fully cured before sanding.
By following these application techniques and tips, you can ensure a professional-quality finish when using BIN Shellac Primer to prime your kitchen cabinets, laying the foundation for a successful painting project.

Using Stix primer
Congratulations on choosing Stix Primer for your cabinet painting project! In this section, we'll dive into the realm of Stix Primer, exploring its versatile properties, benefits, and application techniques. Stix Primer, a part of our 3 step cabinet painting process is renowned for its exceptional bonding capabilities and minimal odor, making it a popular choice among DIYers and professionals alike. Whether you're priming wood, laminate, or other surfaces, Stix Primer offers reliable adhesion and a smooth finish. Join us as we uncover the secrets to successful cabinet priming with Stix Primer and discover how to achieve professional results that stand the test of time.
Stix primer: Unveiling properties and benefits
Stix Primer stands as a versatile solution for priming kitchen cabinets, offering a range of properties and benefits tailored to diverse project needs. Renowned for its exceptional bonding capabilities, Stix Primer forms a strong adhesive bond with various surfaces, including wood, MDF, laminate, PVC, glass, and tile. Its versatility makes it suitable for both interior and exterior applications, making it a go-to choice for a wide array of painting projects.
Comparison with other Primers: Odor, dry time, and smooth finish
In comparison with other primers, Stix Primer distinguishes itself through its minimal odor during application, providing a more comfortable painting experience, especially in indoor settings. While it may not offer the same level of stain-blocking capabilities as some oil-based primers, Stix Primer excels in terms of quick drying, facilitating faster recoating and finishing of cabinets. Moreover, it dries to a smooth, hard finish, offering excellent hiding power and ensuring a flawless base for subsequent layers of paint.
Tips for effectively applying Stix primer on kitchen cabinets
To optimize the application of Stix Primer when priming kitchen cabinets, consider the following tips:
- Surface Preparation: Ensure that the cabinet surface is clean, dry, and free from any dust, grease, or debris before applying the primer.
- Ventilation: Although Stix Primer emits minimal odor, adequate ventilation is still recommended during application to promote proper drying and ventilation of fumes.
- Application Technique: Utilize a high-quality brush or roller to apply Stix Primer evenly across the cabinet surface, using smooth, overlapping strokes for uniform coverage.
- Recoating: Allow ample drying time between coats, typically around 1 hour, depending on environmental conditions and the thickness of the application.
- Cleanup: Clean tools used with Stix Primer promptly after use, employing suitable solvents or specialized cleaners as necessary to ensure thorough cleanup and maintenance of equipment.
By adhering to these recommendations, you can achieve optimal results when using Stix Primer to prime kitchen cabinets, ensuring a professional and long-lasting finish that enhances the overall aesthetic of your space.

Pros and cons
Pros:
- Superior Bonding: Stix primer is renowned for its exceptional bonding properties, adhering well to a variety of surfaces, including wood, MDF, laminate, PVC, glass, tile, and more.
- Versatile Application: It can be used as a bonding primer for both interior and exterior surfaces, making it suitable for various painting projects beyond kitchen cabinets.
- Low Odor: Compared to some oil-based primers, Stix primer emits minimal odor during application, providing a more comfortable painting experience, especially in indoor settings.
- Quick Drying: Stix primer dries relatively quickly, allowing for faster recoating and finishing of cabinets, which can expedite the painting process.
- Excellent Hide: It offers excellent hiding power, helping to conceal surface imperfections and creating a smooth base for the paint to adhere to evenly.
Cons:
- Limited Stain Blocking: While Stix primer provides good adhesion, it may not offer the same level of stain-blocking capabilities as some oil-based primers like BIN Shellac primer, particularly on surfaces prone to tannin bleed-through.
- May Require Multiple Coats: Depending on the surface and desired finish, Stix primer may require multiple coats to achieve optimal coverage and adhesion, which can extend the painting process.
- Cleanup Challenges: Cleanup of tools used with Stix primer may require solvents or specialized cleaners, similar to other oil-based primers, which can be more cumbersome compared to water-based primers.
Overall, Stix primer is prized for its superior bonding capabilities, versatility, and low odor, making it a popular choice for various painting projects, including kitchen cabinets. However, its limited stain-blocking properties and potential need for multiple coats should be considered when selecting a primer for specific surfaces and applications.

Have three days to spare? My 5 weekend home improvement projects will make a big impact fast.
Application techniques
Comparison of spraying versus rolling/brushing techniques
When applying Stix Primer, you have the choice between spraying and rolling/brushing techniques, each with its own advantages:
Spraying: Spraying Stix Primer offers efficient coverage, especially for large cabinet surfaces. It provides a smooth, even application and reaches into intricate details more effectively. However, it requires proper equipment and careful masking to prevent overspray.
Rolling/Brushing: Rolling or brushing Stix Primer allows for greater control, especially in confined spaces or areas with intricate designs. It provides versatility and precision, ensuring thorough coverage even in hard-to-reach corners. However, it may require additional effort to achieve a completely smooth finish compared to spraying.
Tips for achieving a thin, even coat of primer
To ensure a thin, even coat of Stix Primer and minimize the risk of drips or brush marks:
- Stir the primer thoroughly before application to ensure consistency.
- Apply the primer in thin layers, avoiding heavy application that can lead to drips or uneven coverage.
- Use high-quality brushes or rollers suitable for the primer's consistency to achieve smooth application.
- Work methodically, applying the primer in overlapping strokes to ensure uniform coverage.
- Maintain a wet edge to blend each section seamlessly and prevent visible brush marks or roller stippling.
Recommendations for sanding between primer coats
Sanding between Stix Primer coats is essential for achieving a smooth, professional finish:
- Use fine-grit sandpaper (around 220 to 320 grit) to lightly sand the surface after each primer coat has dried completely.
- Sand in the direction of the wood grain or surface texture to avoid creating scratches or marks.
- Remove sanding dust with a clean, dry cloth or tack cloth before applying subsequent coats.
- Inspect the surface for imperfections or rough spots, addressing them with additional sanding or spot priming as needed.
- Repeat the priming and sanding process until you achieve the desired level of smoothness and coverage, ensuring each coat is fully cured before sanding.
By following these application techniques and recommendations, you can achieve optimal results when using Stix Primer to prime your kitchen cabinets, ensuring a durable and flawless base for the paint and a professional-quality finish.

Preparing cabinets for priming
Thorough cleaning and degreasing of cabinet surfaces
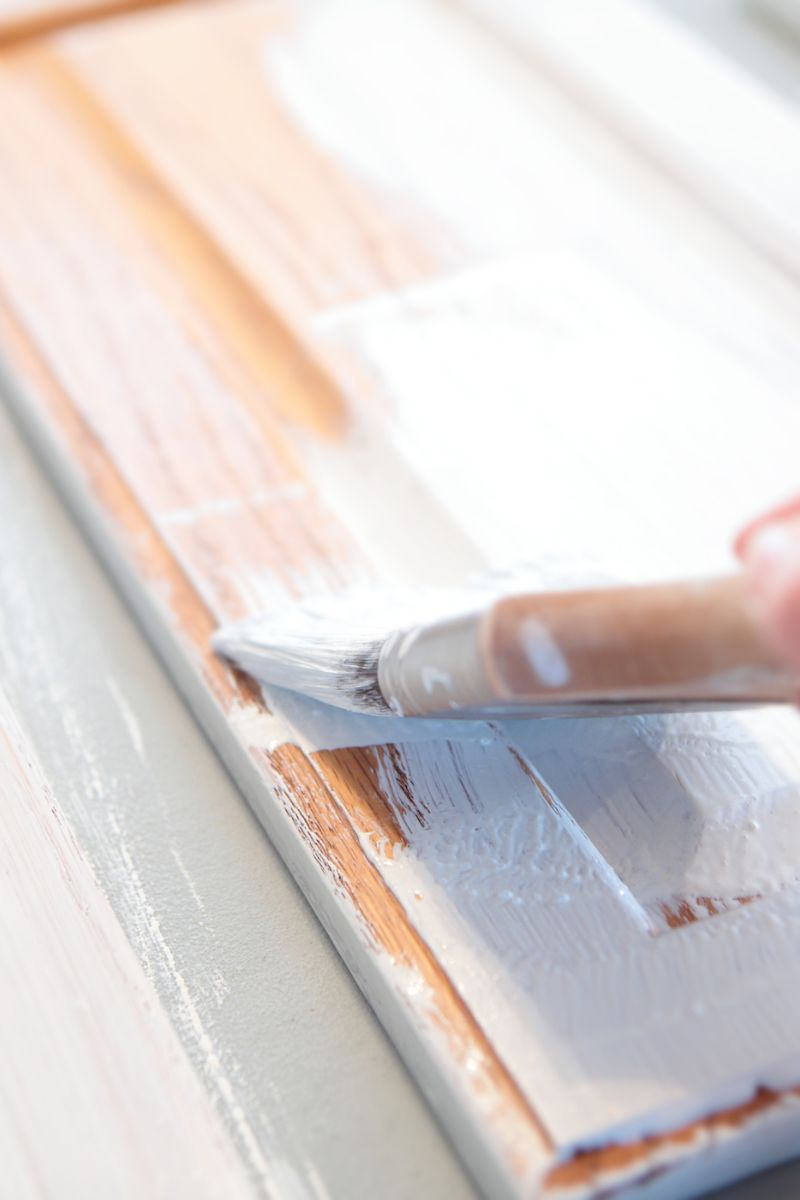
Before diving into the priming process for your kitchen cabinets, it's paramount to embark on a thorough cleaning and degreasing journey. This step ensures optimal adhesion and a flawless finish for your cabinets. Over time, grease, grime, and residues can accumulate on cabinet surfaces, hindering the primer's ability to adhere effectively. To combat this, utilize a potent degreasing solution (I recommend Dirtex Cleaner) or a mixture of water and mild detergent to banish any grease or dirt buildup. Pay special attention to areas around handles, knobs, and cooking spaces where grease tends to linger the most.

To sand or not to sand...
While sanding is a standard recommended for prepping cabinet surfaces, it's not always necessary. We did not sand our cabinets or our kitchen island and they have held up beautifully for years using Stix Primer with Advance paint. If Using BIN Shellac Primer you will want to sand between coats for a smoother finish.
Precautions before priming: Removal of hardware and filling holes
Before you start priming, it's wise to remove all hardware such as handles, knobs, hinges, and drawer pulls from the cabinet doors and drawers. This ensures that the primer and paint can be applied evenly across the entire surface, leaving no area untouched. Additionally, take a moment to inspect the cabinet surfaces for any holes, dents, or imperfections that may need attention before priming. Utilize a suitable wood filler or spackling compound to address any blemishes, ensuring a smooth and seamless canvas for your painting endeavors.

It's crucial to note any specific requirements or differences in preparation steps for each primer type you choose. While some primers may adhere well to surfaces without extensive sanding, others may necessitate more thorough surface preparation for optimal results. Always adhere to the manufacturer's instructions and recommendations provided with your chosen primer to achieve the best possible outcome for your cabinet painting project.
Mistakes to avoid when priming cabinets
- Neglecting Surface Preparation: Skipping thorough cleaning and degreasing, which can hinder primer adhesion.
- Applying Too Thick of a Coat: Overloading with primer results in drips, uneven coverage, and longer drying times.
- Ignoring Ventilation: Inadequate airflow during priming, especially with primers containing strong odors.
- Rushing the Application: Not allowing sufficient drying time between coats, which affects adhesion and finish.
- Using the Wrong Primer Type: Choosing a primer unsuitable for the cabinet material or intended paint type.
- Skipping Primer Altogether: Underestimating the necessity of primer for achieving a durable and smooth finish.
- Neglecting Hardware Removal: Failing to remove cabinet hardware before priming, resulting in uneven coverage.
- Disregarding Manufacturer Instructions: Ignoring specific guidelines provided by the primer manufacturer, which can impact the quality of the finish.
Tip: Pay close attention to #4: Rushing the Application it is imperative on each step of priming and painting cabinets that you allow sufficient drying time between coats. Rushing the application process can lead to a range of issues, including poor adhesion, uneven coverage, and compromised durability of the finish
Frequently asked questions
The best primer for cabinets depends on your surface. Use Stix Bonding Primer for slick or factory-finished cabinets that need strong adhesion. Use BIN Shellac-Based Primer if you are working with wood or stained cabinets that may bleed tannins. Both are professional-level options that create a durable base.
Most professional painters rely on shellac-based primers like BIN for stain blocking or bonding primers like Stix for adhesion. These primers provide a stronger foundation than standard latex primers and help prevent peeling, chipping, and yellowing over time.
Kilz can work for basic wall or trim projects, but it is not usually the top choice for kitchen cabinets. Cabinets need stronger adhesion or stain blocking than standard primers provide. For long-lasting results, most painters recommend Stix for bonding or BIN Shellac for stain blocking rather than general-purpose Kilz formulas.
Zinsser 123 is a water-based primer that can work on cabinets in some cases, but it does not offer the same bonding strength as Stix or the stain-blocking power of BIN. If you want the most durable finish on high-touch surfaces like kitchen cabinets, Stix and BIN are more reliable choices.

More kitchen design inspiration
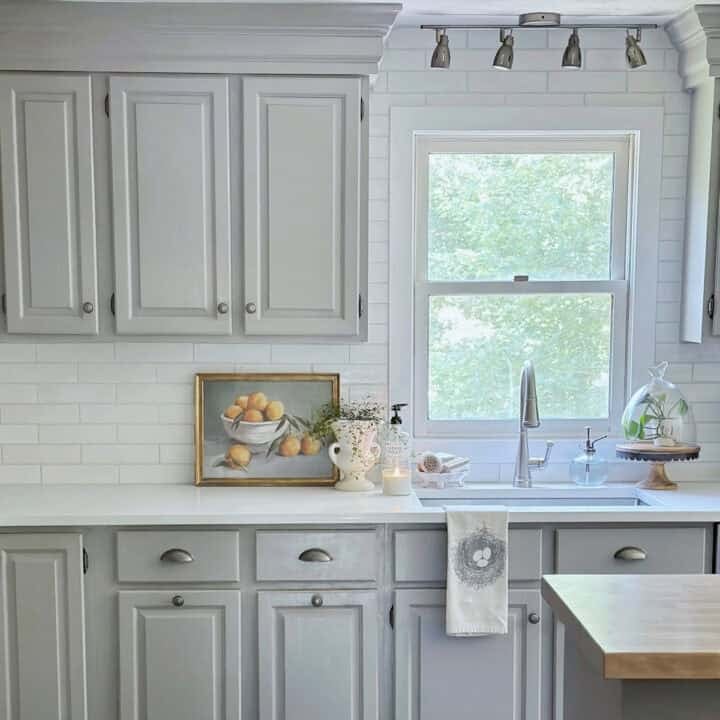


Painting kitchen cabinets can indeed be a lot of work, but the results are well worth the effort. From personal experience, using Benjamin Moore Advance paint with their Stix primer proved to be the perfect solution for achieving a smooth finish on our grey cabinets. While it may seem daunting at first, taking the time to prep work and choose the right type of paint and primer pays off in the end. Whether you're a DIY enthusiast or prefer hiring a professional painter, finding the best product for your project is key to ensuring the best results.
I hope this, the best primer for cabinets (How to choose the right one for a lasting finish) helped demystify the process of selecting the perfect primer for your cabinet painting project, empowering you to achieve professional-quality results with confidence and ease. If you have any questions, please leave them in comments! We are always happy to help!
Happy painting friends!