Elevate Your Bedroom With a Custom Upholstered DIY Box Spring
A couple of years after getting a nice new mattress for queen-size bed, our old sagging box spring just couldn't support all that comfort properly. While newer mattresses remove the need for old springs, a sturdy flat platform remains key. As our canopy bed frame needed custom queen sizing, finding an ideally supportive readymade base seemed unlikely.
Rather than compromise on comfort or looks, my husband Ray and I considered tackling the perfect foundation ourselves. Some Googling revealed DIY wood platforms as an option. Between Ray's handiness and my determination to avoid a basic bed skirt opting for a polished custom upholstered appearance that you see on a high-end platform bed instead, could we create an ideal new box spring on a budget? I was eager to take this carpentry challenge on!

Content may contain affiliate links. When you shop the links, we receive a small commission at no cost to you. Thanks for supporting my small business.
Jump to:
Evaluating existing box spring/support needs
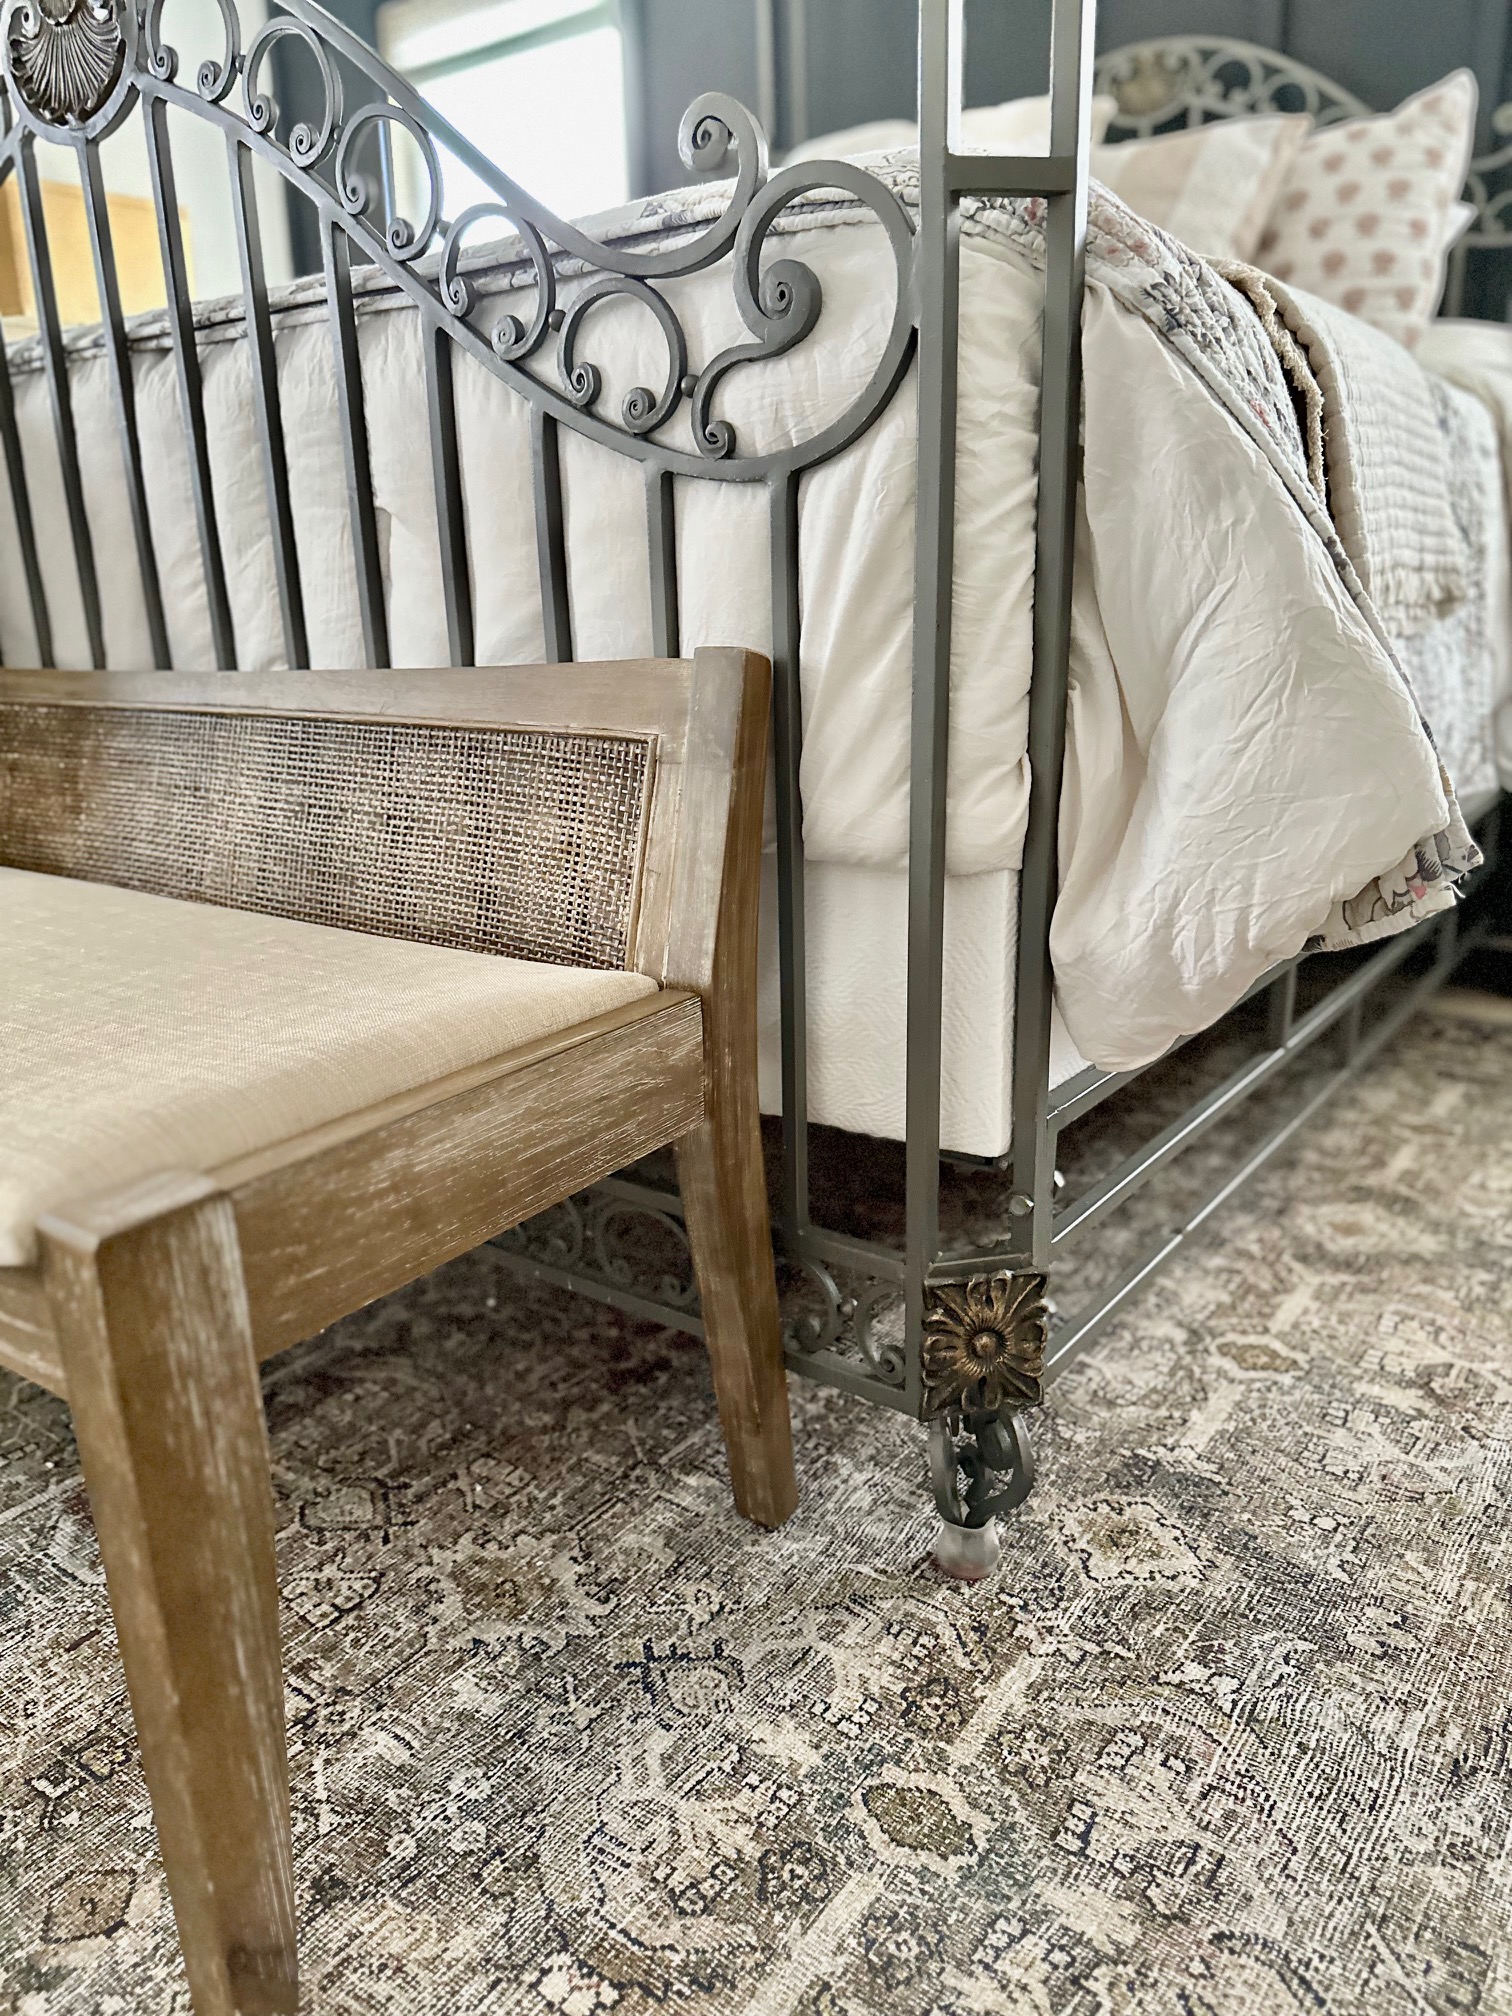
Inspecting the current state of our existing foundation first provided plenty of motivation for replacement. Warped wooden side rails, plus broken slats created an uneven sagging surface under our new mattress. Not ideal comfort-wise!
And since our new mattress has an advanced inner-spring free design that contours on its own, simply replacing the sagging box spring identically seemed unnecessary for proper support. However, we struggled to find any ready-made box spring alternatives suited to our cherished canopy bed frame's dimensions. This style requires a flat solid platform base precisely fitted from edge to edge rather than using a typical centralized rail leg design.
Then the lightbulb hit - what if WE carefully crafted a custom cut plywood foundation to achieve that elusive flat plane?" Between Ray's carpentry skills and my conviction only a tailored upholstered look would do, building our stable base from scratch specifically for the frame suddenly felt possible and was a great way to get what we wanted.

You can shop this bedroom here and learn how to install your own DIY Board and Batten Wall. Learn more about our Loloi rug and why its the best rugs for dogs.
Designing ideal height
Beyond structural support priorities, visual proportions balanced with mattress thickness mattered for overall bedroom harmony in a canopy cocoon centerpiece. We adore sleeping tall, The frame sits off the floor 6" so keeping a 28" total bed height with 12" plush mattress set the custom box spring at 8" - a mix of plywood and 2x6 framing achieving proportions perfectly.
Many modern foundations squat lower than historic internal spring predecessors. But robust 2" thick x 8" wide boards formed ideal side walls, availability and value sealing construction material decisions supporting queen dimensions measured at 60" x 80".
For reference adapting to other bed sizes, dimensions include:
| Bed Size | Dimensions |
|---|---|
| Twin | 39 inches x 75 inches |
| Full | 54 inches x 75 inches |
| Queen | 60 inches x 80 inches |
| King | 76 inches x 80 inches |
With Ray's carpentry skills, we transformed standard lumber from the home improvement store into a custom-sized queen size box spring foundation at just the right height for our bed thanks to precise calculations.

Perks of building our own
Financial savings appealed right away. Quality wood and an upholstery fabric box spring cover from Land's End still added up far less than comparable mattress foundations at typical market rates.
Crafting allowed completely customized sizing too. After double-checking the canopy bed frame corners to center perfectly, we altered the DIY plan ensuring a gapless fit hugging all sides. No more uneven spaces!
Choosing premium 3⁄4 inch plywood along with reinforced stability battens for center support granted durability and rigidity current compromised support was lacking. Building by hand meant no skimping on materials or construction quality!!
In a market rife with flimsy platforms failing prematurely or prohibitively priced replacements, this project promised needed support cost-effectively, sized impeccably AND with discerning materials hand-selected. A triple win!

Building a sturdy structure
After researching options balancing cost, availability, and durability goals, the ideal box spring skeleton supply list emerged quickly:
- 3⁄4" premium hardwood plywood formed a rigid flag platform base able to withstand heavyweight mattresses sans excessive sagging. Can't skimp on foundation integrity!
- Abundant 2" x 6" boards added strong structural reinforcement once precisely screwed underneath like slatted supports. Happily, the thicker dimensions cost less than 1 x 6" options for maximized savings.
- Standard fasteners and basic tools filled out additional construction needs. Having an electric miter saw helped achieve perfect custom-sizing cuts too.
- A box spring cover ordered online affordably delivered the sleek upholstered look I coveted once fitted securely over the handmade wooden base, disguising DIY effort.
With quality pieces sourced reasonably from the home improvement store and a helpful tool library, we were ready to elevate bedtime by making a solid structure through carpentry!

Crafting a supportive frame
The first vital step involved triple confirming canopy bed interior platform distances end-to-end so calculating custom frame dimensions precisely. Careful side-to-side and front-to-back tape measure checks ensured a gapless fit.
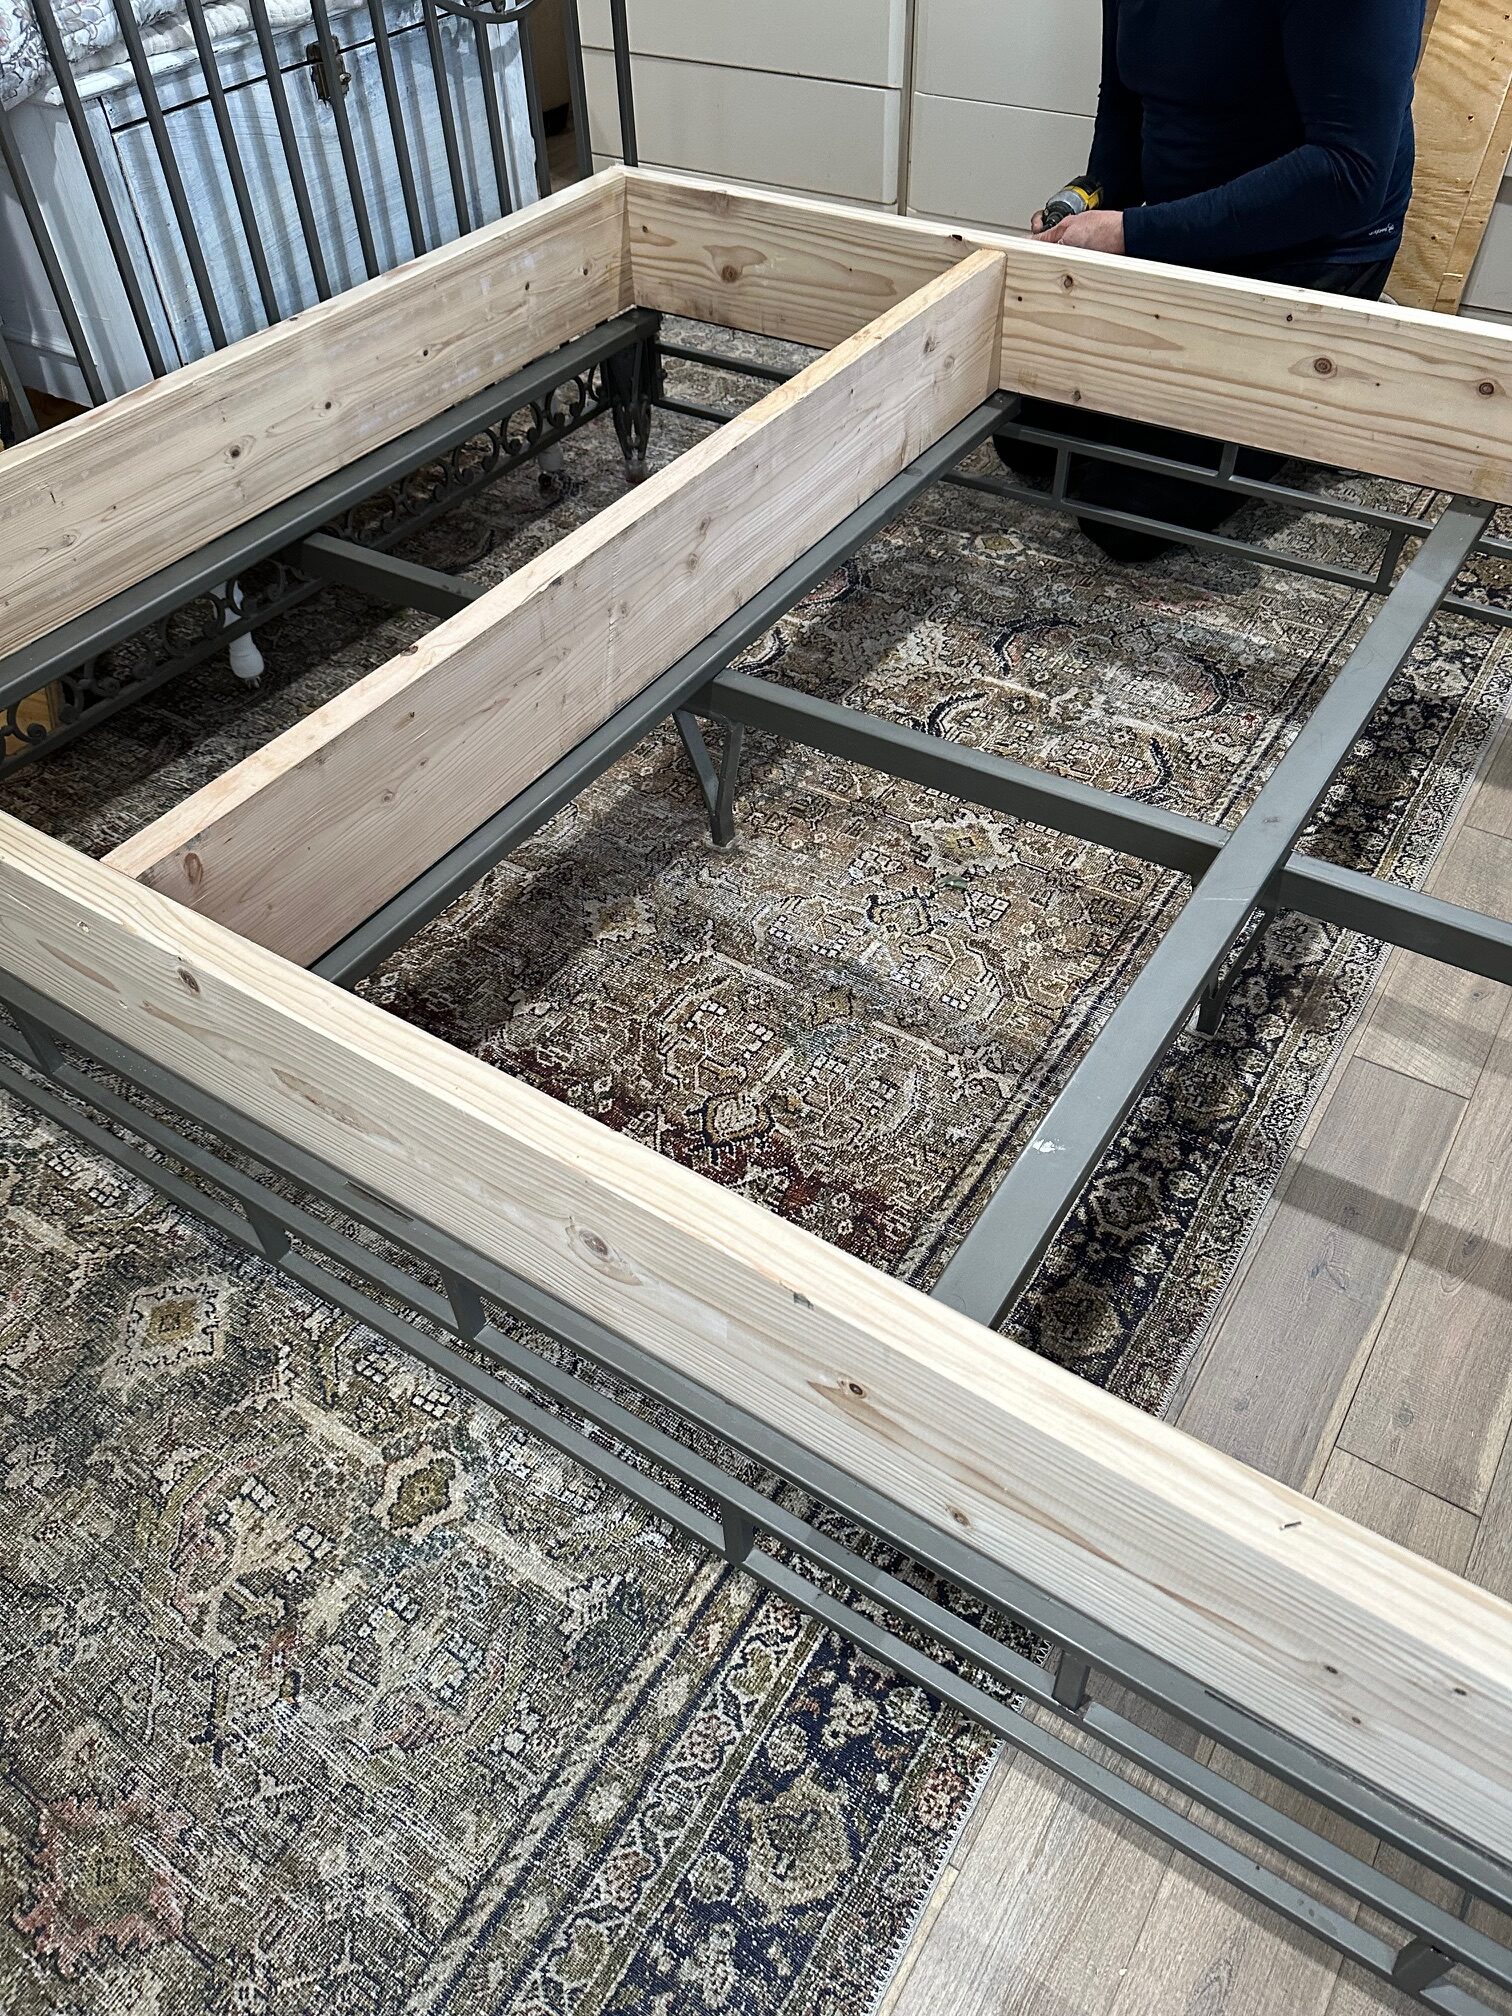
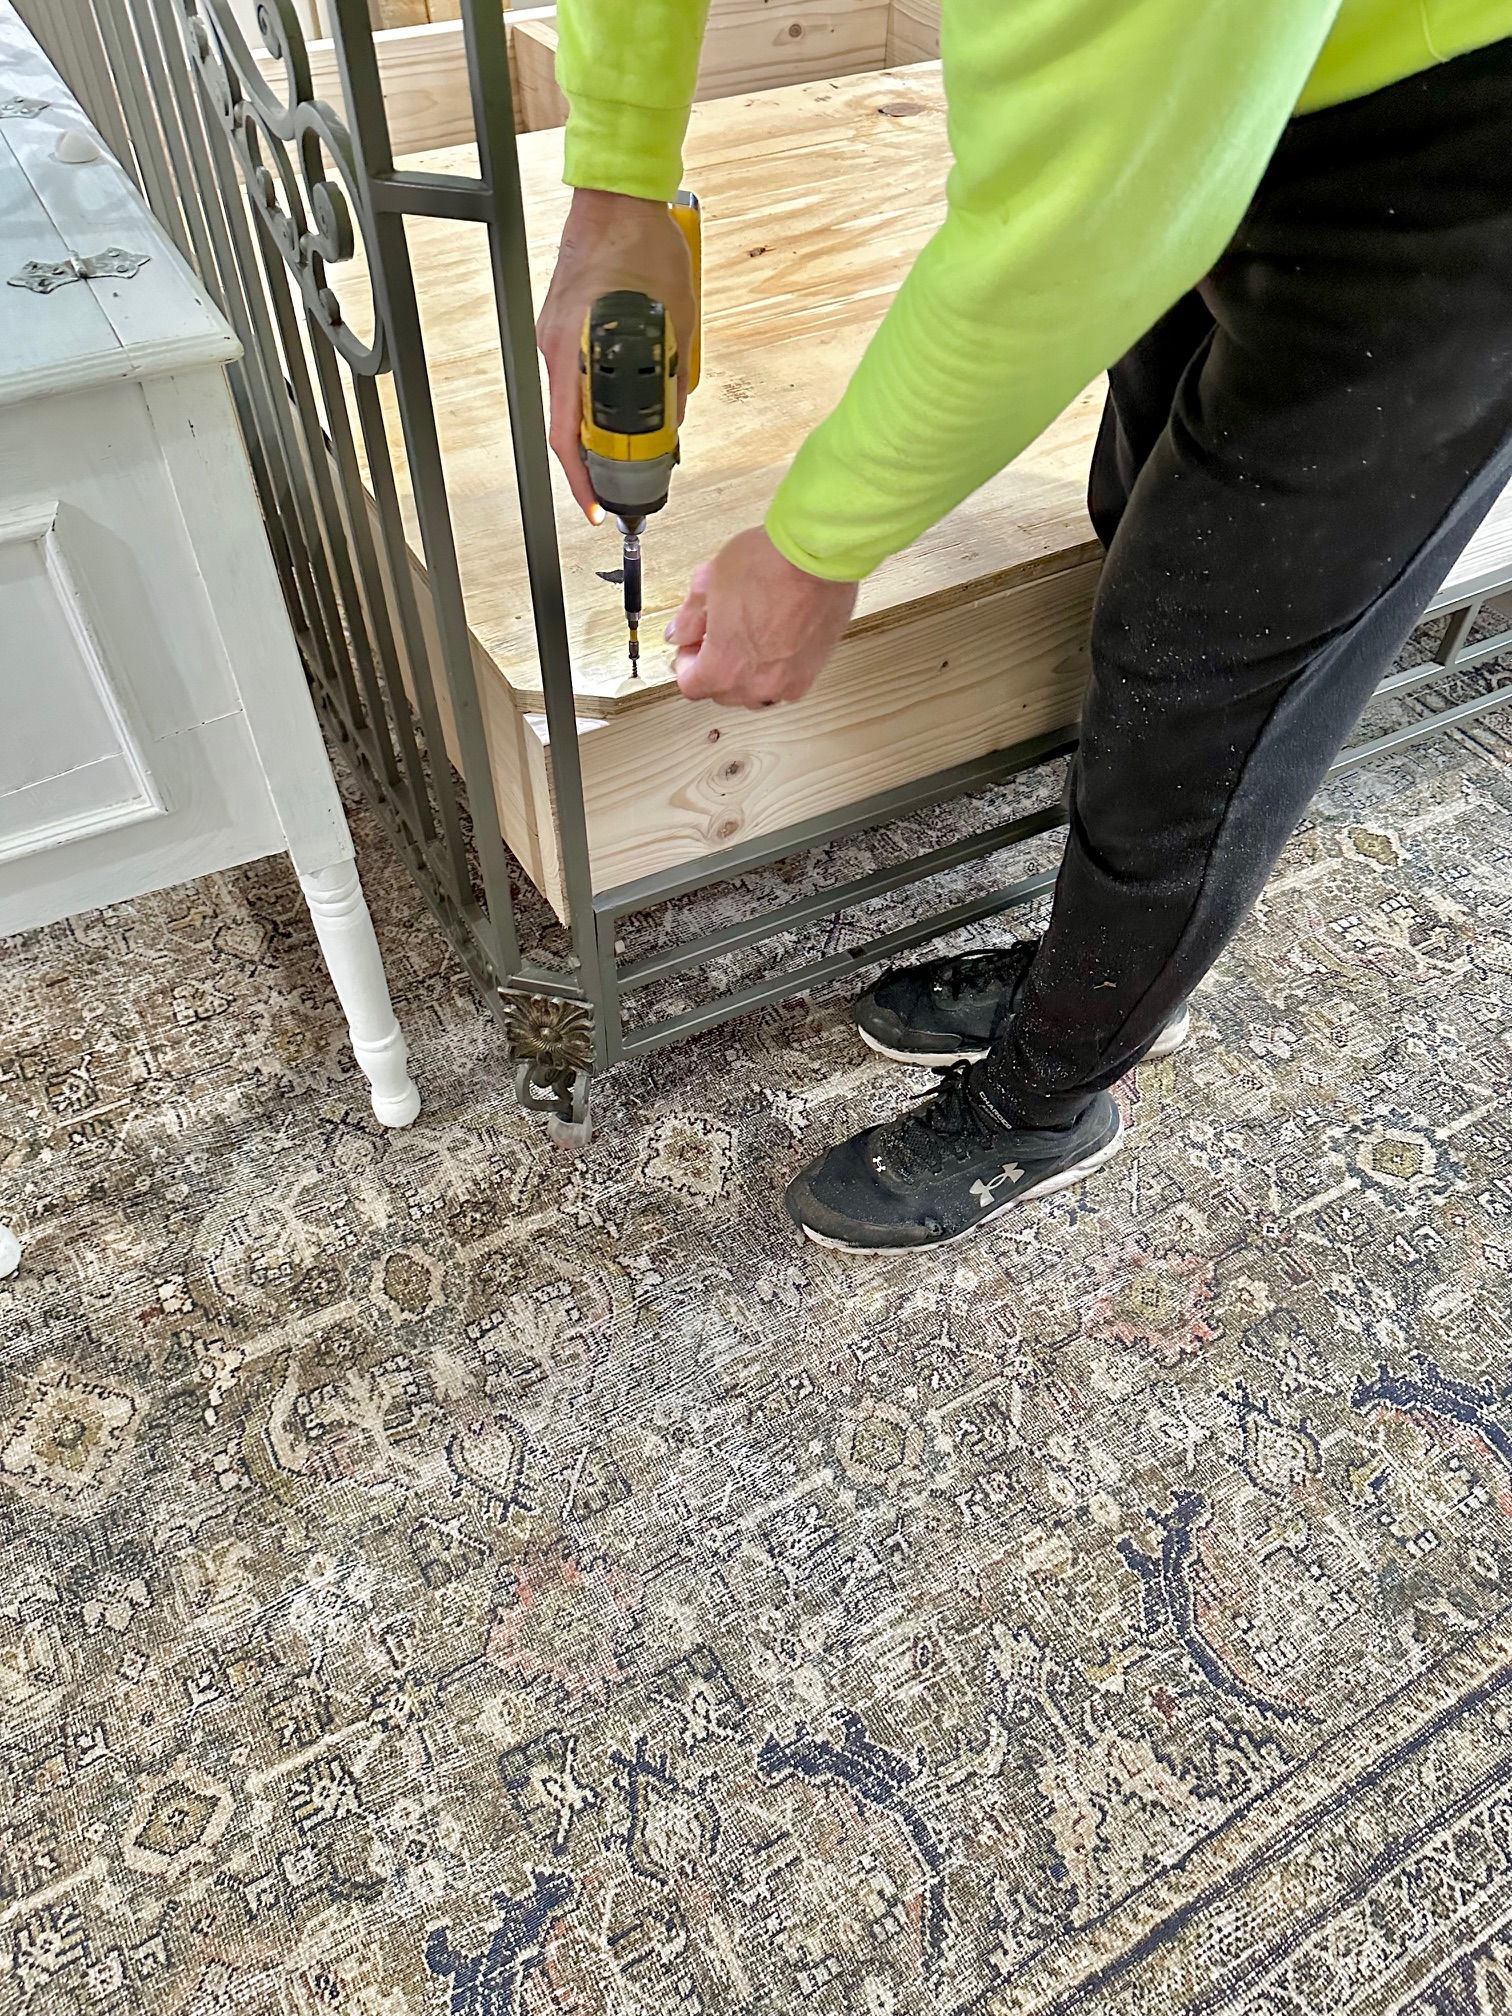
With the target design visualized after sketching, we gathered suitable 2x6 lumber to begin construction. The rigid outer shell came first - boards cut to custom lengths based on verified interior bed sizing then tightly screwed together into a surrounding square utilizing a convenient cordless driver forming deep rigid sides.
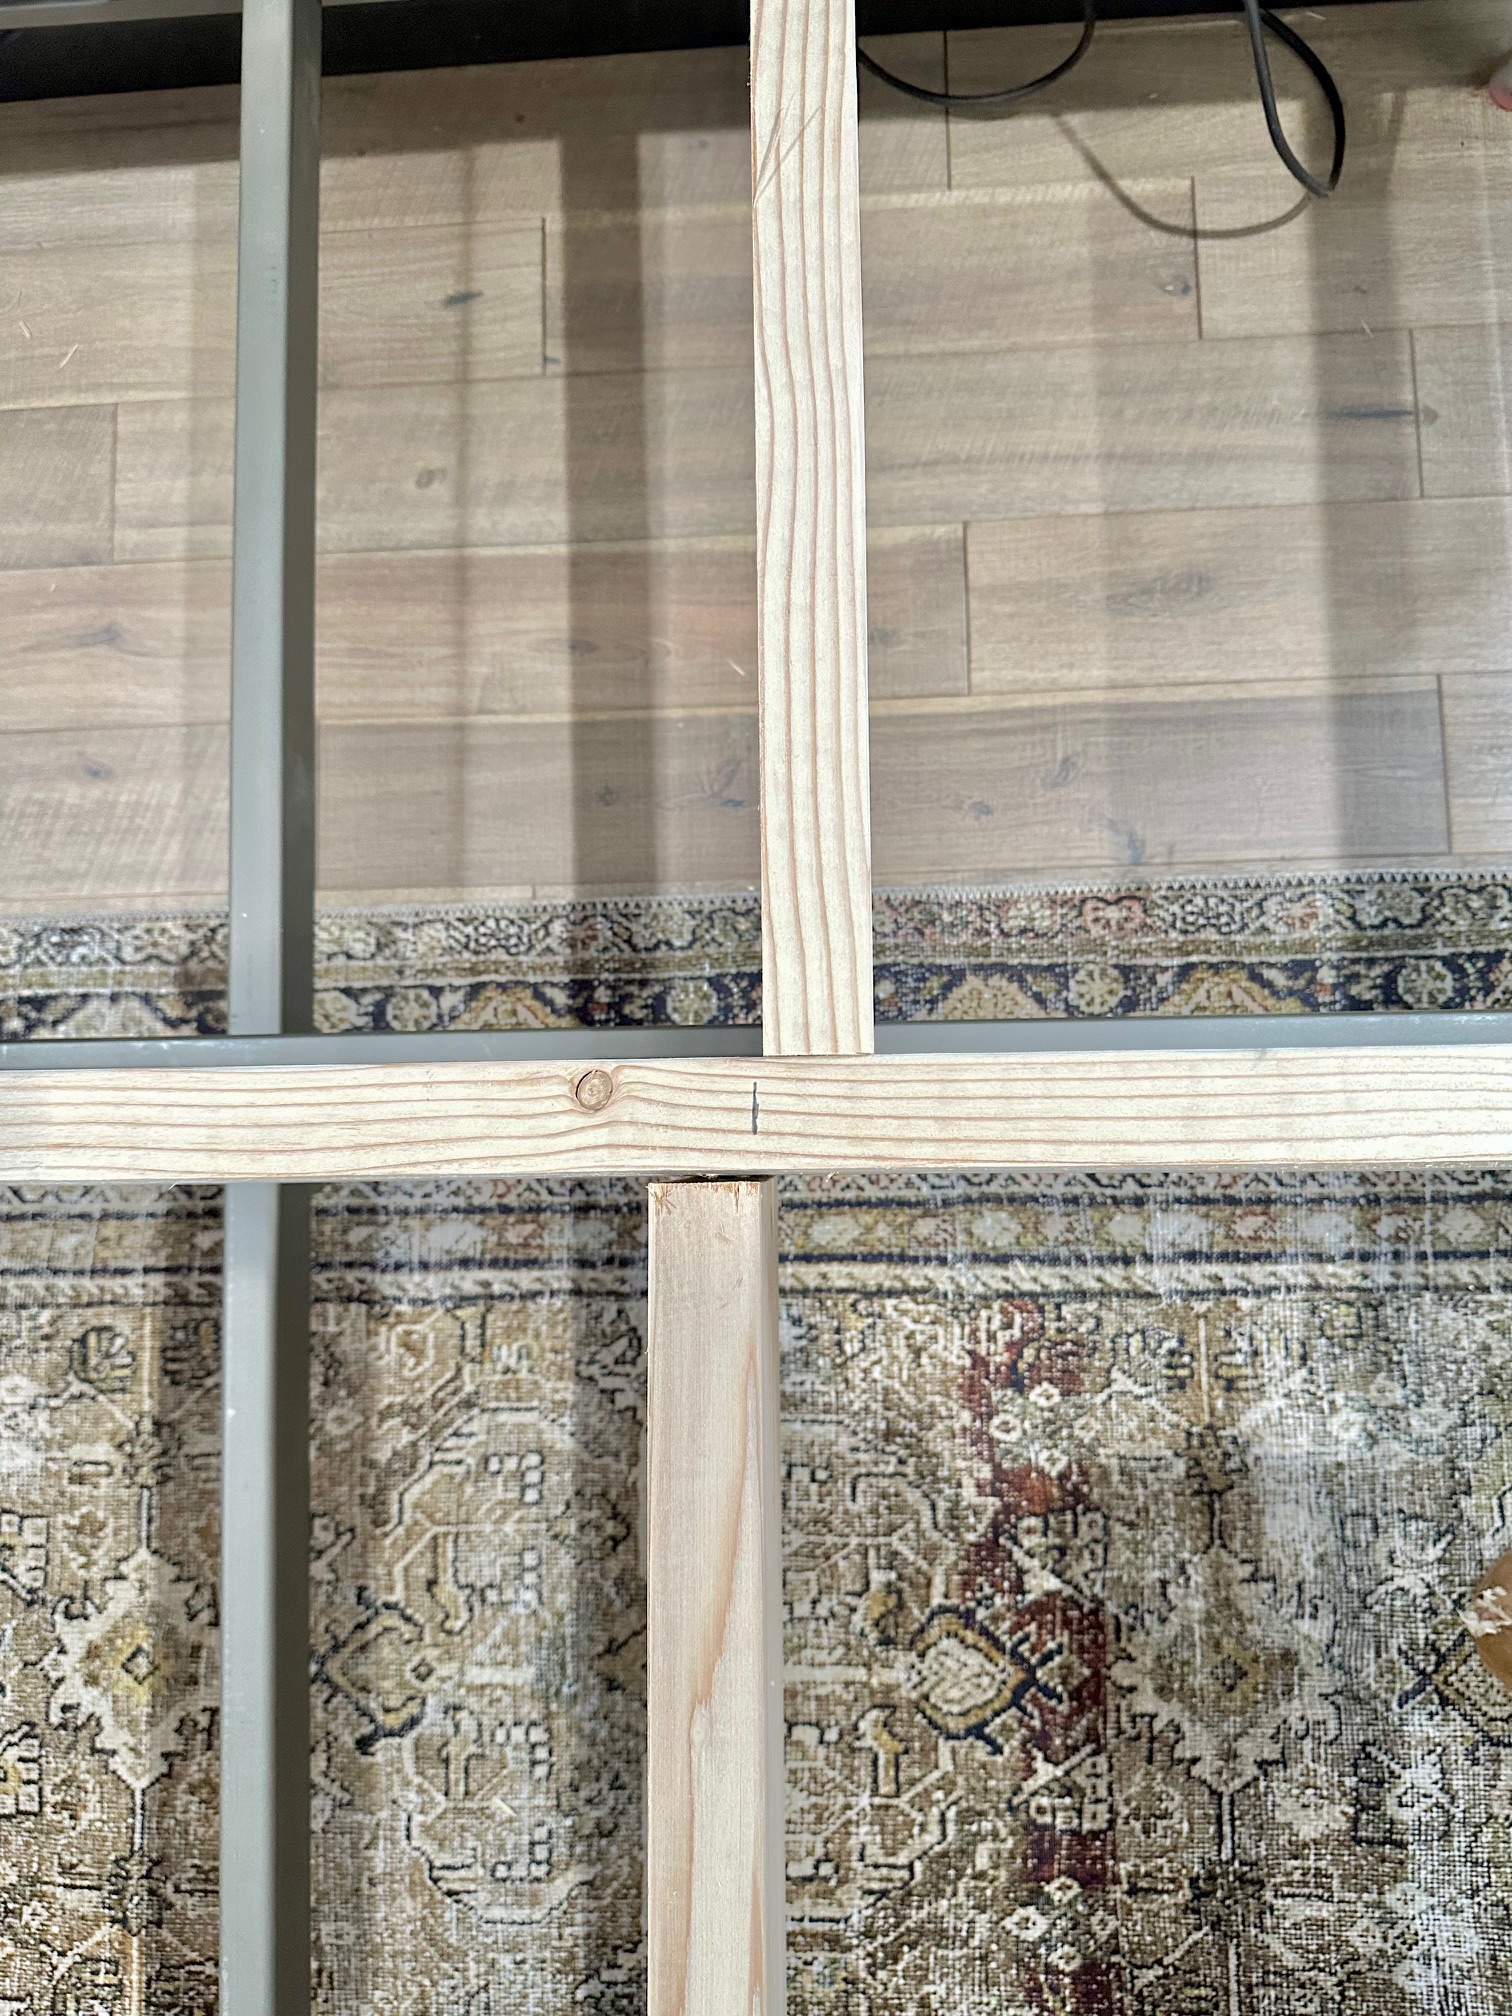
Two evenly centered horizontal support battens fitted inside next, again precisely measured between vertical outer walls and screwed firmly from the exterior to reinforce the entire frame.
Next, we incorporated a tic tac toe board configuration to further stabilize the inner structure. Six vertical stabilizers slotted snugly between horizontal beams, positioned slightly off center for easiest angled screwing top down into the horizontals. Any visible screw heads were countersunk deeply to allow flawless plywood topping soon.
After ensuring total frame solidity and triple-checking levelness, we placed premium 3⁄4" plywood sheets atop creating an ultra-smooth flat plane then secured it firmly with screws. Light sanding prepped for upholstering disguising DIY effort next step!

Step by step instructions
Materials needed:
- 2 sheets of 3⁄4" premium plywood
- 7 - 2x8 boards
- Tape measure
- Pencil
- Circular Saw
- Power drill
- Wood screws (we used 2 ½" wood screws for the base and 1 ¼" to secure the plywood)
- Box spring cover
Instructions:
- Constructing the Square Base
Measure inside mattress area then cut (2) longer 2x8 boards to determined width and screw together with outer boards forming a square base ( box spring frame)

- Building the External Frame
Next, cut (2) 2x8 boards to length for foot and head external frame and screw to the outside boards.
- Adding Horizontal Central Supports
Add (2) 2x8 boards screw-fitted horizontally as central supports and screw to secure.
- Installing Vertical Support Boards
Insert (6) off-center vertical 2x8 boards between horizontal pieces. Alternating off-center allows the easiest top-down screwing where needed.
- Attaching Plywood Boards
Cut plywood boards to size matching outer frame and smoothly attach to the top of the box spring with screws.
- Trimming Plywood Edges
Use a power saw to trim plywood edges even with sides. Lightly sand the raw edges if needed.
- Applying the Box Spring Cover
Place a box spring cover for mattress size and fit over the frame.
- Aligning with the Bed Frame
Set the bottom of the box spring in line with the bed frame.
- Placing the Mattress
Set the mattress atop the new smooth upholstered platform and enjoy your carpentry transformation!


Looking for your next DIY? These 5 home improvement projects are perfect for a long weekend transformation.
Reviewing outcomes
Beyond functioning flawlessly once custom cut and screwed into place underneath our beloved bed frame, this box spring build took only about 2 construction hours total - incredible savings versus traditional foundations pricing! Careful shopping ensured quality too.
The roughly $175 total between top grade plywood, lumber, a miter saw kit rental, plus upholstery cover delivered functionality and looks of a box spring costing easily four times as much prebuilt. And nothing store-bought allows custom tweaking dimensional specs for ideal edge-to-edge support beneath uncommon canopy sizing. My confidence bloomed!
Now perfectly flat and immobile stabilizing our mattress months later, durable results speak for themselves. Not a sag or creak thanks to diligent reinforcements and quality fasteners. The fitted fabric boxspring cover disguise blended into our peaceful bedroom decor beautifully with an extra touch of tailored polish.

Frequently asked questions
Many adjustable bed frames now have flexible wooden slat systems that support foam beds without a bulky box spring while providing storage space. Or create your own easy DIY platform from plywood with center support - customize height to your preferred needs!
These simple supplies are available at hardware stores. We used premium plywood to build the wooden frame plus 2x8 boards from Home Depot cut to size using a circular saw. Along with screws, this built an incredibly solid DIY foundation for under $175 - far less than premade options suitable for our queen bed size.
Most standard box spring covers secure to the wood frame underneath with elastic corners, adjustable ties or zippers, and tabs. After positioning the fabric smoothly over your DIY bed frame, tuck the excess fabric inside neatly. If needed, attach included fasteners to the side of the box spring or use a staple gun and tightly pull so the upholstered look stays perfectly tailored.
If purchasing a premade box spring cover is cost-prohibitive for your DIY project budget, you can create a custom-fitted DIY box spring cover to cover the side of your boxspring using a standard fitted sheet secured tightly with a staple gun instead. This is a great solution for a fresh new cohesive look for much less money than specialized covers. Get creative mixing and matching remnant upholstery fabrics or even tablecloths for further unique tailored style!
More easy building projects
DIY Bathroom Mirror Frame: Achieve Style on a Budget: Transform your builder-grade bathroom mirror into a stylish statement piece with our DIY Bathroom Mirror Frame project. Discover how to achieve a custom look on a budget while adding personality to your space. Say goodbye to plain mirrors and hello to elevated bathroom decor with this simple yet impactful upgrade.
A Kitchen Island Made from Base Cabinets: Revitalize your outdated kitchen with a budget-friendly and innovative solution: repurposing a free bathroom vanity base cabinet into a stylish DIY kitchen island. In this project, we transformed our 1980s kitchen by removing old features and creating a custom island with added storage and workspace. Discover how a simple coat of paint, butcher block countertop, and creative design can elevate the heart of your home without breaking the bank.
Whether tackling worn sagging box springs or desiring an elevated tailored bedroom aesthetic affordably, this is a project proving amateur skills build professional-looking results. With basic lumber, plans, and upholstery covers elevating plywood panel foundations, creating your own box spring is a cinch!
Rather than mass market frames unsuitable for unique spaces, take mattress support into your own hands! Before commitment to lackluster options, ponder the custom potential Craft-built bedroom confidence grants. Sturdy systems matching exact needs transform through straightforward construction methods in remarkably little time.
Happy DIYing friends!