DIY Bathroom Mirror Frame: How We Built a Custom, Built-In Look for Less
To build a DIY bathroom mirror frame, start by measuring your existing mirror and cutting four pieces of decorative trim to size. Paint or stain the trim, then remove the mirror from the wall and attach three sides of the frame before sliding the mirror back in place. Finish with the top piece, caulk the seams, and touch up the paint for a polished built-in look that costs a fraction of a new mirror.
Content may contain affiliate links. When you shop the links, we receive a small commission at no cost to you. Thanks for supporting my small business.
If you have a big, frameless builder-grade bathroom mirror, you've probably noticed how plain it looks. It's practical, sure, but it never feels quite finished or personal. When my mom asked for help updating her bathroom, my husband, Ray and I decided to start with her large bathroom mirror. Instead of gluing trim on top like most tutorials suggest, we wanted to build something that looked custom.
Ray built a wood frame that the mirror actually slides into, giving it a true built-in look. It completely changed the space for less than sixty dollars and a few hours of work. What started as a simple project turned into one of my favorite small upgrades, proof that a little effort can make a big difference.
Jump to:
- Project at a glance
- Supplies and tools
- Planning and measuring the frame
- Choosing trim and prep day
- Installation day
- Finishing touches
- Addressing frame installation challenges
- How to build a DIY bathroom mirror frame
- Common fixes and quick tips
- Frequently asked questions
- Completed project
- More impactful home improvement projects
Project at a glance
Project: DIY Bathroom Mirror Frame
Goal: Upgrade a plain builder-grade mirror into a custom built-in style
Time: About 3 hours of hands-on work (not including paint dry time)
Cost: Around $60 using leftover paint and trim from Home Depot
Difficulty: Moderate - ideal if you're comfortable with a saw and measuring tools
Best for: Large, frameless mirrors that need a more finished look
Tools used: Miter saw, table saw, nail gun, caulk gun, paintbrush, tape measure
Materials used: Decorative trim, wood glue, nails, caulk, and paint
Quick summary: This moderate-level DIY takes about three hours and less than $60 to turn a basic builder-grade mirror into a custom, built-in focal point.
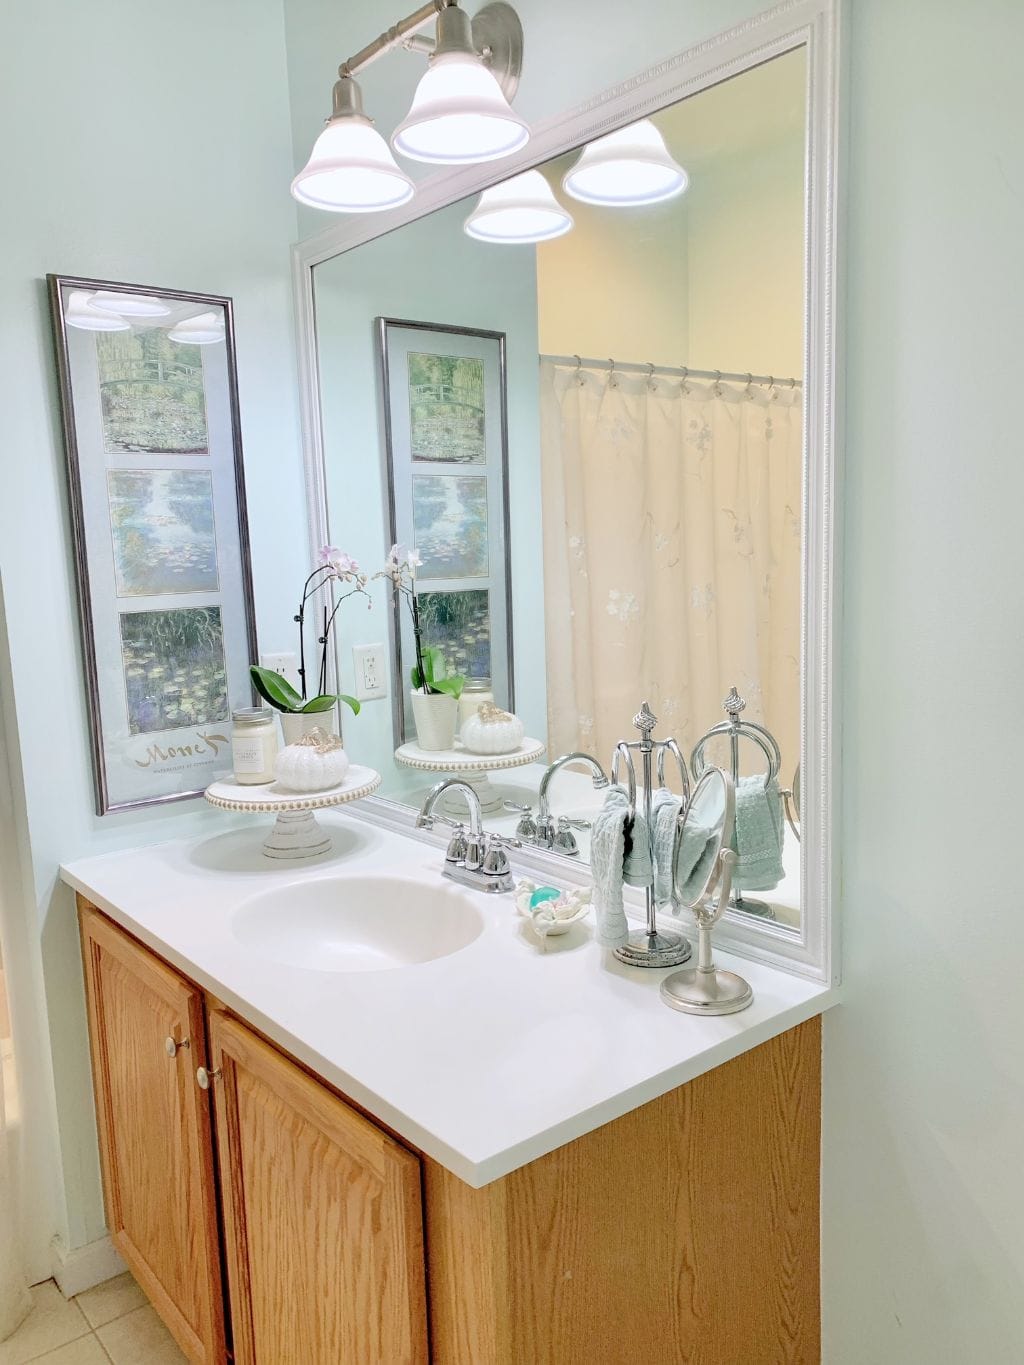
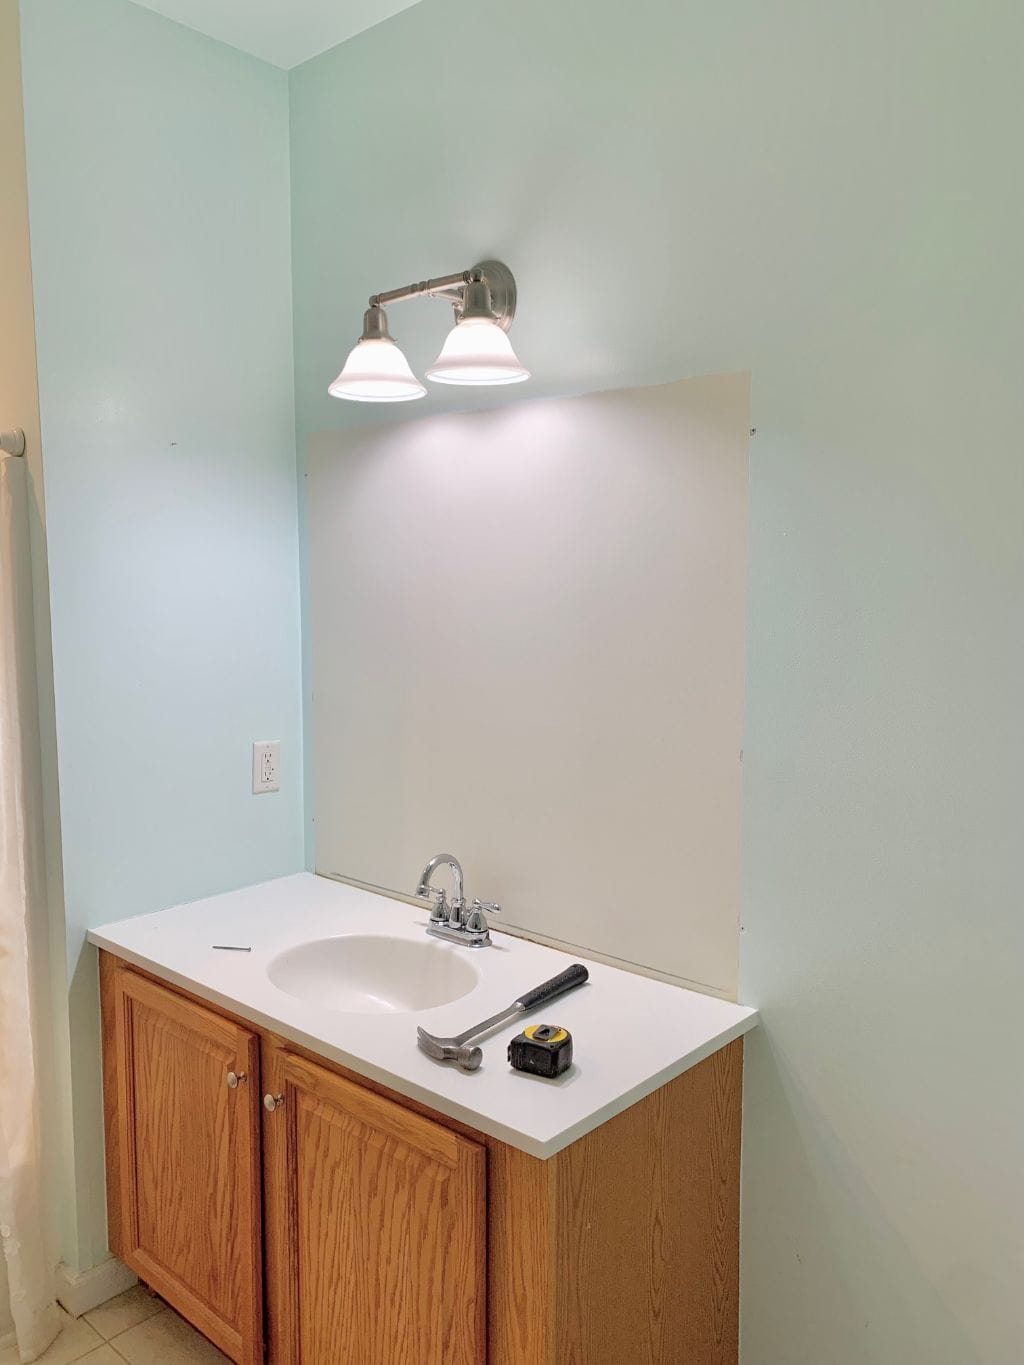
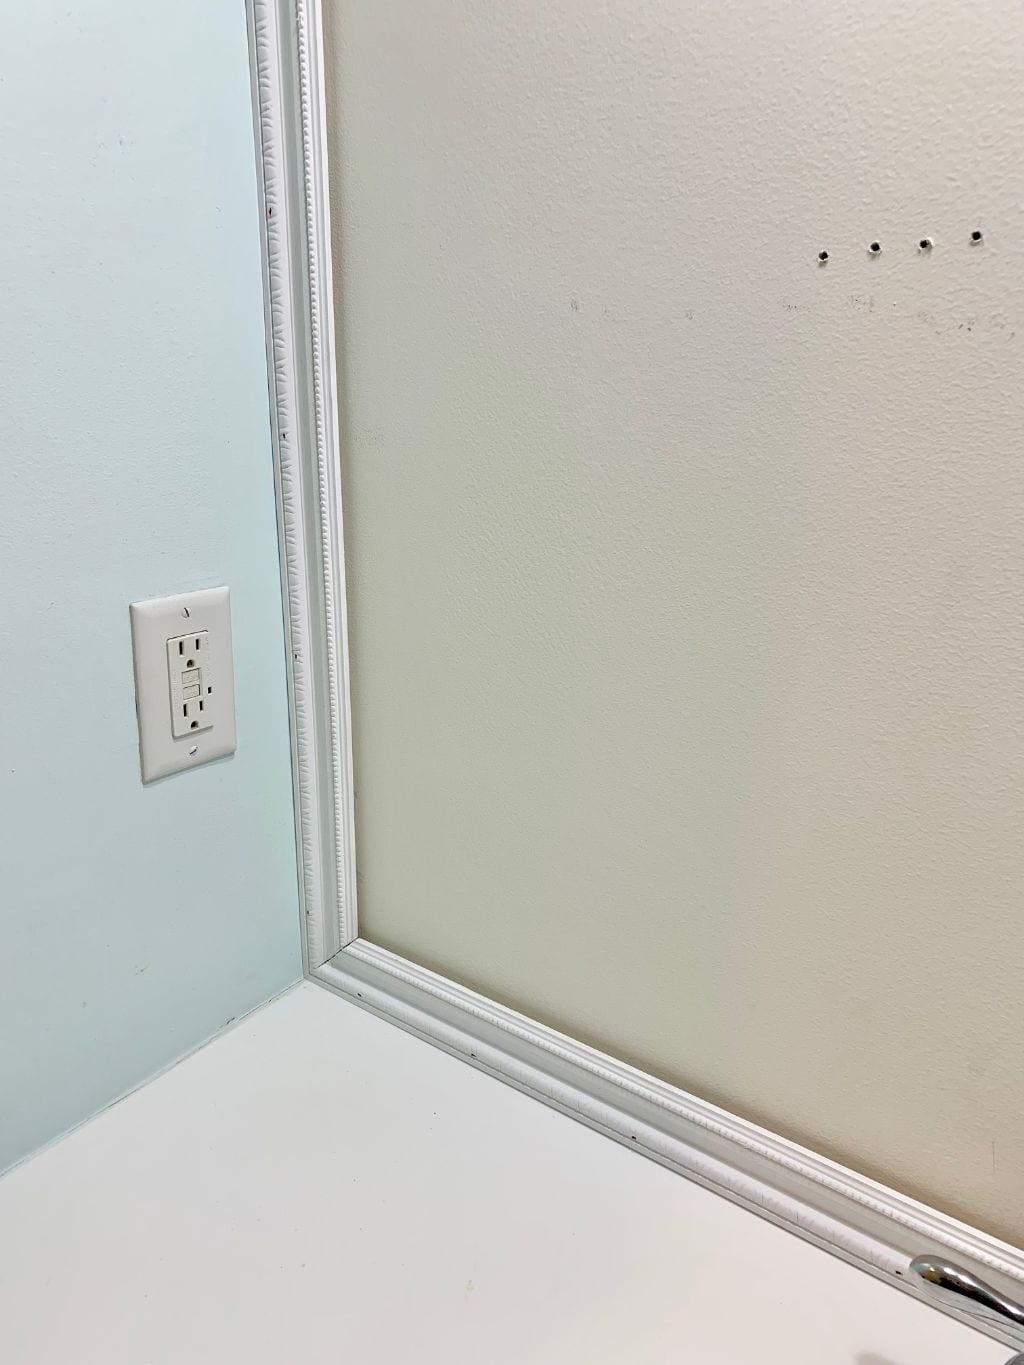
Mirror before:
Mirror after:

Supplies and tools
This list is based on a frameless mirror measuring about 46 inches wide by 42 inches tall. Adjust quantities and measurements to fit your own mirror size.
Supplies
- Decorative trim (we used this one - 2 pieces of 8-foot chair rail from Home Depot)
- Wood glue or construction adhesive
- Nails - 2" finish nails (6D)
- Paint (latex, chalk, or spray paint)
- Painters putty
- Caulk
- Drop cloth or newspapers
Tools
- Stud sensor (optional)
- Miter saw or hand saw
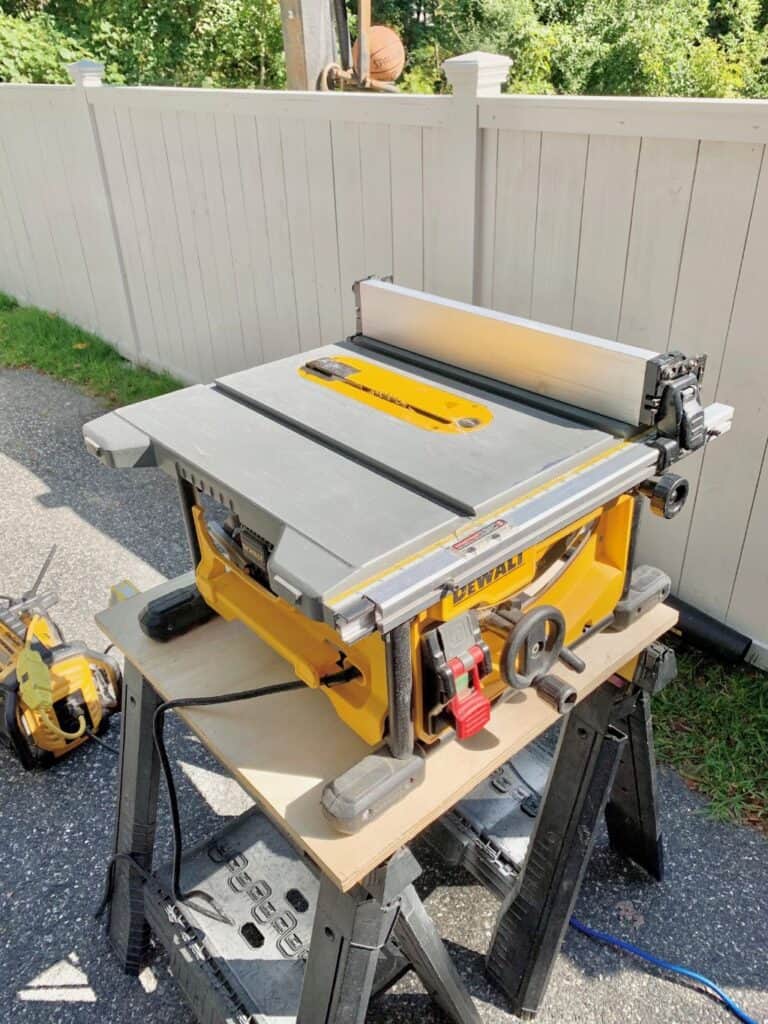
- Table saw
- Cordless finish nailing gun or hammer and finish nails
- Tape measure
- Caulk gun
- Sandpaper
- Paintbrush
- Screwdriver
Planning and measuring the frame
Before cutting any wood, take a few minutes to assess your mirror and plan your frame. Every builder-grade mirror is installed a little differently, so understanding how yours is attached will save you a lot of frustration later.
Step 1: Check how the mirror is mounted
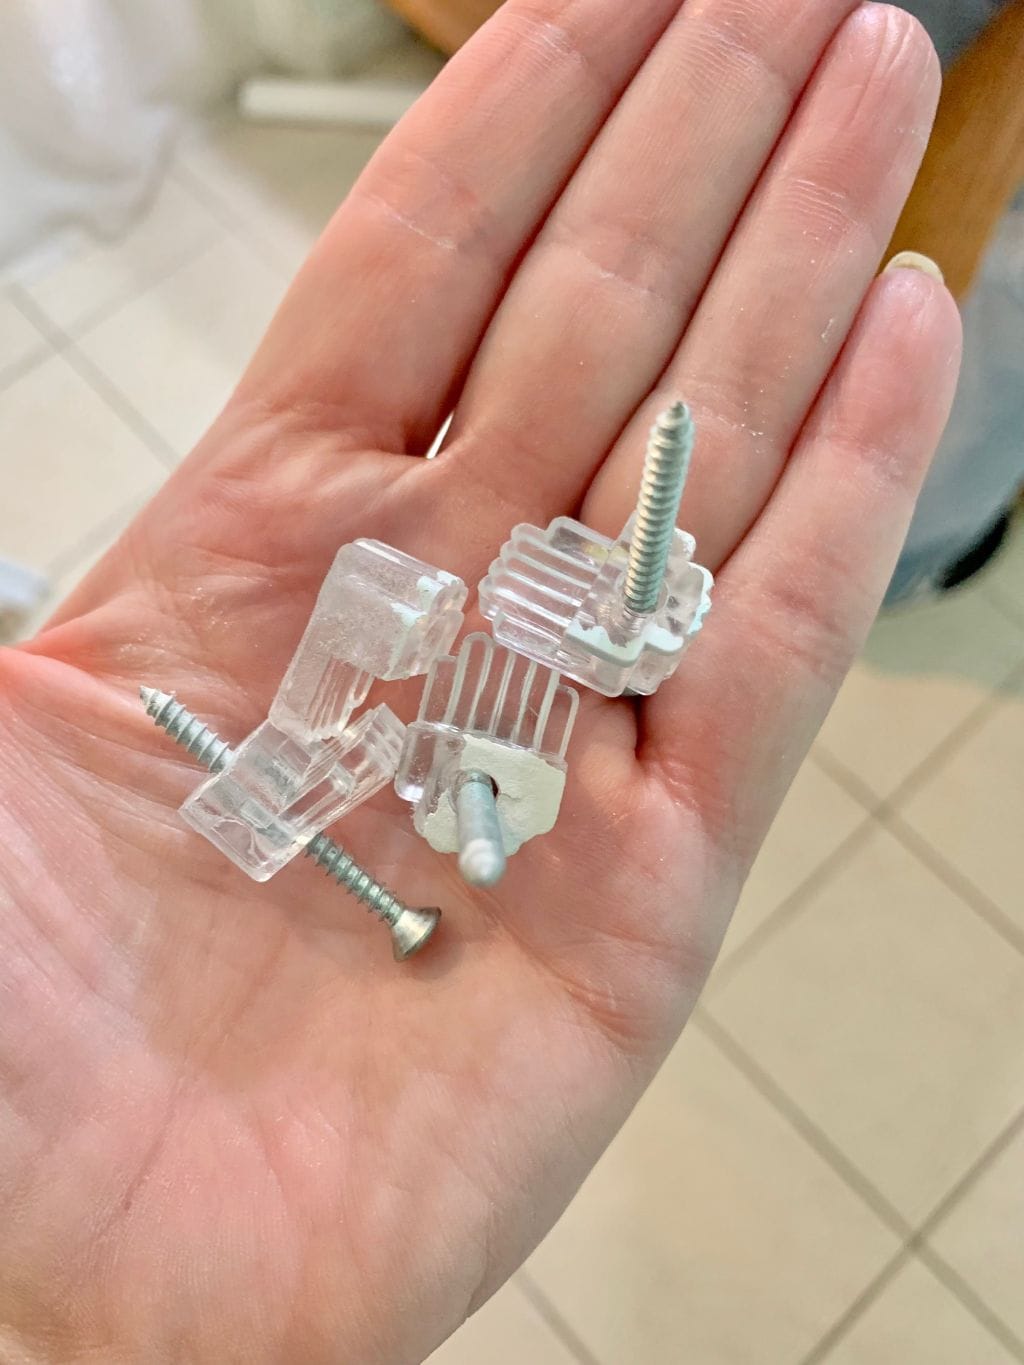
Look closely along the edges of your mirror to see how it's held in place. Some are mounted with small clips, while others are glued directly to the wall.
- If your mirror has clips: Unscrew one carefully to check if the mirror moves. If it lifts slightly, that means it isn't glued and can be removed easily.
- If your mirror is glued: Leave it in place and build a frame that attaches directly on top. We didn't need to do this for ours, but it's a good option if your mirror can't come down safely.
Step 2: Measure your mirror and surrounding space
Once you know how the mirror is attached, grab your tape measure.
- Measure the width and height of the mirror.
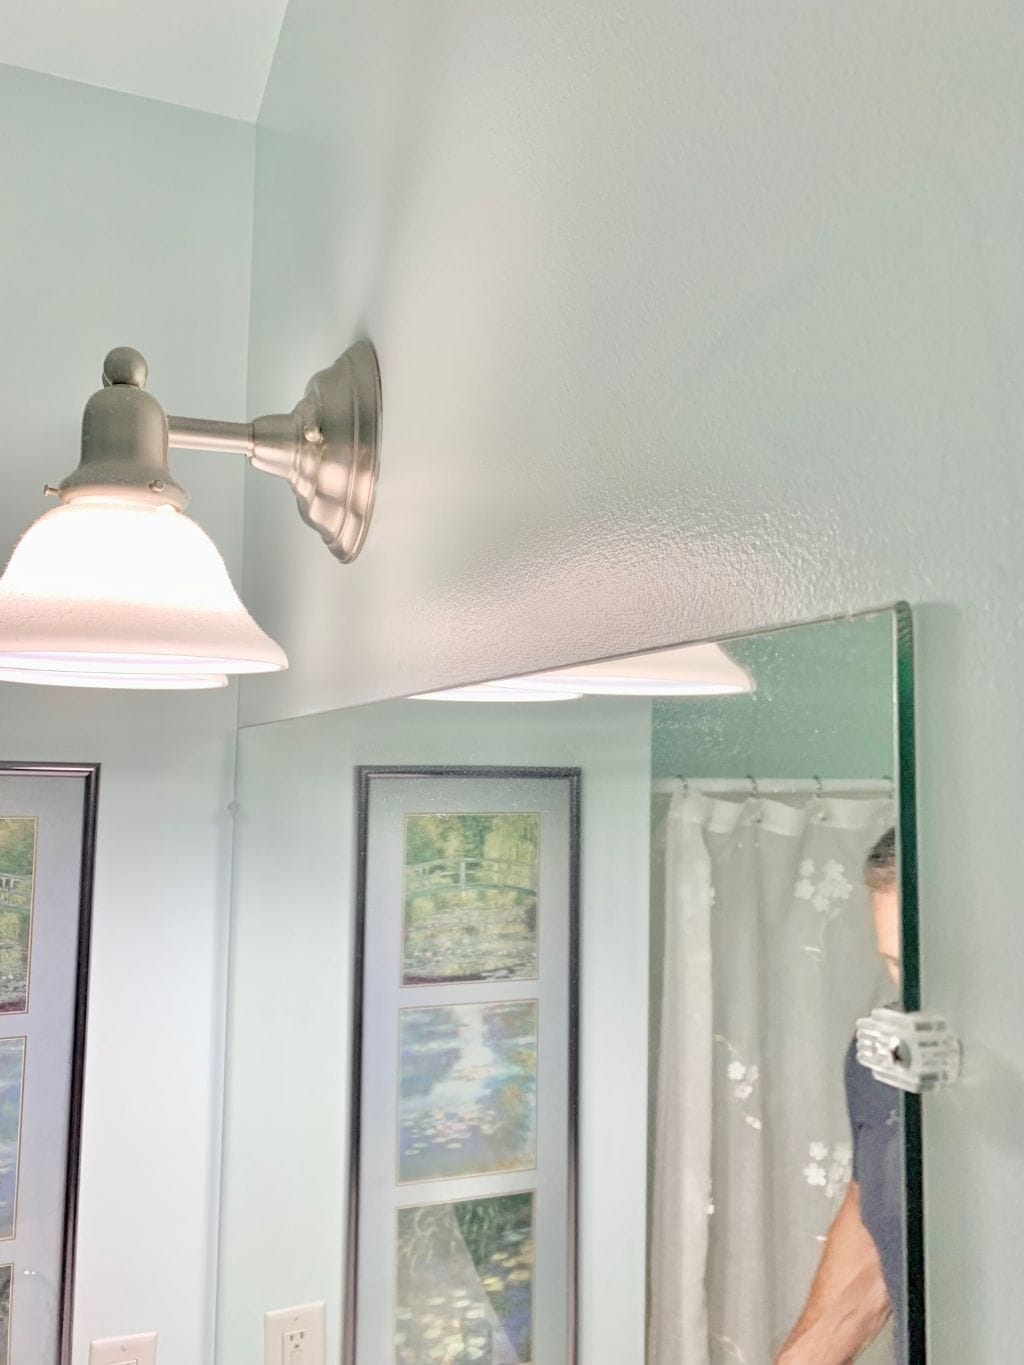
- Note how much space you have above the mirror before reaching the light fixture.
- Check the distance between the mirror edges and your vanity countertop.
These numbers will help you determine how wide your frame pieces should be and where they'll line up once installed.
Step 3: Plan your frame dimensions
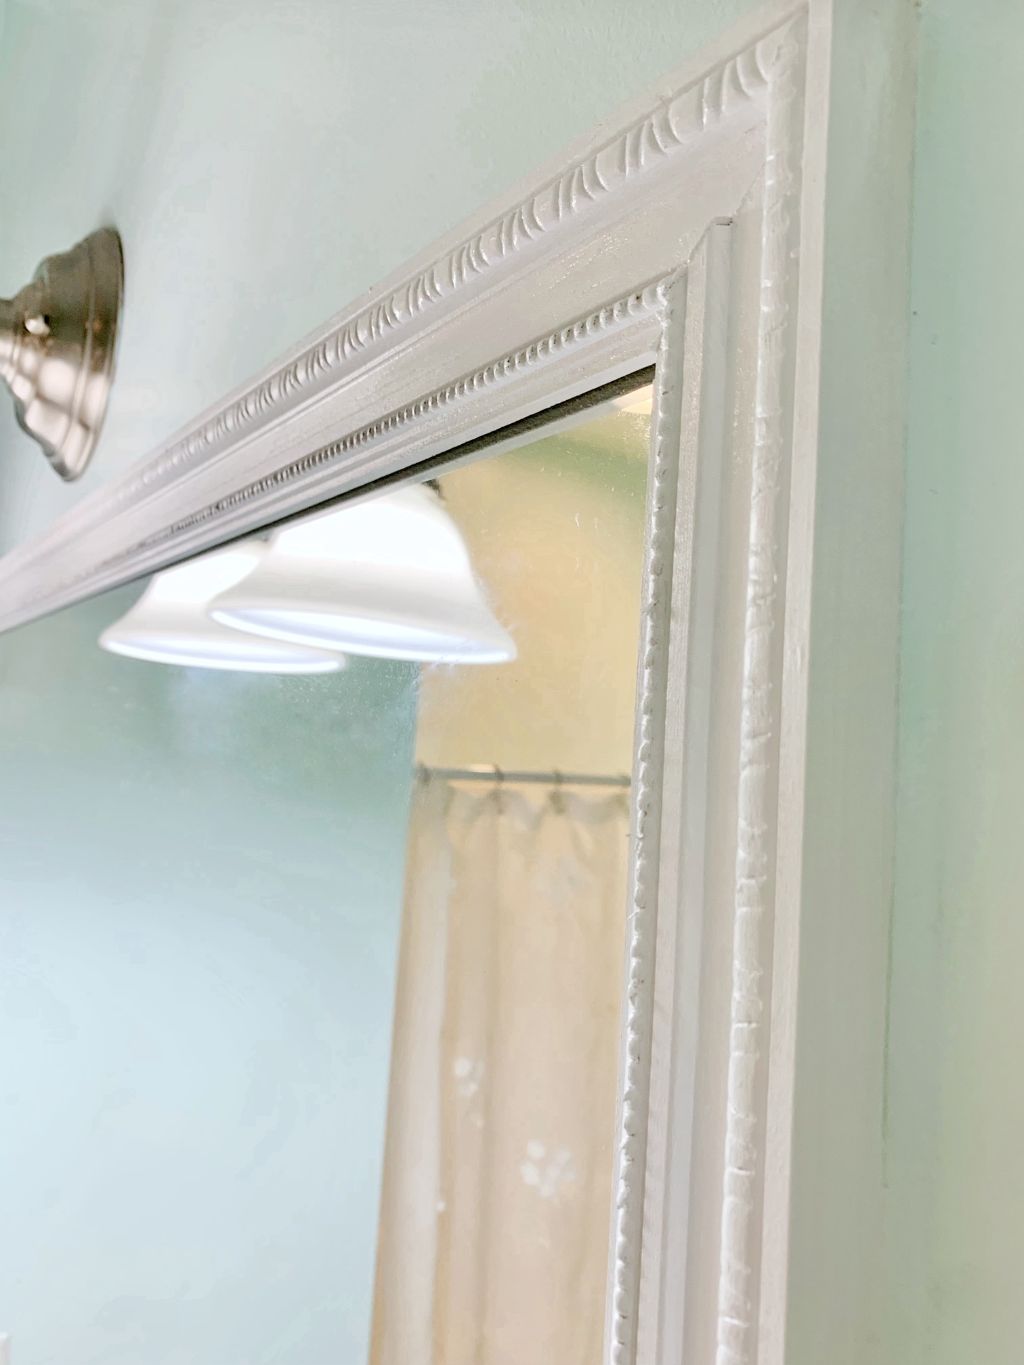
For this project, our mirror measured 46 inches wide by 42 inches tall, and we had about 4.5 inches of space between the top of the mirror and the light fixture. We chose trim pieces that were 2.5 inches wide, with about three-fourths of an inch overlapping the mirror for a clean, built-in look. This width lined up nicely with the vanity below and left just enough space above the mirror.
Once your measurements are set, write them down and double-check before cutting your trim.

Safety and preparation tips
Before you start cutting or gluing, take a few minutes to prep your space and materials. It makes the process smoother and keeps you safe while you work.
Set up your workspace: Work on a flat, stable surface with good lighting. If possible, take the cutting and sanding outdoors or into a garage to keep sawdust out of your bathroom.
Protect yourself and your space: Wear safety glasses when using saws and gloves when handling wood or adhesive. Lay down a drop cloth or newspaper to catch dust, paint drips, and glue.
Double-check your measurements: Measure twice before cutting to avoid wasting trim or ending up with uneven corners. Dry-fit the trim around your mirror once before painting to be sure your cuts align.
Gather everything first: Have all your tools and materials ready before you begin. This saves time and helps you work more efficiently once the glue and paint start to dry.
Pro Tip: If you're using power tools for the first time, watch a quick tutorial on miter or table saw basics before you begin. It's a simple way to build confidence and avoid mistakes.
Choosing trim and prep day
With measurements in hand, it's time to choose your trim and get everything ready for cutting and painting. The trim you select will define the look of your finished mirror, so take a few minutes to find a style that fits your space.
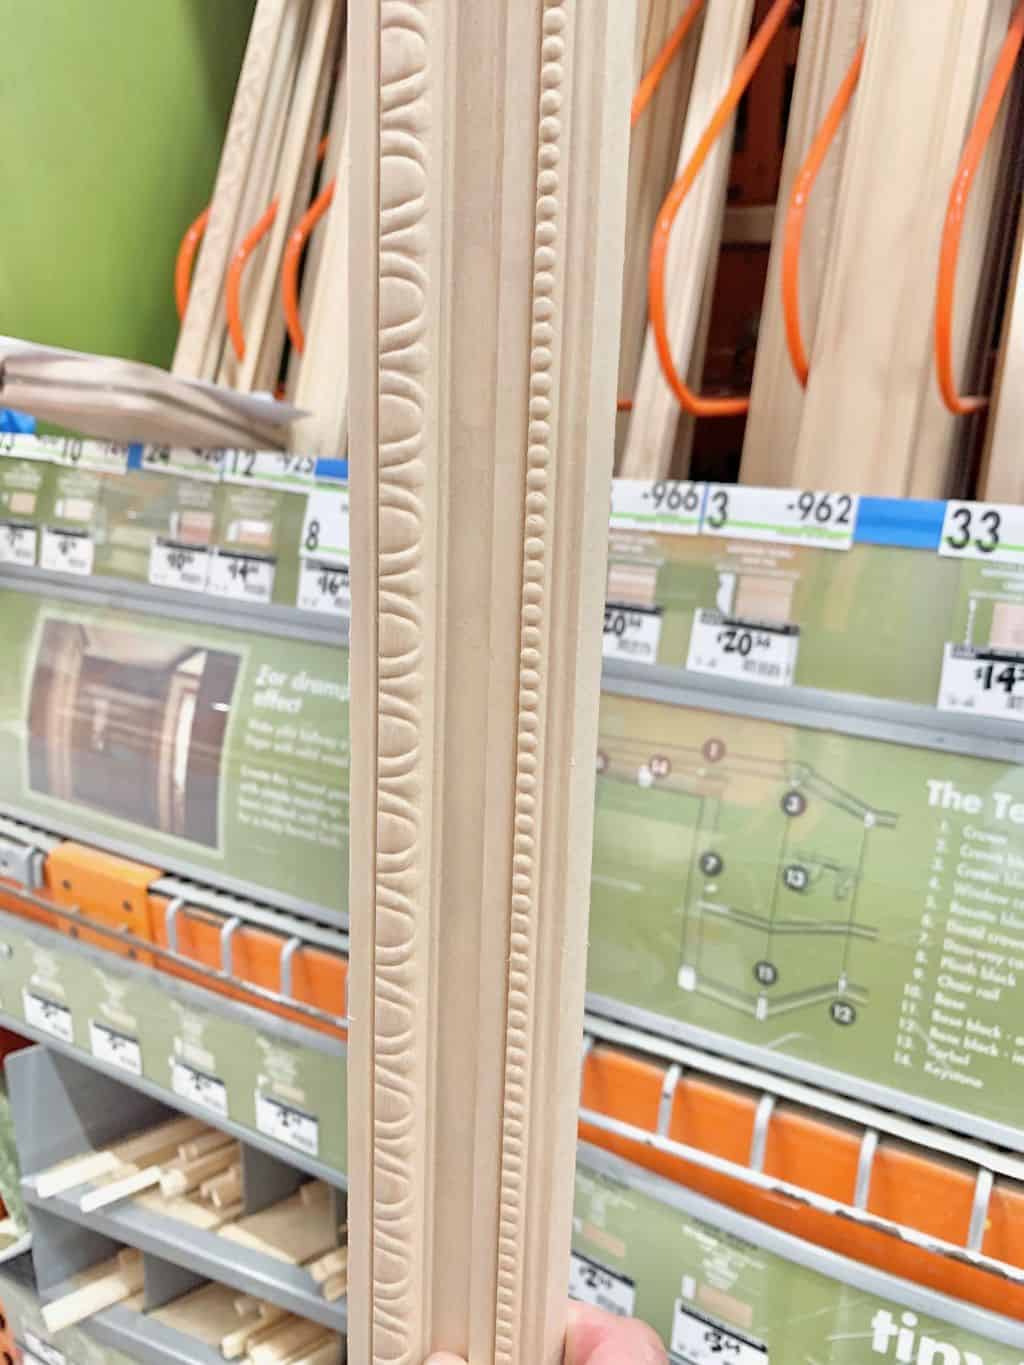
Choosing the trim
We shopped the trim and chair rail aisle at Home Depot and landed on a decorative chair rail that checked every box. It had the right width, thickness, and profile to give the mirror a finished, custom look without being too heavy.
Look for trim that is:
- About 2 to 3 inches wide
- Thick enough to cut a shallow groove (for the mirror to slide into)
- Straight and free from warping
Buy a little extra length so you have room for clean miter cuts. For our mirror, two 8-foot pieces were plenty.
Prep day
We did all of the cutting and painting at home before heading to my mom's condo for installation. Prepping the trim ahead of time makes installation day much faster and cleaner.
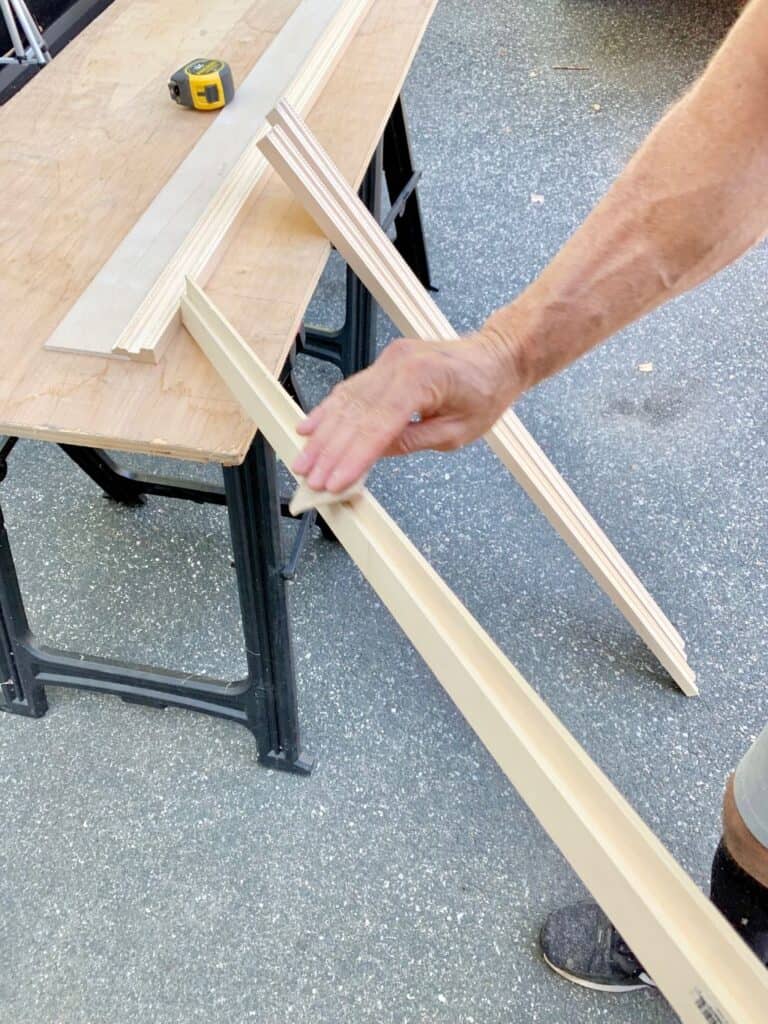
- Cut the long trim boards into manageable pieces before making your final cuts.
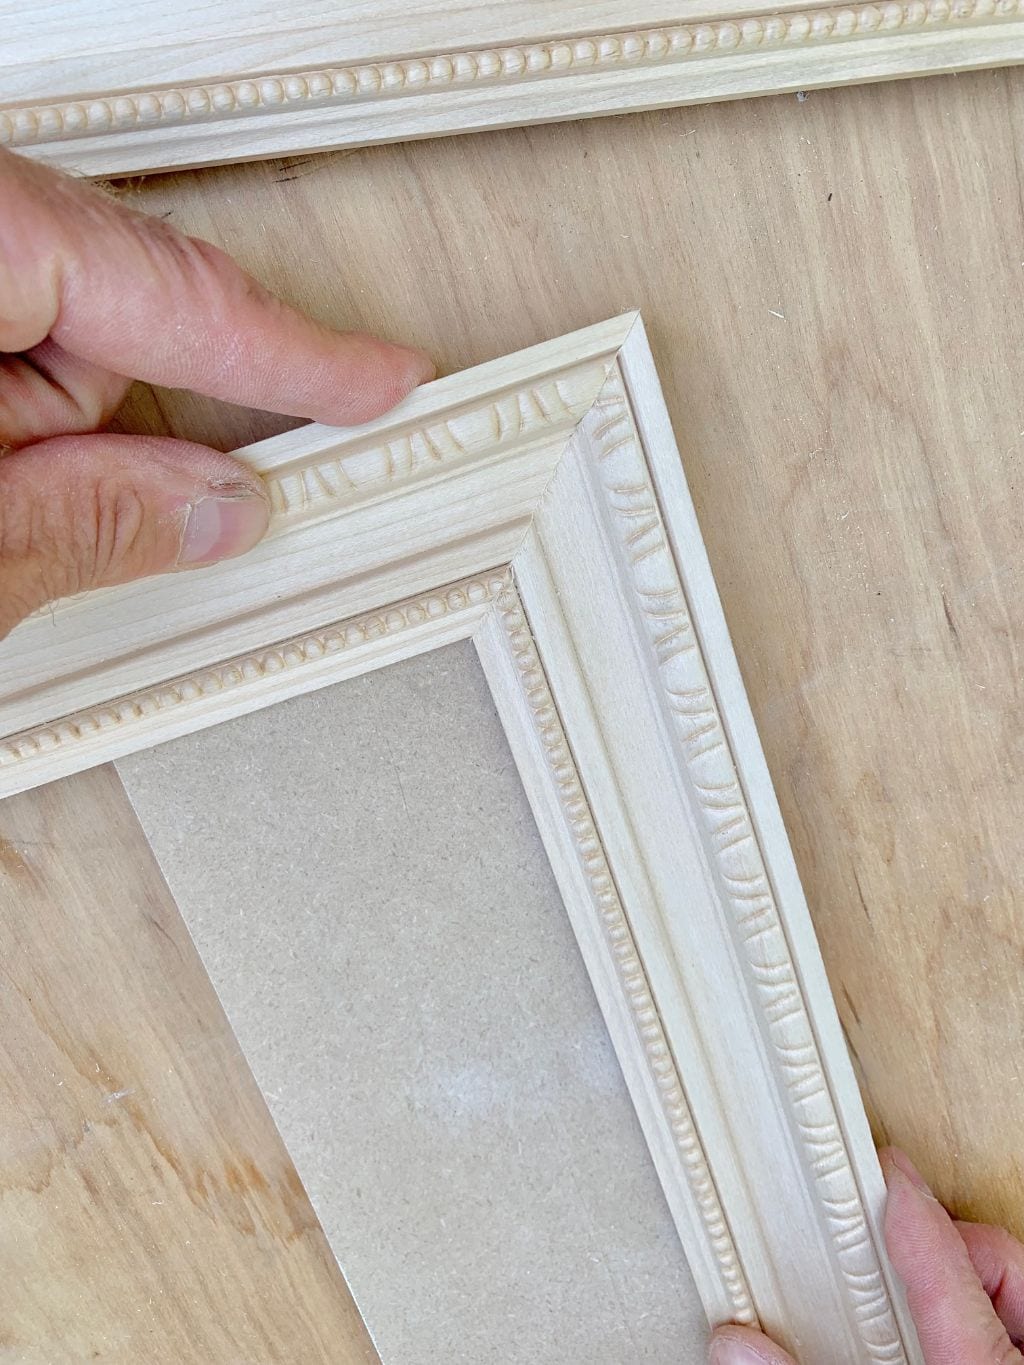
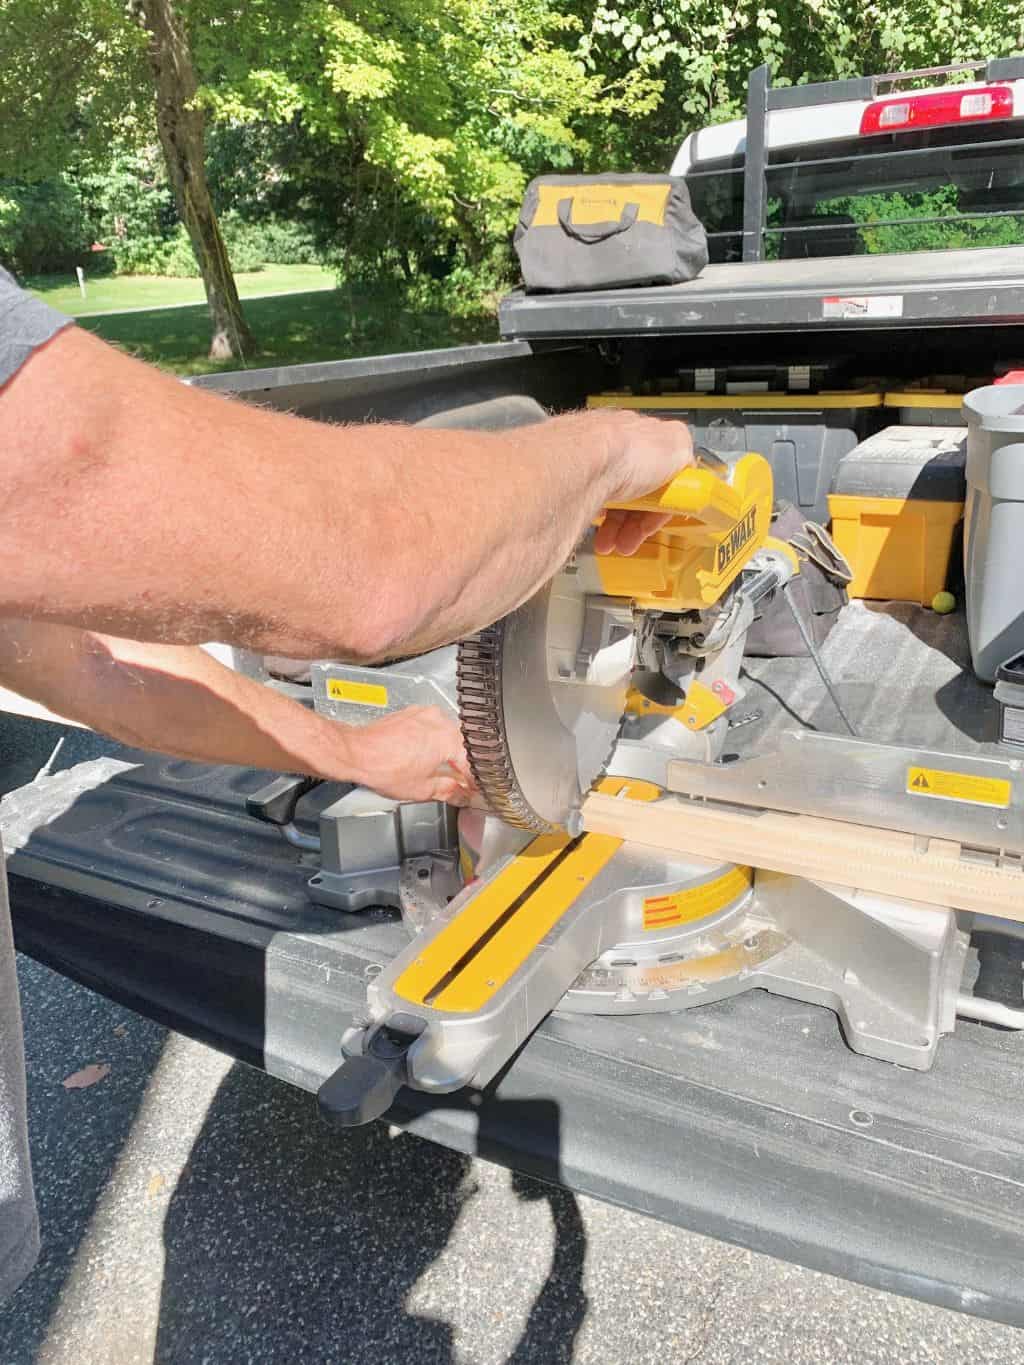
- Measure carefully and use a miter saw to cut each corner at a 45-degree angle for a tight fit.
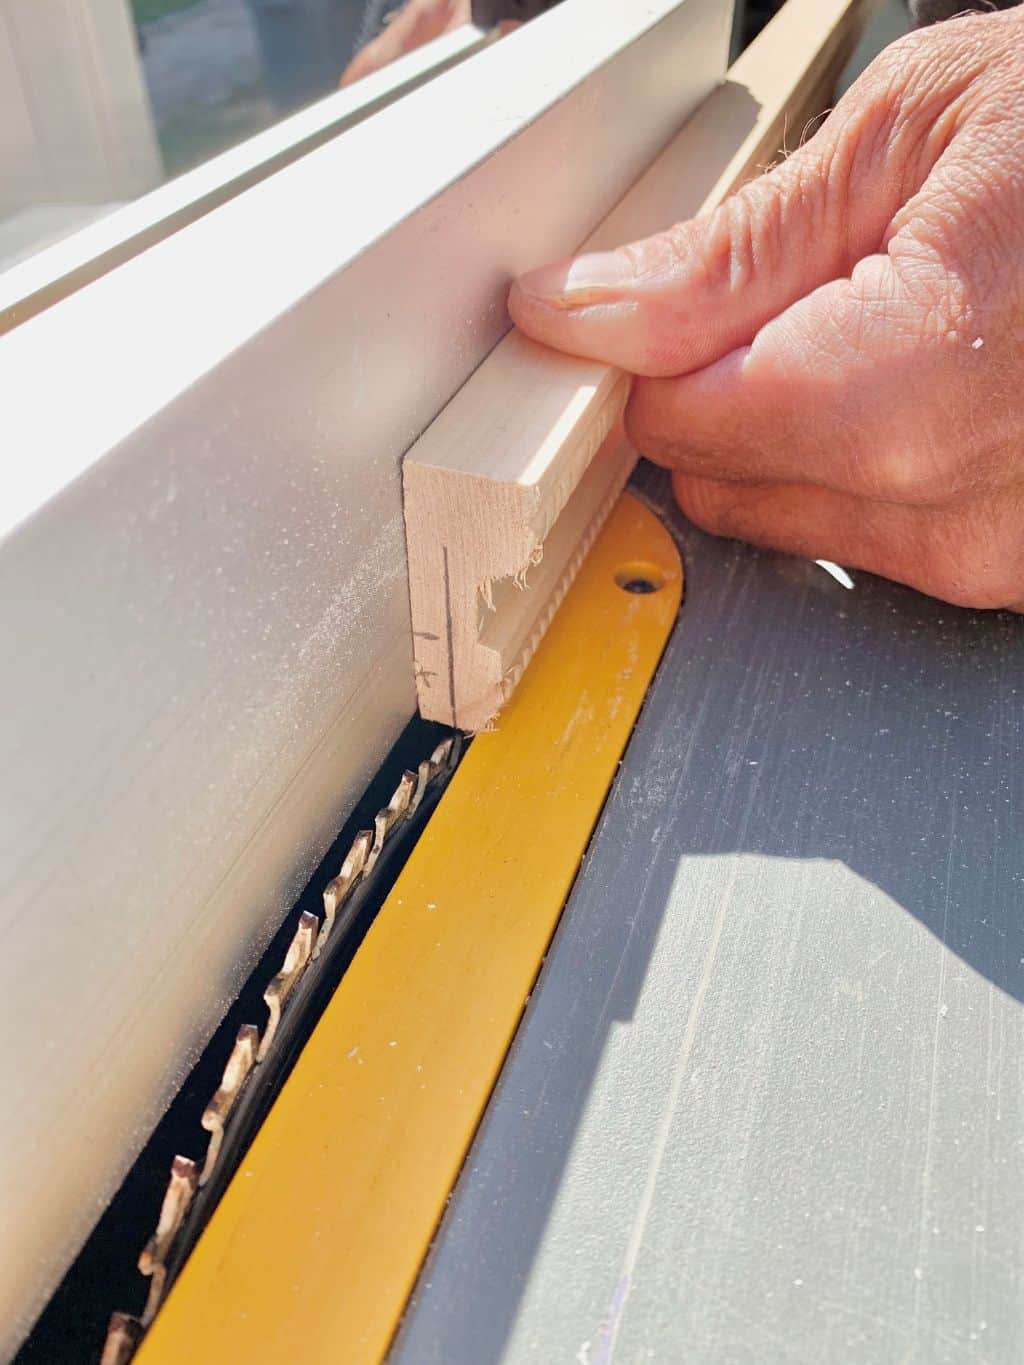
- Cut grooves (shiplap-style joints) on the inner edge of the trim using a table saw. The groove should be slightly wider than your mirror's thickness so it slides in easily.
- Sand the edges smooth and wipe away dust before painting.
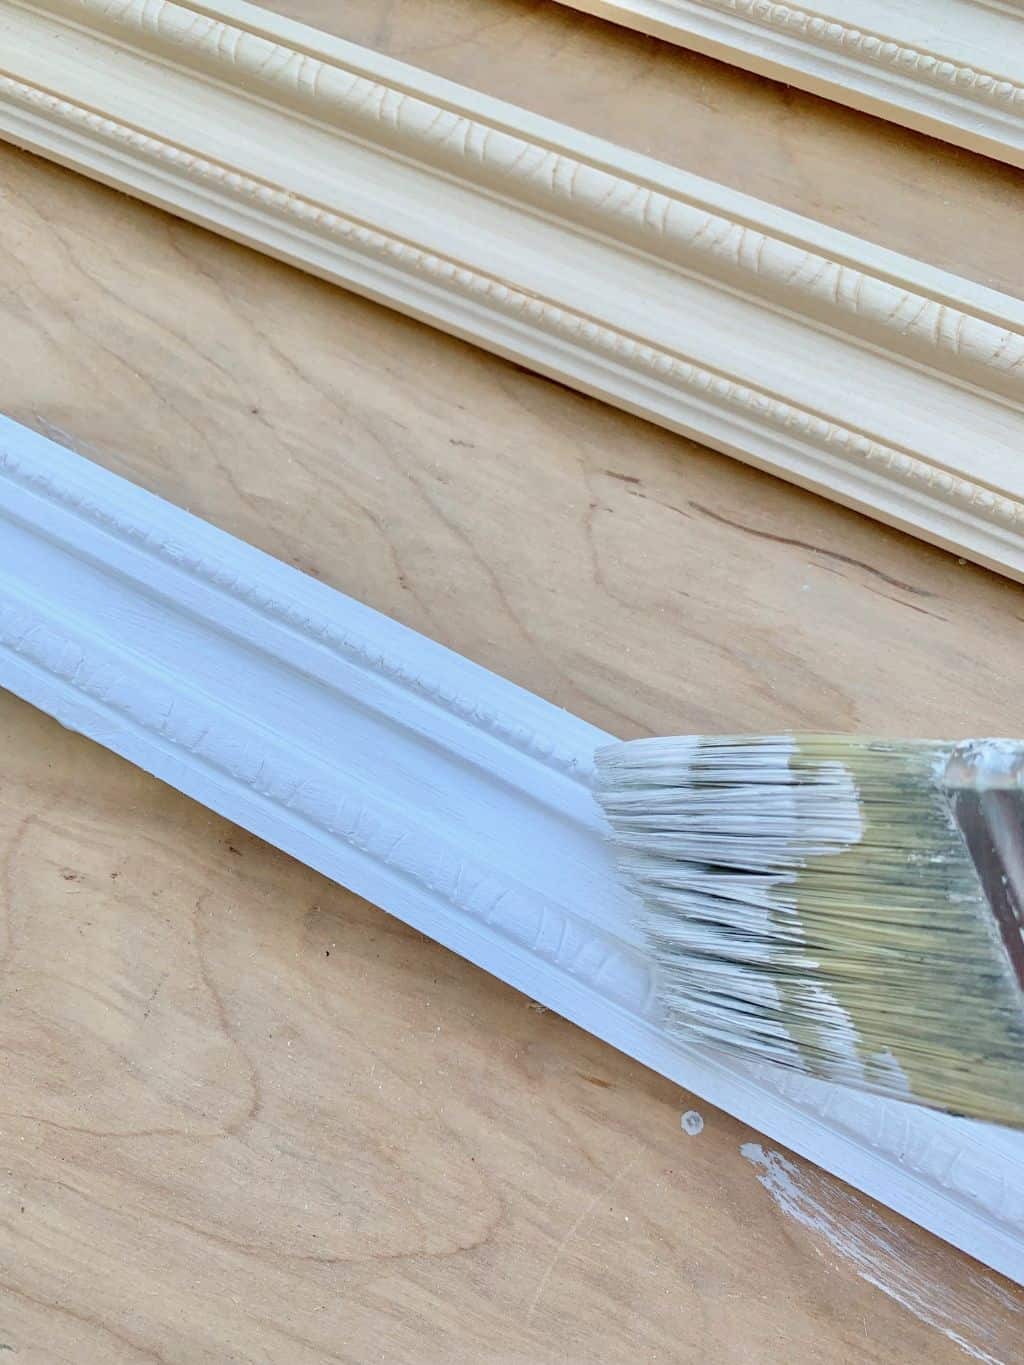
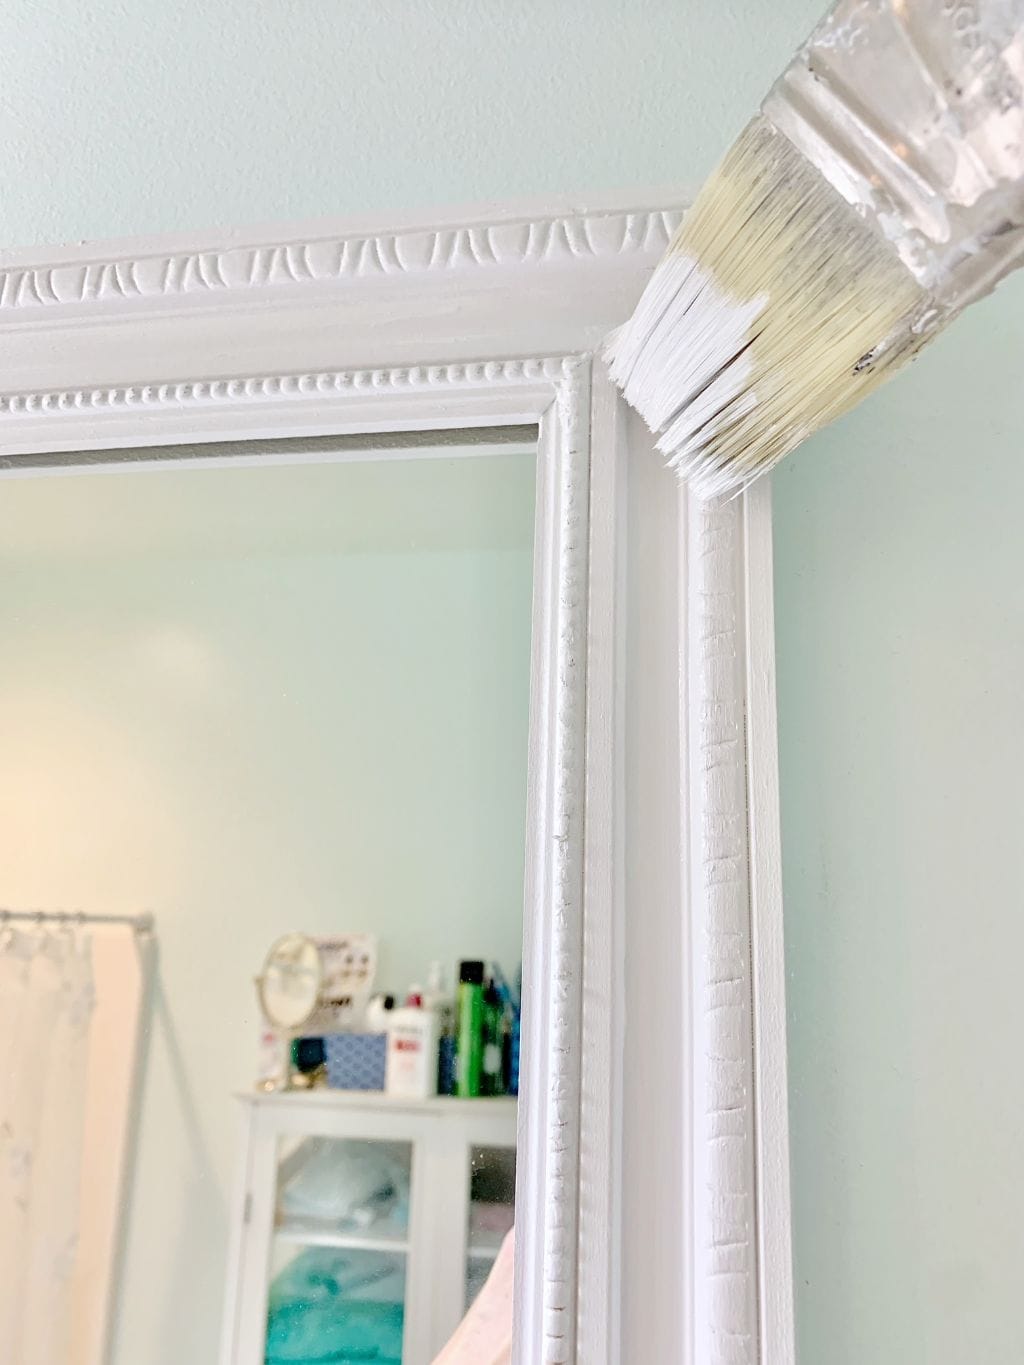
- Paint the trim with your chosen color, including the inside of the groove so it looks finished once the mirror is in place. Let dry completely before installing.
We used leftover Benjamin Moore paint from my mom's recent condo refresh, so the frame tied right into her bathroom trim color. For a natural look you can use wood stain or do a faux wood finish instead.
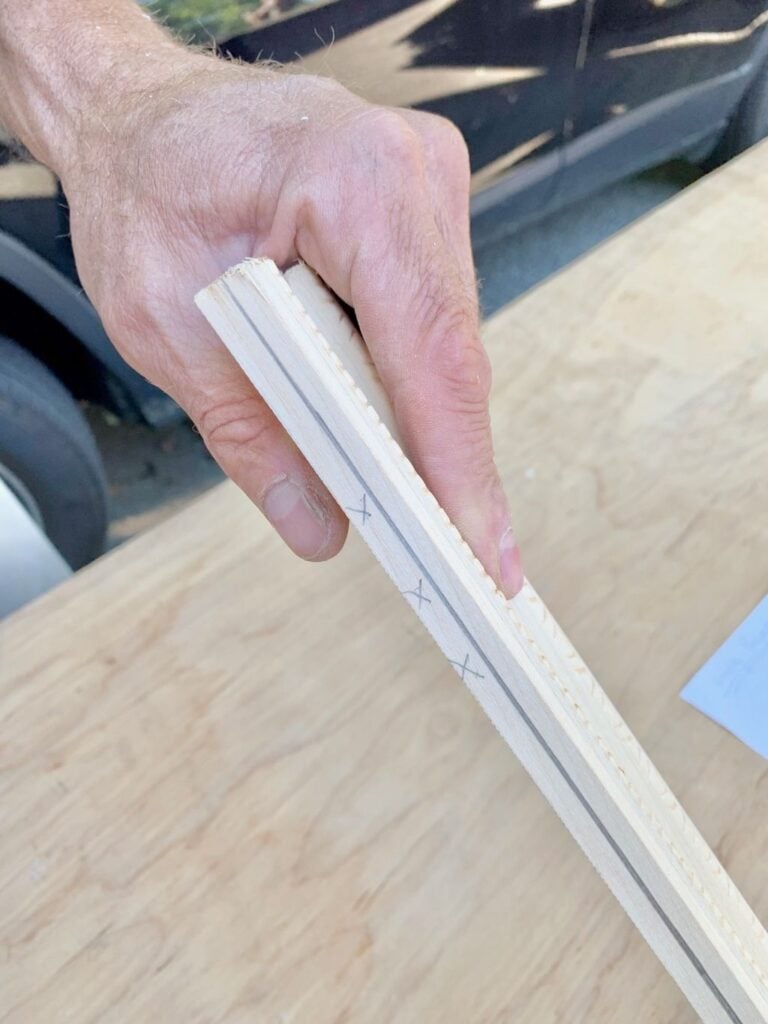
Mini how-to: Cutting mirror grooves
This step is what gives the frame its custom, built-in look. Instead of gluing trim directly onto the mirror, we created a small groove so the mirror slides securely into the frame.
Here's how to do it:
- Measure the thickness of your mirror.
Most builder-grade mirrors are about ¼ inch thick. Add a little extra space (around 1/16 inch) so the mirror slides in easily. - Mark your trim for the overhang.
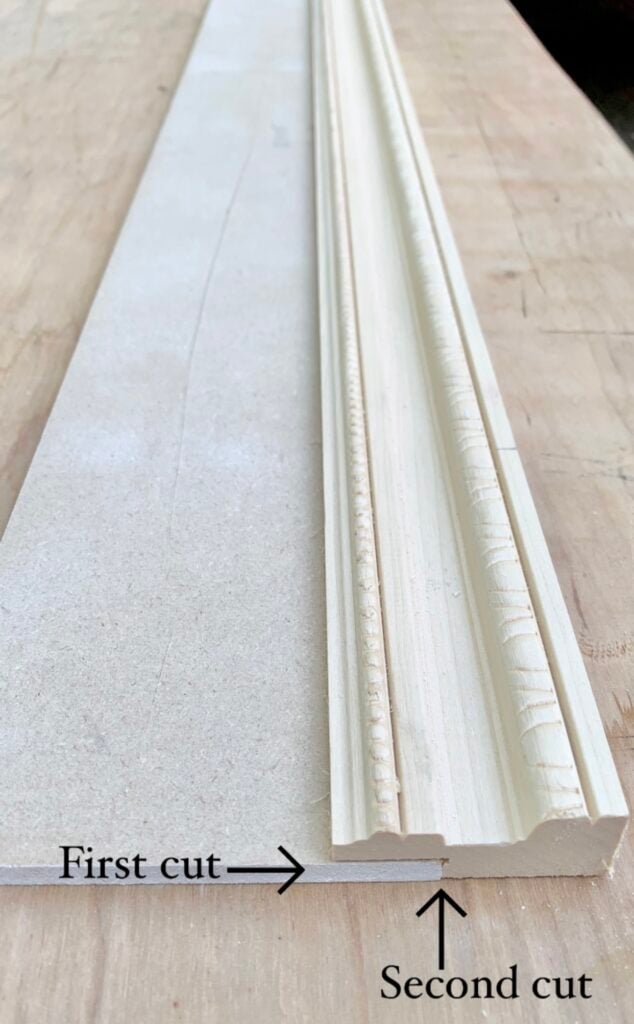
The groove should be about ¾ inch wide. Mark this line on the back of each trim piece using a pencil. - Make your first cut.
With the trim standing on its side, run it through the table saw to create the width of the groove. - Make your second cut.
Lay the trim flat and run it through again to set the depth. This cut defines how far into the trim the mirror will sit. - Test the fit.
Use a sample piece or scrap mirror to check that the groove fits snugly but not too tight. You should be able to slide the mirror in without force. - Smooth the edges.
Lightly sand inside the groove to remove splinters before painting or assembly.


Alternative method for renters: If you're renting or can't remove your mirror from the wall, you can still get the same custom look without a full rebuild. In this version, the trim attaches directly to the surface of the mirror. Start by measuring and cutting your trim just as you would for the main project, keeping those neat mitered corners for a polished finish. Paint or stain the pieces ahead of time and let them dry completely before attaching. Then use a mirror-safe construction adhesive, such as Liquid Nails Mirror Adhesive, to secure the trim along the mirror's edges. Press each piece firmly to set it in place, wipe away any excess glue before it dries, and once everything is secure, run a thin line of caulk along the outer seams where the trim meets the wall. The result is a framed mirror that looks built in but can be removed later with minimal wall damage - a perfect option for apartments or temporary spaces.
Before you start checklist
Before you pick up a saw or open the glue, take a few minutes to make sure you have everything ready. A little prep makes this project go faster and keeps your results looking polished.
- Mirror is not glued to the wall: Gently loosen one of the mirror clips to check. If it's glued, you'll need to adapt your approach (see the renter-friendly method below).
- Trim pieces are cut and pre-painted: Have your trim measured, mitered, and painted before installation day so you're ready to go as soon as the mirror is off the wall.
- Adhesive, nails, and caulk are ready: Keep your tools, glue, and caulk within reach. Once you start attaching the frame, you'll want everything prepped to move quickly.
- Light fixture clearance checked: Make sure you have enough room between the top of the mirror and your light fixture for the frame. About four inches is ideal.
- Work area protected: Lay down a drop cloth on the vanity and floor. Have a damp rag nearby for quick cleanups of glue or paint.
Installation day
With the prep work done, it was finally time to bring this mirror project together. We packed up the pre-cut, pre-painted trim pieces and headed to my mom's condo, ready to transform her builder-grade mirror into something special.
Step 1: Remove the mirror
We started by unscrewing the clips that held the mirror in place. Ours wasn't glued to the wall, which made this project much easier. If your mirror is glued, you'll need to decide whether to frame directly over it or remove it carefully using a putty knife and help from another set of hands.
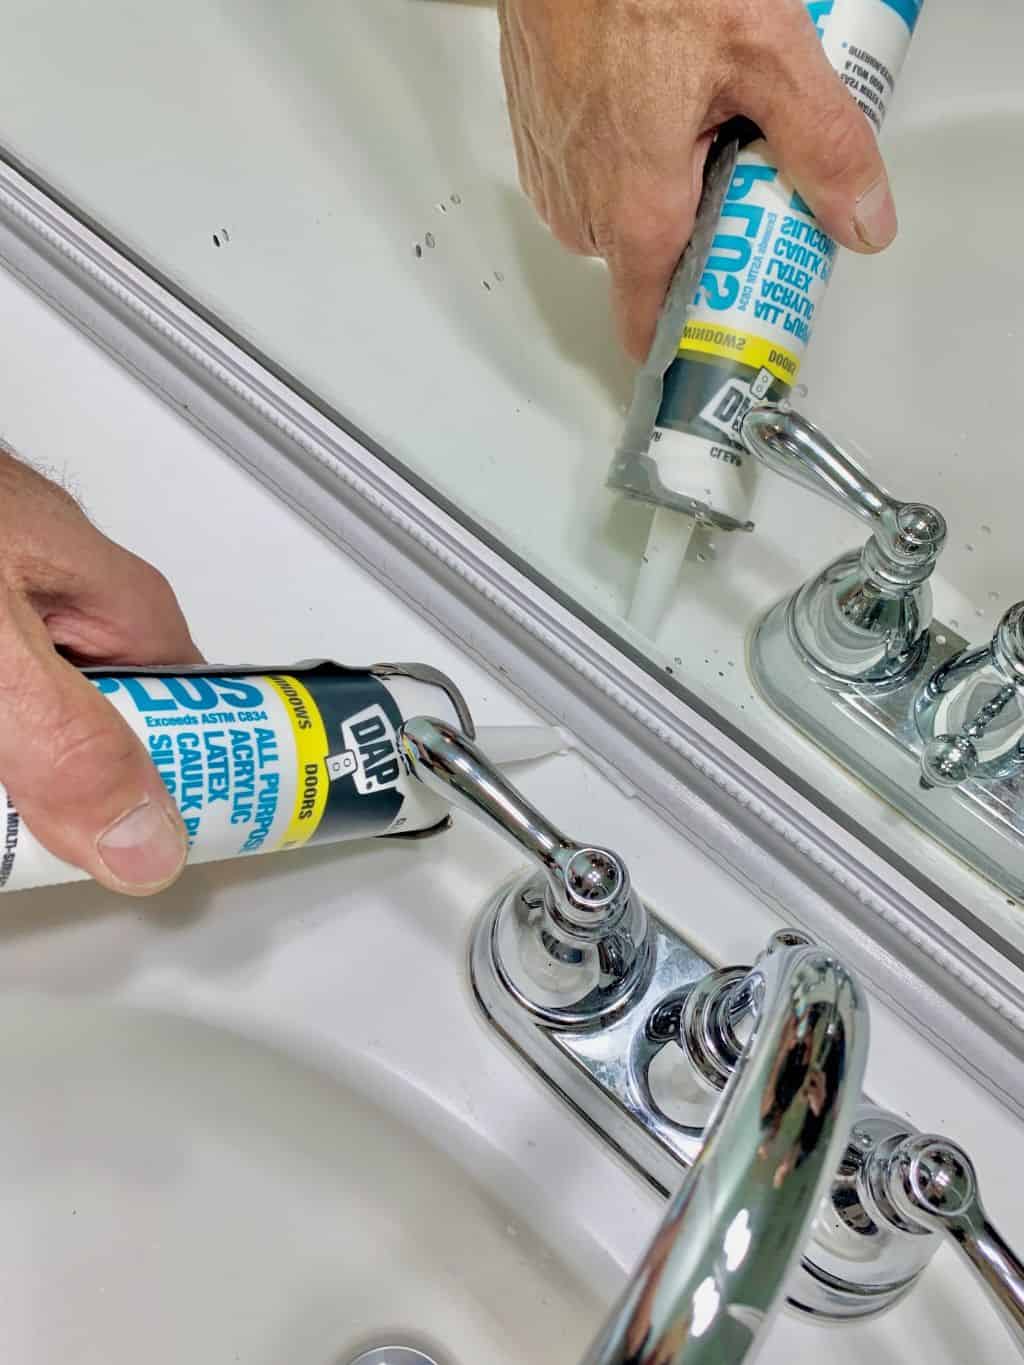
Step 2: Clean the wall and vanity area
Once the mirror was off, we scraped away any leftover silicone or residue on the wall and countertop. We also wiped the surface clean to ensure a strong bond for the frame.
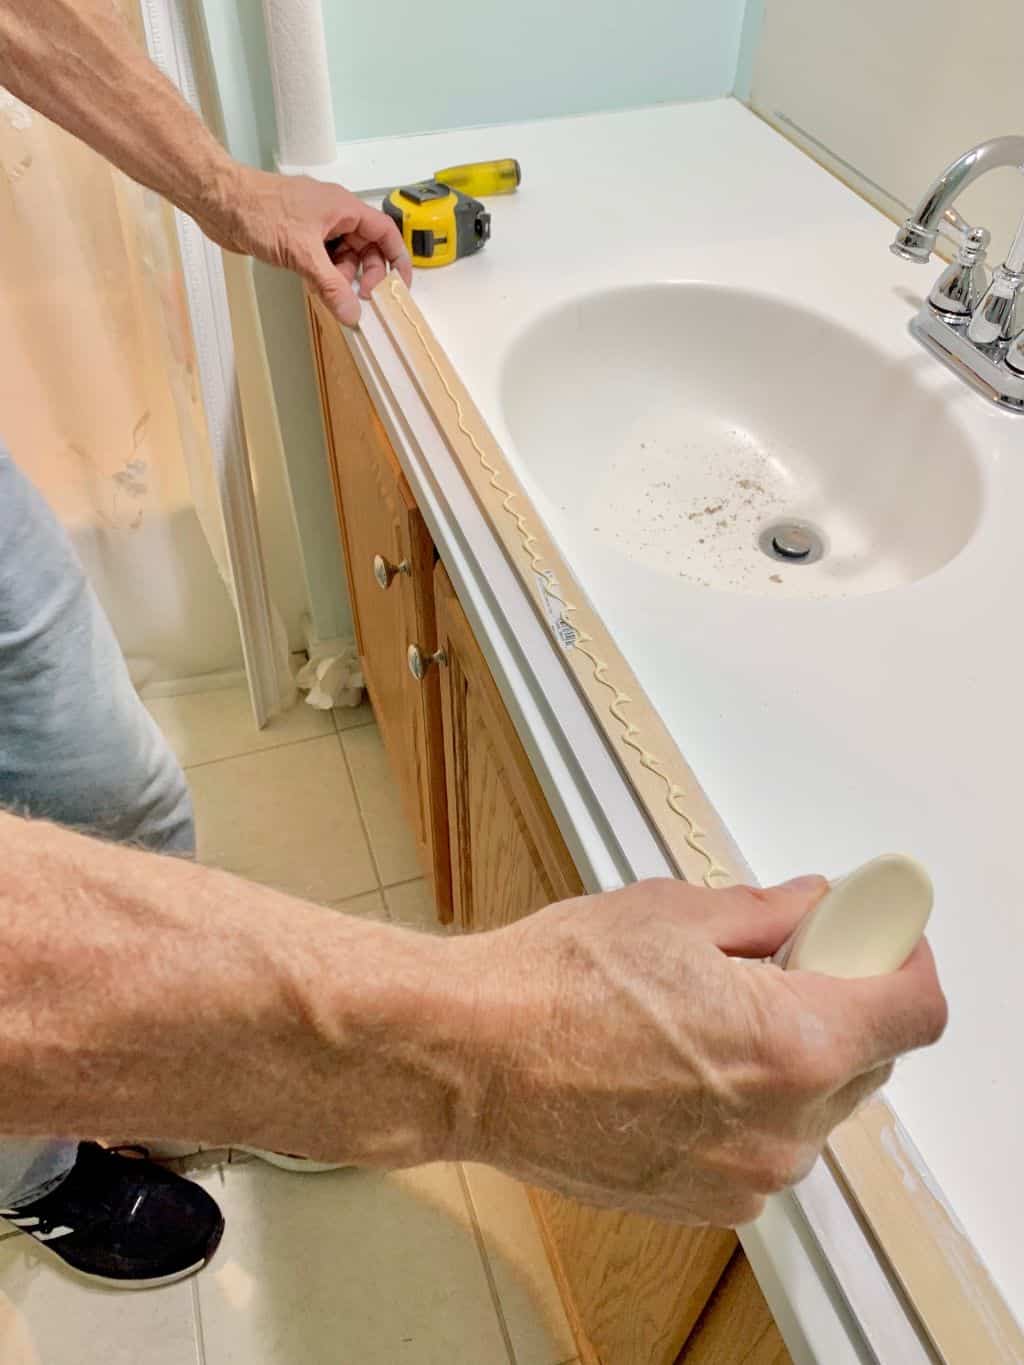
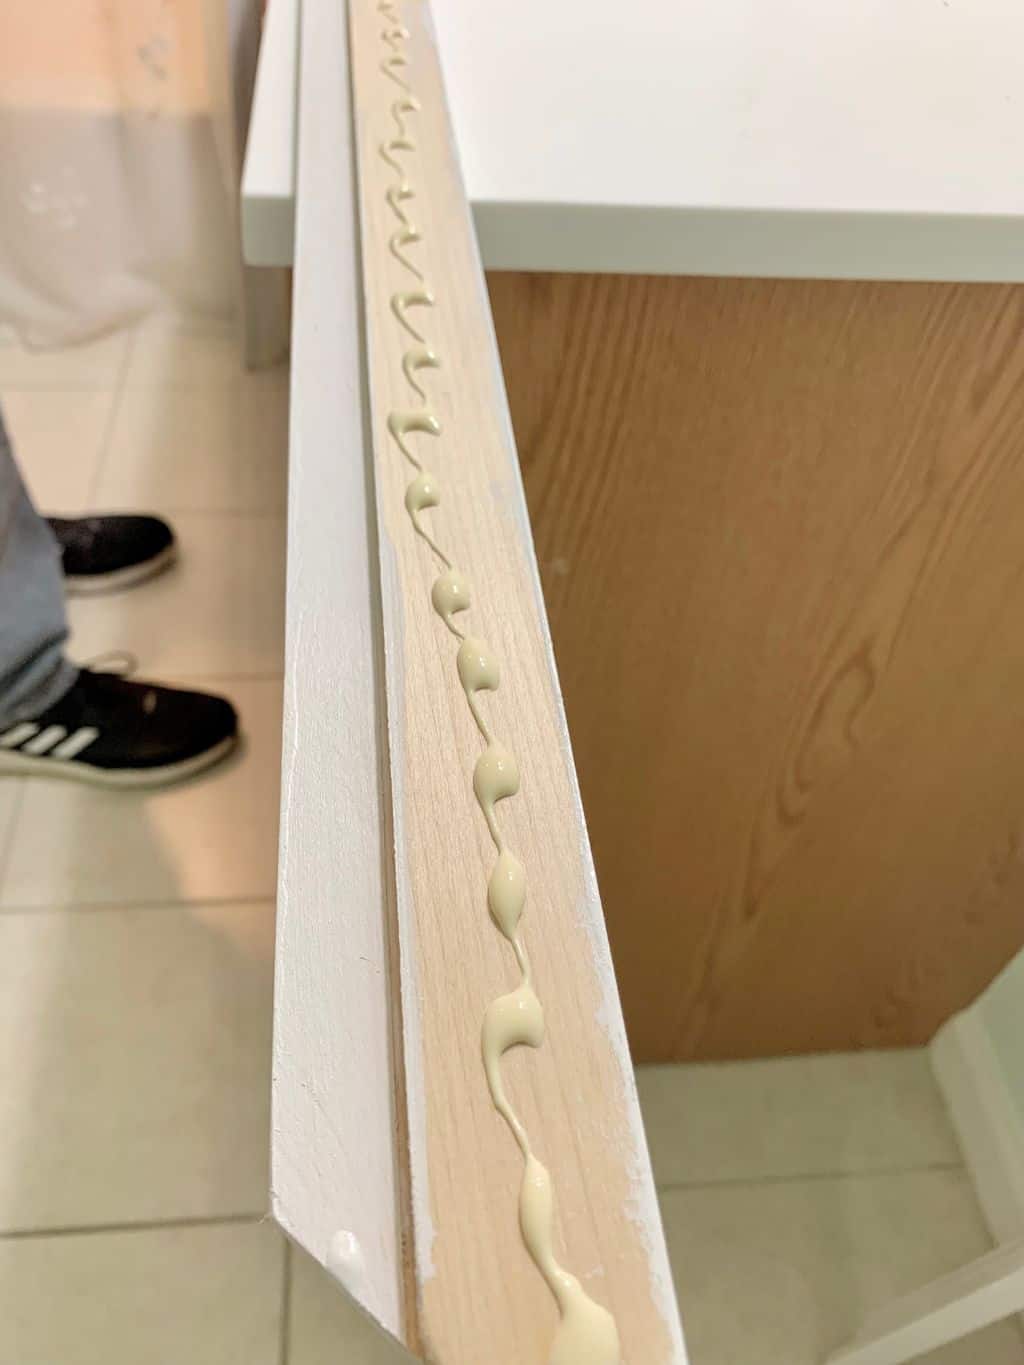
Step 3: Glue and attach the first frame piece
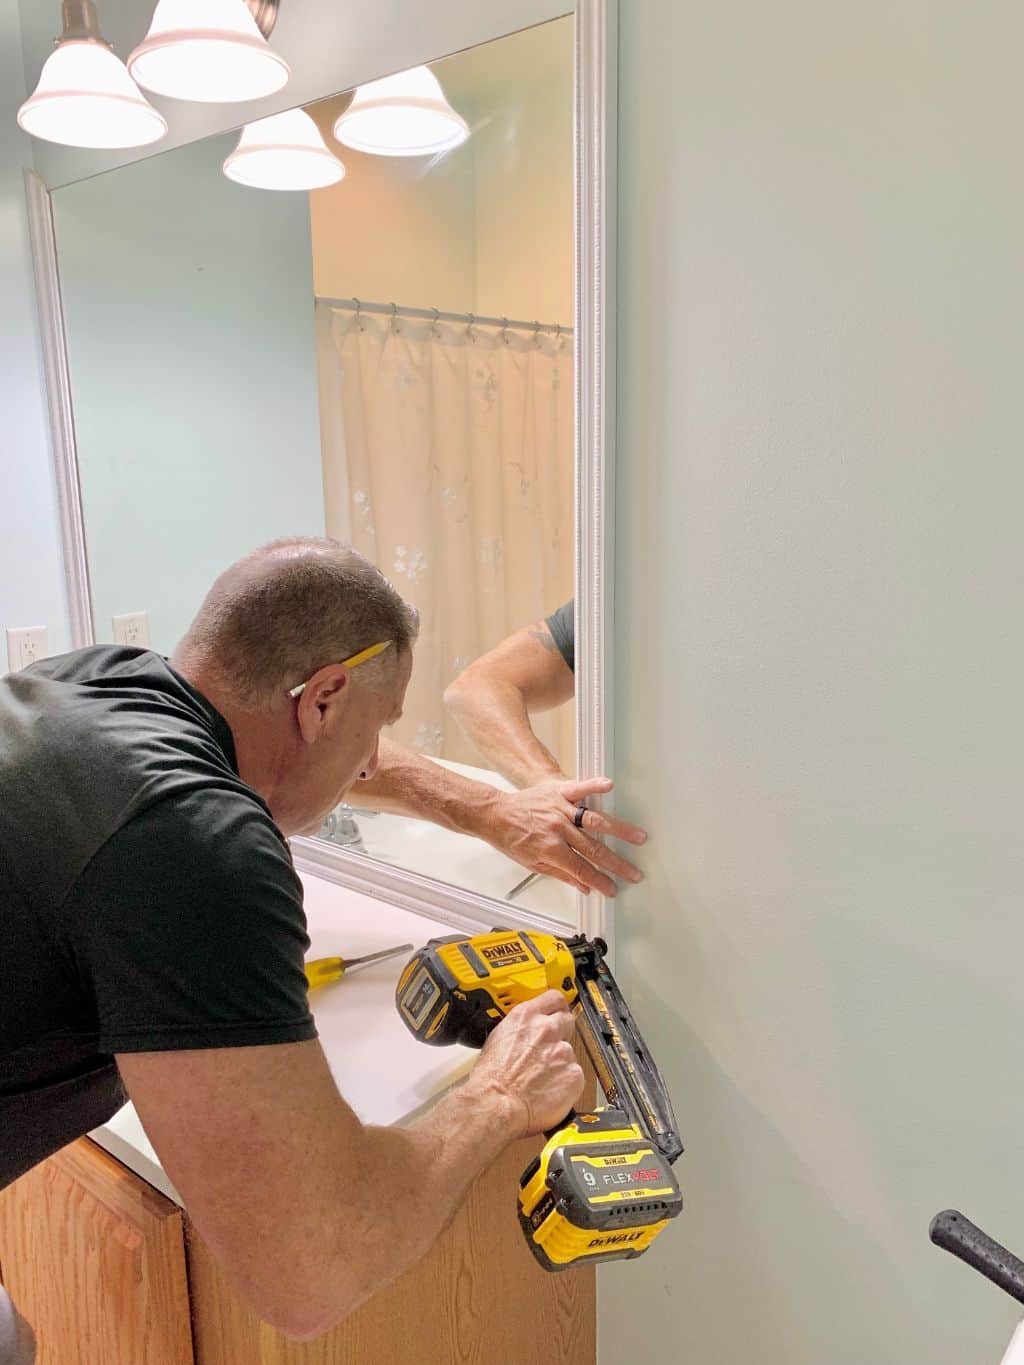
We began with the bottom trim piece. Using wood glue, we ran a thin bead along the back and positioned it right above the vanity top. Once it was in place, we secured it with the nail gun, driving nails into the thicker section of the trim to avoid cracking the mirror later.
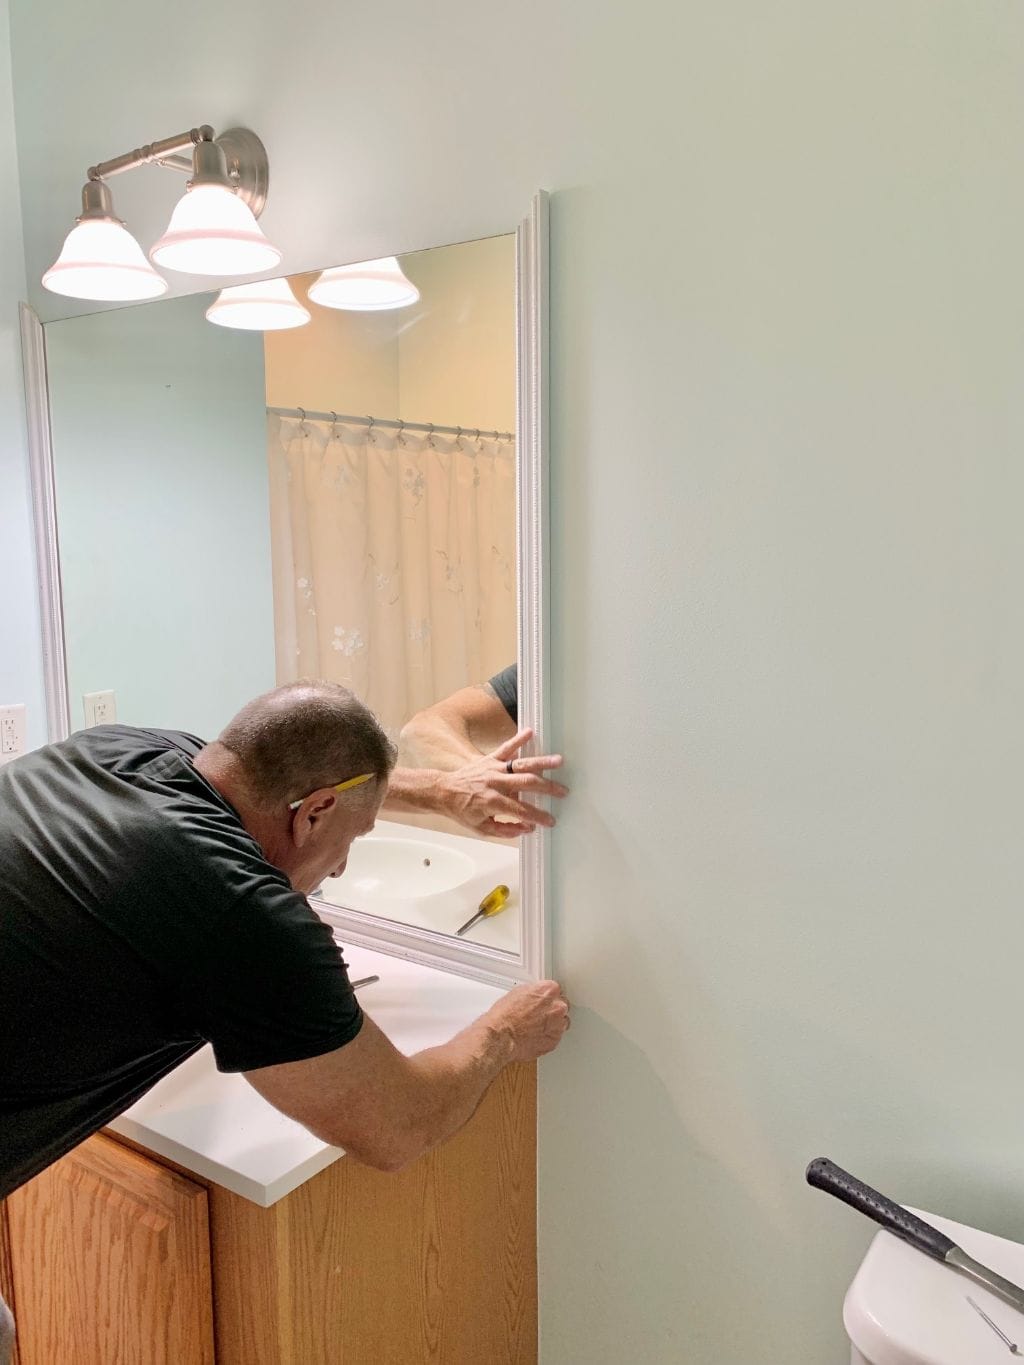
Step 4: Add the left side and slide in the mirror
Next, we glued and nailed the left side of the frame, making sure the corners aligned perfectly. Once those two sides were secure, we carefully slid the mirror into the grooves we had cut earlier. It fit like a glove.

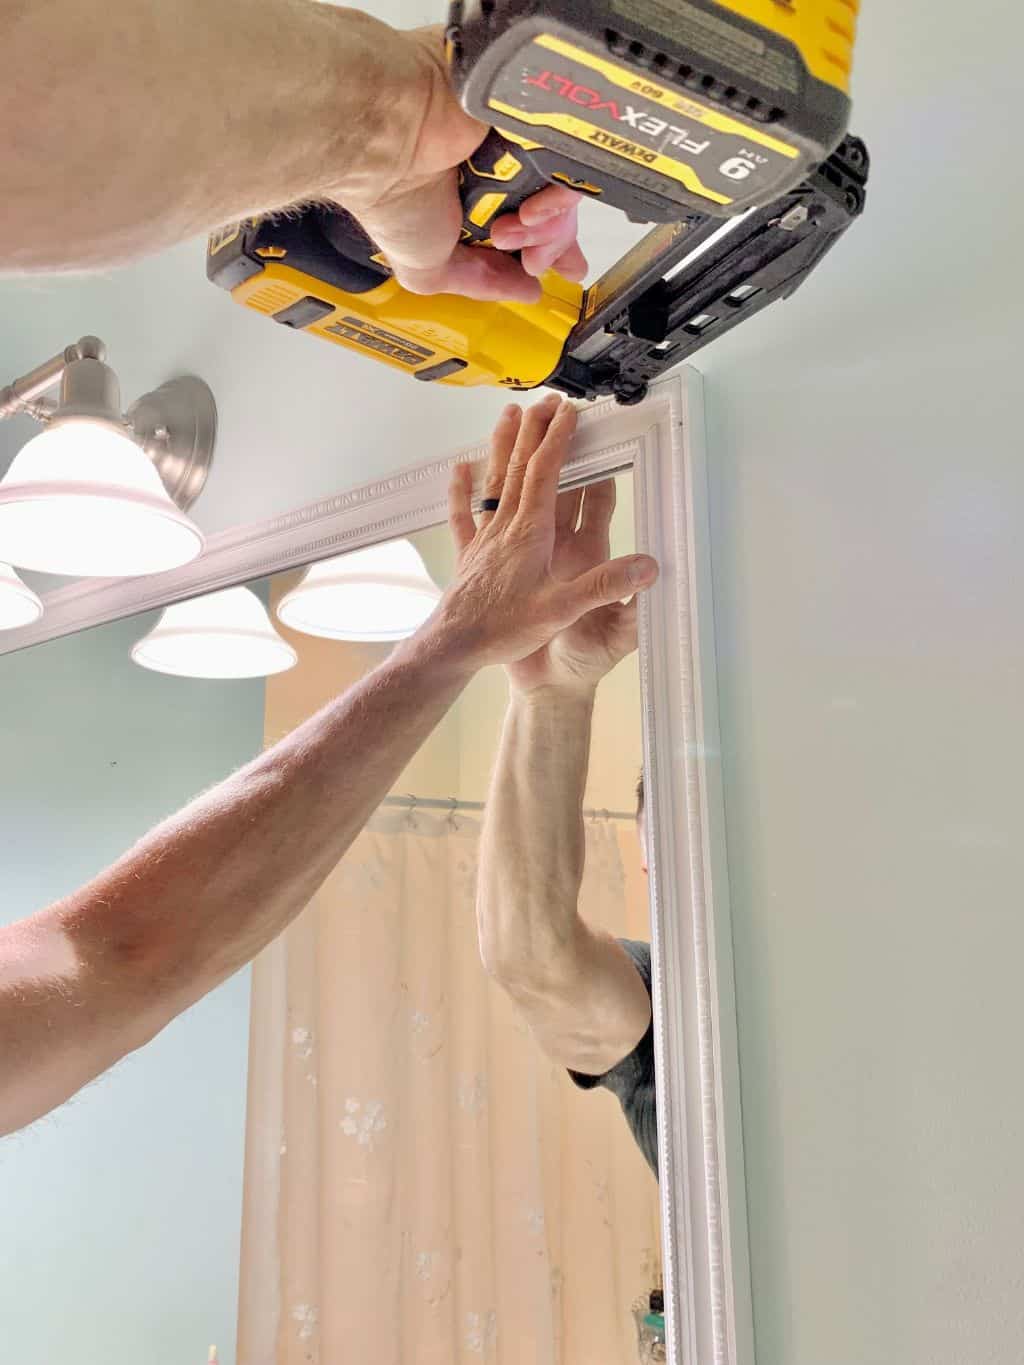
Step 5: Install the remaining pieces
We glued and nailed the right side next, followed by the top trim piece. For the top of the frame, we used a stud finder to secure it into a stud where possible for extra support.
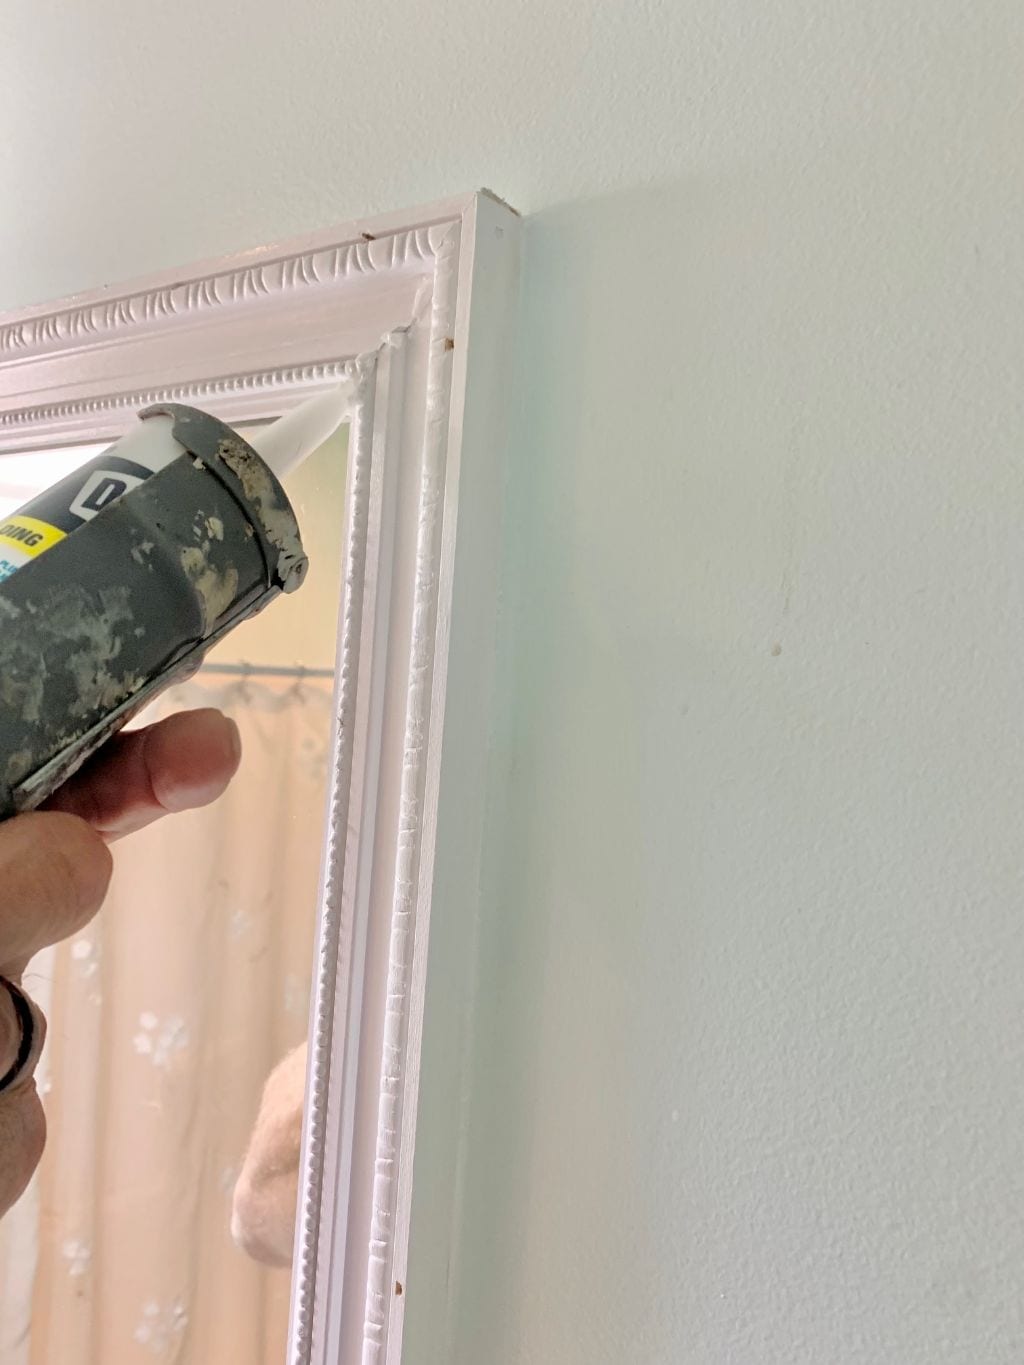
Step 6: Fill, caulk, and touch up paint
Once the frame was complete, we filled the nail holes with painter's putty, smoothed the seams with caulk, and added a light coat of paint to give everything a clean, finished look.

By the end of the day, the mirror looked like a custom built-in piece, giving the bathroom a polished, designer feel for under $60. It's amazing what a little trim, paint, and patience can do.
Finishing touches
Once the frame was fully installed, it was time for the final details that pull everything together. We wanted the mirror to look seamless and intentional, as if it had always been part of the space.
Fill and smooth imperfections: Using painter's putty, we filled each nail hole and smoothed the surface with our thumbs to blend it in. This step gives the frame a professional finish without needing to sand before painting.
Caulk the corners and edges: We ran a thin bead of caulk along the outer edges and corners of the frame to hide any small gaps. A damp towel helped wipe away the extra caulk and keep the lines clean. We skipped the inner edge against the mirror for a sharper reflection.
Add touch-up paint: After the caulk dried, we brushed on a light coat of paint to cover the filled holes and seams. It instantly made the trim look like one solid piece.
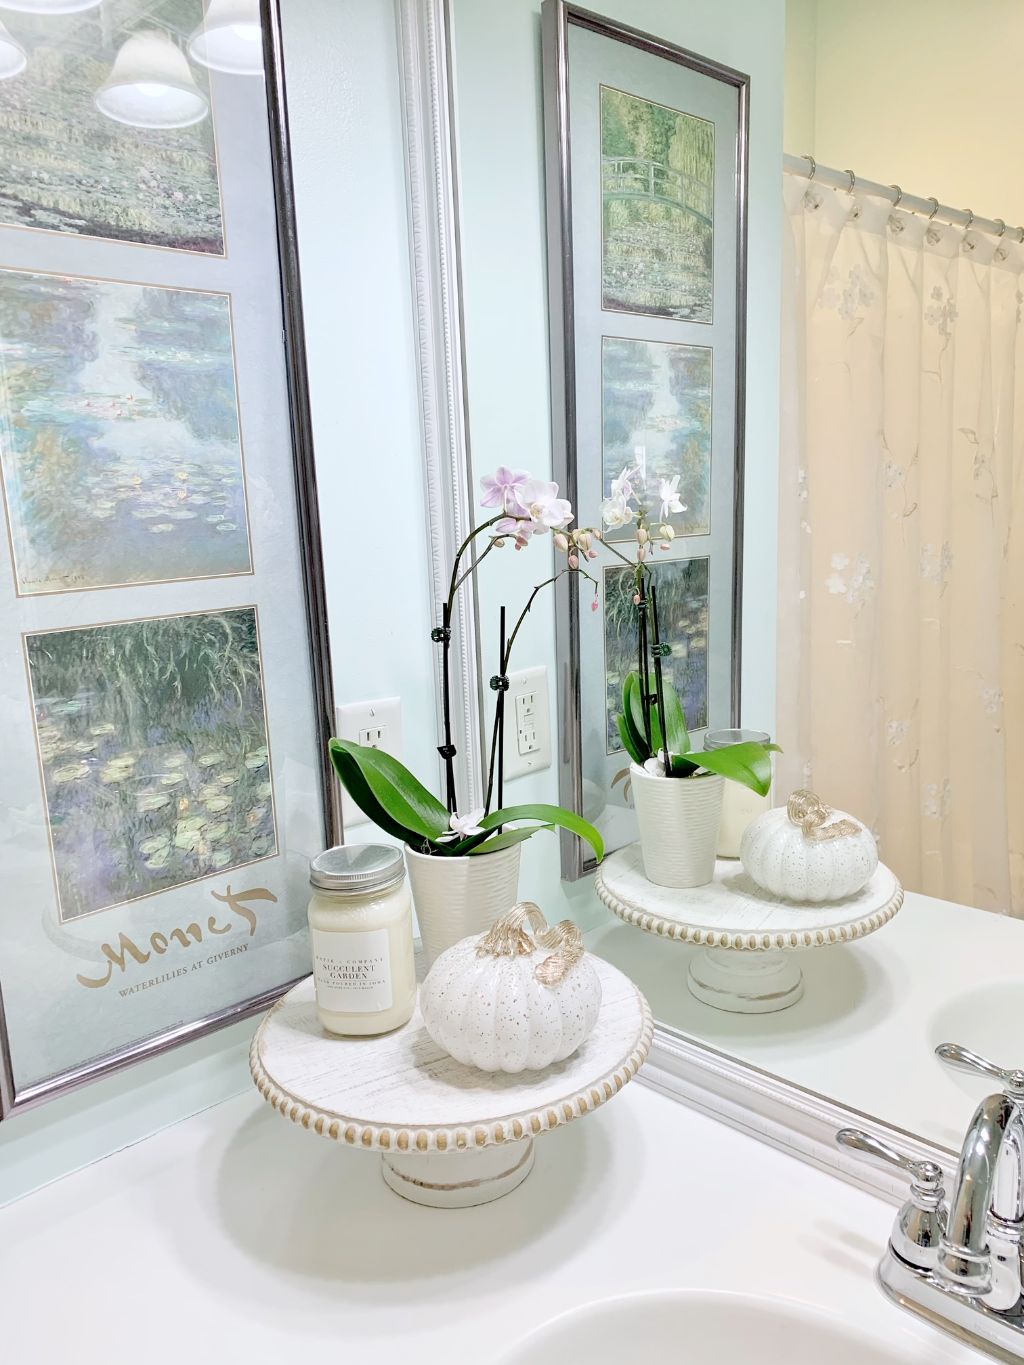
Final clean-up and styling: With everything dry, we gave the mirror a quick polish and cleared away any dust or debris from the vanity. A few accessories like an orchid, a candle, and a small decorative tray finished the look.
The transformation was immediate. That plain builder-grade mirror now had character, texture, and a timeless look for a fraction of what a custom frame would cost.
Addressing frame installation challenges
Every DIY project comes with a few hiccups, and this one was no exception. Here are some of the small challenges we faced while building and installing our bathroom mirror frame, along with how we handled them.
The frame did not sit flush against the wall: We noticed a slight gap between the trim and the wall in one corner. To fix it, we checked the boards for bowing and used a bit of wood filler before caulking to even out the surface. Once painted, the gap disappeared completely.
Mitered corners were slightly off: Even a small variation in angle can make corners look uneven. Before final installation, we dry-fitted all four pieces and made small adjustments with the miter saw. If the fit still is not perfect, caulk and paint can help disguise small seams.
Visible nail holes after painting: A quick touch-up with painter's putty and a second coat of paint easily solved this issue. Always check for nail heads or tiny dents in the light before calling the job done.
Mirror shifting slightly after installation: If your mirror moves once it is in place, add a small bead of clear silicone along the inside edge of the frame to keep it secure without damaging the glass.
Tackling these small issues as they came up helped us achieve a professional, custom finish that looked built-in from the start.
How to build a DIY bathroom mirror frame
Estimated Time: 3 hours (plus drying time)
Skill Level: Intermediate
Cost: Around $60 using leftover supplies
- Measure and Plan the Frame
Measure the height and width of your existing mirror. Note any obstacles such as light fixtures or outlets. Decide how wide you want your frame to be and write down the final measurements.

- Choose Trim and Prepare Materials
Select decorative trim that suits your bathroom style and is thick enough to cut a groove for the mirror to slide into. Cut the boards to length using a miter saw, making 45-degree corner cuts. Lightly sand any rough edges.
- Cut the Mirror Grooves
Use a table saw to cut a shallow groove (about ¼ inch deep) along the back of each board where the mirror will sit. This groove will hold the mirror securely once installed.
- Paint or Stain the Trim
Before installation, paint or stain all four pieces of trim. Be sure to paint the inside of the groove so it looks finished when reflected in the mirror. Allow everything to dry completely.
- Install the Bottom and Side Pieces
Apply wood glue to the back of the bottom and one side trim piece. Press each piece into place on the wall and secure with a nail gun or finish nails.
- Slide the Mirror into Place
Carefully lower the mirror into the groove created by the bottom and side pieces. Make sure it sits evenly before moving on.
- Add the Remaining Trim
Attach the opposite side and top trim pieces using wood glue and nails. Check that the corners align and adjust before the glue dries. Nail in place.
- Fill, Caulk, and Paint Touch-Ups
Fill nail holes with painter's putty, caulk the outer seams, and touch up any areas with paint for a smooth, polished finish.

Result: You've transformed a plain builder-grade mirror into a custom, built-in feature that adds character and charm to your bathroom, all for a fraction of the cost of a new mirror.
Common fixes and quick tips
Even with careful planning, little hiccups can happen during a project like this. If your frame doesn't sit flush against the wall, check that your trim pieces aren't slightly bowed - a bit of wood filler and caulk can usually smooth things out. For small gaps in the corners, lightly sand the edges and reapply caulk once everything's dry. If paint chips while you're working, just touch up those spots after installation for a seamless finish. And if the mirror feels a bit loose once framed, add extra adhesive or mirror clips for support. Small adjustments like these can make all the difference in getting that crisp, professional look.

Frequently asked questions
Yes! If your mirror is securely mounted and not glued to the wall, you can easily frame it in place. For a permanent, custom look, build a wooden frame and install it around the mirror as we did in this project. If you're renting or prefer a quicker option, you can attach trim directly to the mirror's surface using a mirror-safe adhesive for a similar result.
Moisture-resistant wood trim is the best choice, especially materials like pine, oak, or MDF that can handle the humidity of a bathroom when sealed with paint or polyurethane. You can also use PVC or composite trim for a low-maintenance option that won't warp or swell over time.
A simple way is to measure your mirror, cut four trim pieces with mitered corners, and attach them around the mirror using wood glue, nails, or adhesive. Paint or stain the frame, let it dry, then caulk the edges for a finished look. This post walks you through how we built our version by removing the mirror and sliding it into a custom frame for a true built-in look.
You can glue decorative trim directly onto the surface of the mirror. Use a mirror-safe adhesive and press the pieces in place along the edges. Once the glue sets, caulk where the trim meets the wall for a clean, seamless finish. It's an easy way to upgrade a frameless mirror without removing it from the wall.
Completed project
We're so excited about how this turned out! Mom was thrilled and couldn't believe how this project elevated the look of her whole bathroom. The framed mirror gives the bathroom a fresh new look and has gone from one of those basic builder-grade mirrors to a beautiful custom mirror frame.


And that's how we transformed a plain builder-grade mirror into a custom feature that looks completely built in. This project added so much character and polish to the bathroom without the cost of replacing the mirror. With a few tools, some patience, and a little planning, you can create the same high-end look in your own home.
Whether you follow our full build method or try the renter-friendly version, framing a bathroom mirror is a simple way to make a huge impact. It's an easy DIY project that reminds you how satisfying it can be to take something basic and make it beautiful again.
Keep creating friends!