How to Make a Christmas Tree Look Fuller (My Simple Layering Trick)
You can make a Christmas tree look fuller by adding greenery inside the tree, not just on the outside. Tuck a garland of mixed evergreens close to the trunk to fill gaps and create depth. Then layer additional stems or picks where the tree feels sparse. Once the greenery is in place, weave lights from the inside out and place your larger ornaments deeper in the branches. This approach builds fullness at the core of the tree so it looks naturally lush, whether your tree is real or artificial.

Content may contain affiliate links. When you shop the links, we receive a small commission at no cost to you. Thanks for supporting my small business.
Ahhhh, my favorite topic. In our house, we are famous for waiting just a little too long to get our tree. Which means we've brought home our fair share of "character" trees over the years. Somewhere along the way, I became an expert at making a sparse Christmas tree look full. Purely out of necessity... and a little bit of stubbornness.
The good news? These tips work beautifully on fresh trees that are looking a little thin, and on artificial trees that need help in the fullness department. With just a few simple tricks, your tree can look lush, layered, and ready for the holiday spotlight.
Here's what we'll cover:
- The garland trick that instantly fills bare spots (my secret move)
- Easy fillers that add depth and dimension
- Lighting strategies that make your tree look fuller
- Ornament placement that pulls the whole look together
So grab your tree, your garland, maybe a cup of something warm, and let's make this beauty look full, cozy, and magical.
Jump to:
Fluff the branches well
Before you bring out a single ornament or strand of lights, take a few minutes to fluff your tree. This step matters more than people think. A lot of the fullness in a Christmas tree comes simply from spreading out the branches and tips so they fan out and fill the space.
Start from the inside and work your way out. Gently pull each branch outward and separate the smaller tips so they aren't clumped together. Think of creating layers. The more layers, the fuller the tree will look.
If you're working with an artificial tree, this step is especially important because most trees come out of the box a little squished and flat. Break up any tight folds, soften the shape, and open the branches so there are no hard, straight lines.
If you're working with a fresh tree, take a moment to snip off any awkward branches that stick out too far and reshape it a bit. Sometimes removing one wild branch makes the whole tree look more balanced.
None of this needs to be perfect. Just take a little time to open the tree up and give it some shape. Think relaxed, natural, and softly layered.
This fluffing step sets the stage for everything that comes next. Once the branches are opened up and the tree has a little breathing room, the fullness tricks work even better.
The evergreen garland Trick: Your tree's secret weapon
Alright, folks, here's my secret ingredient - the trick that made jaws drop on Instagram last year! Grab yourself a faux green garland. Trust me, this is going to be a game-changer.
Choosing the right garland: Look for a garland that mimics pine, cedar, or mixed greens. The key is to find something that blends well with your tree. Don't stress too much about an exact match - we're going for overall fullness here. Here's a money-saving tip: since this garland won't be visible, go for a more inexpensive option. No need to splurge on the fancy stuff for this trick!
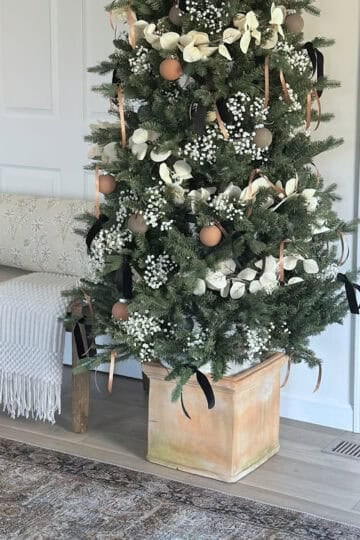
Wrapping technique for maximum volume: Here's the magic: Instead of wrapping the garland around the outside of the tree like you normally would, we're going to lay it on the branches close to the trunk. Do this on each level of branches, working your way up.
Filling in bare spots and gaps: Why does this work so well? It's simple - typically, it's seeing the trunk that makes a tree look sparse. By filling the area near the trunk, you get an instant fuller look. This trick works wonders on both faux and real trees.
The best part? This technique alone, without any of the other tips I'm about to share, will dramatically improve your tree's appearance. It's like an instant tree makeover!
So, before you do anything else, try this garland trick. I bet you'll be amazed at how much fuller your tree looks with just this one simple step. It's a total tree transformation in minutes!


Adding depth with fillers
Now that we've got our garland base, let's bulk up those sparse areas even more. Think of your tree like a flower arrangement - fillers work the same way, adding volume and interest.
Excelsior and Shredded Paper Magic: Don't toss that packing material! Excelsior (those fine wood shavings) or even shredded paper can be your tree's new best friend. Gently tuck these into bare spots, instantly adding volume and a rustic touch.
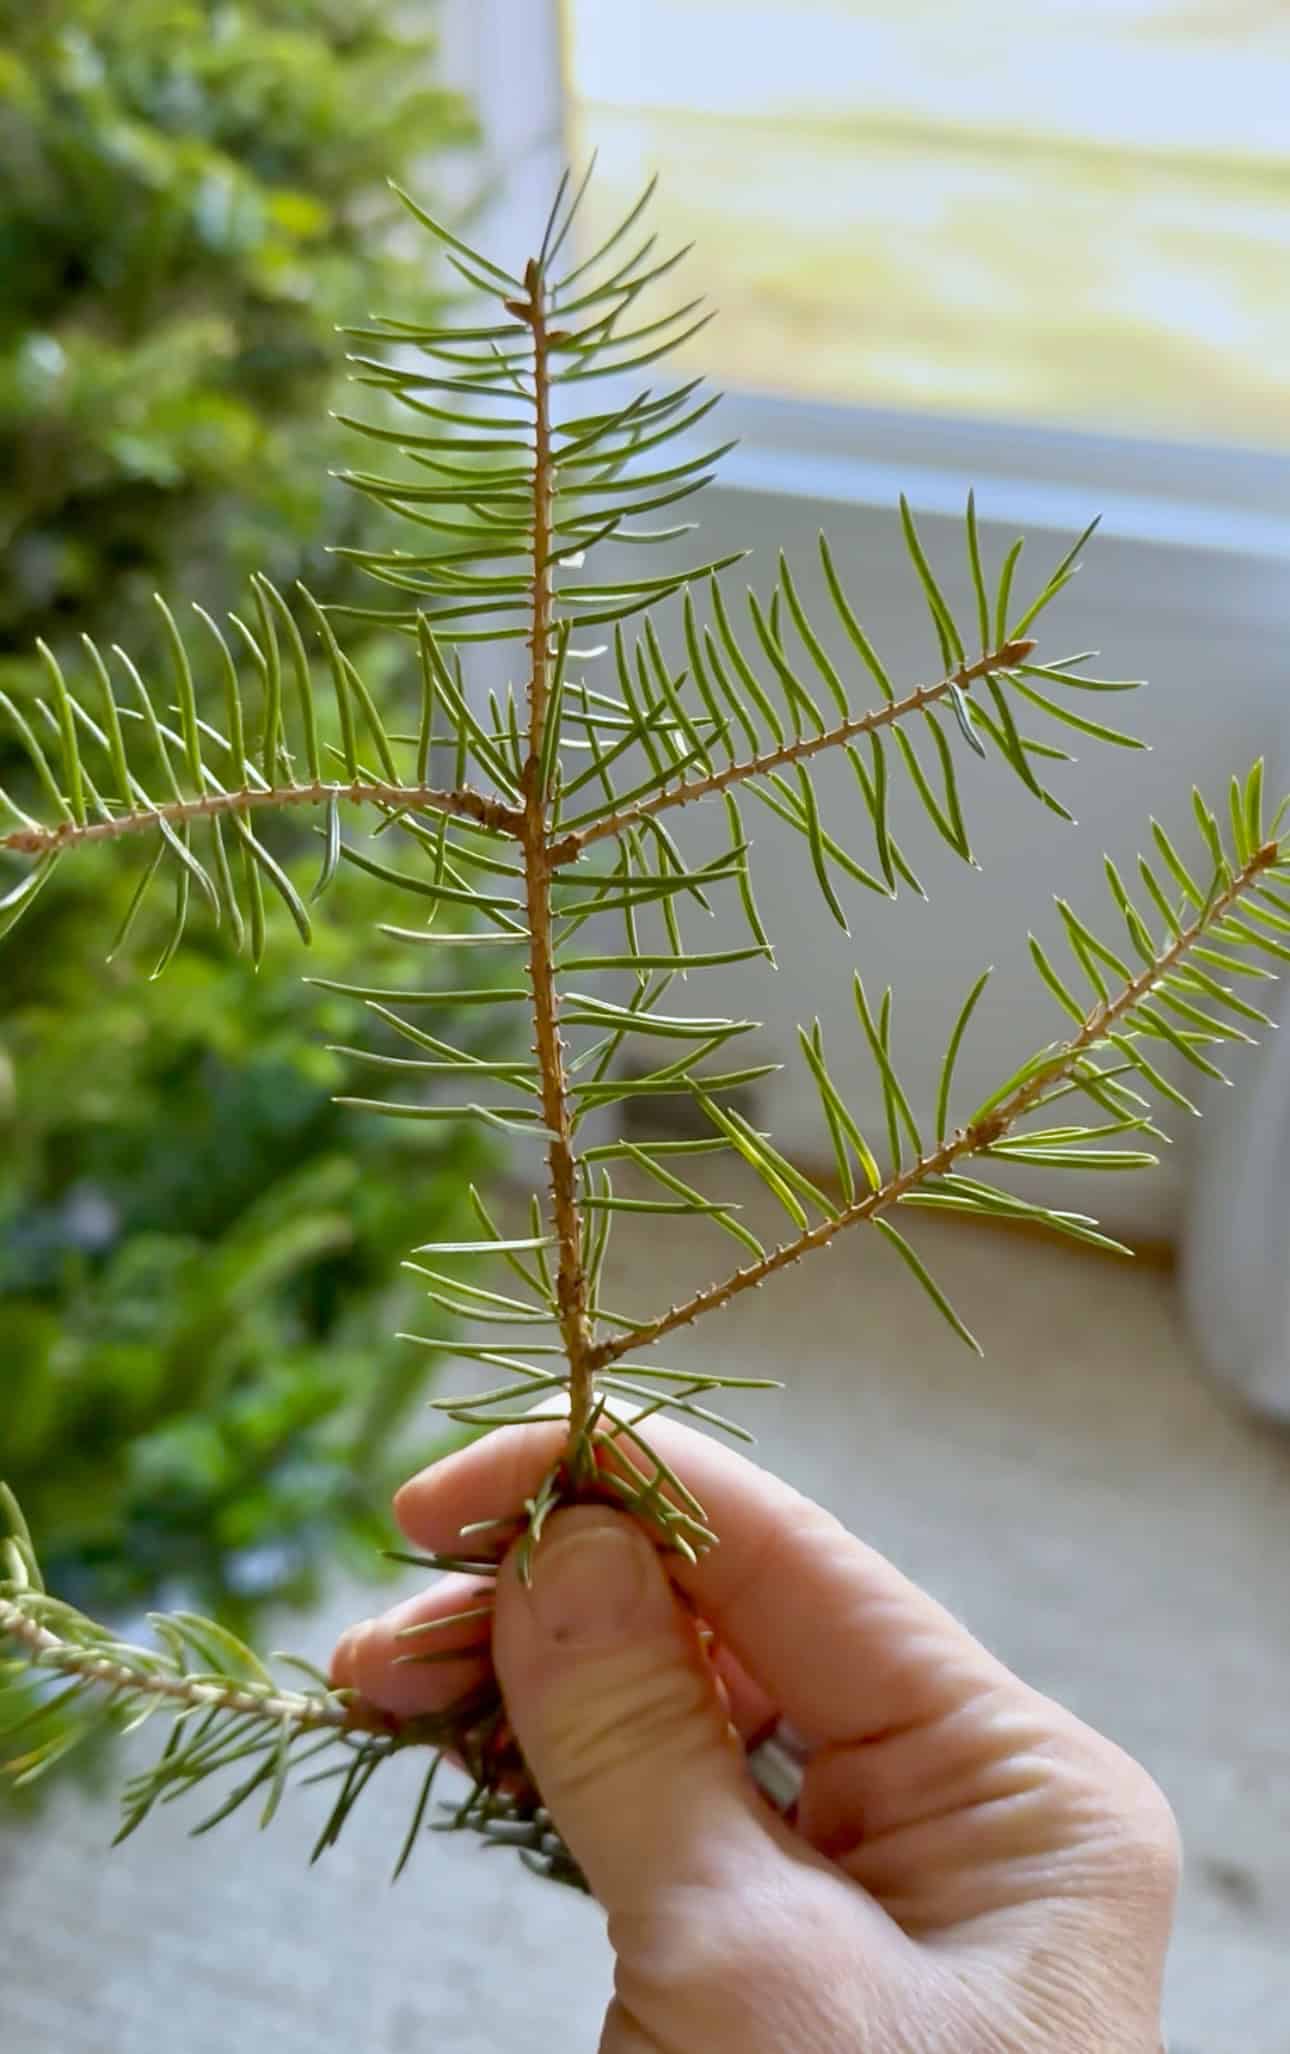
Pine Picks and Berry Branches: Grab some artificial pine picks, berry sprigs, or extra branches. These are great for filling gaps and adding texture. Nestle them deep into the tree, fanning them out for a natural look.
Remember, the more you layer onto the branches, the fuller your tree will look. The key is to add these fillers before you start with lights, ornaments, and bows. We're creating a lush base for your decorations to shine.
Pro tip: Step back frequently to check your progress. You want an even, natural-looking distribution of fillers. And don't be shy - really pack it in there! A fuller base means a more impressive final result.

Strategic lighting for fullness
Alright, let's light this tree up - but with a strategy that adds some serious oomph to its fullness.
Creating Depth and Dimension: Lights aren't just for sparkle; they're key players in the illusion of fullness. By placing lights at varying depths, you're essentially "building" your tree outward.
The Zig-Zag Technique: Forget about wrapping lights in a boring spiral. We're going for a zig-zag approach here. Start near the trunk and work your way out towards the branch tips, then back in again. This creates layers of light that give your tree depth and dimension.
Mix It Up: Don't be afraid to use different sizes and styles of lights. Mixing mini lights with larger bulbs can create interesting textures and fill space effectively.
Go Deep: Here's a pro tip: avoid placing too many lights on the very tips of the branches. That's a dead giveaway for a sparse tree. Instead, nestle lights deep within the branches, closer to the trunk. This draws the eye inward, creating the illusion of fullness.
Remember, when it comes to lights, more is definitely merrier. A well-lit tree looks fuller, period. So don't be stingy with those strands!
By following this lighting strategy, you're not just decorating your tree; you're sculpting it with light. The result? A tree that looks lush and full from every angle.

Ornament placement for maximum impact
Now that we've built a solid foundation, it's time for the fun part - ornaments! But hold on, we're not just throwing these on willy-nilly. There's a method to this festive madness.
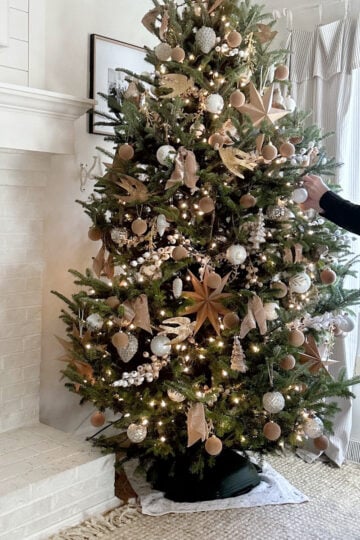
Go Big First: Start with your larger ornaments. These are your heavy hitters in the fullness game. Place them deeper in the tree, closer to the trunk. This creates depth and fills those inner spaces we've been working on.
Deep Dive for Depth: Don't be afraid to nestle some ornaments right up against the trunk. It might feel weird at first, but trust me, this adds incredible depth to your tree.
Branch Out: As you work your way outward, switch to smaller ornaments. Hang these towards the ends of the branches. This gradual size transition from inside to outside creates a natural, full look.
Mix It Up: Variety is the spice of life - and tree decorating! Use ornaments of different sizes, shapes, and textures. This adds visual interest and helps fill space more effectively than uniform ornaments.
Shine On: Incorporate reflective or shiny ornaments throughout your tree. These babies pull double duty - they look great and bounce light around, making your tree look even fuller.
Strategic Coverage: Got a stubborn bare spot? No problem. Cluster a few ornaments together to cover it up. Don't be too perfectionist about it - a natural, slightly imperfect look often appears fuller than a meticulously arranged tree.
Remember, the key is to create layers. Start deep and work your way out, using larger ornaments as your base and smaller ones to fill in. This technique not only makes your tree look fuller but also gives it a professional, well-designed appearance.
And here's a bonus tip: step back frequently to look at your tree from different angles. It helps you spot any areas that need a little extra love.

Final touches for a fuller look
We're in the home stretch now! Let's add those finishing touches that'll take your tree from "looking good" to "wow, that's amazing!"
Picks and Sprays: Got any lingering gaps? Tuck in some decorative picks or sprays. These are great for filling odd spaces and adding texture. You could also add my Pottery barn-inspired pinecone garland for a fuller look!
Go Big or Go Home: Strategically place a few oversized ornaments or big bows in areas that still look a bit sparse. These eye-catching pieces can distract from any remaining thin spots. I love to add large faux hydrangea flowers to my tree for extra fluffy fullness!
Sparkle and Shine: If your style allows, consider adding some tinsel or icicles. A little goes a long way in adding volume and sparkle.
The Final Once-Over: Step back and look at your tree from different angles. Adjust as needed. Move ornaments around, fluff branches, or add an extra pick here and there until everything looks balanced and full.
Remember, the goal is a tree that looks abundantly decorated but not overcrowded. These final touches should enhance the fullness you've already created, not overwhelm it.

Frequently Asked Questions
You absolutely can make your Christmas tree look fuller. The easiest way is to add greenery inside the tree. Tuck a garland or extra evergreen stems close to the trunk to fill empty gaps. Then add your lights and ornaments on top. This builds fullness from the inside out and works for both fresh and artificial trees.
The best order is fluff first, fill second, decorate last. Start by opening and shaping all the branches. Then add a garland or extra stems inside the tree to create fullness. After that, weave lights from the inside out. Finish with ornaments, placing some deeper in the tree and some toward the outer branches.
The quickest way to fill empty spots is to tuck extra greenery into the tree. You can use a garland of mixed evergreens, pine picks, berry stems, or even fresh clippings. Place them deep in the branches, close to the trunk, to create natural fullness. For visible gaps near the front, cluster two or three ornaments together to cover the space.
To make your tree look classy, keep the color palette simple and cohesive. Use lights in warm white and choose ornaments in just one or two colors, mixing different finishes like matte, shiny, and textured. Add ribbon or garland with a soft drape and avoid over-decorating the outer branches. A little breathing room always looks elegant.
Your tree might look sparse because there's too much open space near the trunk. Most trees, especially artificial ones, have gaps inside that make the branches look thin. Adding greenery or garland deep into the center of the tree solves this instantly. Once the middle is full, the whole tree looks lush and complete.


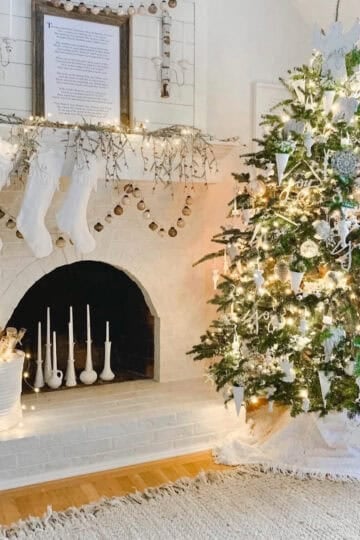
Whether you're decorating an artificial Christmas tree or a real pine tree, these simple tips will transform your sparse Christmas tree into a full, festive centerpiece for your living room this holiday season. From the first step of wrapping the tree branches with garland to the final touches of string lights and reflective ornaments, you'll create a balanced look that covers unsightly gaps and skimpy branches.
Remember, the best way to achieve a fuller tree is to work in layers, starting from the back of the tree and moving outward. Use a variety of decorative elements, from wide ribbon to pine cones, to add different textures and create depth. Don't forget to incorporate a color scheme that complements your Christmas tree theme and overall holiday decorations.
Thank you for visiting the blog today! I hope you found it helpful!
Happy decorating!