DIY Dresser Makeover Before and After
This DIY dresser makeover and hutch could quite possibly be one of my favorite furniture makeovers to date! This upcycle is loaded with some of my favorite furniture refinishing hacks all designed to keep this low-budget project on track.
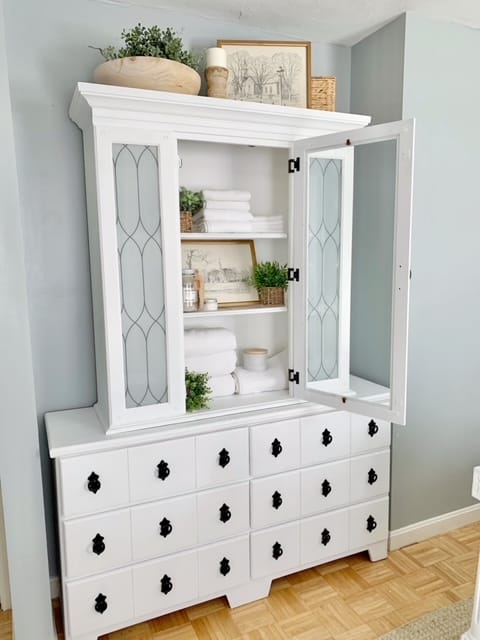
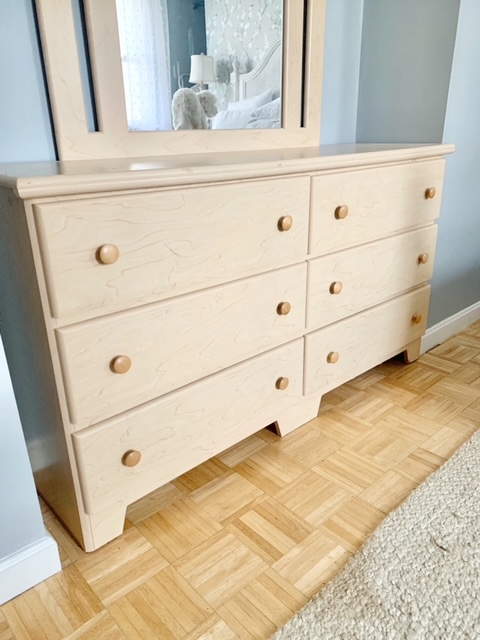
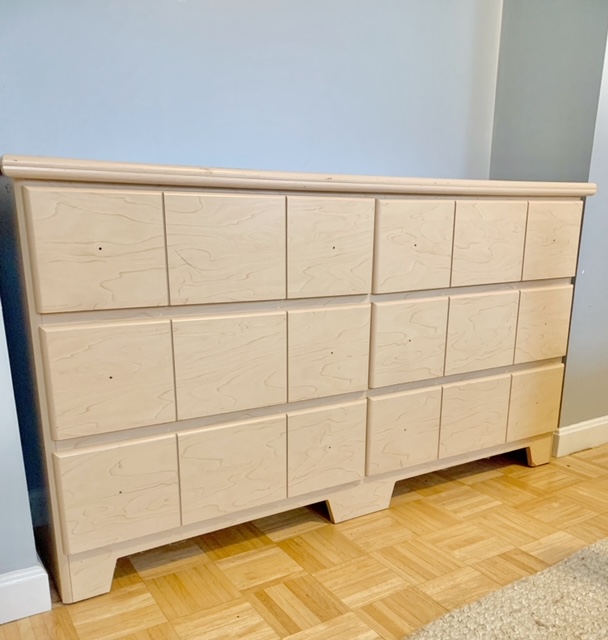
The final result is a custom DIY dresser makeover with a hutch top that mimics a beautiful Restoration Hardware piece.
*This post includes affiliate links, for more info on affiliate links visit here
Jump to:
The Idea: From dresser to apothecary
If you've been following along on Instagram, you know we've been busy creating a guest bedroom with a true Bed & Breakfast feel. My goal was to provide visitors with a comfy, cozy retreat, which meant repurposing existing furniture and finding deals on Facebook Marketplace.
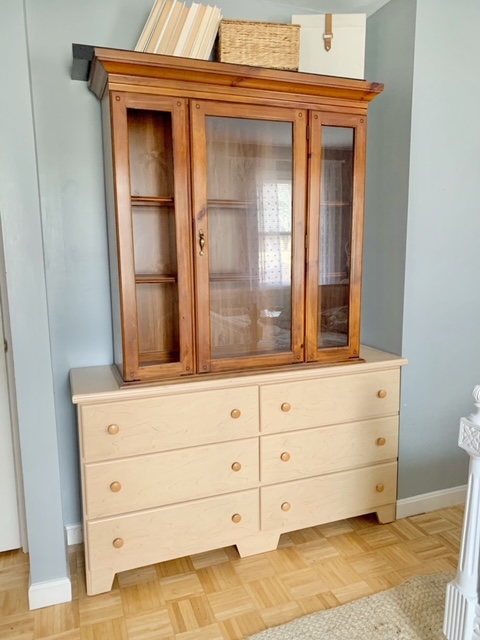
This dresser has a special history - it's traveled through all our kids' rooms over the years. It fits perfectly in the guest bedroom alcove, so rather than replacing it, I decided to transform it completely.
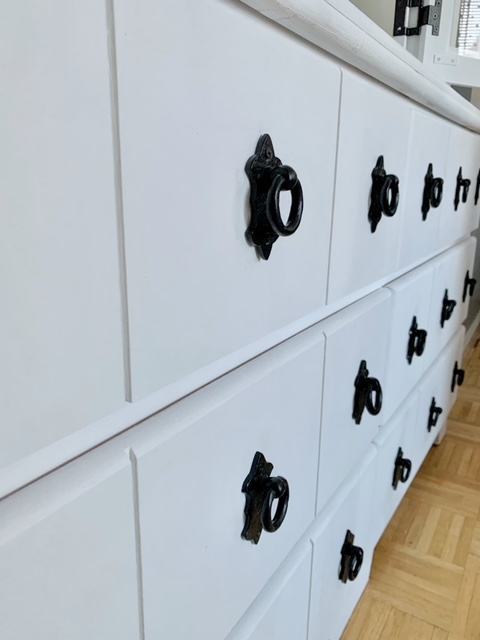
My vision? Convert this standard dresser into a faux apothecary cabinet by dividing each of the 6 large drawers into 3 sections, creating the appearance of 18 smaller drawers. This blog post details this transformation from ordinary dresser to stylish apothecary piece.
For the complete look, visit my China Cabinet Hutch Makeover post to see how I transformed the matching hutch that sits atop this dresser, creating a beautiful two-piece linen cabinet that elevates the entire space.
Transforming the dresser
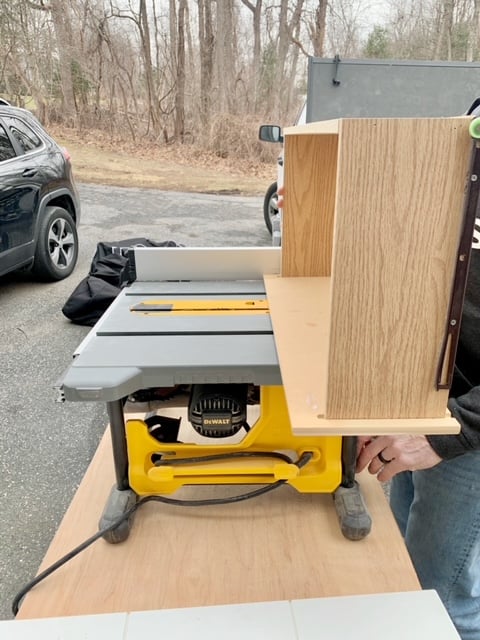
The first step was to figure out the best way to create the look of little apothecary drawers. We had two options - the first would be to use a table saw and cut groves into the existing drawer fronts. The second would be to take a thin piece of wood and cut squares to make faux drawer fronts. These would be added to the front of the drawers. This second option would give the look of raised panels masquerading as little drawers. Ultimately we decided to go with option A - create grooves in the dresser drawer fronts to give the appearance of faux apothecary drawers.
Supplies for the DIY apothecary
- Long dresser (similar option: Ikea Malm dresser)
- White Chalk paint (I used a 32oz jar of Dixie Belle Chalk Paint in the color "Cotton")
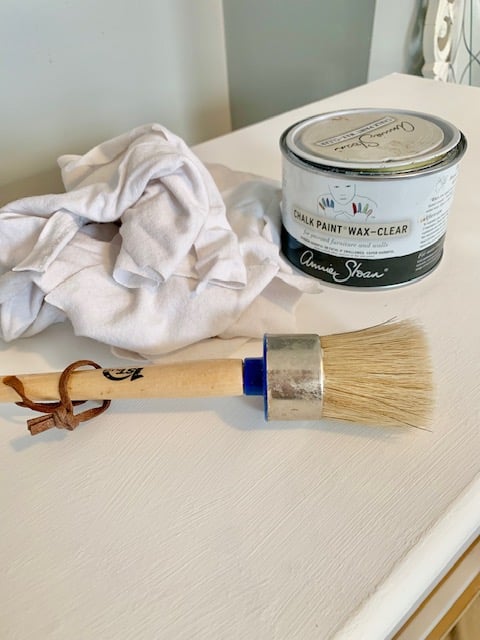
- Clear Wax (I used Annie Sloan Clear Wax)
- Black paint
- 18 Drawer pulls
- Screws
Tools needed
- Table saw
- Tape measure
- Paintbrush
- Waxing brush
- Rags
- Screwdriver
- Drill
- Pencil
Step by step instructions
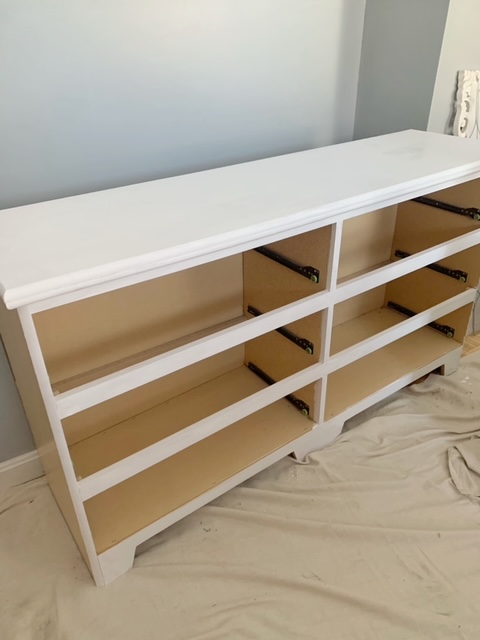
Step 1: Make grooves in the drawer fronts
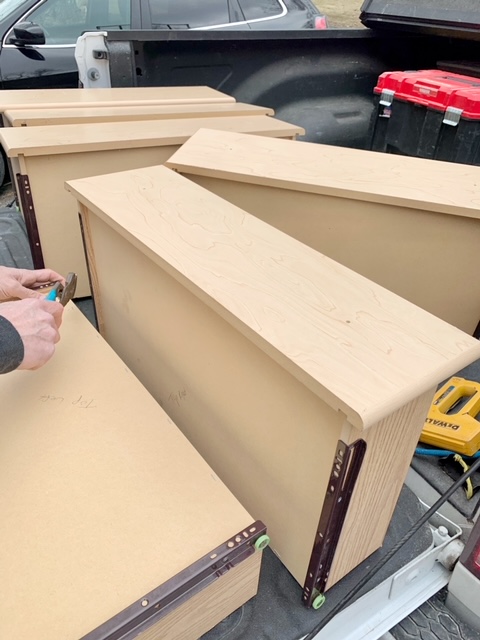
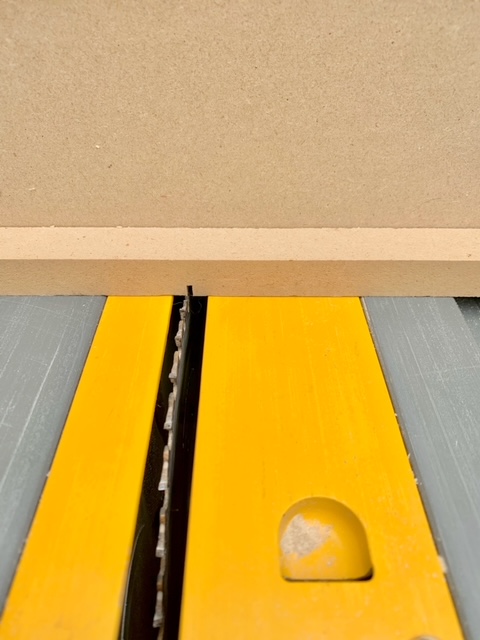
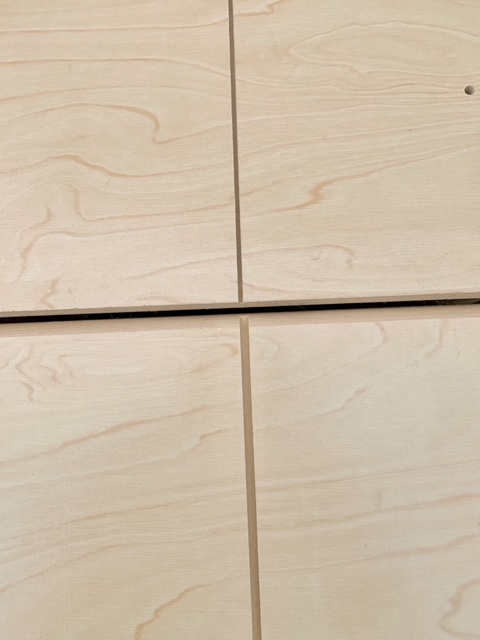
First step - using a screwdriver remove the existing drawer pulls. Next using a tape measure determine the length of the drawer fronts and divide that number by 3. With a pencil mark where the two groves will be (making 3 separate sections). The goal is to have each section the same width. Then determine how wide you want the groove to be. We decided that both the width and depth of each groove would be 3/16". This thickness took two "pass throughs" on the table saw. While we had the drawers off there was a little bit of repair work to be done to the drawer bottoms and drawer slides so we took care of that.
Step 2: Painting and Waxing
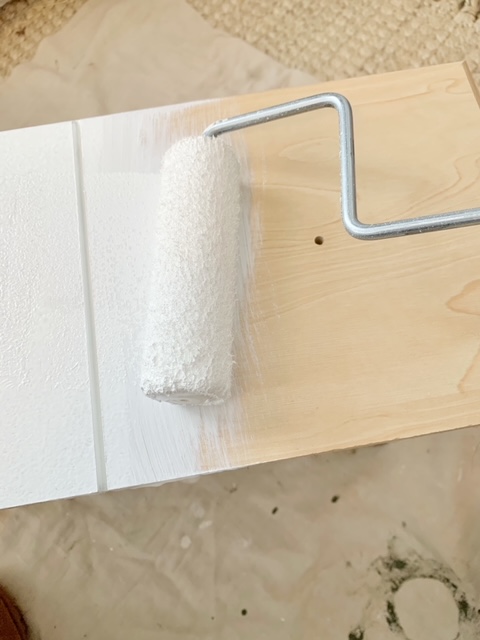
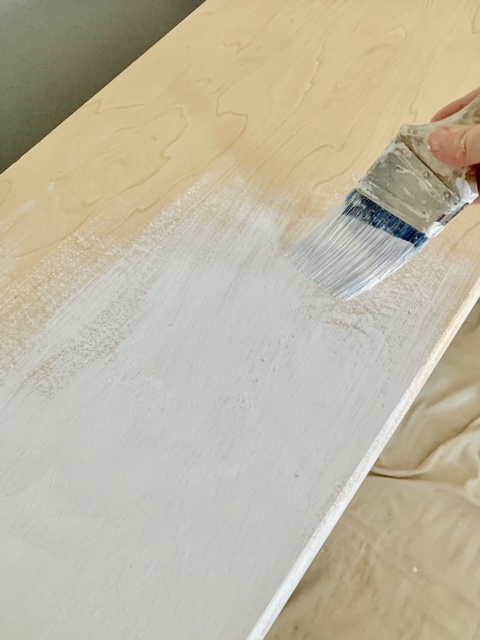
After the grooves are made, it's time to paint. I used 2 coats of paint using Dixie Belle Chalk Paint (paint color "Cotton.") I love this bright white paint and Dixie Belle has such a wonderful texture with great coverage that makes painting a pleasure. For the first coat, I used a roller to avoid brush strokes and then a paintbrush for the second coat. After the paint dried I used Annie Sloan Clear Wax to seal the chalk paint. The wax is applied with a round waxing brush and then lightly wiped down with cut-up pieces of t-shirts for a smooth look. Waxing protects the painted piece and makes cleaning easier.
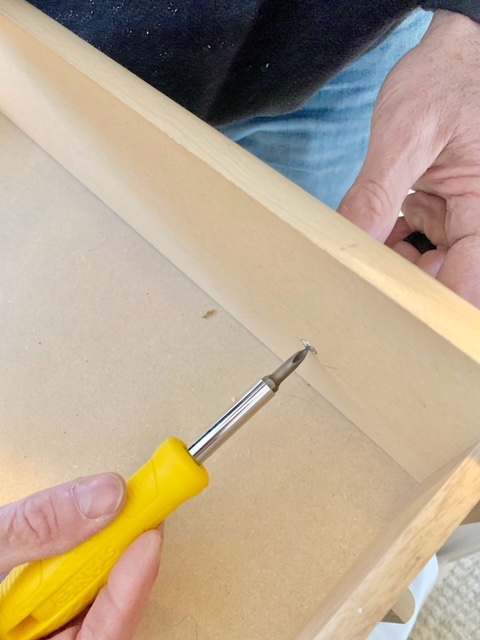
Step 3: Adding the drawer pulls
The last step is adding the drawer pulls. After much consideration, I decided to go with these drawer rings from Hobby Lobby. They were 50% off so I scored them for just $1.99/ea. They did not come with screws so we bought some from Lowes. With a tape measure, we measured the exact center of each section of the faux dresser drawers and drilled holes to add the drawer pulls. The screws were gold so I painted them black after they were on the drawer fronts.
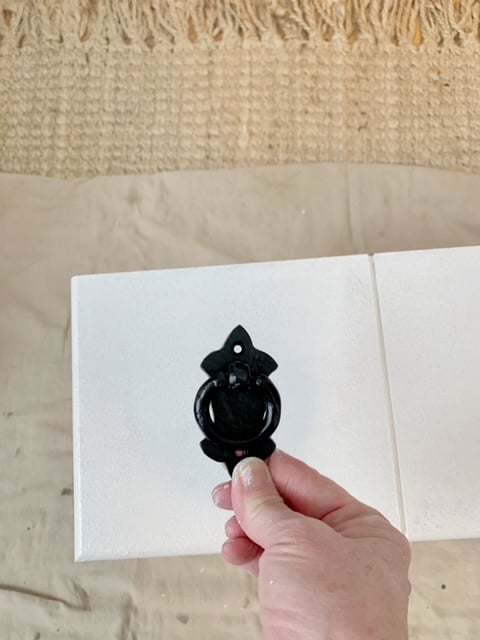
Note: We did not need to use wood filler (wood putty) in the old drawer pull holes since the new pulls covered the hole.
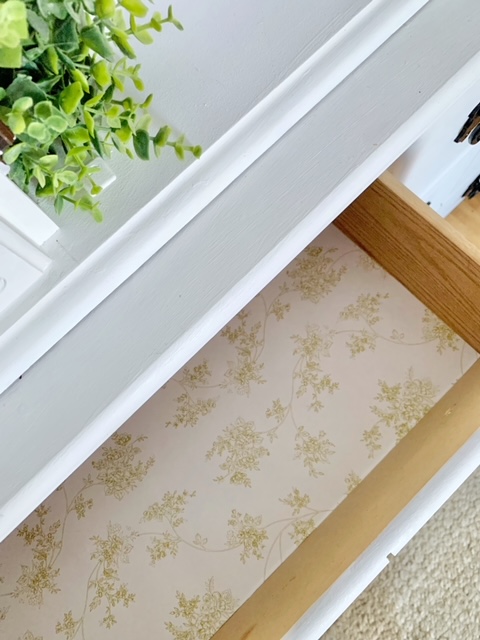
I finished the drawers by placing scented drawer liners inside of the drawers.
Variations and special considerations
- The dresser: I used an old dresser we bought years ago. It was nothing more than a particle board double dresser with laminate. You could do this same project with a tall dresser as well as an antique dresser or any thrifted dresser. Tip: Try to find a dresser that is in good shape. If need be, take the time to give the dresser a little love by fixing the drawer fronts or tracks before moving on to the finish.
- The finish: While I love a distressed look I wanted a fresh clean crisp finish to this piece. You can follow up the chalk paint by sanding the drawer front edges (typically using 220-grit sandpaper) and then adding dark wax to the clear wax. You can see how this distressing technique is done in my DIY Card catalog post. If you prefer choose a different color that you love! You can also use a different paint like spray paint. If your looking for black paint for your project please visit my popular choosing the best black paint for furniture post.
- The pulls: The options are endless! I know because I searched and searched for the right ones! For this piece I went with these ring pulls from Hobby Lobby. You could also go with cup pulls or if you prefer the look of card catalogs you could go with card catalog pulls. Hobby Lobby has a large selection of new handles, you can also find unique pulls in a thrift store or vintage shop or shop your local hardware store for new hardware.
- Uses: This piece is for storage in our guest bedroom however it would be a beautiful living room media console, ideal for a master bedroom or the perfect candidate for an entryway apothecary console.

With a few simple steps and a little time you can transform an old dresser into a new piece of furniture. This whole dresser makeover cost just $57.60 which is a lot cheaper than buying a new dresser.
As mentioned above I added a china cabinet hutch to this old dresser makeover to create a unique DIY linen cabinet for our guest bedroom. This cabinet provides our guests with towels and extra linens to make their stay as comfortable as possible.
I hope you found this DIY dresser makeover before and after post helpful and it inspires you to upcycle what you have to make a unique inexpensive new piece. Even a fresh coat of paint can take an old dresser and give it a new look! Please visit my Furniture refinishing page for more ideas!
Keep creating friends!