Chalk Paint China Cabinet Before And After
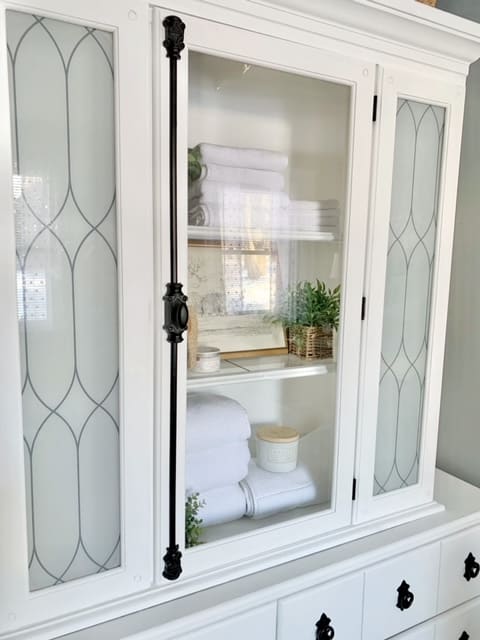
I love to both refinish and repurpose old furniture and I've had my eye on repurposing an old china cabinet hutch to create a Restoration Harware-inspired piece for a fraction of the cost. These 1980s china cabinets are plenty over on the Facebook marketplace and with just a coat of paint in a crisp white with updated hardware I've created a unique statement piece for our guest bedroom that no longer holds china, but now houses towels and linens for our guests.
*This post includes affiliate links, for more info on affiliate links visit here
Jump to:
From dining room hutch to linen cabinet
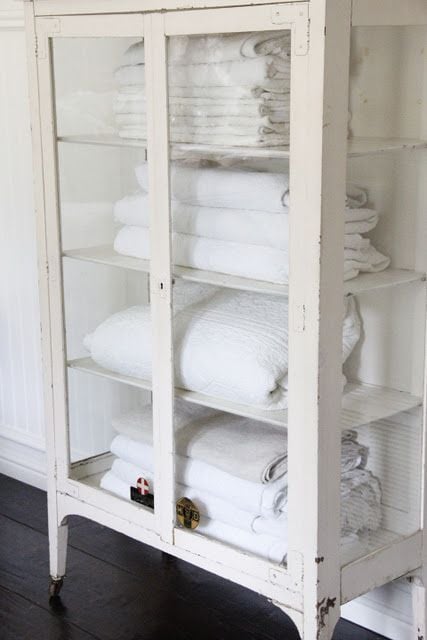
I started with a DIY dresser makeover for the base of this cabinet to sit the cabinet hutch on. My plan was to repurpose the glass door hutch into a linen cabinet to store towels and extra blankets for our guests. I have always loved the look of a beautifully curated glass door cabinet for this purpose.
With plenty of space in this alcove and not a lot of floor space left in the guest bedroom, I decided to take an old Facebook Marketplace dining room hutch top and repurpose it as a linen cabinet.
In this blog post I am going to share the process for refinishing this china hutch. Please visit my DIY Dresser makeover before and after post for instructions on the base.
The hutch
I have wanted to do a project like this for a long time! Years ago when couples bought a dining room set it would often be sold as a set to include a matching buffet with a glass hutch (china cabinet) on top. These sometimes monster-size pieces come in two separate pieces for easy delivery. Well, years later these outdated furniture pieces are plenty on the Facebook Marketplace - usually for short money. Just search china hutch and they are a dime a dozen! For this piece I began my search a few weeks ago with the following goals and criteria:
- To buy just the top china hutch (without the buffet - they are usually sold as a set)
- To spend under $60
- I wanted it to be a bit smaller than the top of the dresser
- I wanted it to be squared (meaning no arches)
Here's a quick round-up of some of the ones I was considering.
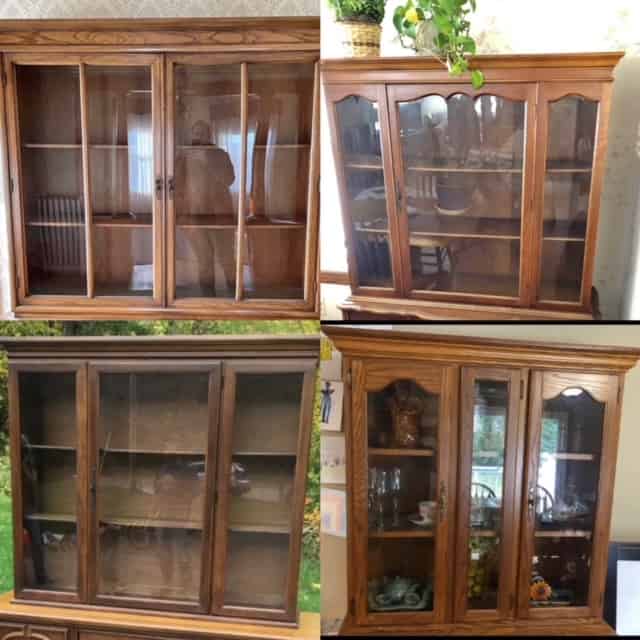
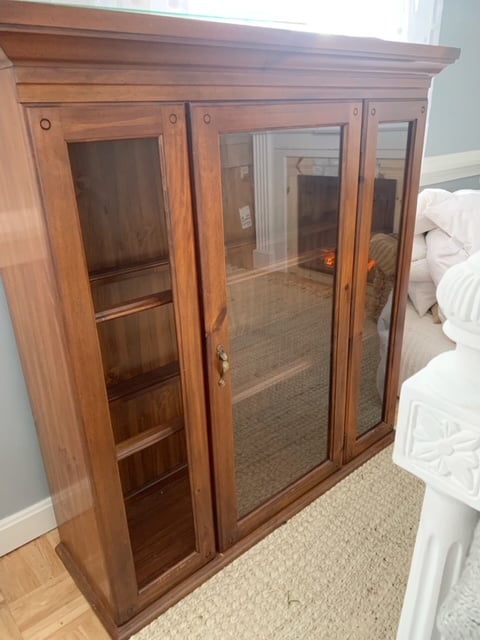
The right hutch:
I found this one just a couple of towns over, it was the perfect size and I paid $50 for just the top piece. One of the glass door inserts was missing so we had a glass store cut a new one for us. I couldn't wait to give this old dated hutch a new life!
Supplies for this piece
- China cabinet/hutch
- BIN Primer
- White Chalk paint (I used a 32oz jar of Dixie Belle Chalk Paint in the color "Cotton")
- Clear Wax (I used Annie Sloan Clear Wax)
- Cremone bolt
- ½ wood trim
- Black paint
- Window film
- E6000
Tools needed
- Tape measure
- Paintbrush
- Small roller brush/tray
- Waxing brush
- Rags
- Screwdriver
- Drill
- Pencil
Step by step instructions
Step 1: Prepare the hutch
The main door of this hutch opens and the two thinner ones on the sides are stationary. The shelves inside are wood with glass inserts, they are not adjustable shelves. Luckily the glass doors had clips holding the glass in the frame so I easily removed the glass inserts from the doors and the shelves and put those aside. By doing so I didn't need to use painter's tape and painting the frames was easy to do. I also removed the hinges and door knob from the door and took the door off the hutch.
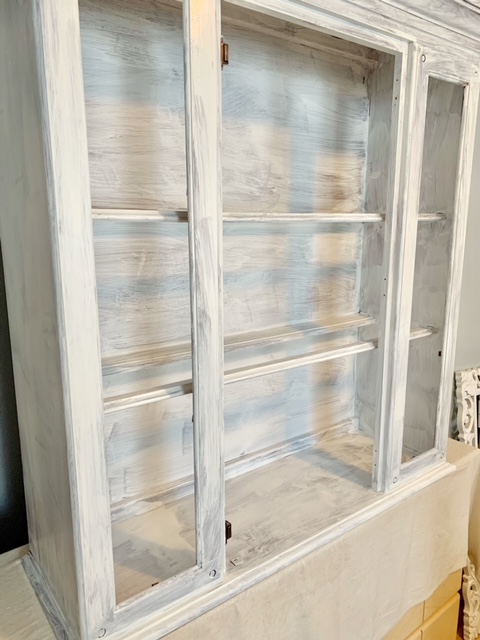
Step 2: Prime:
These older dark pieces of furniture are notorious for the stain bleeding through the paint. Been there, done that - not fun! I find that sanding them can make the bleed-through worse leaving just three options:
- Paint it a dark color
- Strip the finish
- Prime before painting
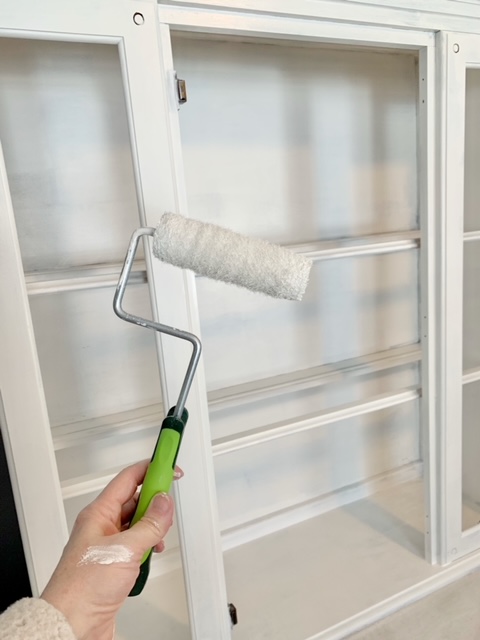
With white paint in mind, I chose to prime and I find the best primer for this problem is BIN Shellac primer. Two coats of this primer and the stain bleeding of the dark wood through should not be a problem. If it is, go for a third coat. BIN primer is dry to the touch after 15 minutes and ready for another coat after 45 minutes. It goes on very wet so you have to watch for dripping. It also dries fast and can "pull" or "drag" on your paintbrush so I try to work fast. Starting with the back of the cabinet I used a paintbrush for the first coat to get in all the nooks and crannies and then a small roller for a smoother finish on the second coat.
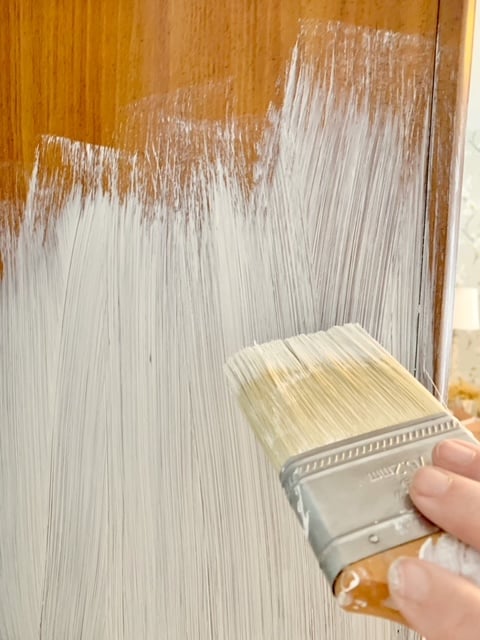
Step 3: Paint and wax:
To achieve a cohesive look, I followed the same steps as the steps listed for the DIY dresser makeover. For the first coat of Dixie Belle Chalk paint color "Cotton" I used a roller to smooth over the brush strokes from the primer. For the top coat, I decided to use a paint brush. I then went in with Annie Sloan Clear wax applied with a waxing brush and blended with a clean t-shirt rag.
Step 4: Adding the Hardware:
I have been waiting for the perfect opportunity to use a cremone bolt. I love the look of this heavy, detailed hardware and knew this would make this project Restoration Hardware worthy! A cremone bolt is a type of decorative hardware used to lock or clasp together a pair of windows, french doors, or cabinet doors. I found this bolt set on Amazon for just $33.99. At just 2 feet long I knew it would be too short for the hutch door but as I searched for larger ones the prices jumped up quite a bit. I decided to order the reasonably priced 2' bolt knowing I could more than likely finagle it one way or another. I wasn't planning to have the cremone bolt function like a traditional one, I just wanted it to look the part, which made "finagling" it much easier.
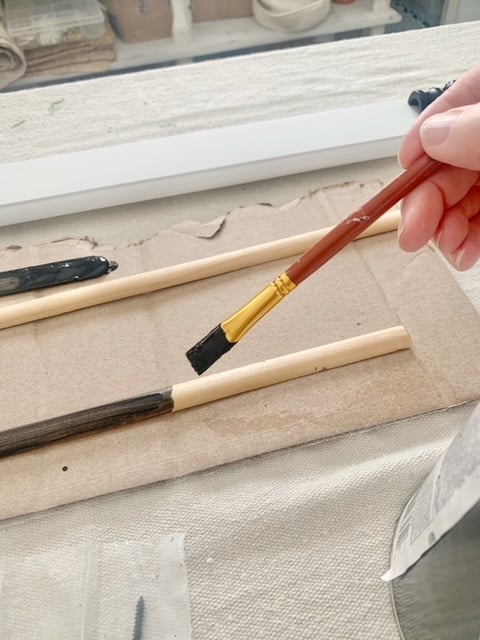
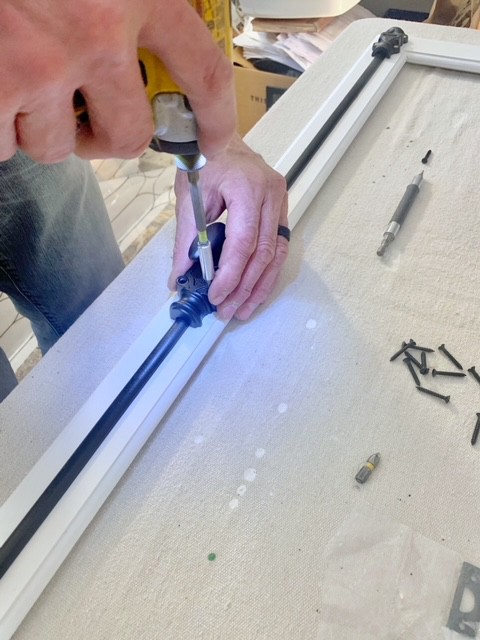
The bolt comes with two iron arms each measuring 12" - we needed those arms to be 18" for the iron arm to reach the bottom and top of the door. We took a quick trip to our local hardware store to pick up a piece of ½" half-round wood molding. This trim cost us a whopping $1.13! We cut the trim to size, painted it black, and using E6000 (which I prefer over wood glue) glued it to the door. Have a look....you would never know...(shhhhh!)
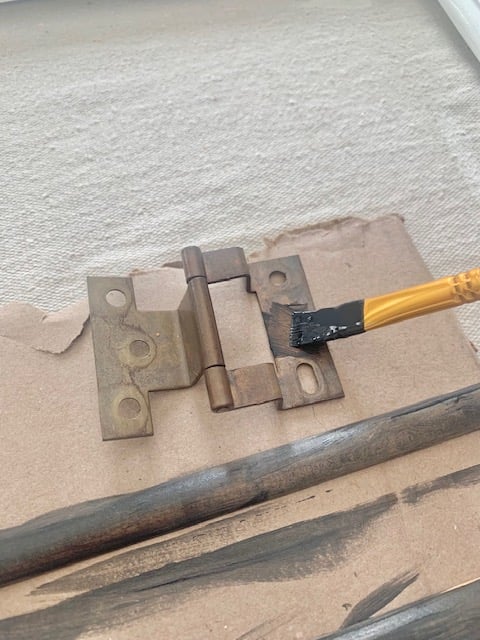
While I had the black paint out I decided to paint the door hinges (original hardware) black as well.
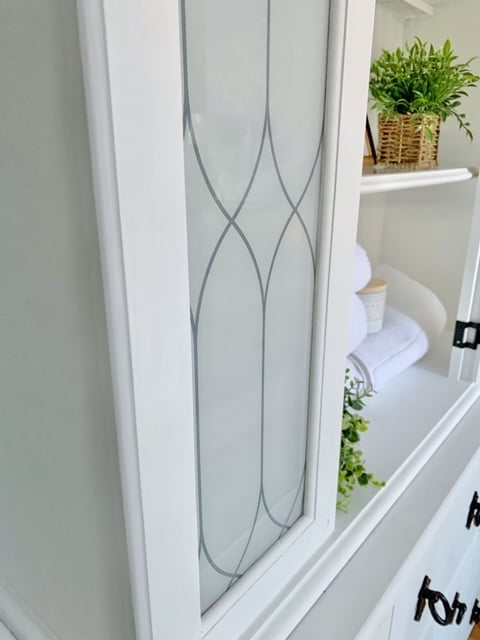
Step 5 - Applying the Window film:
To cover or not - that was the question for days! My original vision showed beautiful, perfectly curated linens draped on the glass shelves with other guest accouterments packaged beautifully - like shelves in a well-manicured apothecary store. But then I found this window film...and I loved how it looked! It peels off as easily as it goes on, so I can always change up the look down the road, but for now, I'm loving it covering the glass doors!
I simply followed the instructions on the packaging which included cleaning the glass surface and applying the product to a wet glass then using a squeegee to work the bubbles out.

Variations and special considerations
- The China cabinet hutch: I bought this hutch from the Facebook Marketplace. You can also find china hutches in a thrift store or flea markets. Often both the lower section (buffet) and upper section (china hutch) are sold together however most are separate pieces since a full cabinet of that size would be hard to move. I suspect some folks keep the buffet piece and list just the top hutch for sale which is why you can often buy just the china cabinet hutch.
- The finish: While I love a distressed look I wanted a fresh clean crisp finish to this piece. You can follow up the chalk paint by sanding the drawer front edges (typically using 220-grit sandpaper) and then adding dark wax to the clear wax. You can see how this distressing technique is done in my DIY Card catalog post. If you prefer choose a different color or colors of furniture paints that you love! You can also use a different type of paint like spray paint. If your looking for black paint for your project please visit my popular choosing the best black paint for furniture post.
- The hardware: For this project, I used the clips that came with it to put the glass doors back in the frames and the hinges. The hinges got a new coat of paint to match the black cremone bolt. If you're not interested in the cremone bolt you can simply reuse the existing pulls or buy new hardware of your liking. Hobby Lobby has loads of options!
- Uses: This piece is for storage in our guest bedroom however it would be a beautiful living room piece holding books and other decor elements, ideal for a kitchen counter as extra kitchen cabinets, or consider using an old hutch for storing craft supplies in a craft room.
The cost of this furniture makeover
Drum Roll Please...
- Hutch - $50
- Glass insert for hutch $15
- Bin Primer - $18.05
- Dixie Belle Paint - $20
- Wood trim - $1.13
- Cremone bolt $33.99
- Window film - $10.99
The Total (of the whole piece) - $149.16
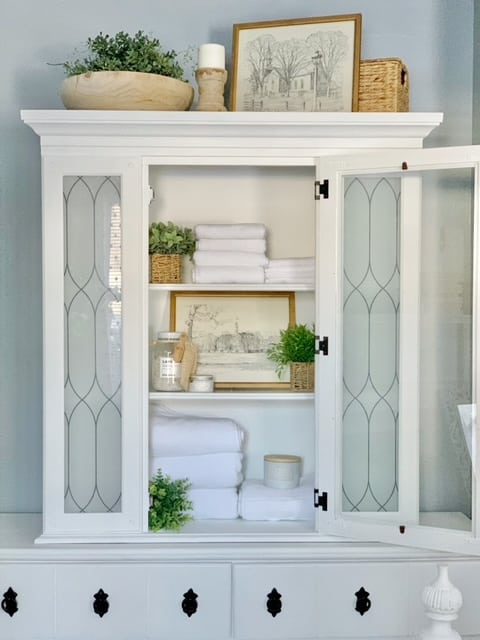
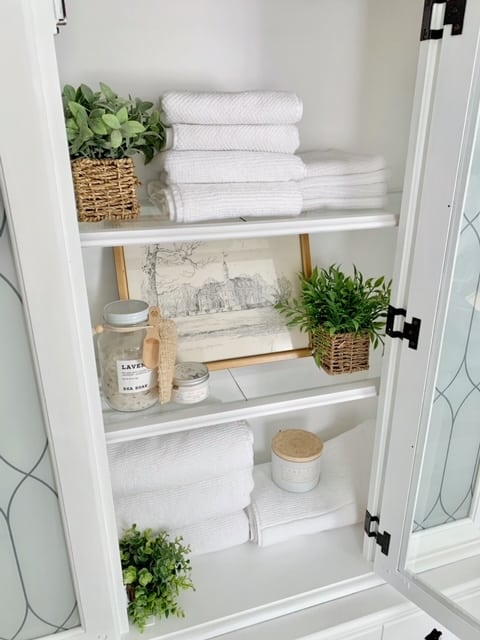
To style, I added a few decor pieces to the top of the cabinet and loaded the inside with extra bedding, towels, and other items for our guests. You can certainly style it in a variety of ways according to where you place your own apothecary cabinet.
Thanks for visiting the blog today for this Chalk Paint China Cabinet Before And After post. Upcycling old furniture is the easiest way to save money and customize it to your liking - not to mention getting a great piece of furniture that you created in your own personal style! For more fun furniture makeovers designed to save you loads of money visit my how to make a wood grain table top post as well as my DIY Card Catalog using green chalk paint post. For another China hutch makeover visit my Quick and Easy China Cabinet Makeover Using Wallpaper post!
This is one of my favorite furniture repurposing and styling - and I've collected more like it in the Decor Projects Hub.
Keep creating friends!