

How to Make Painter's Drop Cloth Curtains (No Rod, No Sewing Required)
These DIY painter's drop cloth curtains require no curtain rod and no sewing. The panels are hung using cabinet drawer pulls and elastic hair ties, making this a renter-friendly window treatment that installs with minimal wall damage and no special tools.
Post updated with clearer instructions, improved photos, styling tips, and fresh formatting for 2025.
*This post contains affiliate links. As an Amazon Associate, I may earn a small commission at no extra cost to you. Learn more here.
Simple. Stylish. No sew.
Drop cloth curtains became popular for a reason. They are easy to make, budget-friendly, and give that relaxed, lived-in farmhouse look without much effort. In this tutorial, I am showing you how to make painter's drop cloth curtains with a clever twist. There is no sewing machine involved and there is no curtain rod required. This method uses simple hardware and a few everyday items to hang the panels in a way that feels custom and effortless.
I first made these curtains years ago, and they continue to be one of my favorite quick window projects. They are perfect for renters, guest rooms, sunrooms or any space where you want softness and texture without committing to heavy hardware. If you have a couple of hours, some basic supplies, and a standard painter's drop cloth, you are ready to go. Let's get started.
Reader Love for This Project: This reader's comment perfectly sums up why this project continues to be a favorite…"I absolutely love this idea! The DIY drop cloth curtains look so effortlessly chic and I can't believe there's no sewing involved. Can't wait to try this in my own home - the twist you added makes it so unique! Thanks for sharing such an inspiring project!"
- Celebrated Nest reader
Jump to:
- About the curtain panels
- Why This Method Works (No Rod + No Sew)
- Materials and supplies (for 2 windows)
- How to make drop cloth curtains without a rod or sewing
- Additional notes
- Solutions for your drop cloth curtains
- More troubleshooting tips
- Alternative hardware options
- Let's talk about keeping these beauties looking fresh
- Styling Ideas
- Frequently asked questions
- More simple DIYs and farmhouse styling ideas to try
About the curtain panels
Materials: Painters drop cloths
The panels for these DIY curtains are simple painters drop cloths. These neutral canvas cloths come with finished hems, so there's no need for sewing. That makes this a quick and easy project.
I left my drop cloth panels in their natural canvas tone, but if you'd like a softer white look, you can bleach them safely before hanging. Bellewood Cottage has a detailed guide on how to bleach drop cloths successfully, including tips on choosing the right cloth material, avoiding uneven color, and minimizing fabric shrinkage.
Where to buy drop cloths
You can find drop cloths at Lowes or Home Depot, but I ordered mine from Amazon. They come in different sizes, so be sure to measure your windows first. I like mine to puddle slightly on the floor, so I added about 3 extra inches to the height.
If you want a lighter look, you can cut one drop cloth in half lengthwise to make two narrower panels. You can hem the cut edge or leave it raw. No one will know.
Why This Method Works (No Rod + No Sew)
This hanging method is simple, renter-friendly, and completely customizable. Instead of installing a traditional curtain rod, the panels are hung using small drawer pulls and hair ties, which allows the curtains to drape naturally without sewing or special hardware. This is a great option for older homes, apartments, or anywhere you want a soft, relaxed look without committing to permanent fixtures.
Materials and supplies (for 2 windows)
- 2 packs of 2 drop cloths
- 20 black hair ties (Scunci or Goody)
- 20 medium sized safety pins
- 20 drawer pulls (5 per panel)
- 20 two-sided screws (also called hanger bolts)
- Scissors
- Tape measure
- Sewing machine or needle and thread (optional)
- Pencil
How to make drop cloth curtains without a rod or sewing
- Wash and Prep the Drop Cloths
Wash and dry your drop cloths to remove any stiffness or odor. Dryer balls help with drying. Iron or steam them if you prefer a smoother look.

- Attach Hair Ties to the Curtain Panel
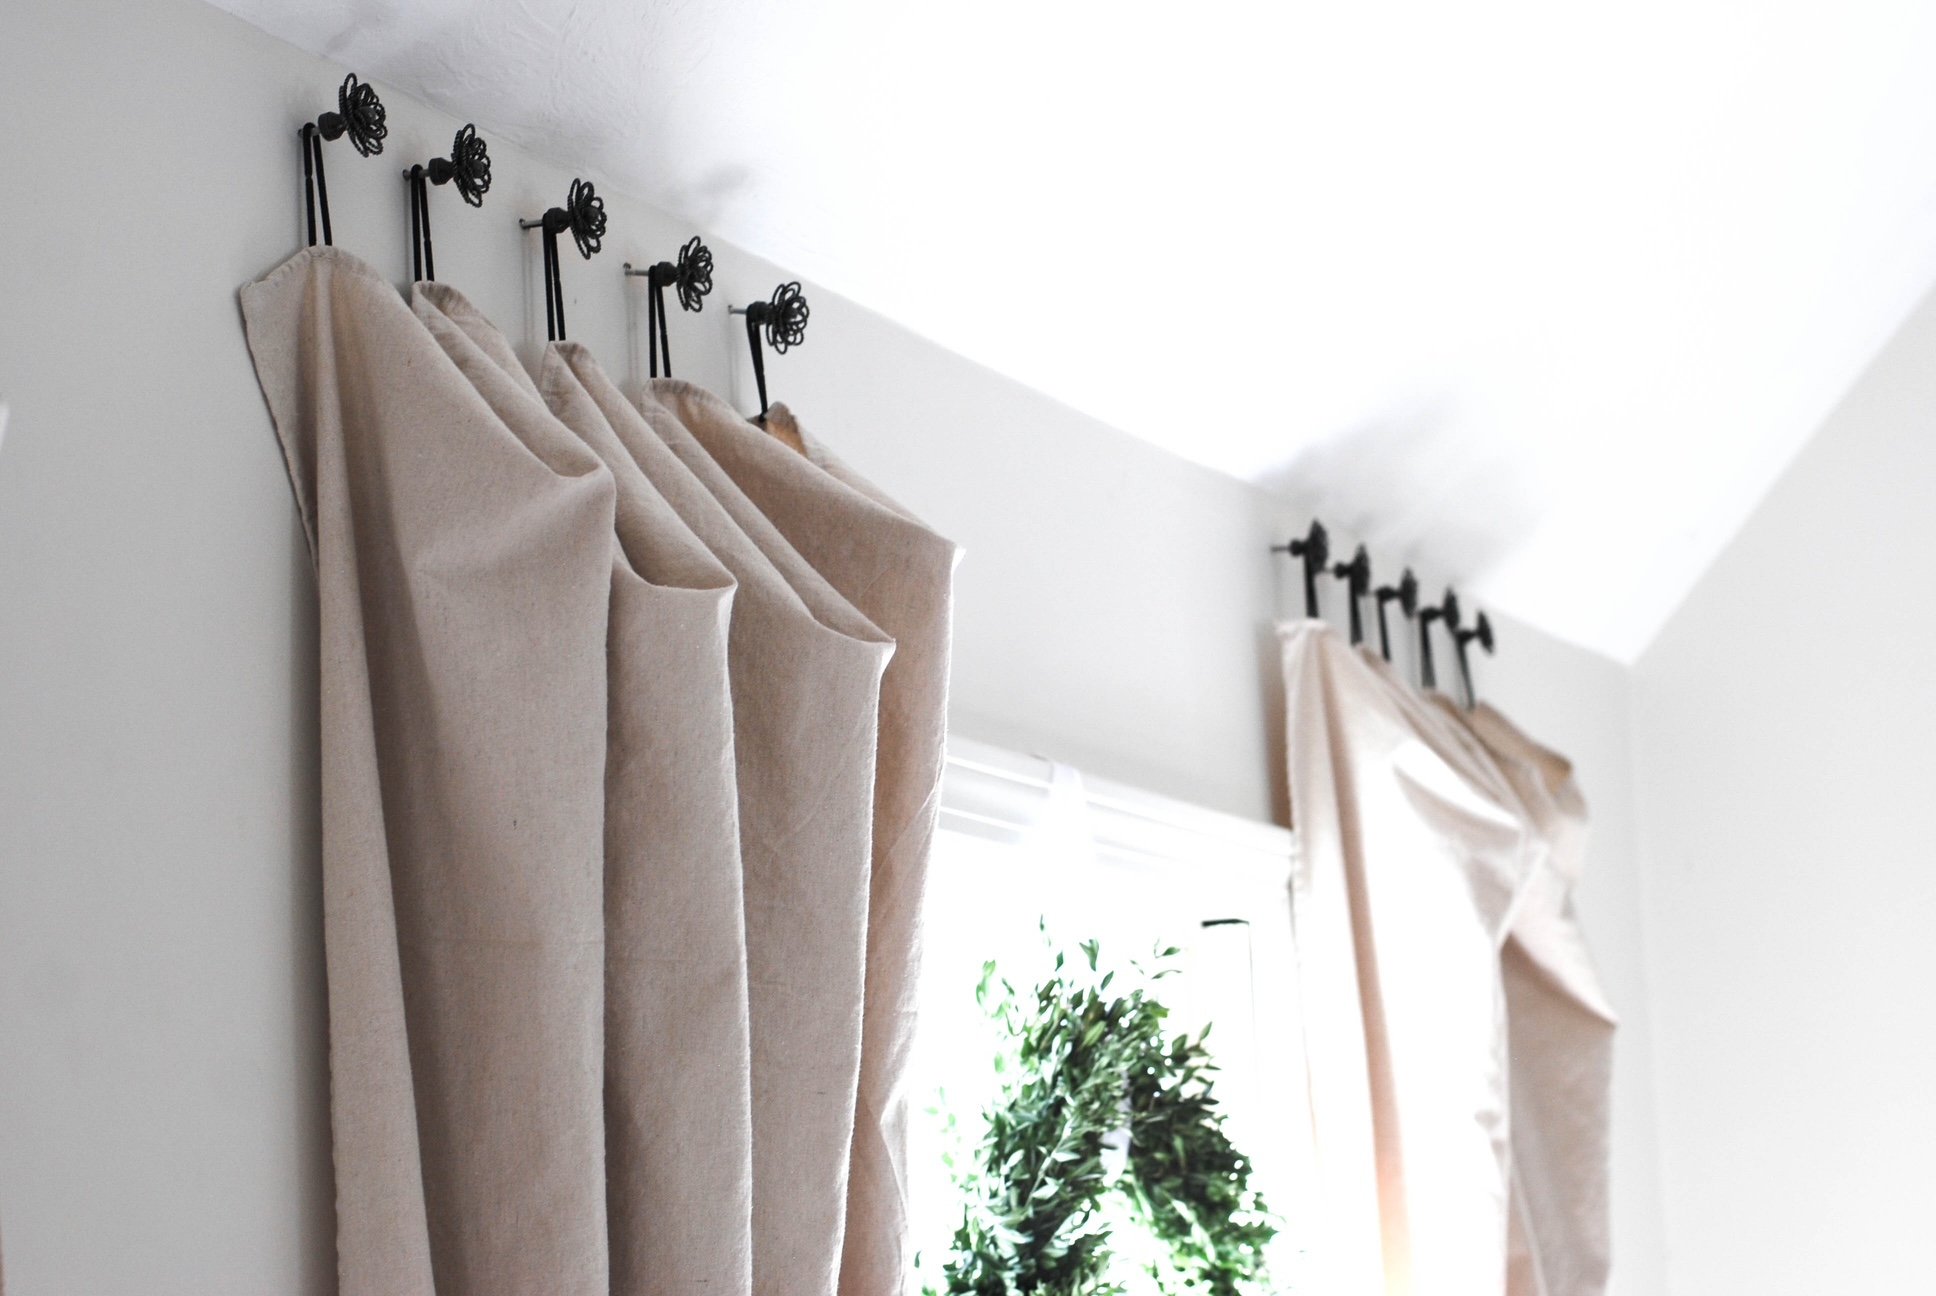
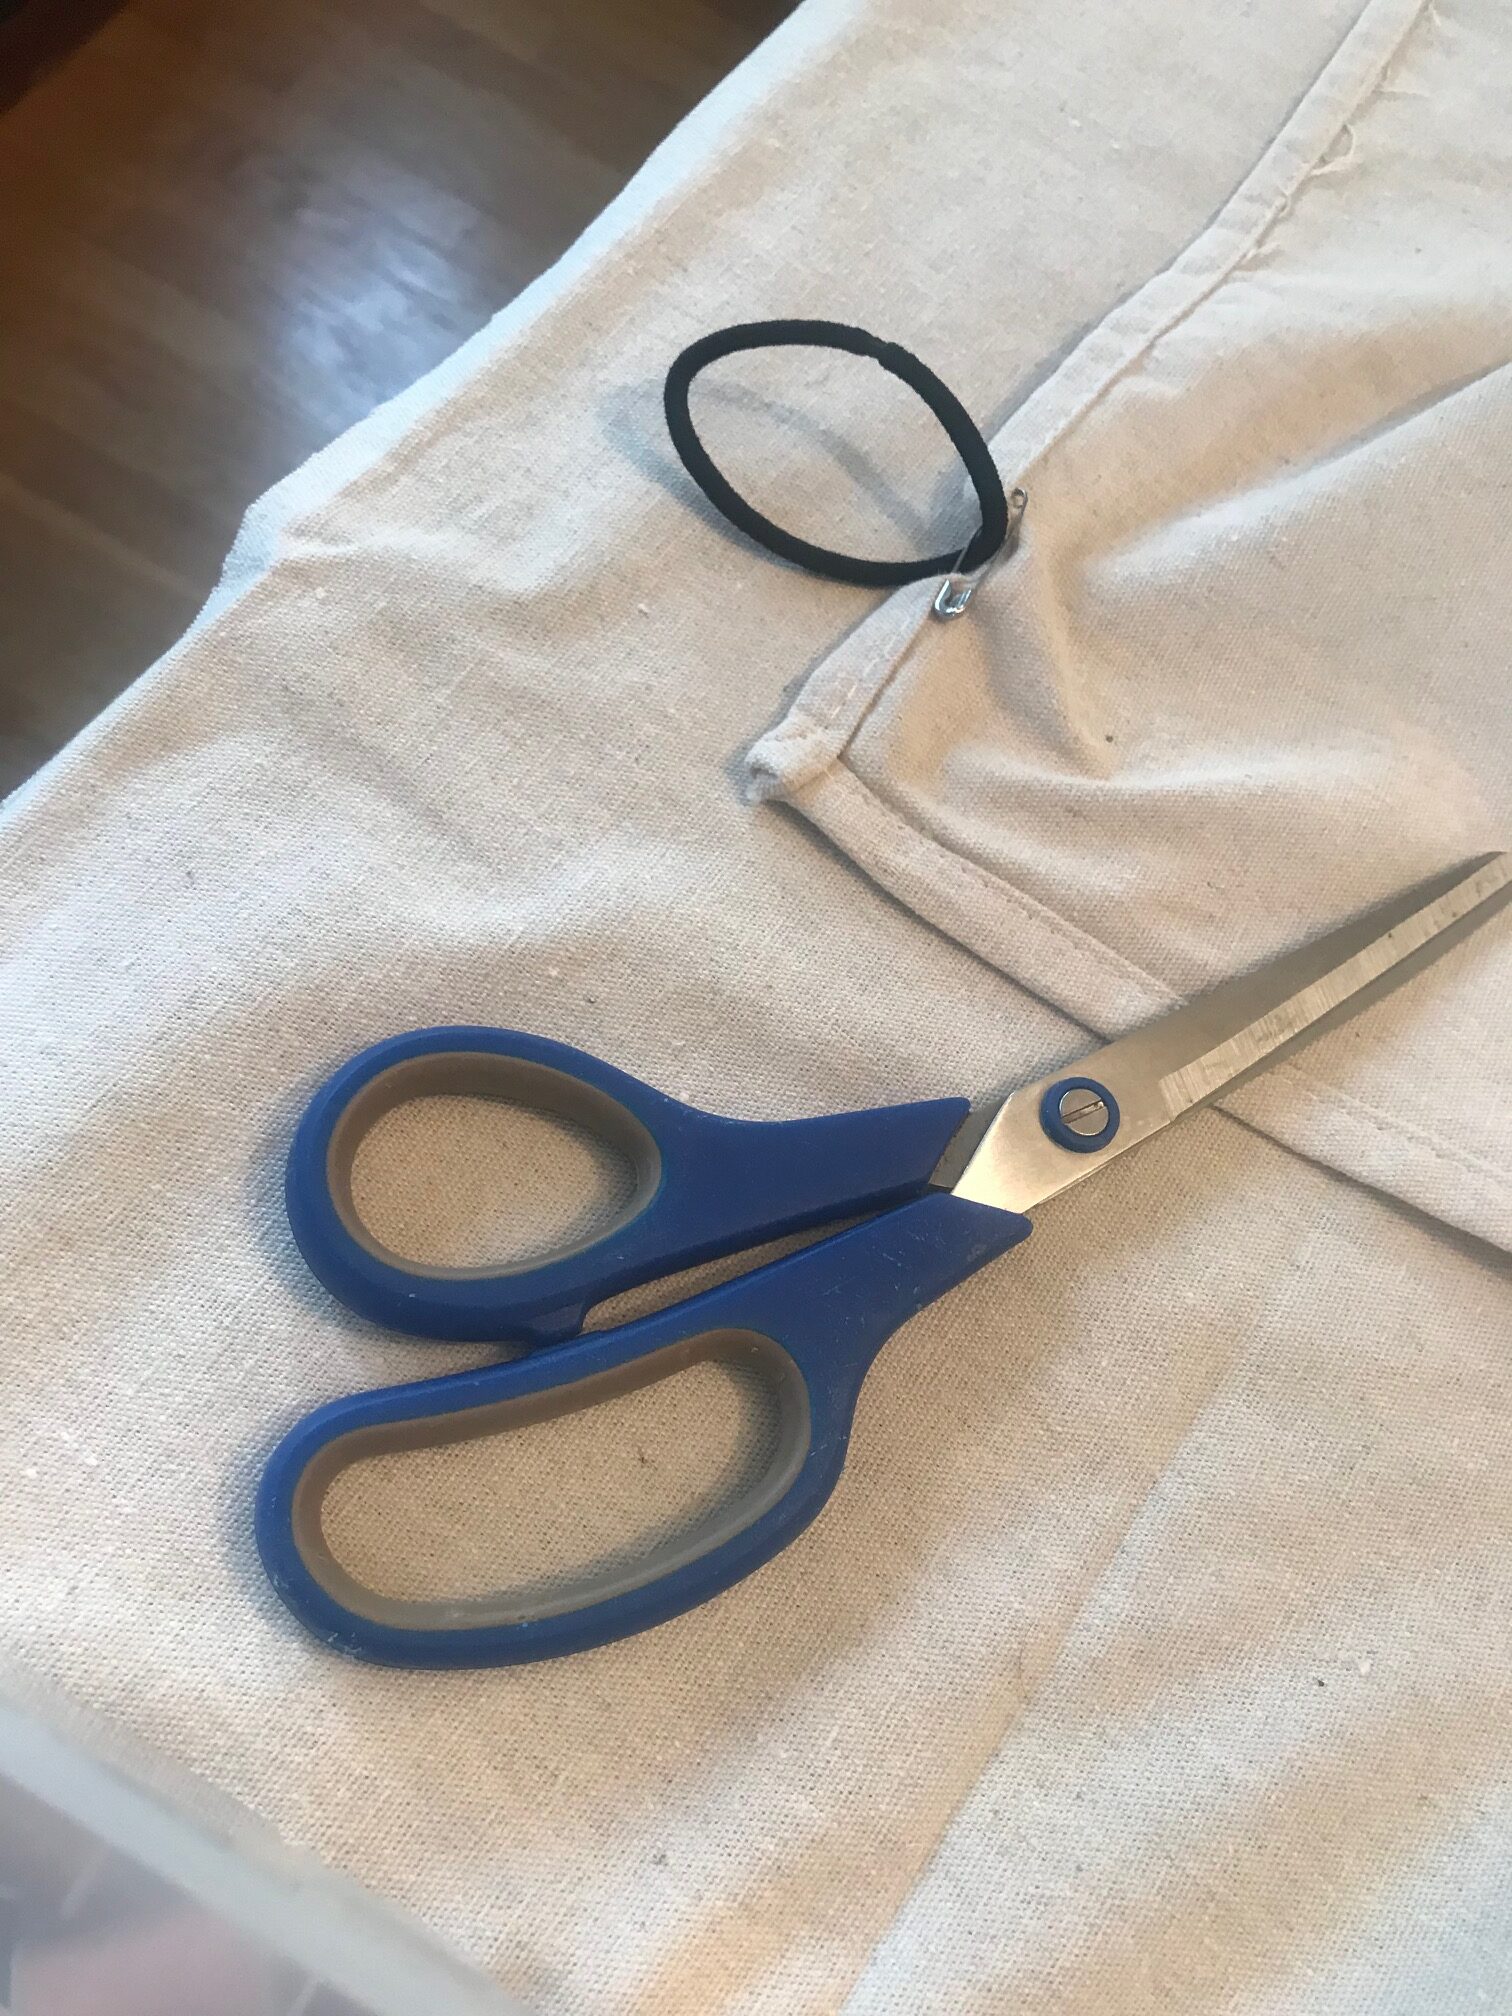
Evenly space five large black hair ties along the top edge of each drop cloth panel. To keep the project no-sew, use large safety pins to attach the ties. For a clean look, pin them to the back side of the fabric, so the safety pins are hidden when the curtain hangs. This creates your hanging loops without showing the hardware.

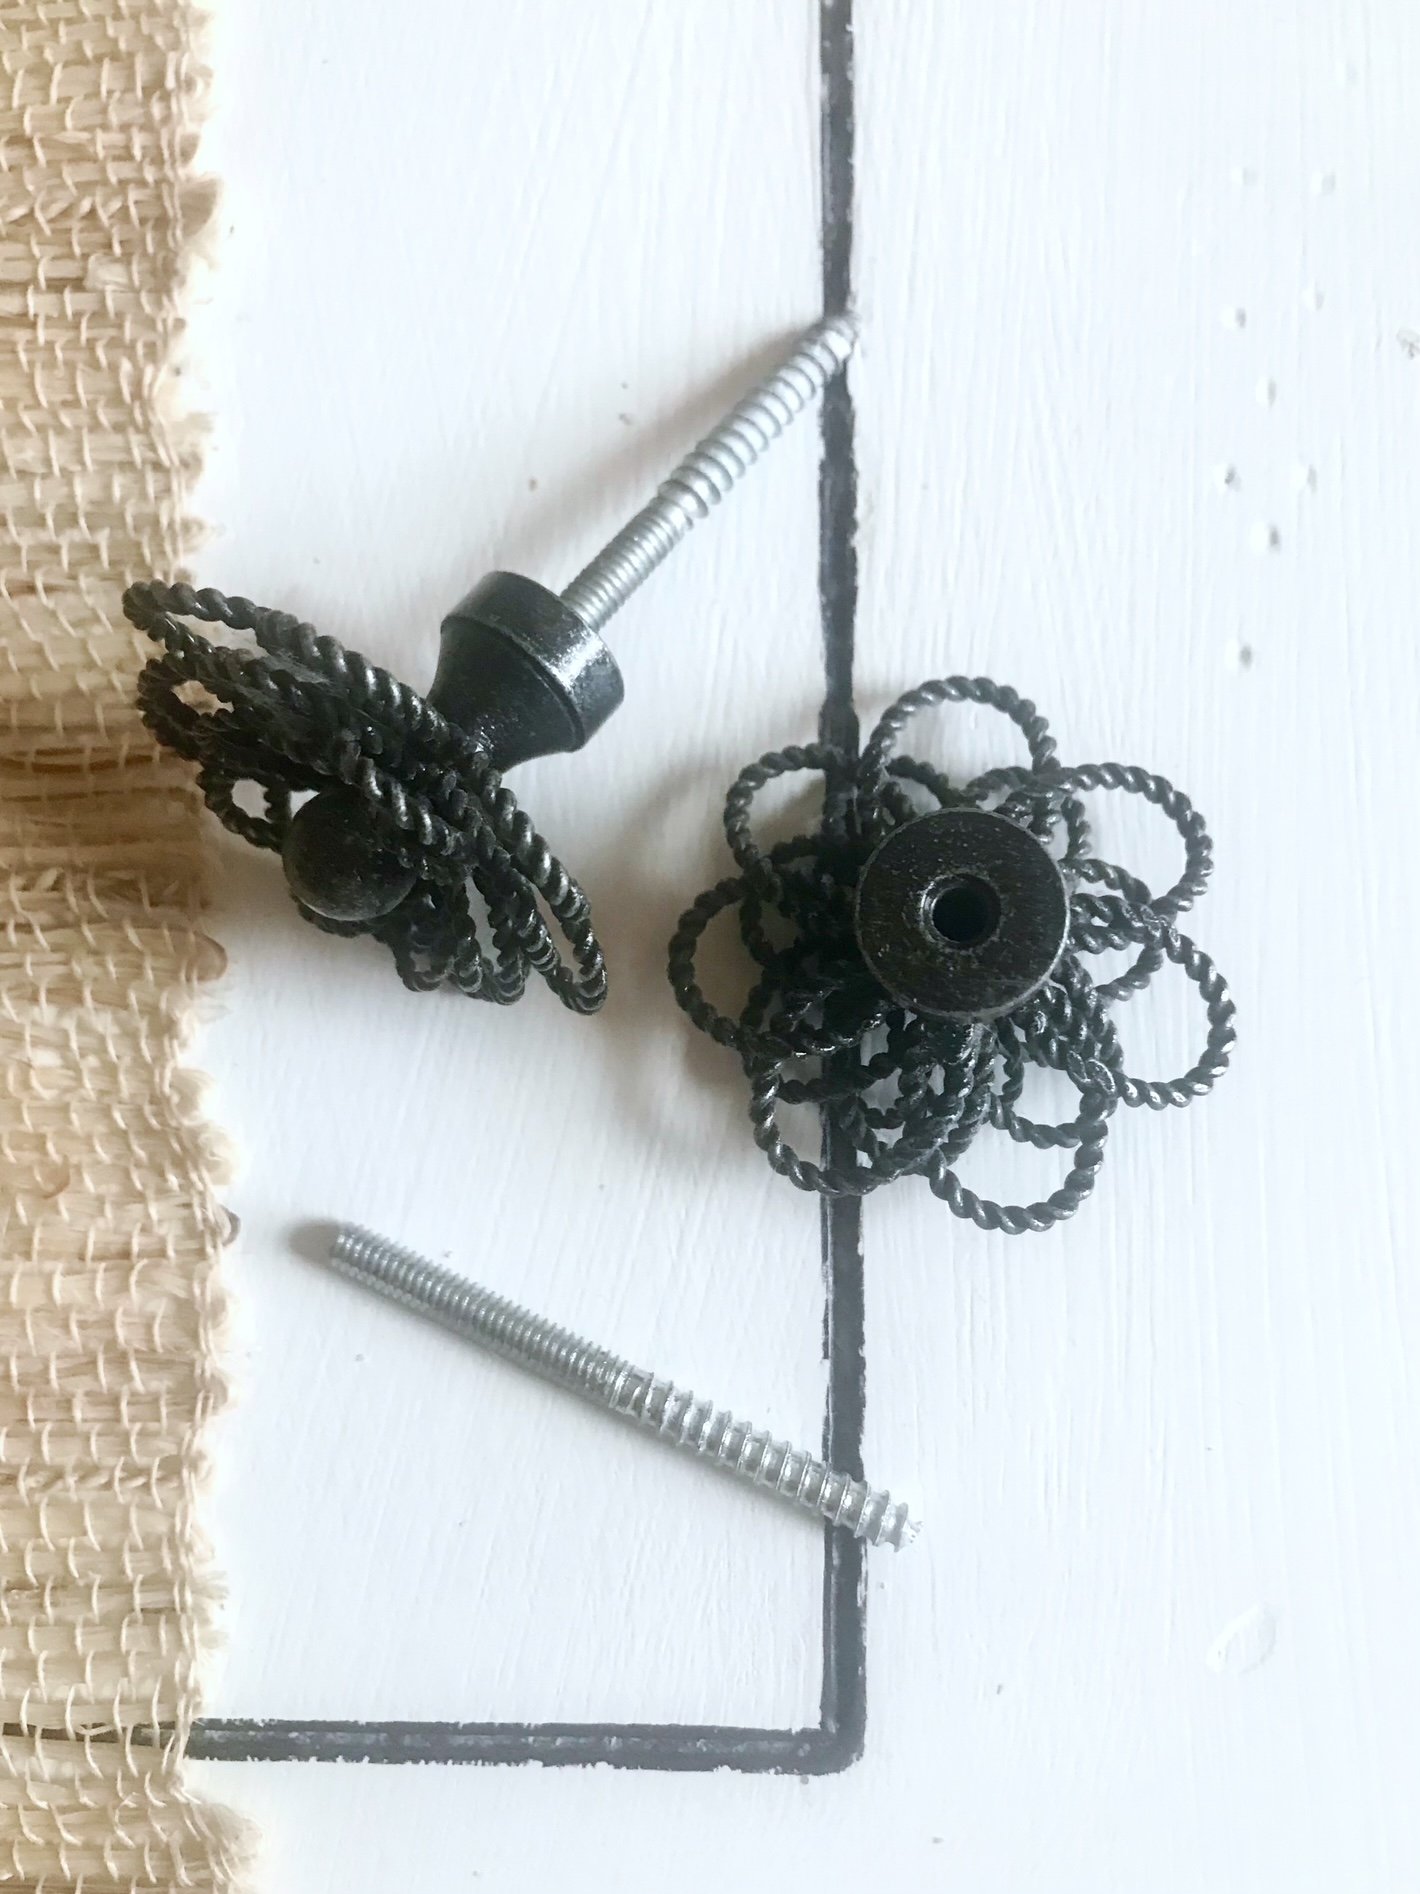
- Assemble the Hanging Hardware
Screw one end of a two-sided hanger bolt into a drawer pull. Repeat for all 20 pulls. Set aside.

- Measure and Mark the Wall
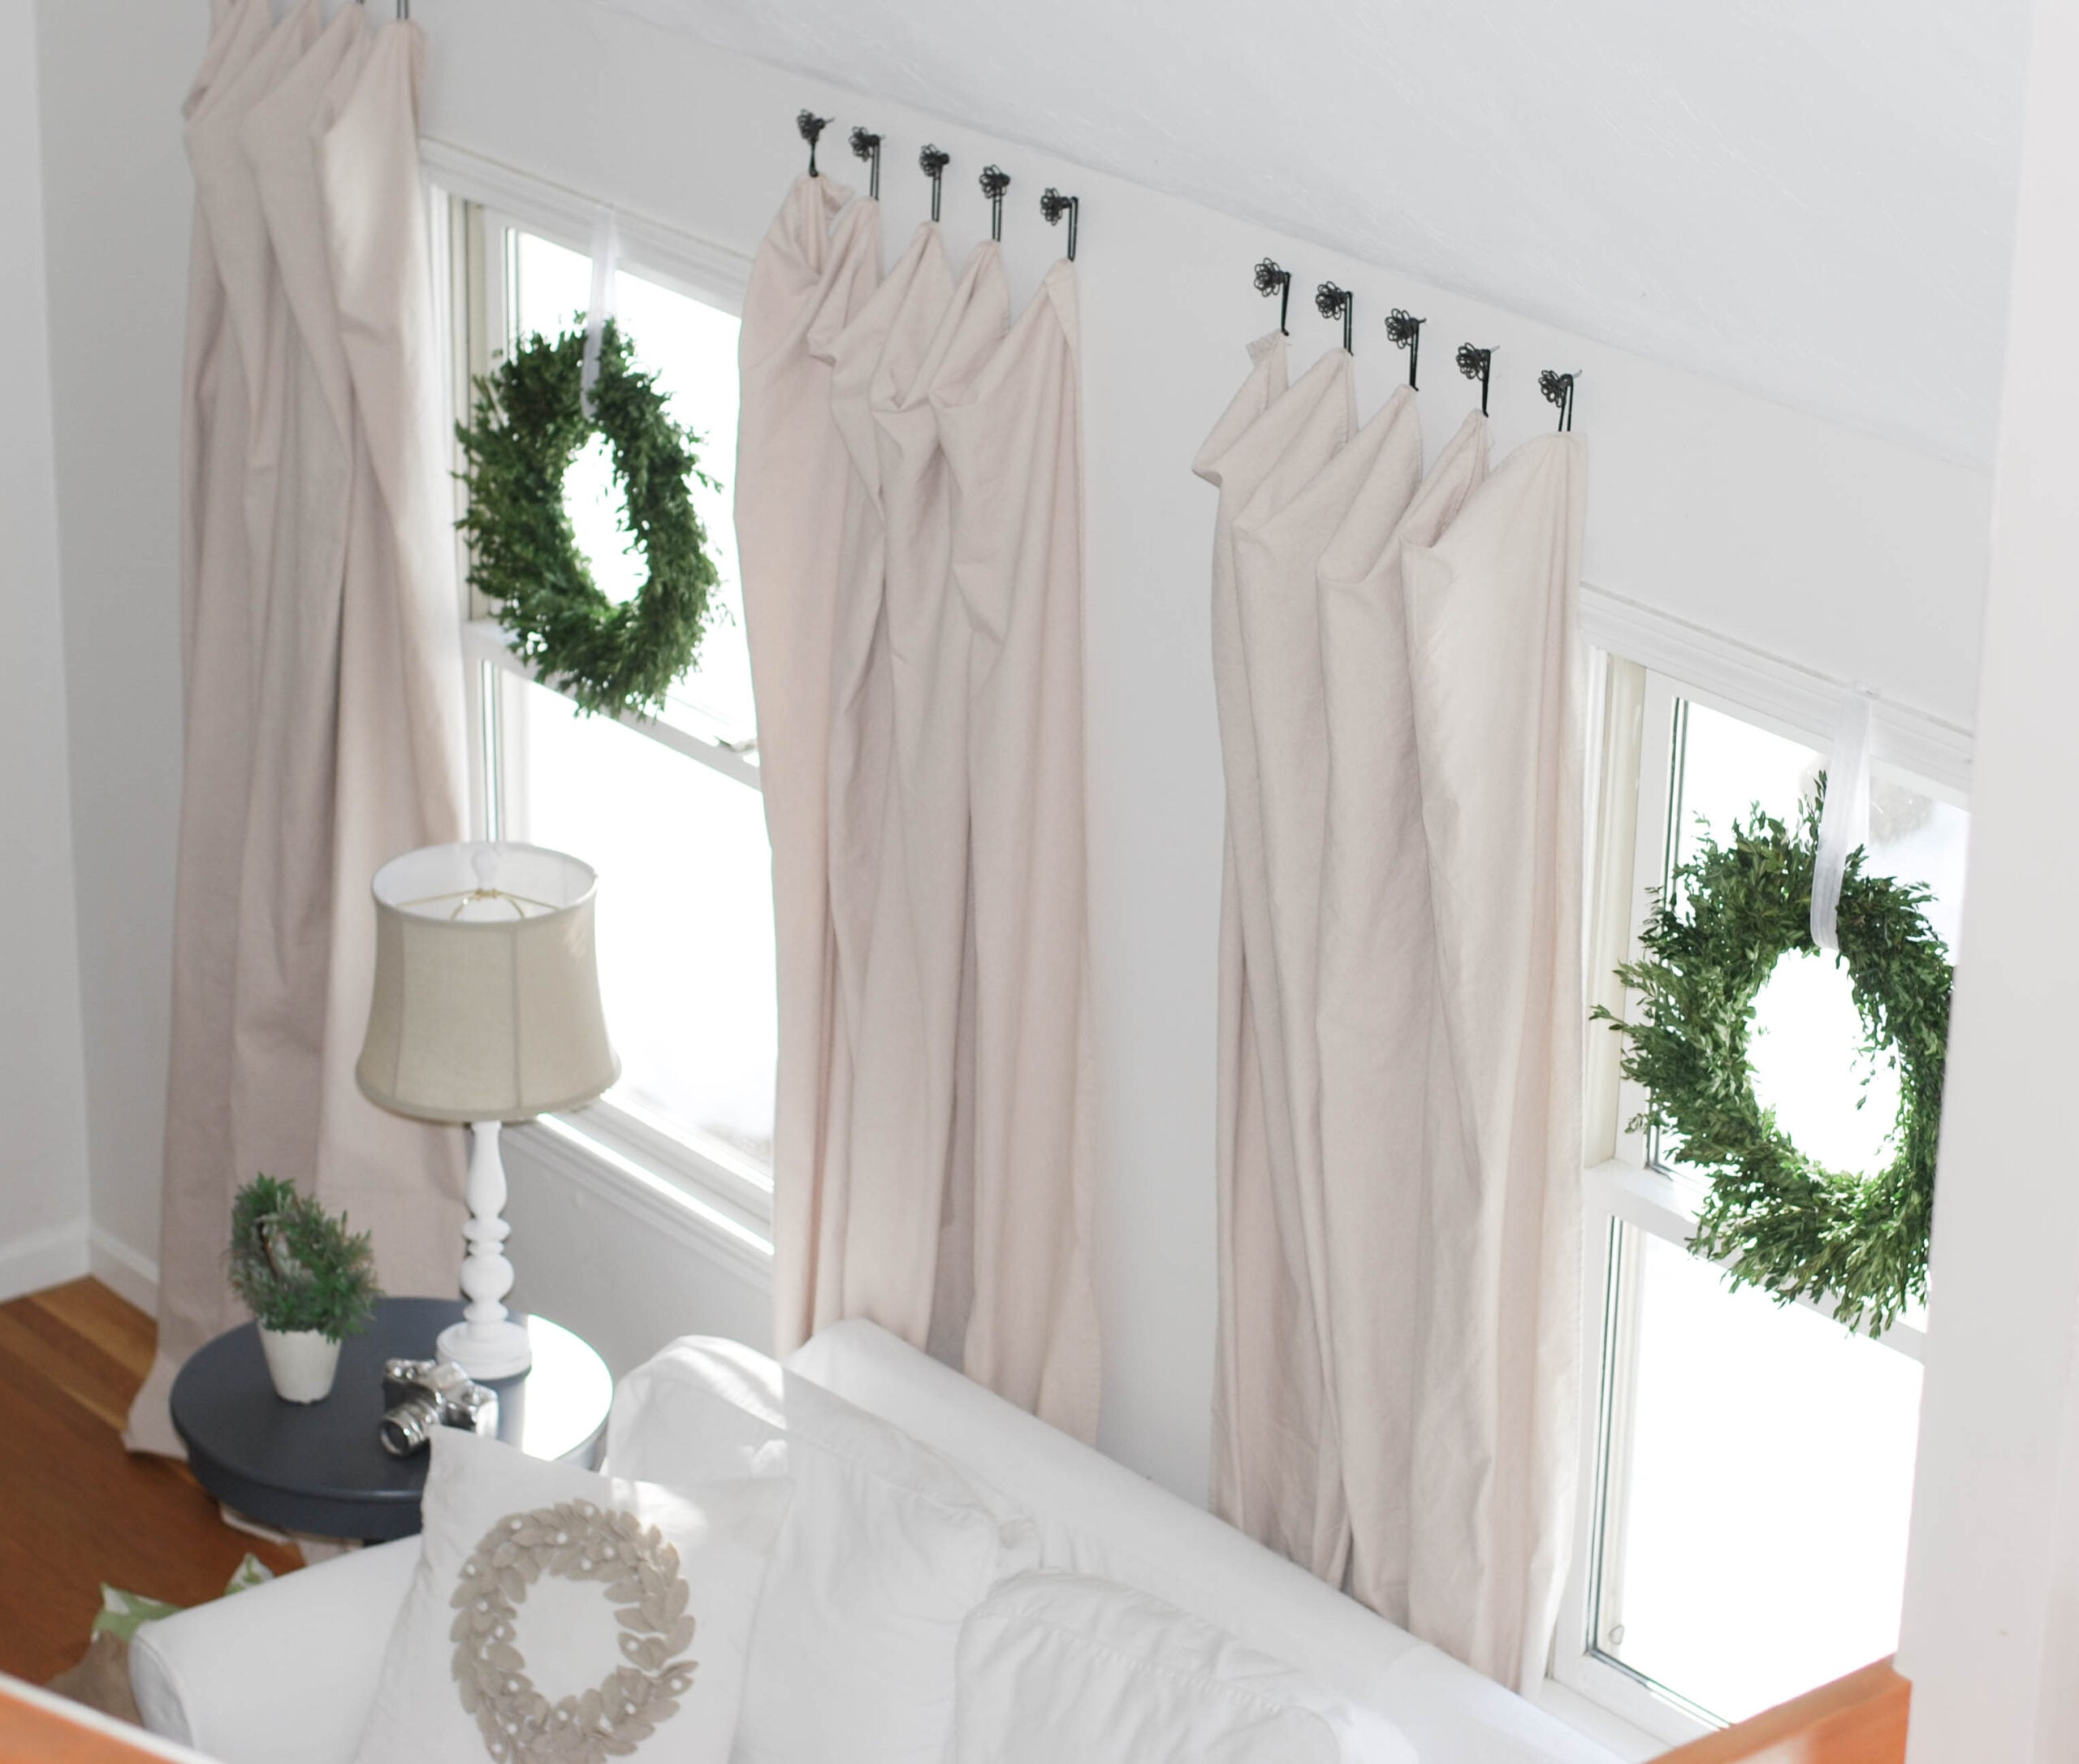
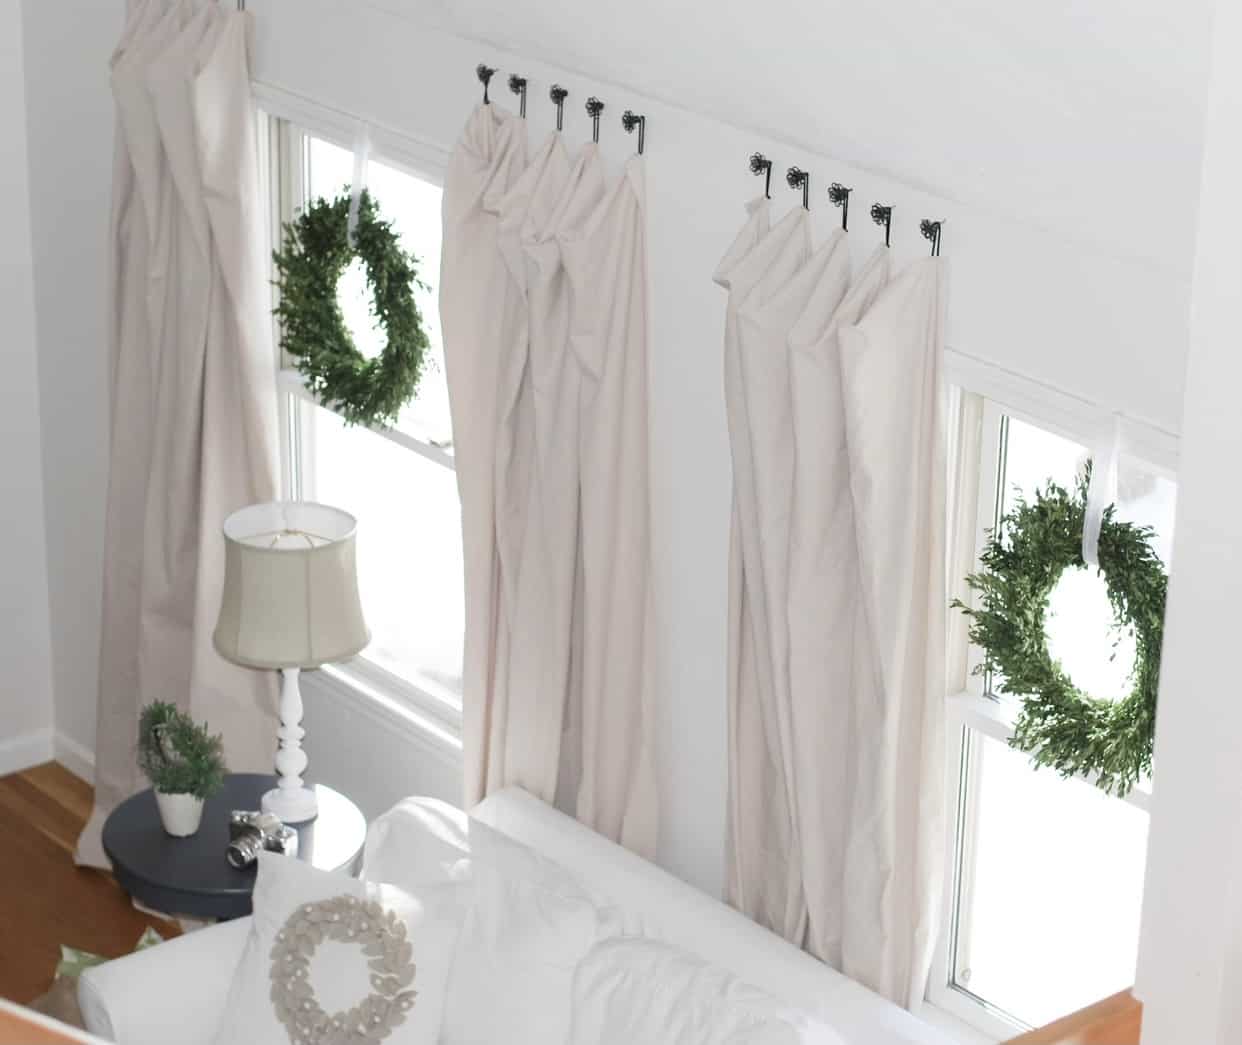
Measure and lightly mark where each drawer pull will go. Place them about four inches apart, five per side. For added height, install them about six inches above the window trim.

- Install the Drawer Pulls
Press the knob to the wall and twist the screw end into the drywall by hand. Repeat for each pull. No anchors needed unless your walls are plaster or crumbly.

- Hang the Curtains
Loop the hair ties over each drawer pull. Adjust as needed for even spacing and a soft drape.


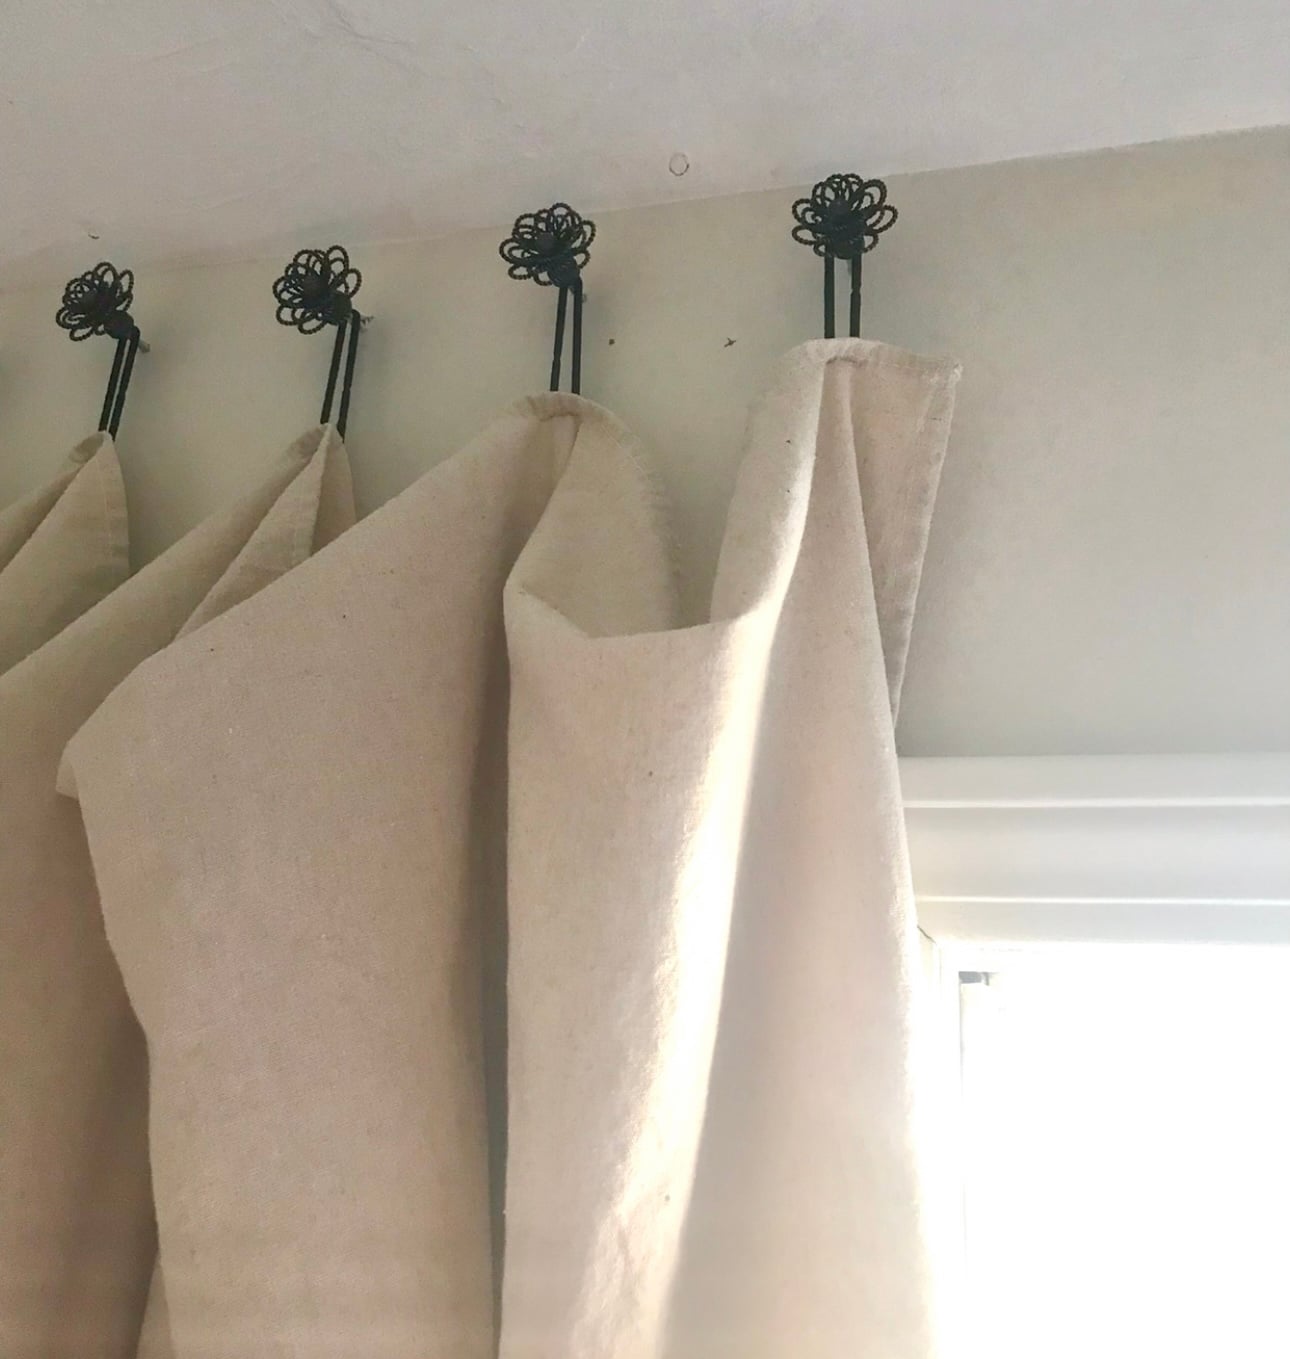
Why hair ties?
When I first came up with this curtain hack, I wanted something simple, flexible, and budget-friendly to hang the panels. I didn't want to mess with curtain rings or grommets. That's when I raided my bathroom canisters and grabbed a pack of thick black hair ties - and they worked perfectly.
Here's why they're a surprisingly great solution:
- They are inexpensive and easy to find
- They are the perfect loop size for hanging
- They stretch just enough to help the curtains drape well
- The black finish looks great with neutral fabric
Sometimes the best DIY solutions are hiding in plain sight!

Additional notes
Privacy considerations
If you are looking for curtains that close for privacy, these may not be the best fit. Drop cloth curtains like this are stationary and meant more for looks than function. In our home, we are set far back from the road, so having decorative curtain panels works just fine. If you need more privacy, consider pairing them with roller shades or bamboo blinds behind the panels.
Tips for a more custom look
To make your windows look taller and your ceilings feel higher, hang the curtains above the window casing. Six to eight inches is a good guide. For a wider, more dramatic effect, extend the curtain hardware out past the sides of the window by several inches. This simple trick gives the illusion of larger windows and adds a more finished, designer feel to the space. This is a must in my book-it makes even simple drop cloth panels look intentional and elevated. I go over this in more depth with my Pottery Barn-inspired ticking stripe curtains with DIY tassels post.
Solutions for your drop cloth curtains
When drop cloths are too long
If your drop cloths extend beyond your desired length, try one of these easy fixes:
- Cut and hem: Trim the excess fabric and create a new hem with a sewing machine for a clean finish.
- Use hem tape: Skip the sewing. Apply iron-on hem tape to create a polished edge without any stitching.
- Create a top fold: Fold the excess fabric at the top before attaching hair ties or curtain clips. This keeps the factory-finished bottom hem visible.
- Add decorative folds: Fold the top edge and secure it with fabric glue or a few hand stitches to create a soft, pleated look with extra style.
When drop cloths are too short
If your drop cloths don't quite reach the floor, try these creative fixes:
- Embrace shorter curtains: Let them hang just below the sill for a casual, café-style window treatment.
- Add a coordinating panel: Sew or glue on a panel at the bottom or top using either more drop cloth or a complementary fabric for a color-blocked look.
- Create a tied design: Cut the bottom of the drop cloth and a second fabric into strips, then tie them together for a soft, boho finish.
- Add a border: Attach a contrasting band of fabric at the bottom to extend the length and elevate the overall look.
Remember: The beauty of DIY is flexibility. Get creative and make it work for your space and style.

More troubleshooting tips
Let's be real - even the simplest DIY projects can throw us a curveball! Here are some solutions to common hiccups you might run into:
When walls won't cooperate
Drawer pulls not staying put in drywall? Use wall anchors for added grip and strength. Especially helpful in high-traffic areas where little hands might give them a tug.
Getting that perfect alignment
If your knobs are drifting off course, grab a laser level or run a strip of painter's tape as a guide before you mark your drill spots. No more crooked curtain lines.
When hair ties get tired
Hair ties losing their stretch? Double them up for more support or swap them out. They're cheap and easy to replace.
Alternative hardware options
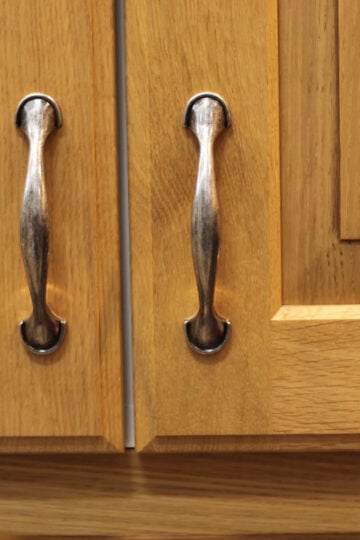
Drawer pulls not your thing? Here are some creative and affordable alternatives:
Wood cabinet knobs: Your best budget option. These are usually under $2 each and can be painted or left raw for that rustic, natural vibe.
Repurposed curtain finials: These decorative rod ends can double as wall hooks and are often less expensive than drawer pulls.
Vintage doorknobs: Head to the thrift store or browse Marketplace for unique knobs that add charm and character.
Bargain bin finds: Don't skip the clearance aisle at your local hardware store or big box retailer. I've scored perfectly good knobs for under a dollar this way. A little mismatched? Embrace it! That collected-over-time look fits right in with farmhouse style.

Let's talk about keeping these beauties looking fresh
Everyday cleaning
For regular upkeep, I use my vacuum's upholstery attachment and give the curtains a quick once-over every couple of weeks.
Deep cleaning
When the kids get creative (and treat the curtains like napkins), I take them down and toss them in the washing machine on a gentle cycle. I usually do this twice a year, and they come out looking good as new.
No-iron refresh
If they look wrinkled after washing, skip the ironing. Just spritz them lightly with water while they're hanging and smooth them with your hands. The fabric's weight will naturally pull out the wrinkles as it dries.
How long will they last?
Drop cloth curtains are surprisingly durable. Mine have handled plenty of wear and tear and still look great. The slightly rumpled texture only adds to their charm over time - kind of like your favorite broken-in jeans.
Styling Ideas
Even though these curtains are simple, a few small choices can shift the overall look and feel of the room. Here are some easy ways to style your painter's drop cloth curtains to match your space.
Cottage Cozy
Let the panels gently puddle at the floor and keep the natural canvas color as is. Pair with soft greenery, wicker baskets, and warm wood tones for a relaxed, welcoming look.
Clean Farmhouse
Wash and steam the drop cloths for a smooth drape. Hang them just above the floor for a crisp finish. Layer with white walls, light woods, and a few oversized pillows for a fresh, airy feel.
Vintage Collected Look
Swap uniform drawer pulls for a mix of painted or thrifted knobs. Slight color variation and shape differences add charm and character. Style with layered textiles and meaningful decor pieces.
Modern Rustic
Keep the panels long and straight with minimal pooling. Choose dark or matte black drawer pulls for contrast. Add greenery with clean lines and simple ceramics for a grounded, tailored look.
Coastal Calm
Bleach the drop cloths for a soft, weathered white tone. Pair with baskets, driftwood finds, and natural fiber rugs. Keep the overall palette light and breezy.
Frequently asked questions
Absolutely! Painter's drop cloths make surprisingly beautiful curtains. The fabric has a soft, natural texture that feels similar to linen without the high price tag. Once washed and dried, the material relaxes and drapes nicely, giving the room a cozy, lived-in feel. They are also durable, washable, and easy to customize. You can leave them in their natural canvas shade, bleach them for a softer white, or even trim them to fit your windows perfectly. They are an affordable way to add warmth and softness to your home.
There are several ways to hang drop cloth curtains, but this tutorial uses a no-rod method that is great for renters. Instead of curtain rings or grommets, the panels are hung using cabinet drawer pulls and small hair ties. The hair ties create flexible loops along the top edge of the fabric and slip right over the drawer pulls. This allows the curtains to drape softly without sewing or installing a curtain rod. It is simple, quick, and easy to adjust.
Drop cloth curtains are surprisingly durable. They are made from cotton canvas (often called cotton duck), which holds up well to everyday use and regular washing. With normal wear, drop cloth curtains can last for several years, and the fabric gets softer over time. The slightly relaxed texture is part of what makes them so charming.
A drop cloth is typically made from cotton duck, which is a tightly woven cotton canvas fabric. It has a sturdy, natural texture that resembles linen but is much more affordable. This makes it a great choice for curtains if you like a soft, casual drape with a touch of rustic farmhouse character.
Yes, washing is recommended. Drop cloths may shrink slightly in the wash, so it's best to clean them first. Washing also softens the fabric, making it drape more naturally. For an even more relaxed look, consider adding fabric softener to the cycle.
I recommend cotton canvas drop cloths. They're made of 100 percent cotton duck fabric with double-stitched seams and heavy-duty thread. They're also washable, which makes them ideal for curtains and other home projects. You can find them at Lowe's, Home Depot, Harbor Freight, or your local hardware store.
Pro tip: shades of canvas vary slightly, so if you can, shop in person to choose the right tone for your space.
Drop cloth curtains work anywhere you want a cozy, farmhouse-inspired look. I hung mine in the living room, but they're great for bedrooms, dining rooms, guest rooms, or even outdoors on a covered patio. Since drop cloths are inexpensive, they're a smart choice if you have lots of windows to cover.
You can absolutely adapt this project. One easy solution is to mount the drawer pulls on a decorative board and hang the board like art. This gives you the same look without putting multiple holes in your wall. Or, skip the pulls altogether and use a traditional curtain rod for a more conventional setup.
No problem. Clip-style curtain rings work perfectly. Just clip them to the top of the drop cloth and slide them over the rod. If you still want to use hair ties, you can loop them over the rings, but keep in mind they won't slide as easily when opening or closing the curtains.
More simple DIYs and farmhouse styling ideas to try
Looking to bring more of today's farmhouse charm into your home? These popular posts will help you create that cozy, welcoming farmhouse aesthetic in every room.


Whether you're just beginning your farmhouse decorating journey or looking to refresh your existing style, these ideas offer practical inspiration to create a warm, rustic-inspired home that feels both timeless and on-trend! Looking for more cozy and creative farmhouse decor ideas? Visit the Cozy White Living Room Hub for layered styling tips, budget-friendly DIYs, and real-life inspiration from my home.
Drop cloth curtains may be simple, but the impact they make is anything but. Whether you're dressing up a blank wall or adding softness to a room, these no-sew panels are proof that beautiful decor doesn't have to be complicated. Thanks for stopping by the blog today - and if you try this project, I'd love to hear how it turns out!
Keep creating friends!


I absolutely love this idea! The no-sew approach makes it so accessible, and the drop cloth material gives a beautiful, rustic feel. I can’t wait to try this in my living room. Thank you for the inspiration!
No Sew is always a good thing! Good luck and please let me know if you have any questions!
I absolutely love this idea! The DIY drop cloth curtains look so effortlessly chic and I can't believe there's no sewing involved. Can't wait to try this in my own home – the twist you added makes it so unique! Thanks for sharing such an inspiring project!
Thank you! Im glad you found these curtains inspiring. Thank you for visiting my blog!
What a fantastic idea! One I will definitely be "borrowing"!!
Thank you Maureen!!