How to Make Pressed Flower Pumpkins (Easy DIY Tutorial)
Pressed flower pumpkins are an easy way to transform ordinary pumpkins into elegant fall decor. In this DIY tutorial, I'll show you how to decorate real or faux pumpkins with pressed flowers using Mod Podge, share tips for choosing the best flowers, and inspire you with several original design ideas you can recreate at home.
Content may contain affiliate links. When you shop the links, we receive a small commission at no cost to you. Thanks for supporting my small business.
Pressed flower pumpkins are one of my favorite ways to decorate for fall. There's something about combining delicate botanicals with simple pumpkins that creates a look that's both elegant and timeless. Whether you use fresh pumpkins from the farm stand or faux pumpkins you can enjoy year after year, this is an easy project that makes a beautiful statement in your home.
In this tutorial, I'll show you how to create pressed flower pumpkins step by step, including one of my favorite designs, a charming pumpkin candle holder. I'll also share tips for pressing your own flowers, choosing the best blooms, and several design ideas to inspire your own fall decorating.
At a Glance: Pressed Flower Pumpkins
_______________________
- Step-by-step tutorial for making pressed flower pumpkins
- My favorite designs using flowers, leaves, and botanical accents
- Press your own flowers or use store-bought pressed blooms
- Decorating tips for real and faux pumpkins
- Display ideas for coffee tables, mantels, and fall centerpieces
- Beginner-friendly project with beautiful results
Summarize and Save this content on:
Jump to:
- At a Glance: Pressed Flower Pumpkins
- Choosing the best pumpkin
- Best flowers for pressed flower pumpkins
- Supplies you'll need
- How to press your own flowers
- How to make a pressed flower pumpkin candle holder
- Mod Podge tips
- Pressed flower pumpkin design ideas
- How to display pressed flower pumpkins
- Taking care of your pumpkins
- Frequently asked questions
- More fun pumpkin crafts to try
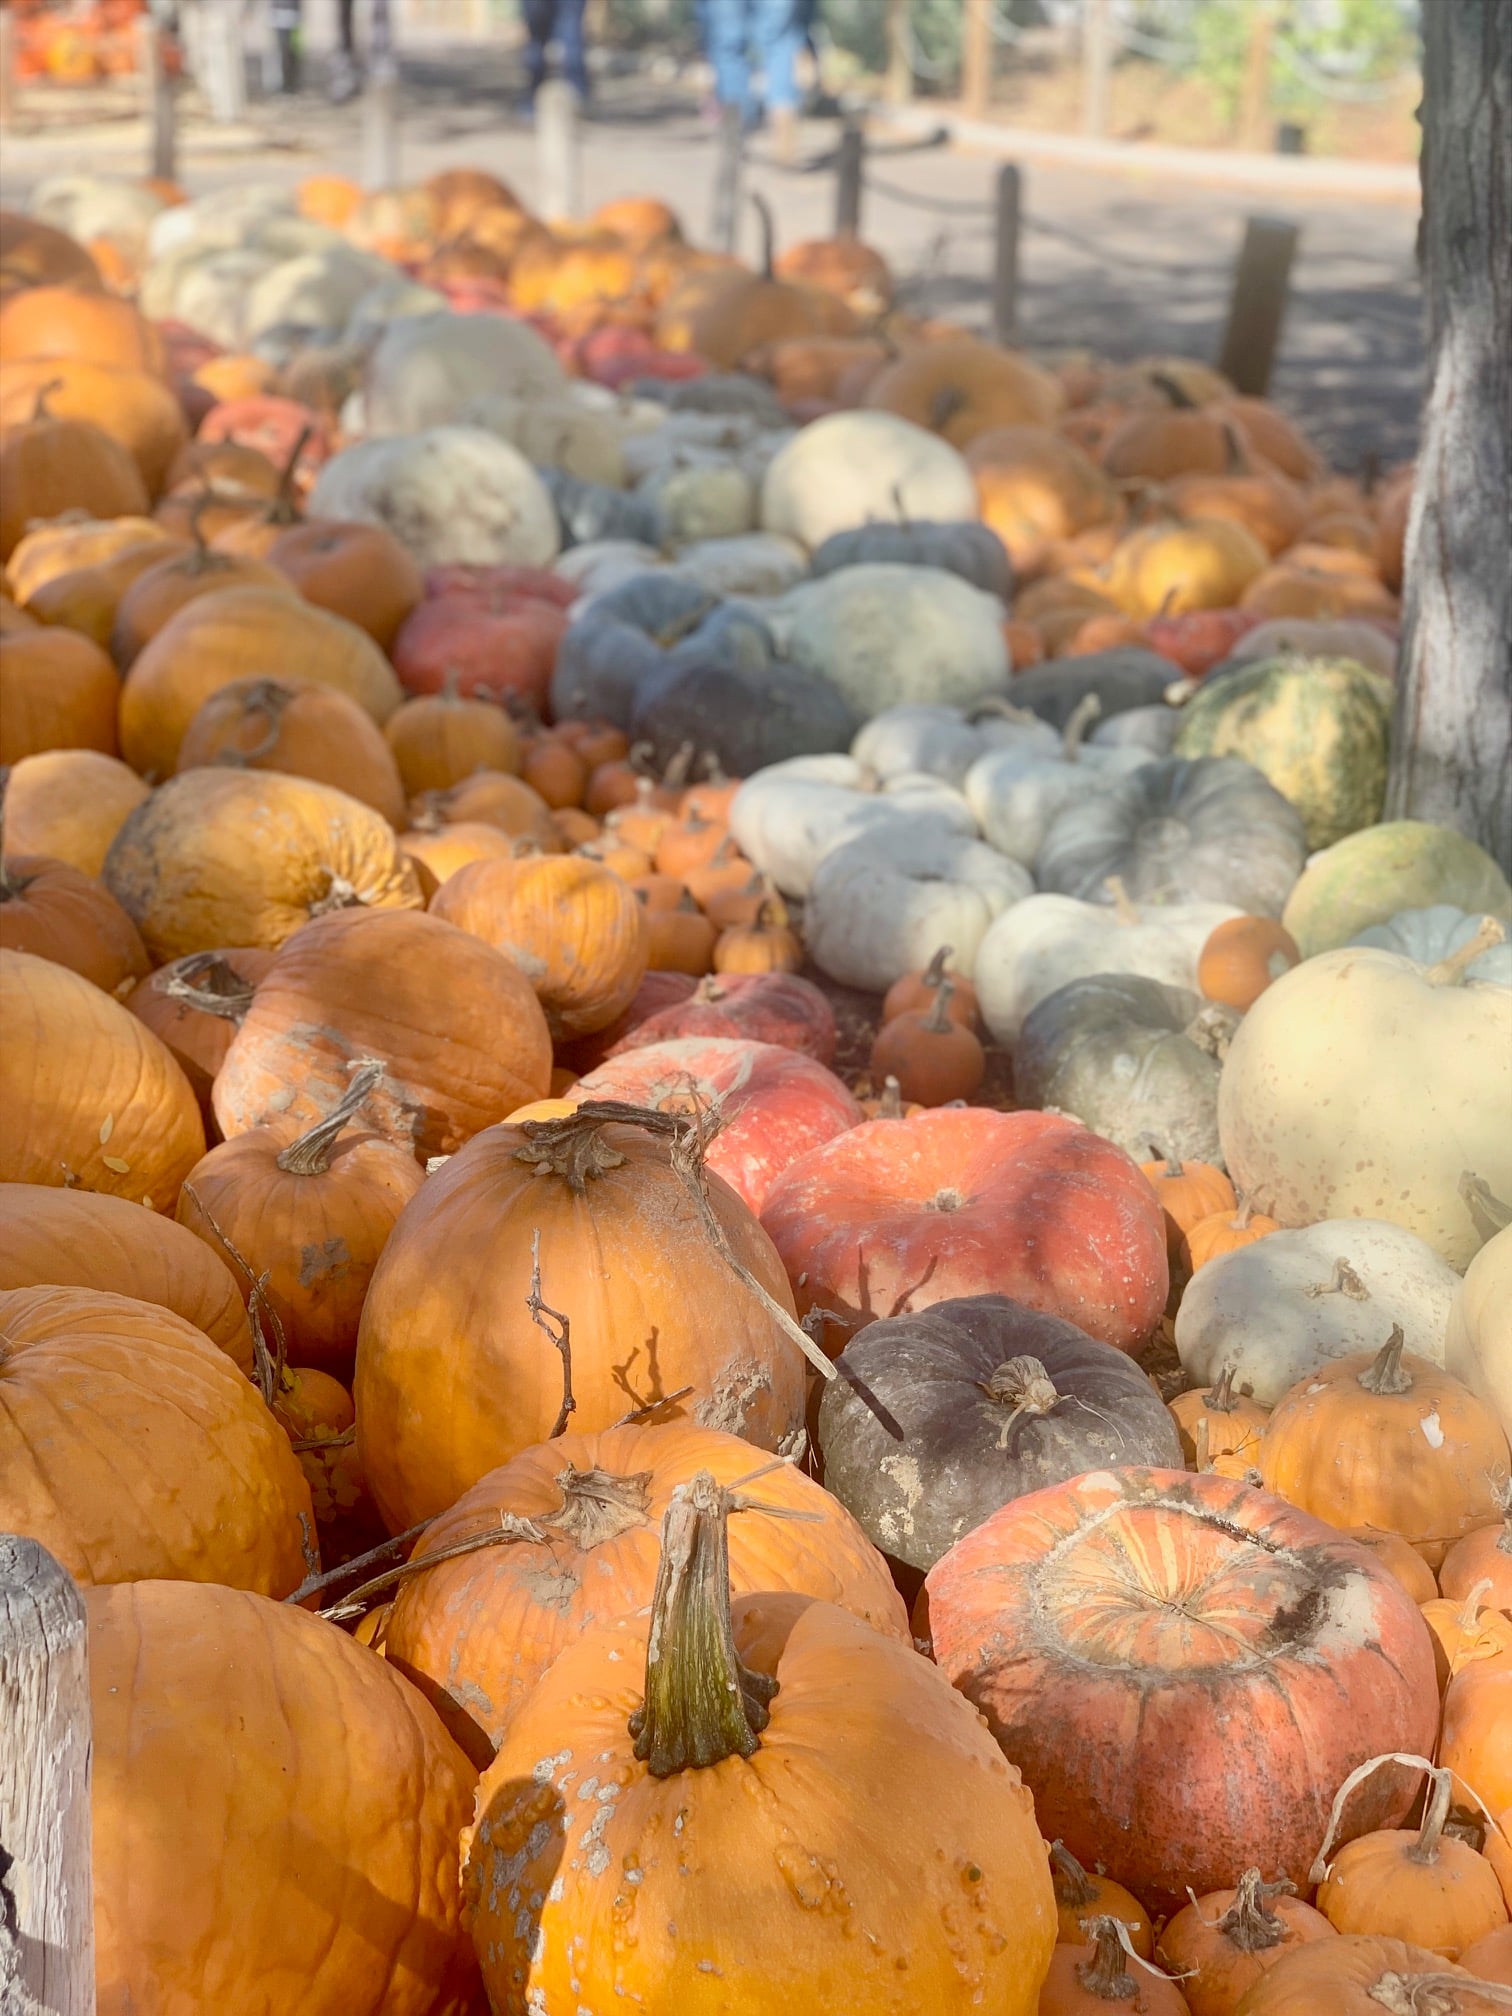
Choosing the best pumpkin
Choosing the right pumpkin is the first step to creating a beautiful pressed flower design. I almost always reach for white pumpkins because they allow the colors of the flowers and greenery to stand out, giving the finished project a soft, botanical look. While orange pumpkins can be just as pretty, I find that white pumpkins let the pressed flowers take center stage.
Look for a pumpkin with smooth, unblemished skin, since bumps, deep ridges, and blemishes can make it harder for the flowers to lie flat. Both real and faux pumpkins work beautifully with this technique. Fresh pumpkins are perfect for seasonal displays, while faux pumpkins let you enjoy your creation year after year.
Mini pumpkins are ideal if you're making the candle holder version featured in this tutorial, but larger pumpkins give you more room to create cascading floral designs or all-over botanical patterns.
Tip: I've learned after decorating with pumpkins for years is to check that the pumpkin sits flat before you buy it. A pumpkin that rocks or tilts can make decorating more difficult, especially if you're creating a candle holder or displaying it as a centerpiece. I always set the pumpkin on a flat surface at the farm stand or garden center to make sure it's stable before bringing it home.
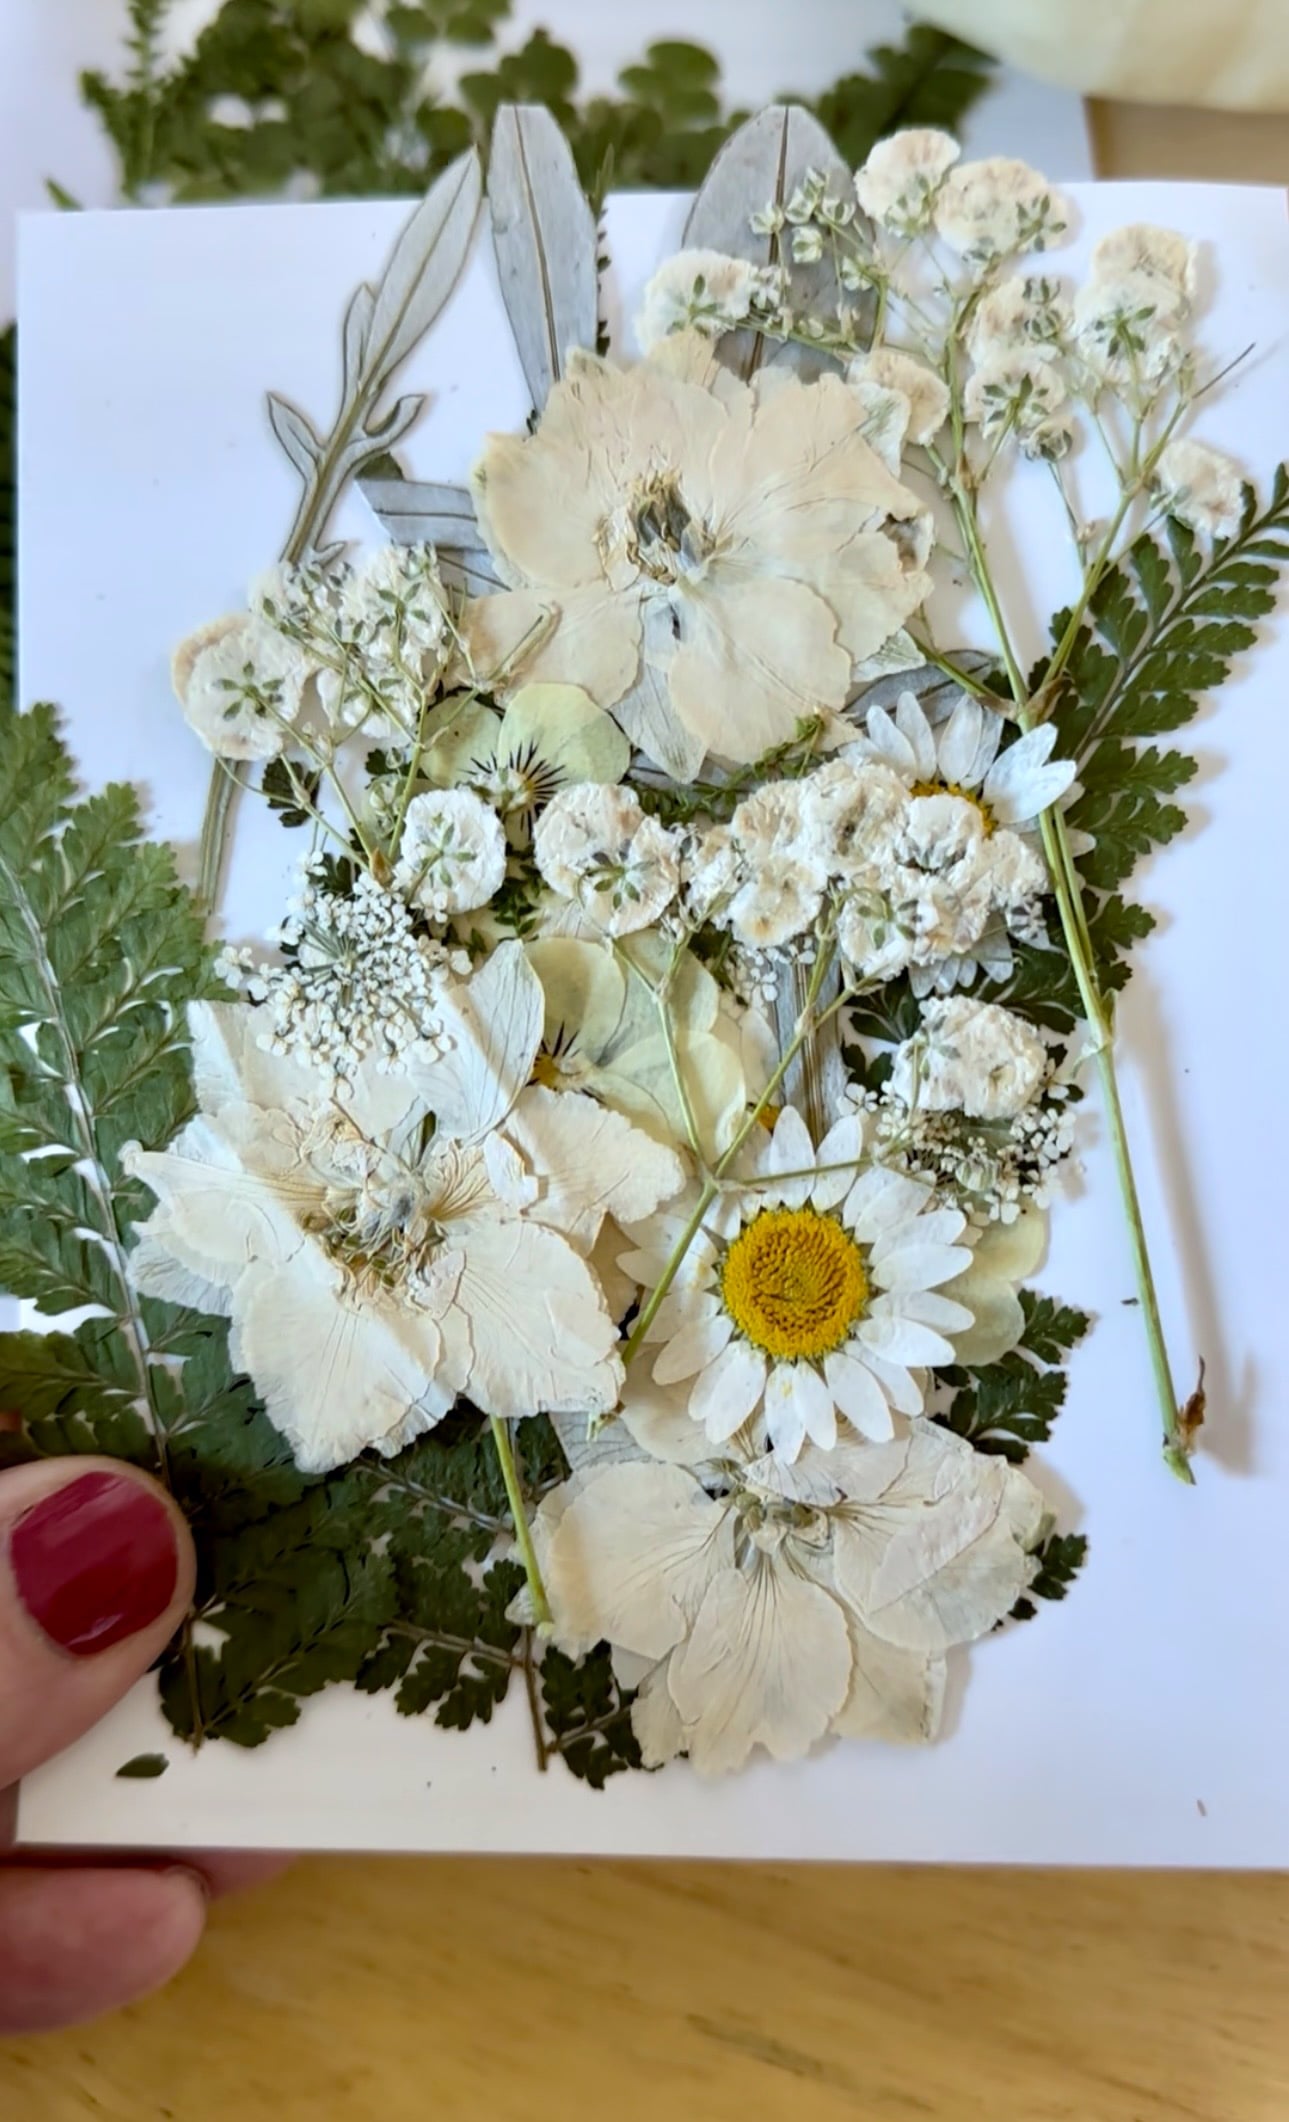
Best flowers for pressed flower pumpkins
One of the things I love most about pressed flower pumpkins is that no two ever look exactly alike. The flowers you choose will completely change the finished design, so don't be afraid to experiment with different colors, shapes, and textures.
Flowers with naturally flat blooms tend to work best because they adhere smoothly to the pumpkin's surface. Some of my favorites include pansies, violas, daisies, cosmos, and delicate hydrangea petals. For a more whimsical, garden-inspired look, tuck in a few sprigs of Queen Anne's lace or small pressed fern fronds. Pressed leaves also add beautiful texture and help create flowing botanical designs that connect the flowers together.
I like mixing larger blooms with smaller flowers and greenery to create movement across the pumpkin rather than placing everything in evenly spaced rows. Whether you prefer a cascading floral arrangement, a wreath around the stem, or a simple scattering of blooms, combining different sizes and textures gives the design a more natural, collected feel.
Tip: While I used store-bought pressed flowers for these pumpkins, pressing flowers from your own garden adds an even more personal touch. It's a wonderful way to preserve favorite blooms and create a decoration that's completely one of a kind.
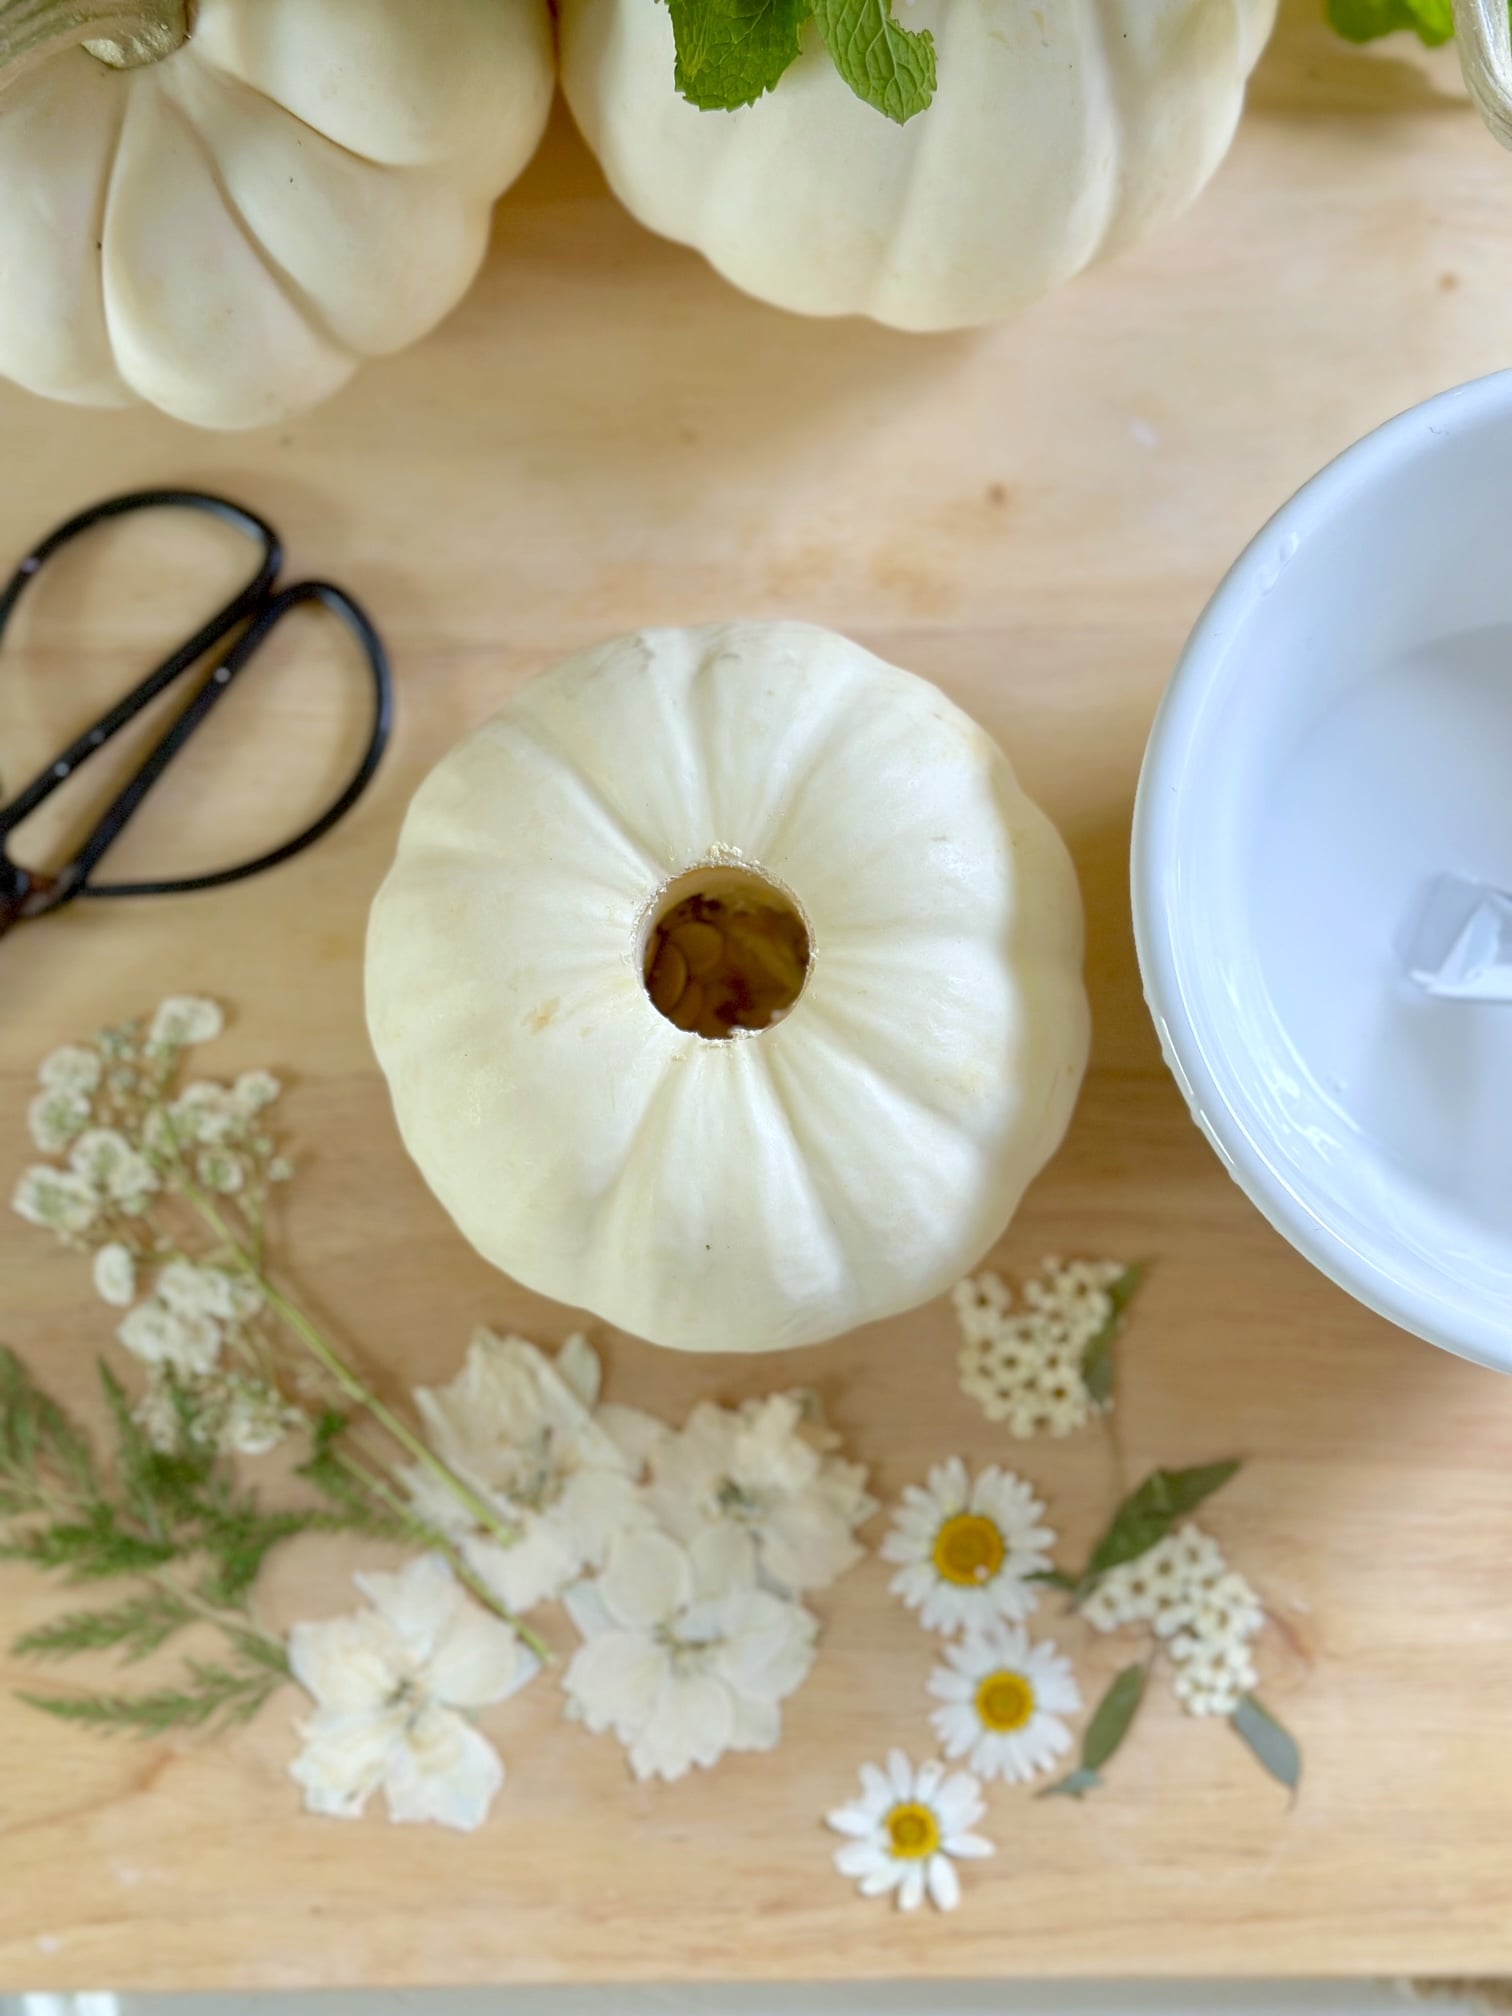
Supplies you'll need
For these, I used fresh mini white pumpkins from my local farm stand, though faux pumpkins work just as well. Store-bought pressed flowers and greens made this project quick and easy, but you can definitely press your own flowers too. Flat blooms like pansies or small wildflowers work best - they lay nicely against the pumpkin's curve. I added some pressed leaves and greenery to mine for that garden-fresh look.
Here's what you will need:
- Faux white pumpkins or mini pumpkins
- Pressed flowers (store-bought or homemade)
- Mod Podge and foam brush or paint brush
- Taper candles (if making candle holders)
- Lenox 1-3/16 inch hole saw (optional) (to create the hole in the pumpkin)
Quick Tip: Fresh pumpkins add that perfect seasonal touch to your fall decor, but if you want to keep these beauties year after year, grab some faux pumpkins instead. Both options work great with this technique - just choose what works best for your style!
How to press your own flowers
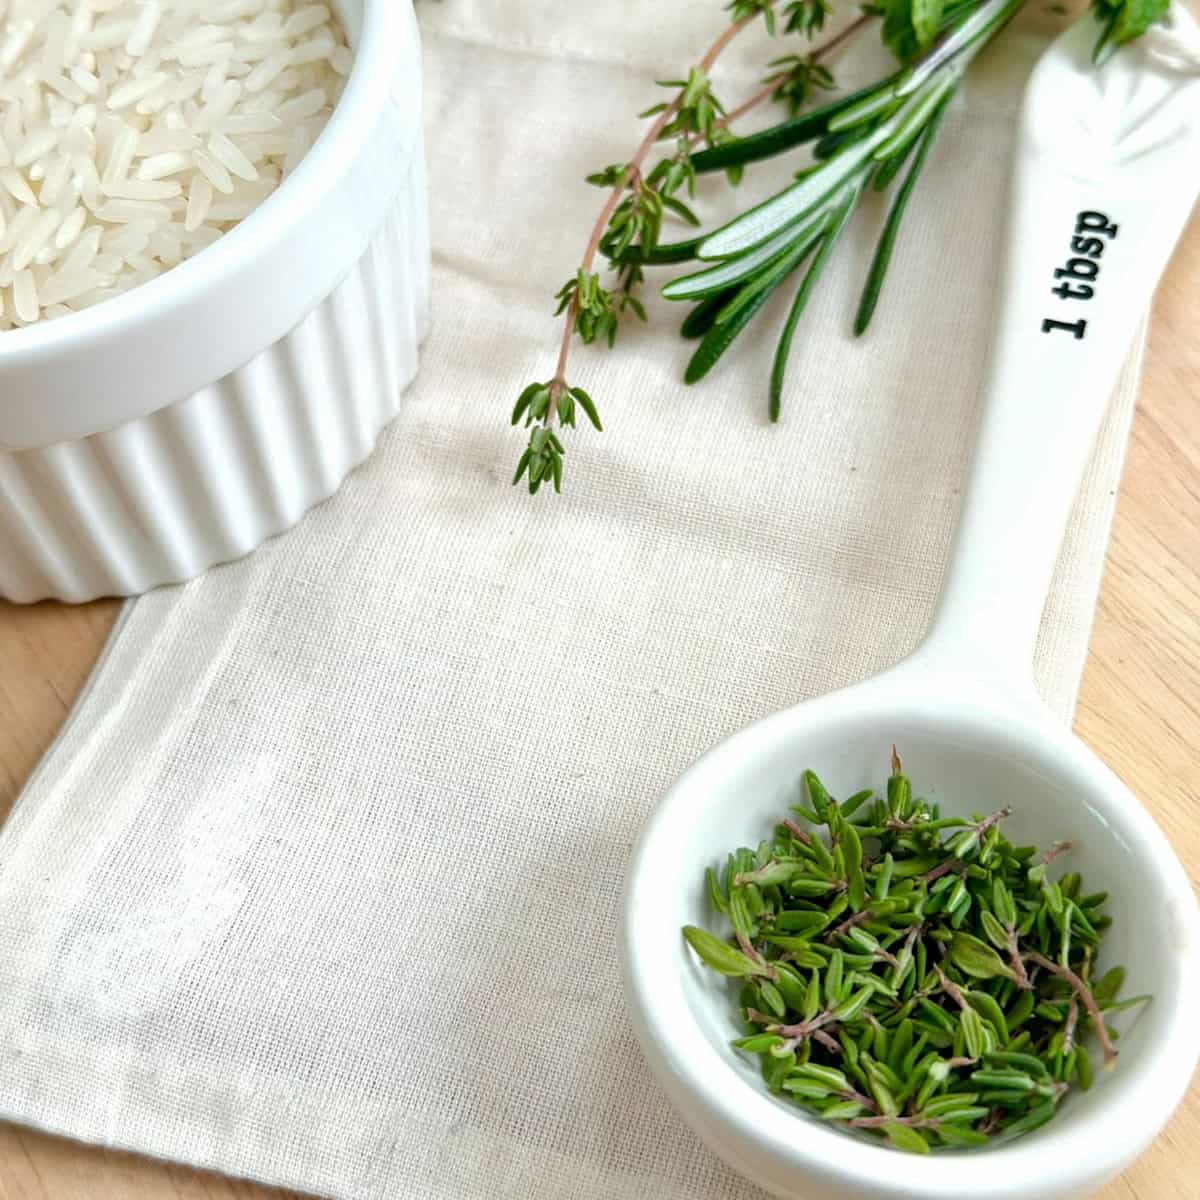
While I bought pressed flowers for these pumpkins, I often press my own flowers at home. If you've got a few weeks before starting this project, here's the simple process: Grab your flowers (make sure they're completely dry), lay them between paper towels, and stack some heavy books on top. I usually leave mine for about 3 weeks. Place the books somewhere flat and out of direct sunlight, like a closet shelf.
Want it done faster? A flower press speeds things up and works better for delicate blooms. I picked up mine at a craft store for under $20, and it's been worth every penny. The pressing time is about the same, but the results are more consistent.
If you're impatient like me, check out my How to Dry Roses in a microwave post - it works for most flowers and takes just a few minutes. Though for these pumpkins, I found traditionally pressed flowers hold up better when applying mod podge.
Quick tip: Choose flowers that are already fairly flat - daisies, pansies, and small wildflowers work great. And always pick them on a dry day to avoid any moisture issues.
How to make a pressed flower pumpkin candle holder
- Create Candle Opening
Start by removing the pumpkin stem. Using a hole saw, drill where the stem was to create an opening for your taper candle. If you do not have a hole saw, you can carefully carve the opening with a knife. Clean out any loose pieces from inside the pumpkin before moving on.

- Seal Interior (Optional)
This step is optional, but helpful if you are using a fresh pumpkin. Apply a thin layer of Mod Podge around the candle opening and inside the pumpkin, then let it dry completely. This can help the pumpkin last a little longer.

- Add First Layer of Mod Podge
Working in small sections, brush a thin layer of Mod Podge directly onto the pumpkin where you want to place your pressed flowers. I like to start with the greenery first so I can layer the flowers over it.

- Arrange Flowers
Place your larger pressed flowers first, then tuck smaller flowers, leaves, and greenery around them. Take your time adjusting the design until you are happy with the placement. This is where the pumpkin really starts to come to life.
- Seal Design
Carefully brush a thin layer of Mod Podge over the pressed flowers to seal them in place. Use a light hand, since too much Mod Podge can cause wrinkling or bubbling. Let the pumpkin dry completely before handling or adding the candle.


Mod Podge tips
✓ Apply in layers: first on pumpkin, then place flower, then coat over top
✓ Don't panic - it looks cloudy at first but dries completely clear
✓ Use thin coats to prevent bubbling and wrinkling
✓ Work in small sections so the Mod podge doesn't dry before adding flowers
✓ A foam brush or wide paint brush helps get even coverage
✓ Let each layer dry completely before handling
Tip: Want to learn more about using Mod Podge for protective finishes? Check out my easy laser transfer post where I cover the best techniques for getting smooth, bubble-free coverage every time.
Pressed flower pumpkin design ideas
One of my favorite things about this project is that no two pumpkins ever turn out exactly alike. Once you learn the basic technique, you can create completely different looks simply by changing the flowers, leaves, and placement.
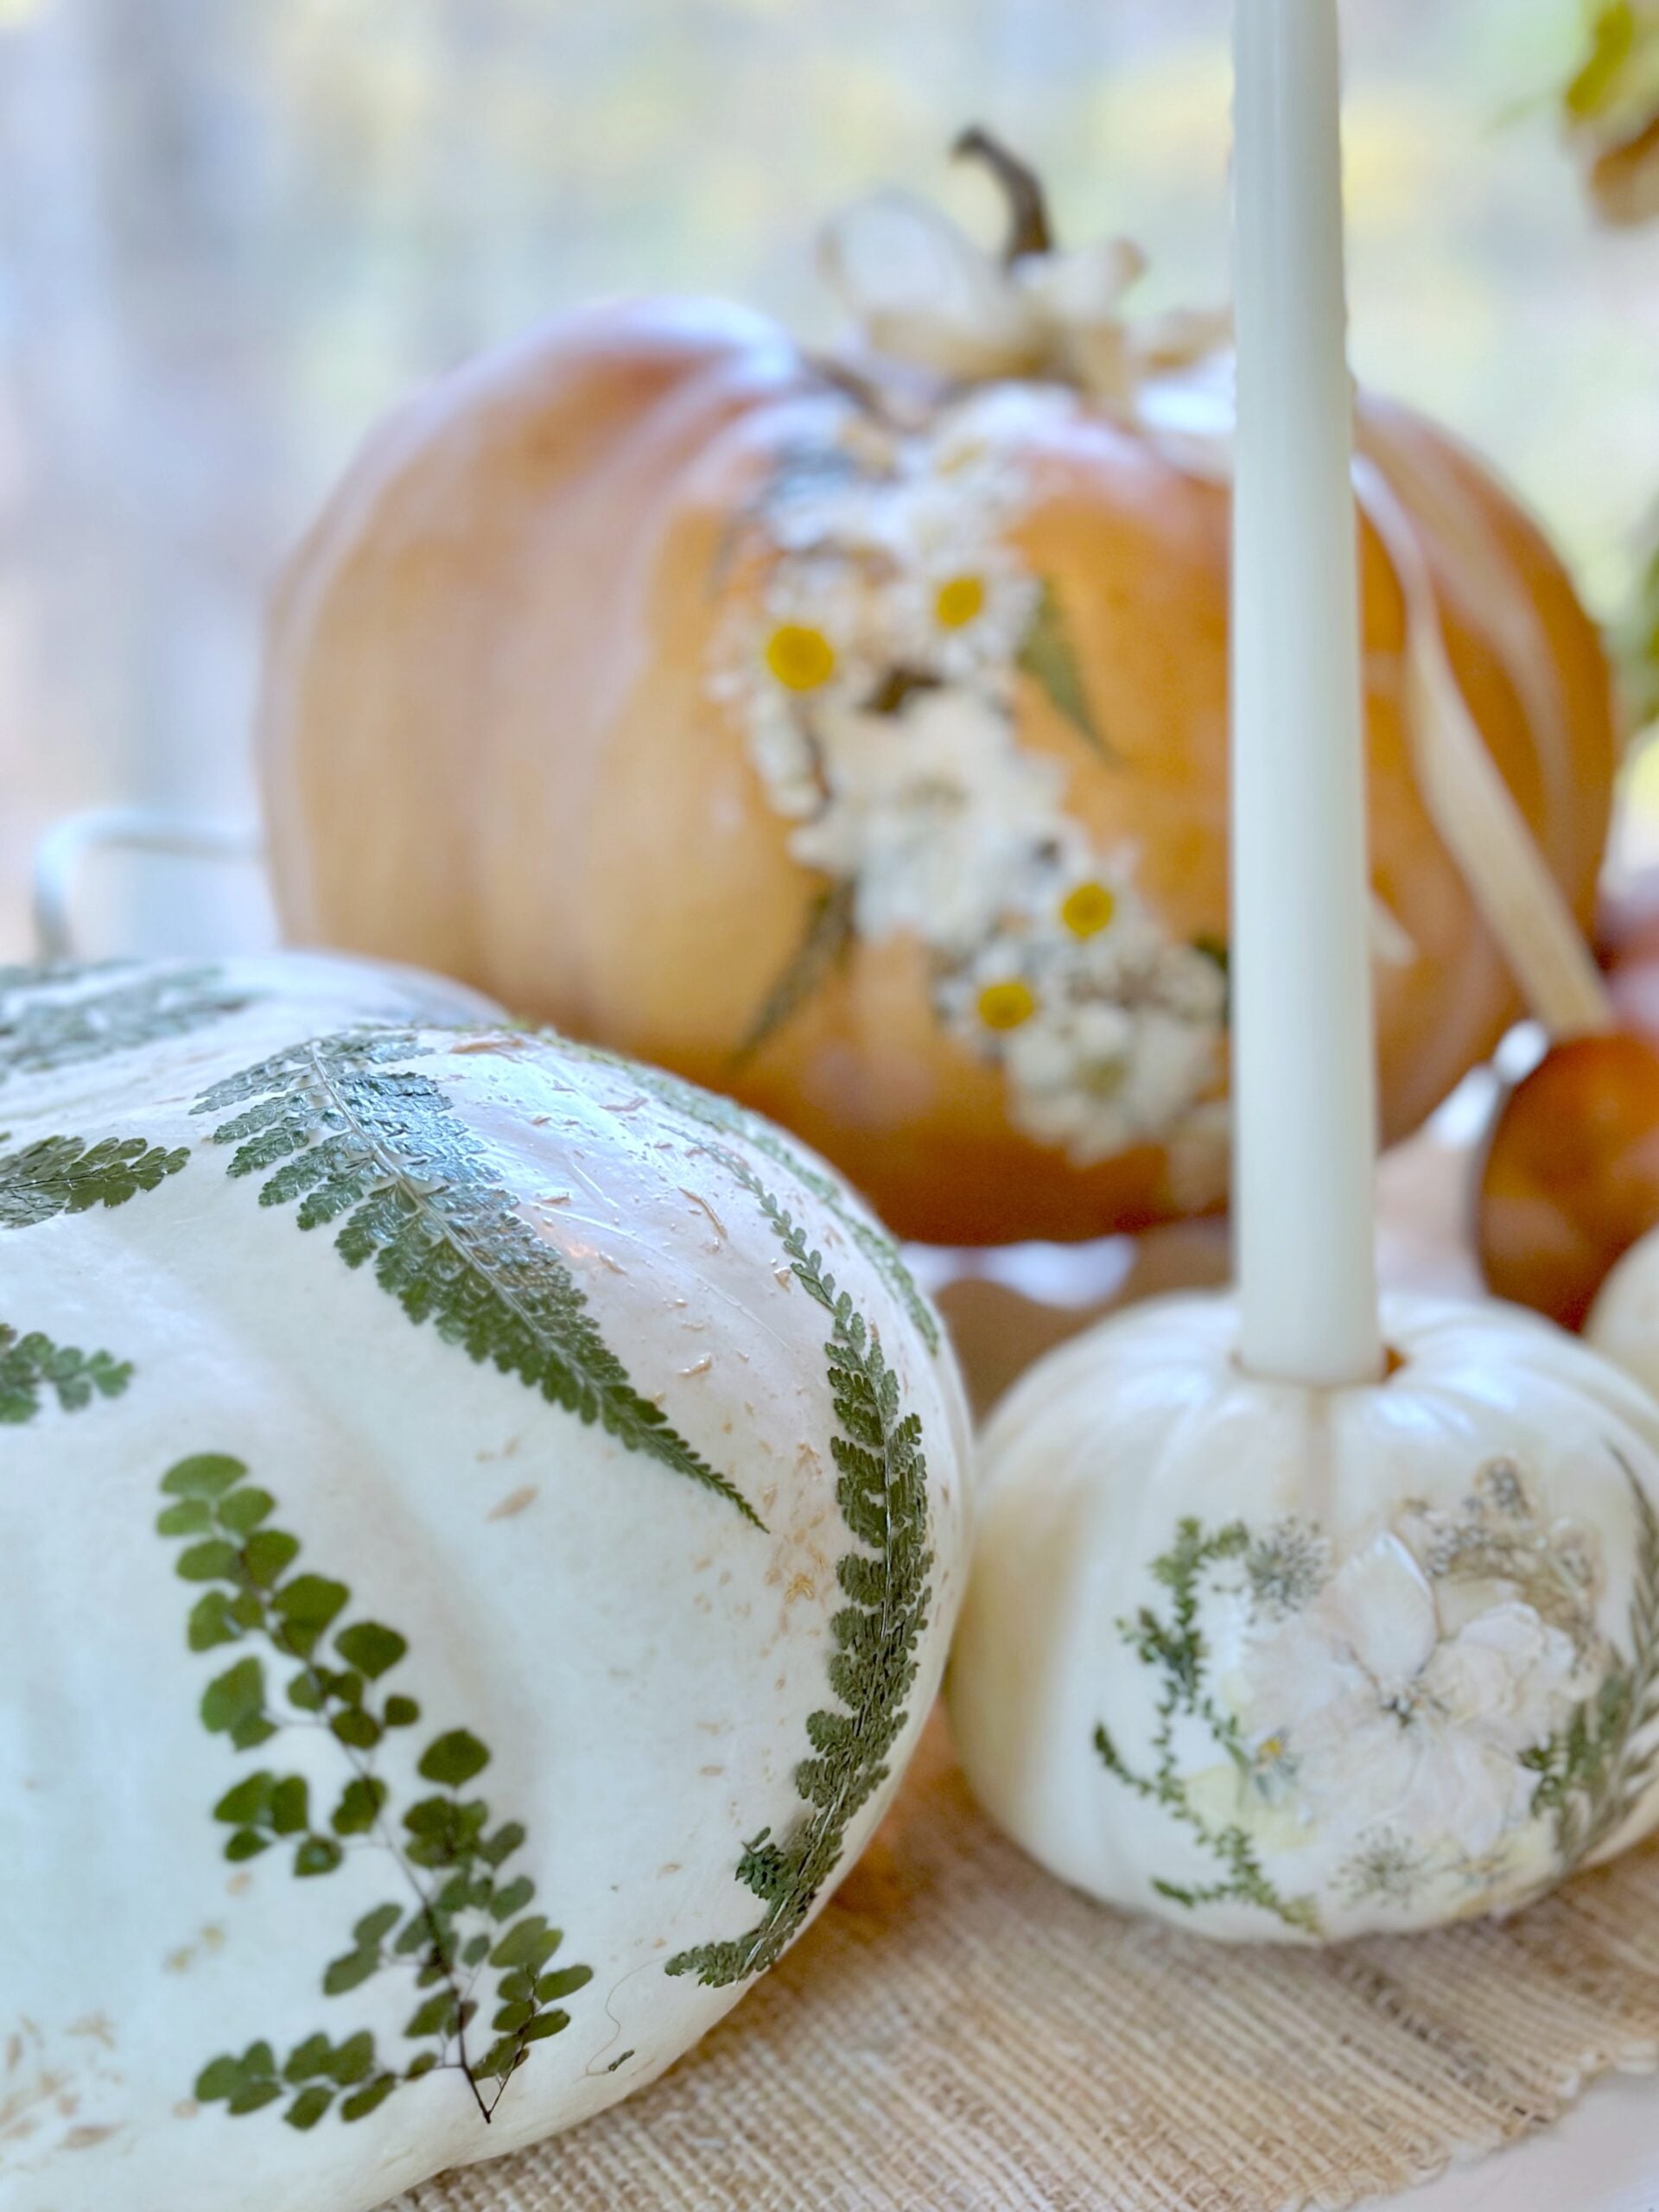
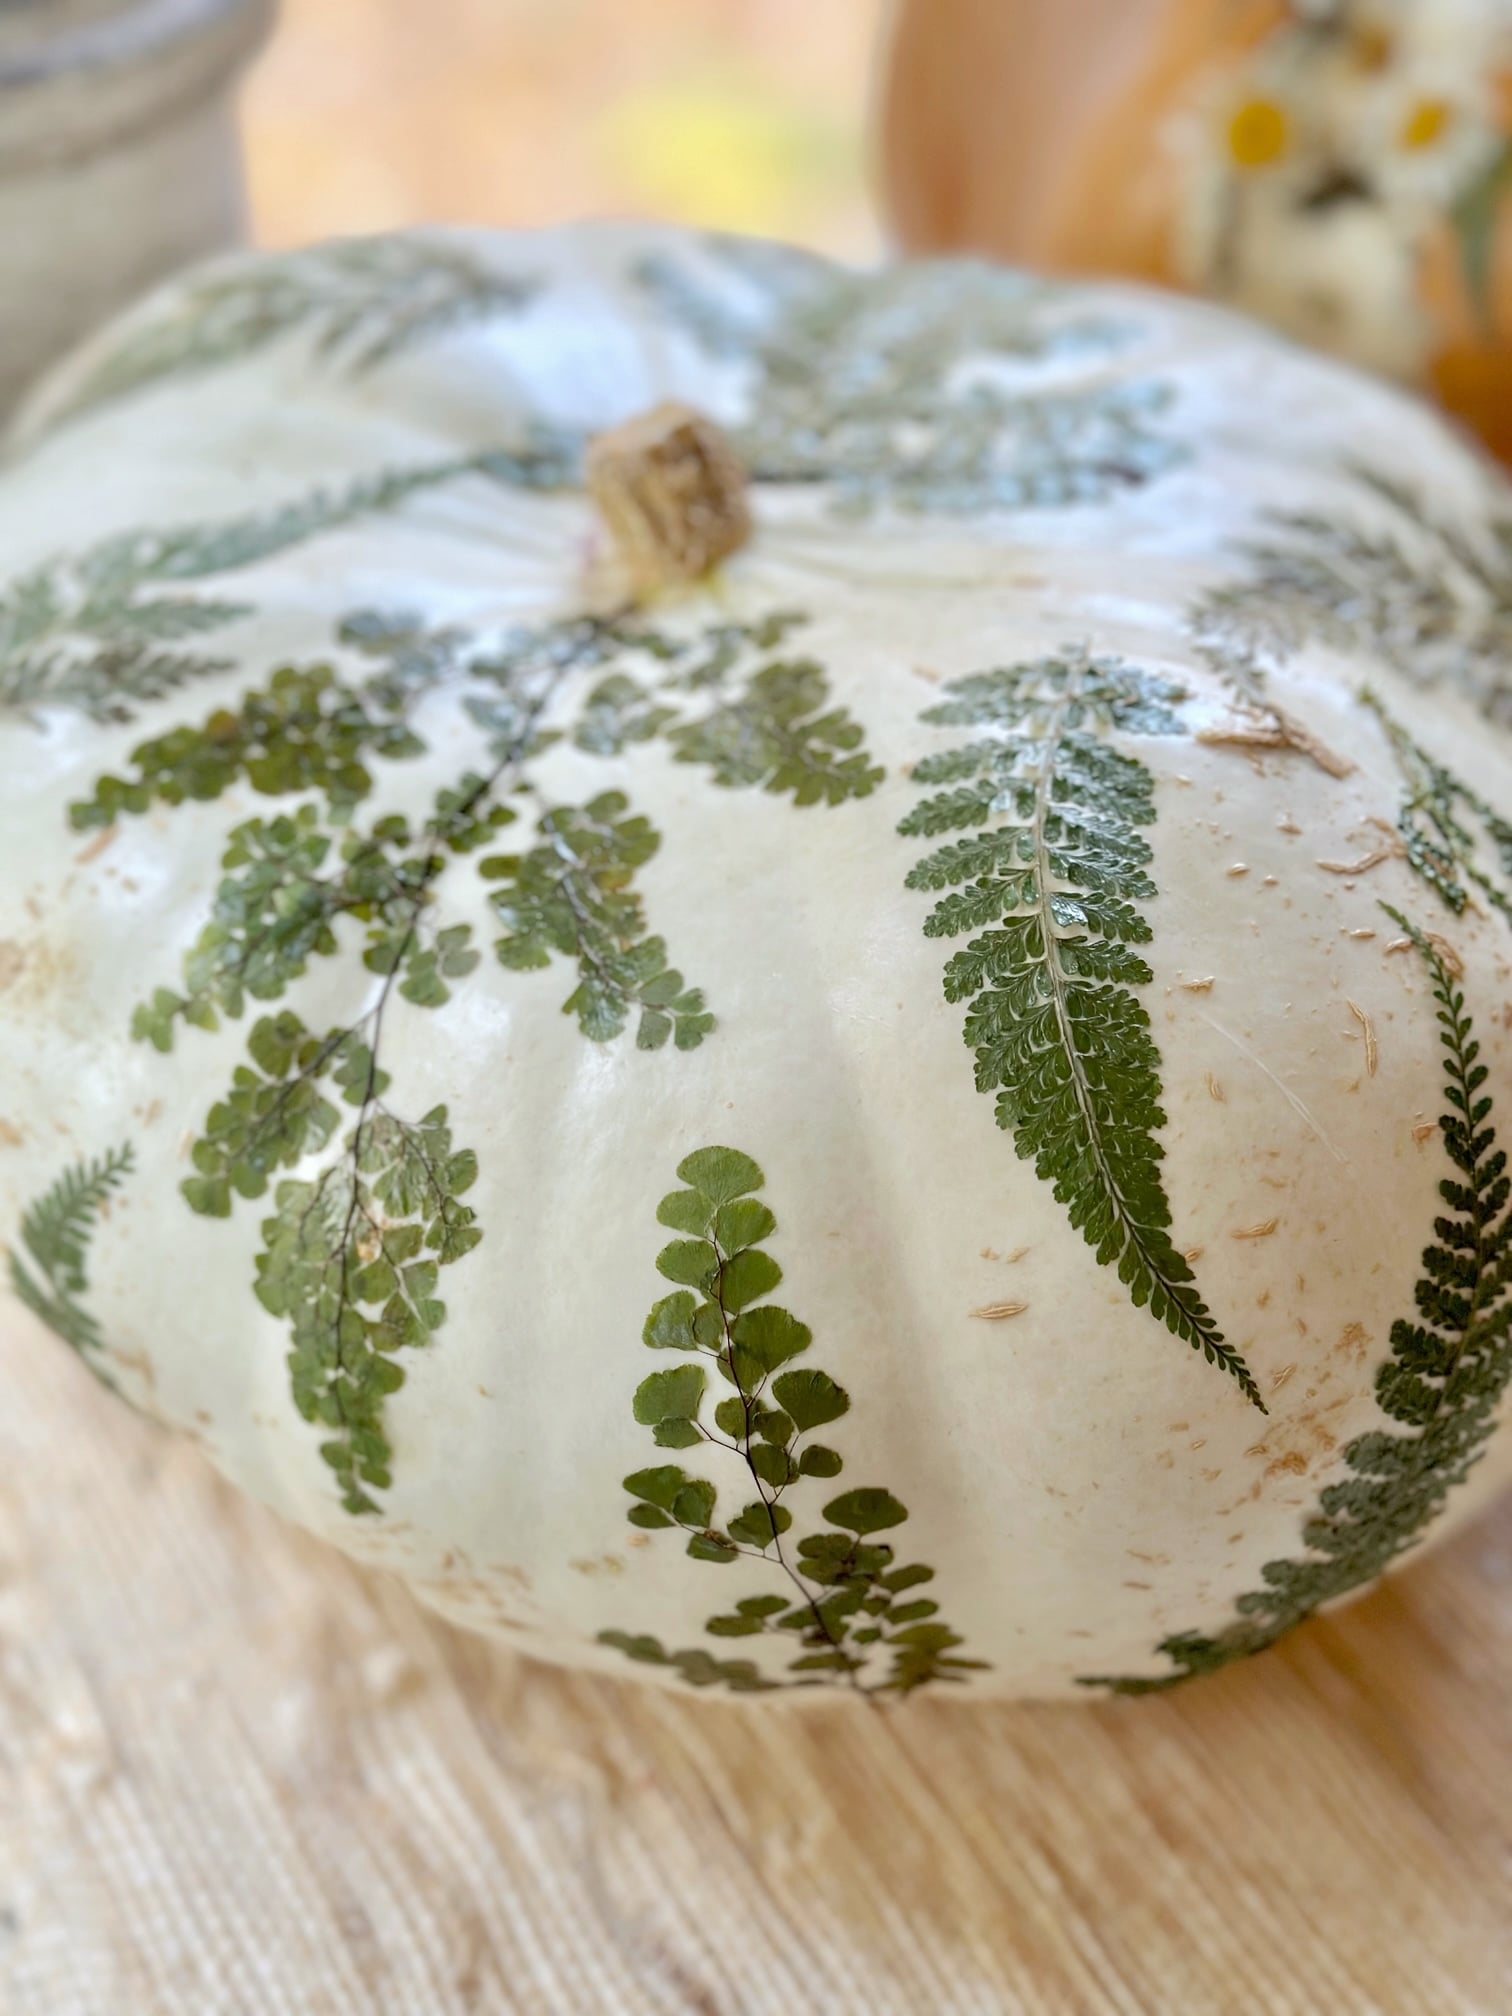
Botanical fern pumpkin
For a simple botanical look, cover your pumpkin with pressed fern fronds instead of flowers. The delicate texture creates an elegant, nature-inspired design that's beautiful on white pumpkins and pairs perfectly with other neutral fall decor.
Wreath around the stem
Arrange flowers in a loose circle around the top of the pumpkin to create a floral wreath effect. This design works especially well on pumpkins that will be viewed from above, such as coffee table or dining table centerpieces.
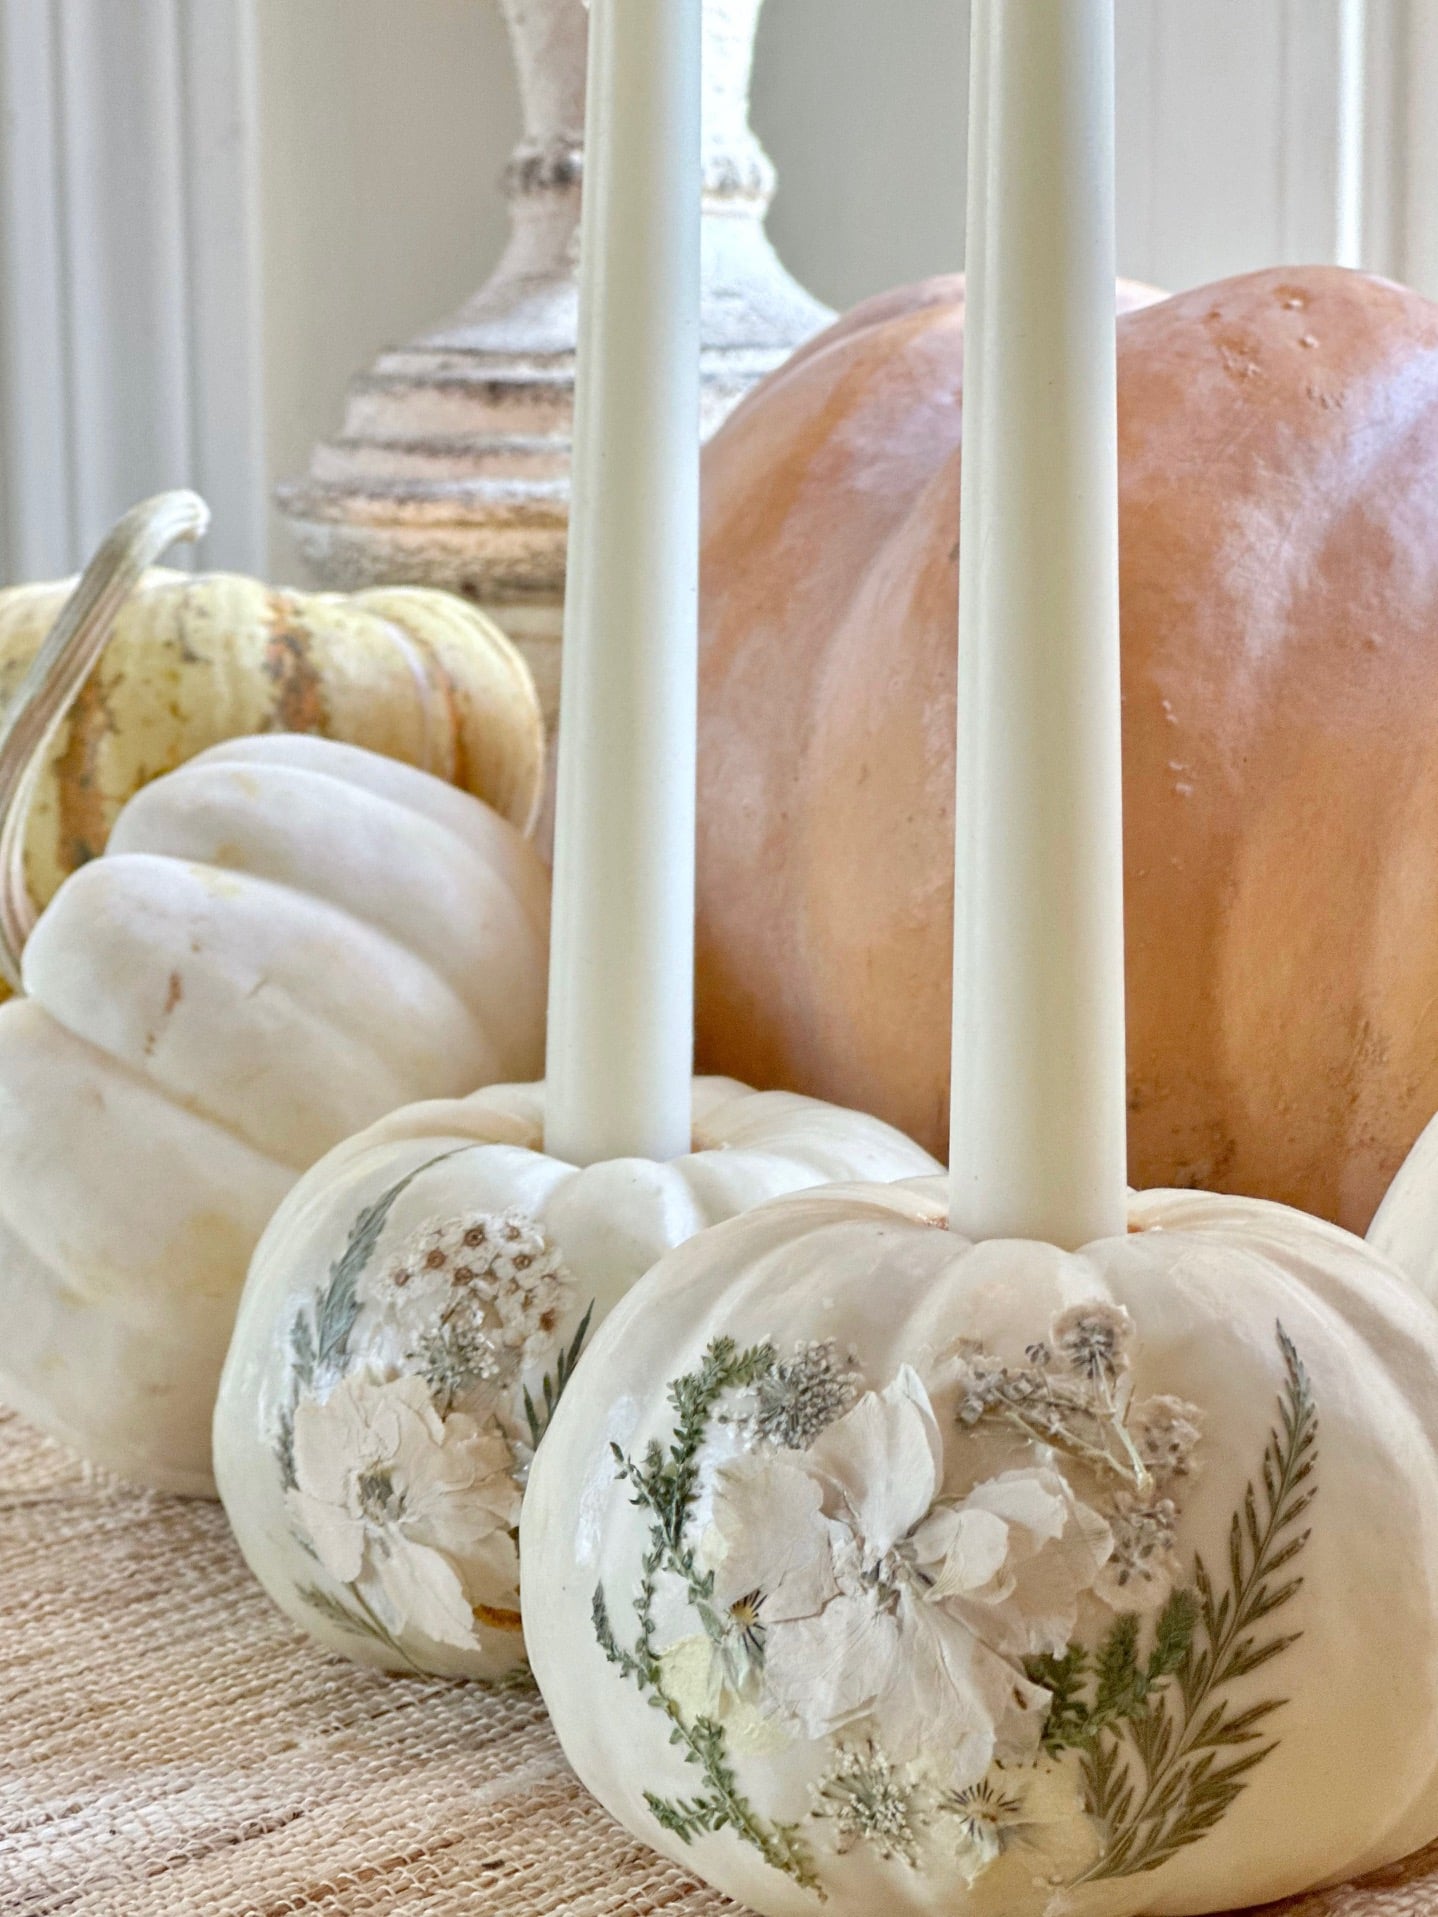
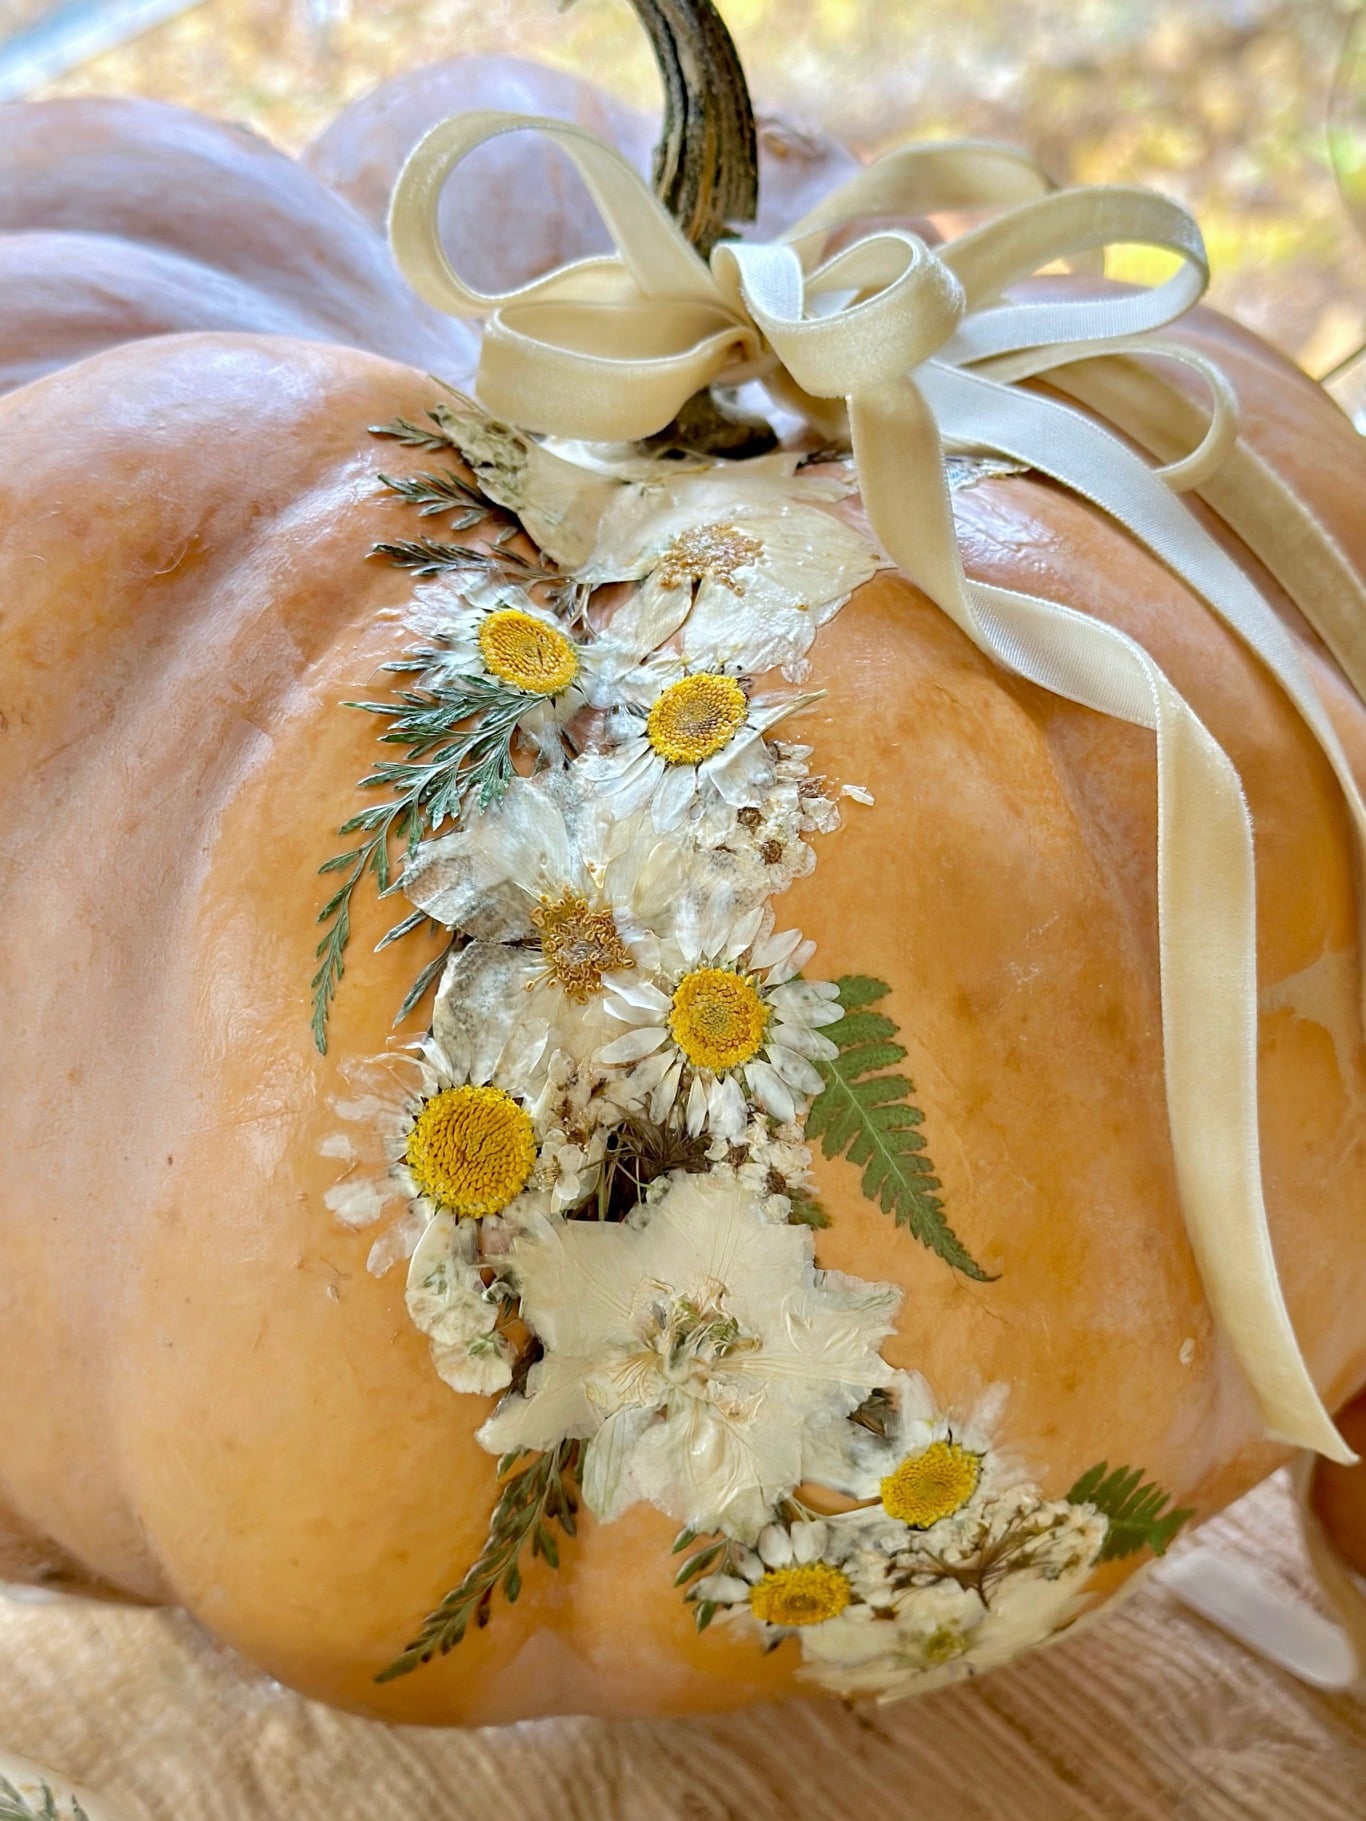
Floral cascade
Create the look of flowers gently spilling down one side of the pumpkin by starting with a cluster near the stem and gradually tapering the blooms toward the bottom. Mixing flowers with small sprigs of greenery gives the arrangement a soft, garden-inspired feel.
Scattered botanical blooms
For a simpler, more modern look, space individual flowers and pressed leaves evenly around the pumpkin instead of clustering them together. Leaving plenty of white space allows each bloom to stand out and gives the finished pumpkin a lighter, more contemporary feel.
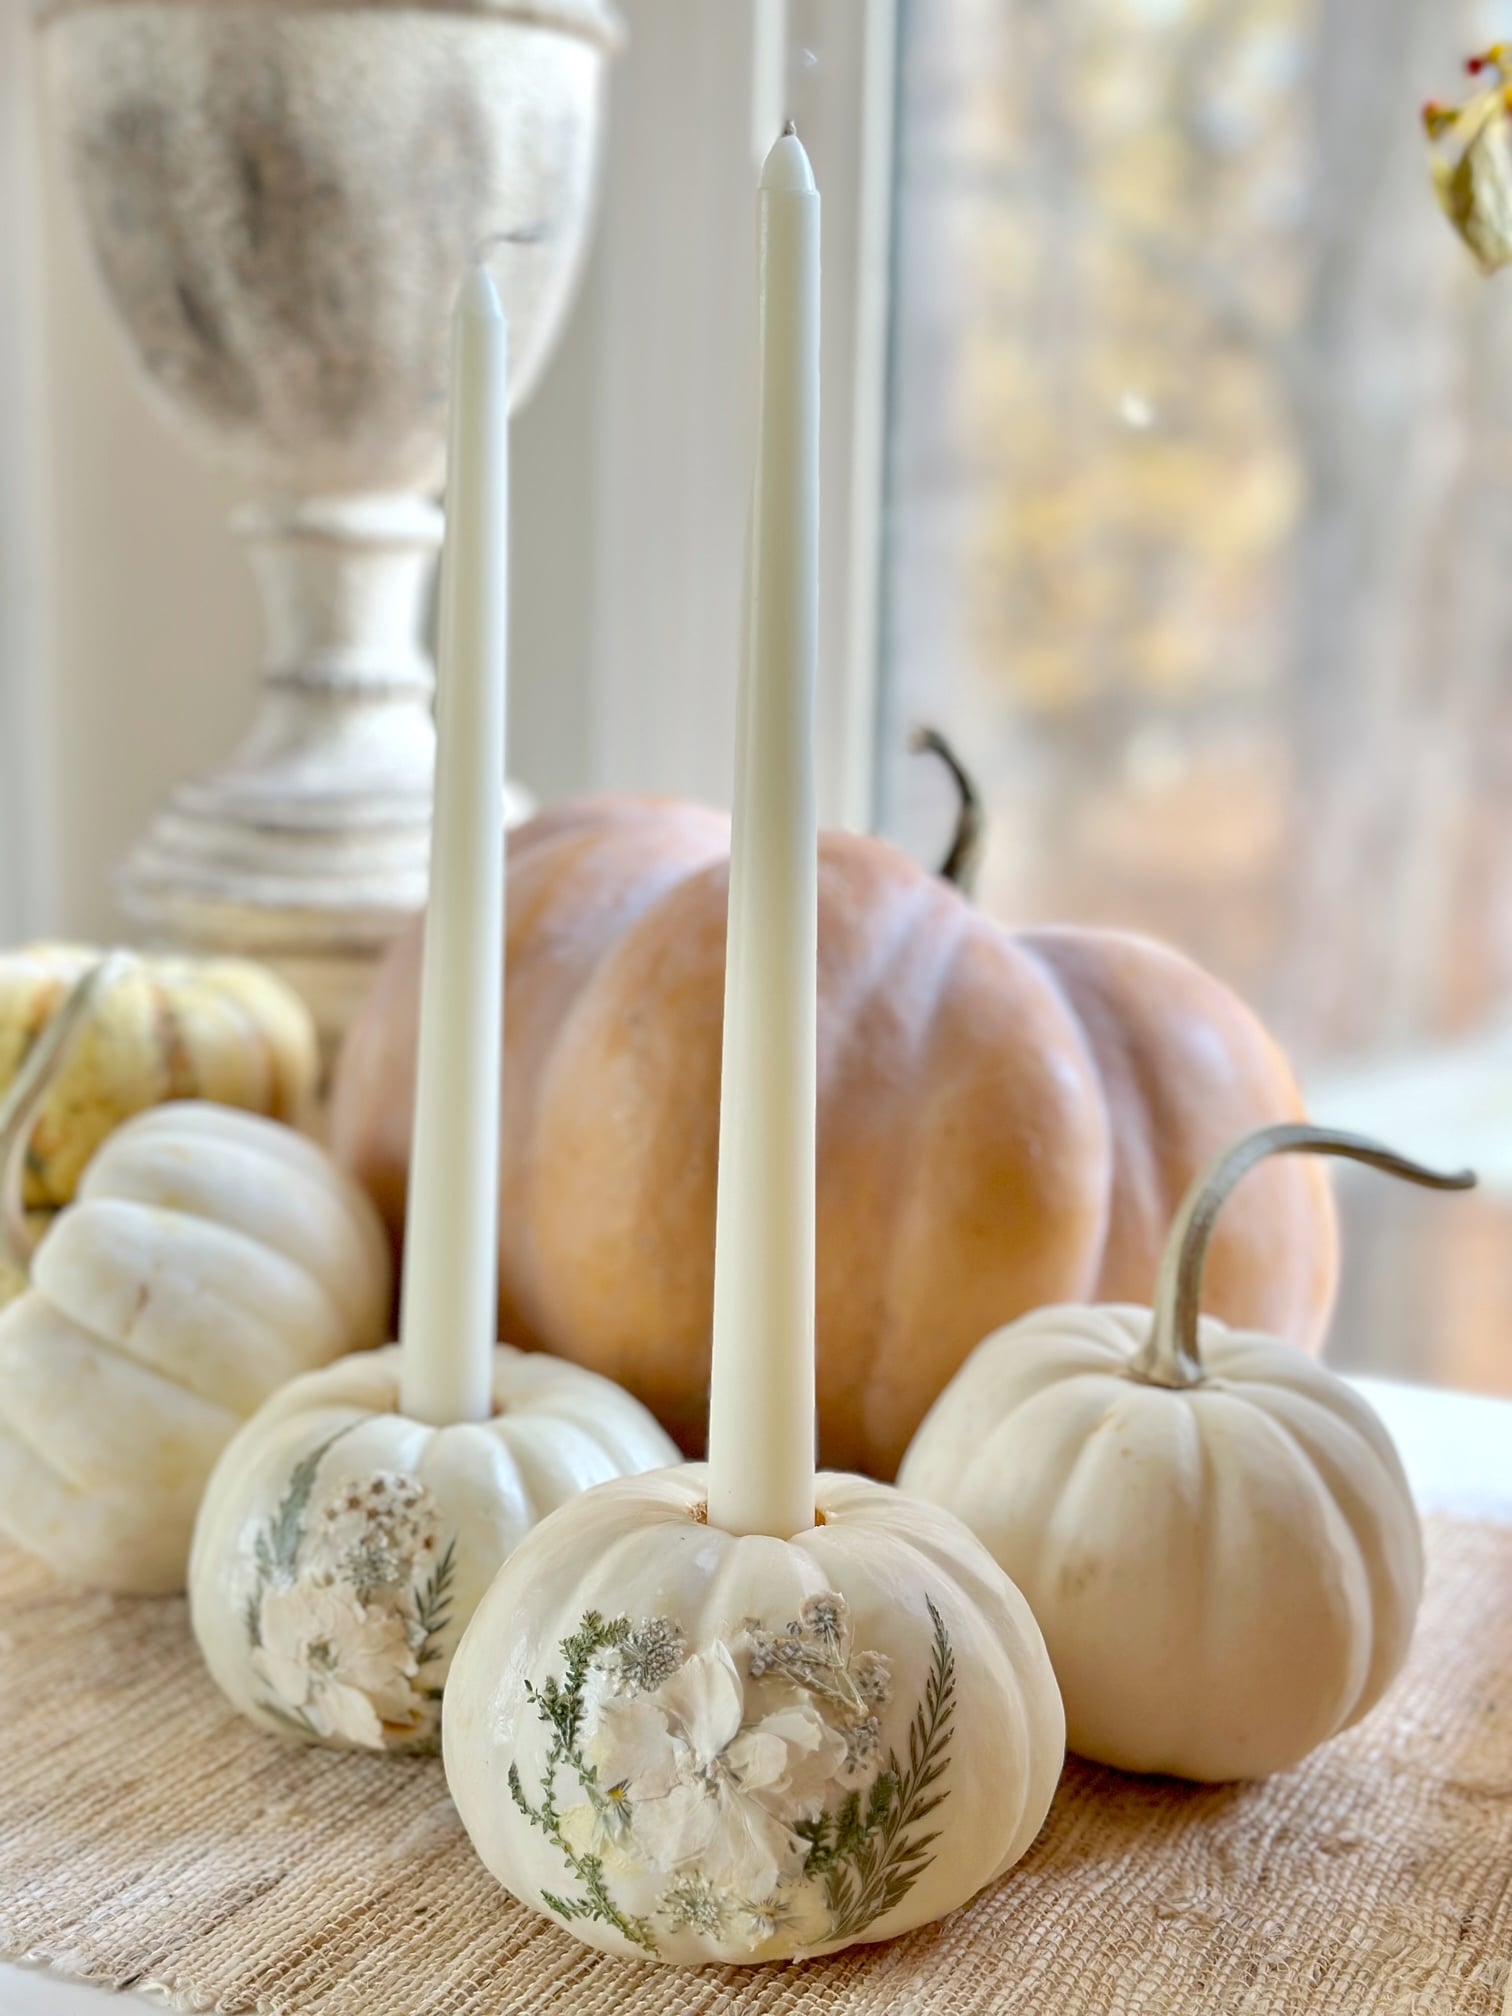
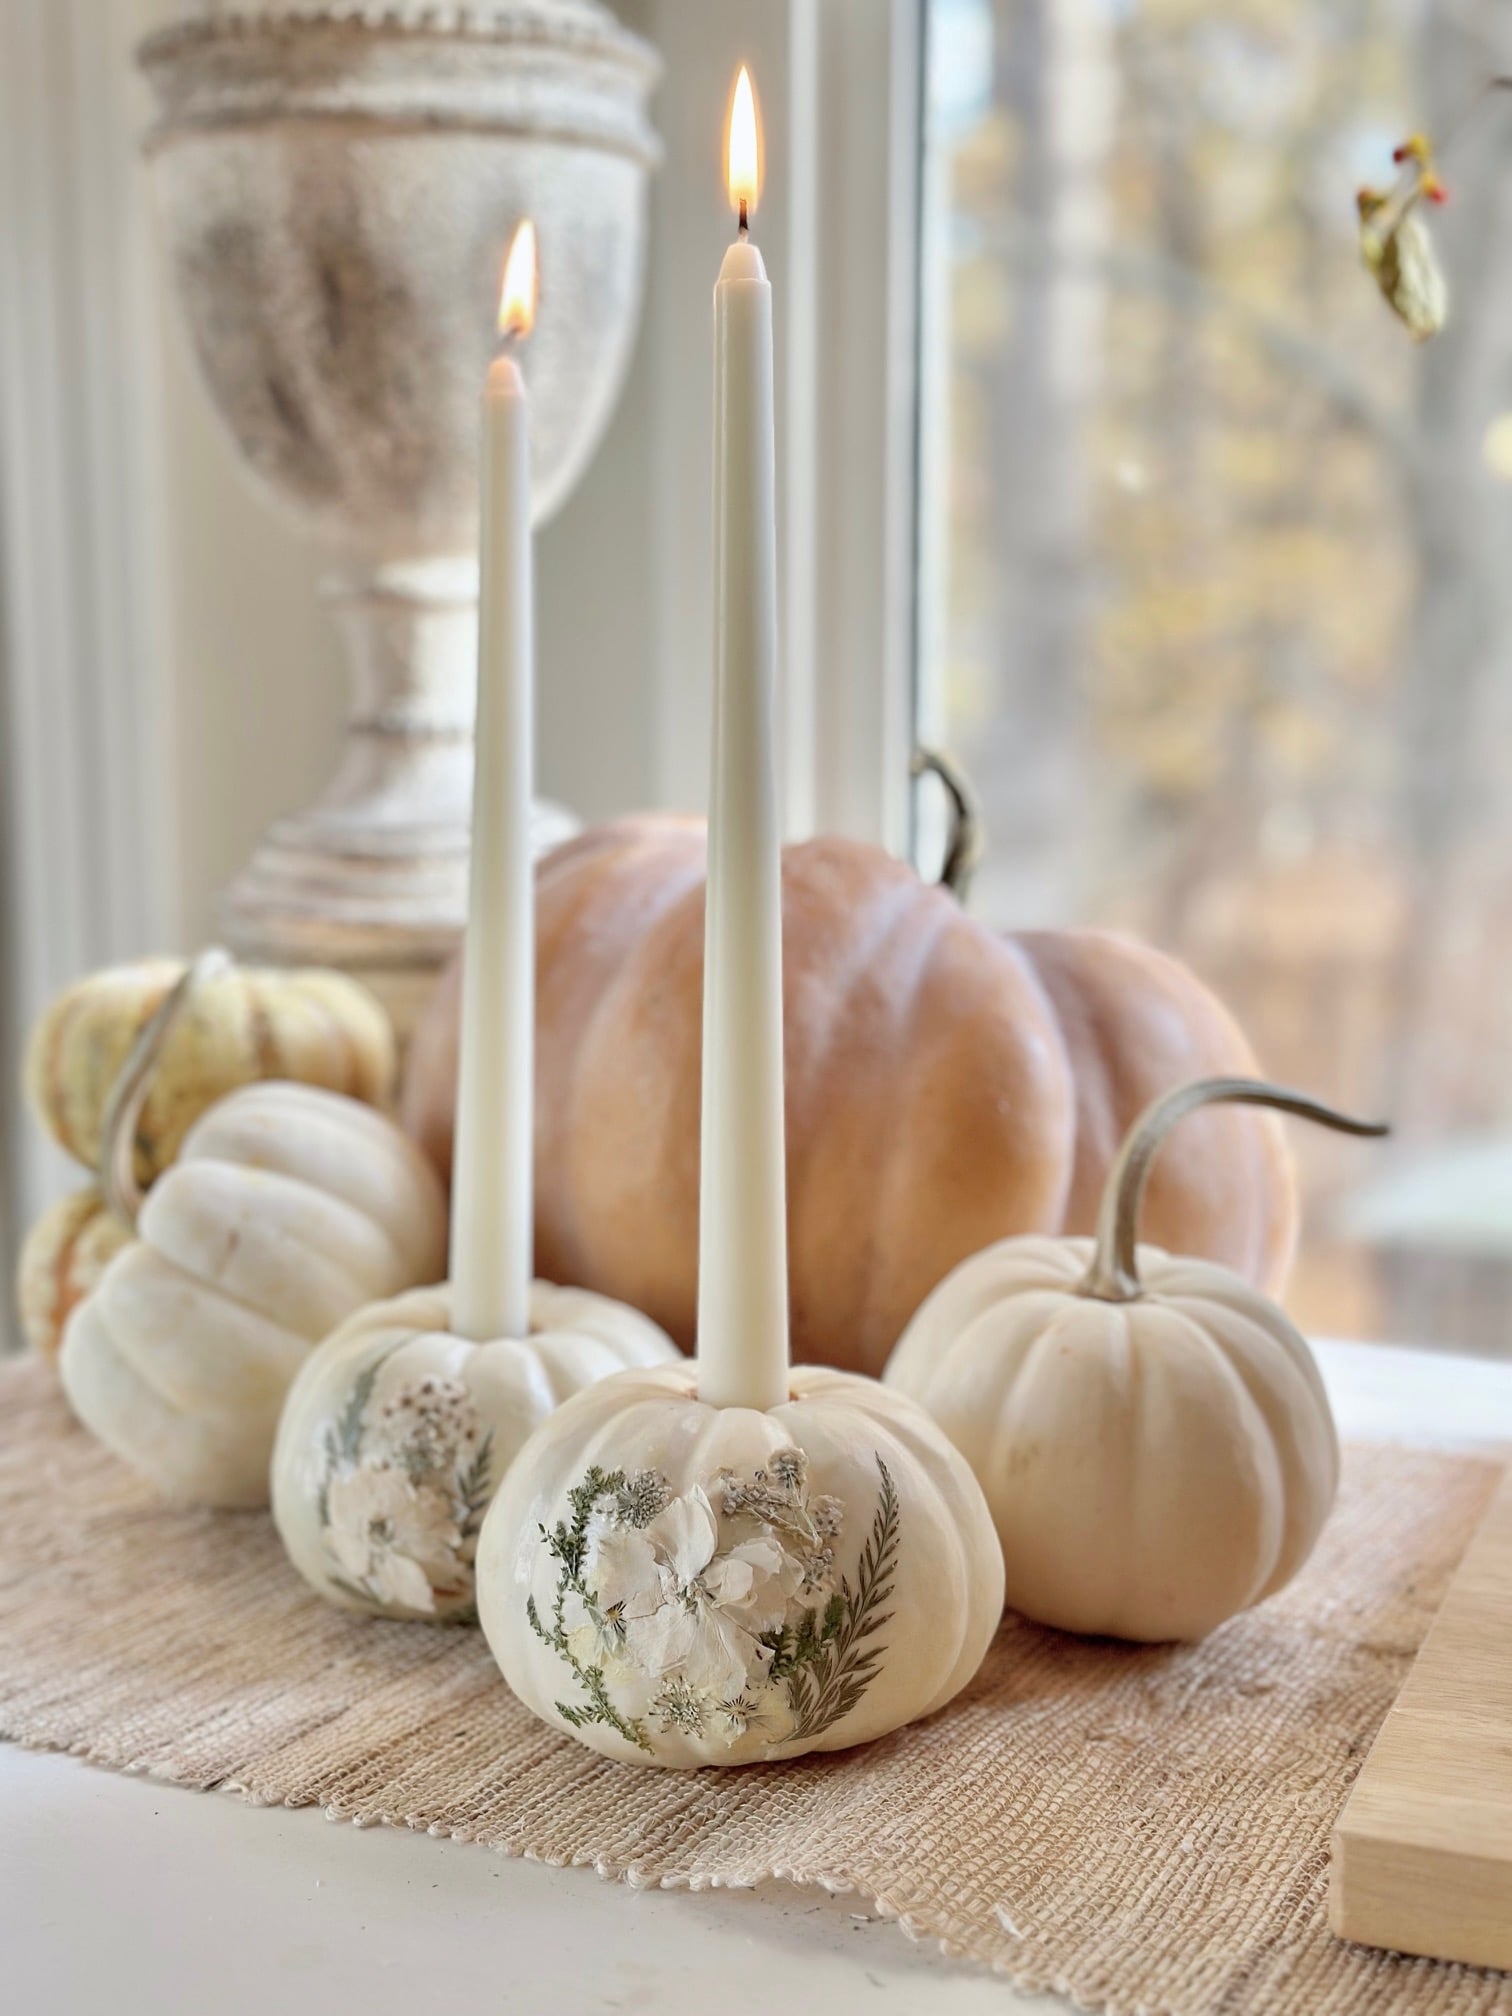
How to display pressed flower pumpkins
Pressed flower pumpkins are beautiful on their own, but they become even more striking when grouped together. I love displaying several mini pumpkins as a dining table centerpiece or mixing a larger statement pumpkin with plain white pumpkins for a layered fall arrangement.
For an organic, collected look, pair them with dried grasses, branches, or preserved seed pods. If you're displaying fresh pumpkins outdoors, place them on a covered porch away from direct sunlight and rain to help them last longer.
Taking care of your pumpkins
Keep your pressed flower pumpkins looking good by displaying them in a cool, dry spot away from direct sun. For outdoor display, tuck them under a covered porch to protect from rain. Fresh pumpkins will last a few weeks with proper care, while faux ones can be stored and enjoyed year after year.
Frequently asked questions
No. Fresh flowers contain too much moisture and will wilt quickly once they're attached to the pumpkin. For the best results, always use pressed flowers or dried botanicals. They adhere smoothly with Mod Podge and will keep their shape and color much longer.
Yes, but how long they last depends on the pumpkin you use. Fresh pumpkins typically last several weeks when displayed in a cool, dry location away from direct sunlight and rain. If you'd like to enjoy your design year after year, use a faux pumpkin instead.
Absolutely! Faux pumpkins work just as well as fresh pumpkins and are a great option if you want to reuse your pressed flower pumpkin each fall. They're also lighter, easier to store, and don't require worrying about the pumpkin eventually breaking down.
I recommend using Mod Podge because it works as both the adhesive and the protective topcoat. Apply a thin layer to the pumpkin, gently place the pressed flower, then brush another light coat over the top to seal it in place. Thin coats dry clearer and help prevent wrinkles or bubbles.
Love pumpkin crafts? We have several projects on the blog: make a warm Candle in a Pumpkin for evening ambiance or design elegant Decoupage Pumpkins with your favorite patterns. Host a flower pumpkin workshop! Invite friends over to create pressed flower pumpkins together. I share more party hosting ideas in my Painting Pumpkins Party post.


This fun craft is such a great way to bring a touch of nature to your fall decor. Whether you choose real pumpkins like I did or want to try this on faux pumpkins, the process is the same. The best part? Each pumpkin becomes its own unique work of art, adding a touch of elegance to your autumn display.
I've loved seeing how this project has taken off on TikTok, with crafters adding their own creative spins. From mini pumpkins to larger ones, each design brings that lovely bohemian feel to traditional fall decorating. If you make your own pressed flower pumpkins, I'd love to see how they turn out!
Happy crafting, friends!