

How to Create a Lily Flower Arrangement That Works as a Statement Centerpiece
To create a lily flower arrangement that feels elevated, begin with a shallow container and a firm floral foam base. Long lily stems are grouped together and secured so the flowers rise above the base in a single focal form. This approach allows the blooms to open fully, keeps the design balanced, and creates a centerpiece that looks intentional rather than crowded.
Content may contain affiliate links. When you shop the links, we receive a small commission at no cost to you. Thanks for supporting my small business.
Lilies are bold, dramatic flowers, but arranging them does not have to be complicated. With the right structure, a few supplies and a few simple techniques, you can turn long stemmed lilies into an elegant, statement arrangement that feels intentional and balanced. This design uses a shallow base, floral foam, and long stems gathered into a clean focal shape, allowing the blooms to open fully and take center stage.
Once you understand how to work with cut lilies, everything becomes easier. From choosing stems that will open on schedule to removing pollen so it does not stain your table linens, small details make a big difference. This approach keeps the arrangement polished and long lasting while still being simple enough to recreate at home.
Jump to:
If you have been following me on social media or here on the blog, it is no secret that I love floral design. I actually had my own floral design business for years, creating fresh flower arrangements for weddings and events.
I have always preferred working with real flowers, but as a floral designer I am happy to practice with faux stems too. Today I am taking you step by step through a lily flower arrangement using fresh lilies, with the same design working just as well with faux lilies if that is what you have on hand.
Best tips for choosing the perfect lilies
Boy is it tempting to buy a big bunch of full-blown beautiful Lilies! They're so beautiful, right?? But wait...that is not always the best idea for a few reasons. Let's discuss:
First, buying lilies in bloom will ensure a shorter lifespan - best to get them closed or with the blooms just starting to open for a longer-lasting bouquet.
Second, lilies in full bloom can be delicate flowers, and getting them home without damaging them can be challenging. Bought in full bloom you are sure to lose a bloom or two along the way.
Lastly, grocery stores and flower markets rarely remove the stamen once the lilies open so often you will see blooms already stained from the orangey pollen. (more on this below)
Pro Tip: Purchase lilies that are still in bud form 3-5 days before you are ready to design with them, this will ensure you bought the freshest flowers.
Flower preparation
Step 1: Bringing the lilies home
I resisted the urge to buy open lilies and instead opted for 2 bunches (3 stems each) of tight, closed lilies, one of my favorite flowers, from our local grocery store. They were $5.99 per bunch. Lilies are luckily available year-round in most stores. As I mentioned previously, on the day I purchased them, the blooms were closed tight, meaning the flower buds had not started opening yet. Having worked with lilies many times in the past, I knew that within a few days they would start blooming.
Once I got the lilies home, I filled a pitcher with cool water and added the included floral food sachet. To prep the flowers, I stripped away any foliage that would sit under the water line and, using my floral knife, trimmed the flower stems at an angle as close to the base as possible. This design requires long stems, so I cut them as long as I could.
Pro Tip: Warm water helps the lilies open faster. Simply follow the steps above but place the stems in warm water.
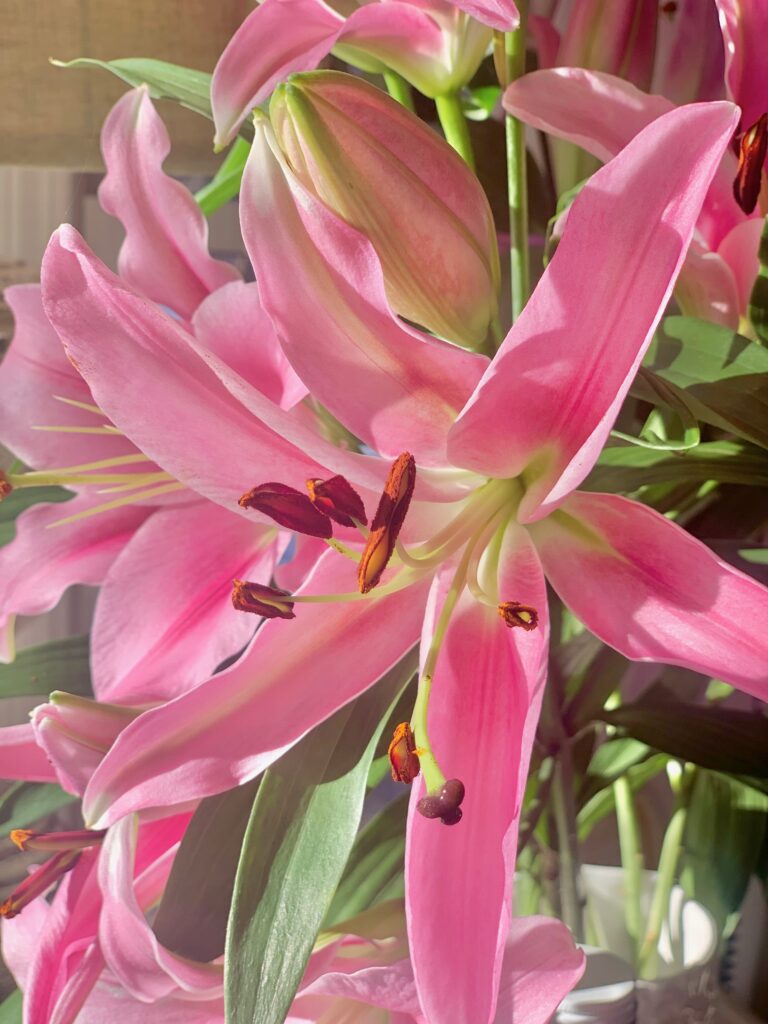
Step 2: Once the lilies begin to bloom
Over the course of the next few days, the lilies will begin to bloom. You will notice the Stamen which consists of the Anther and Filament as they open. These are parts of the reproductive system of the flower.
As the blooms open, usually one by one, I make sure to remove the Anther as this keeps the orange powdery coating from dropping on the petals of the flower. This powder stains the petals and can stain anything else it touches (i.e. clothing, table cloths, etc) so best to remove them by gently swiping your fingers over to pull them off.
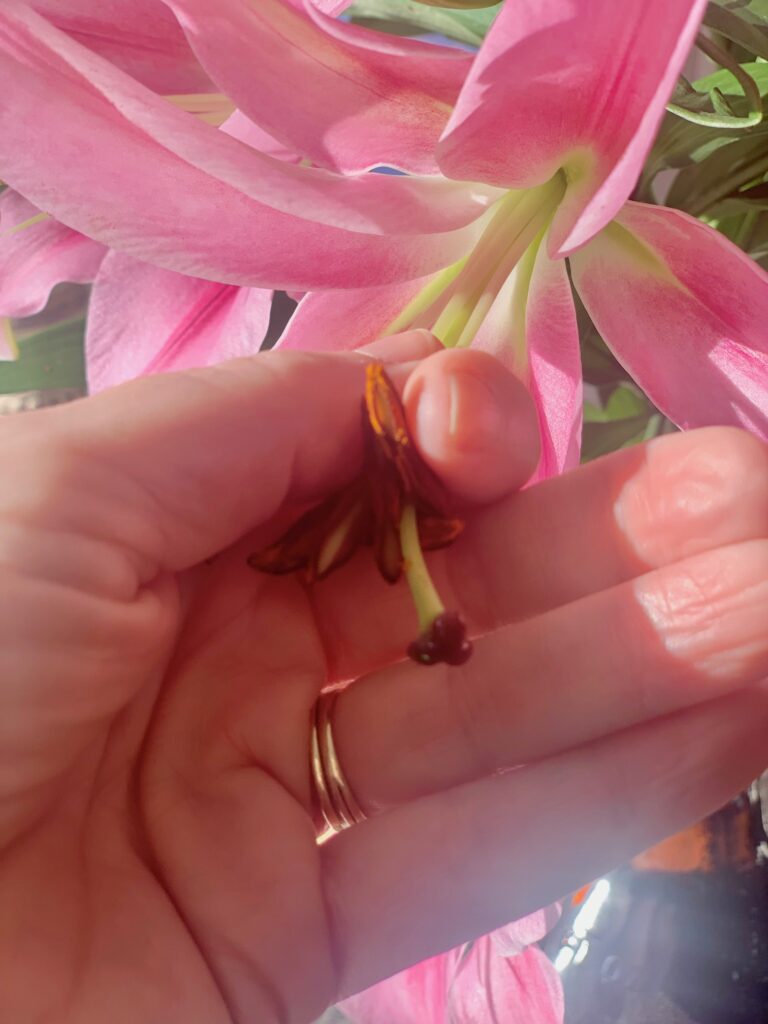
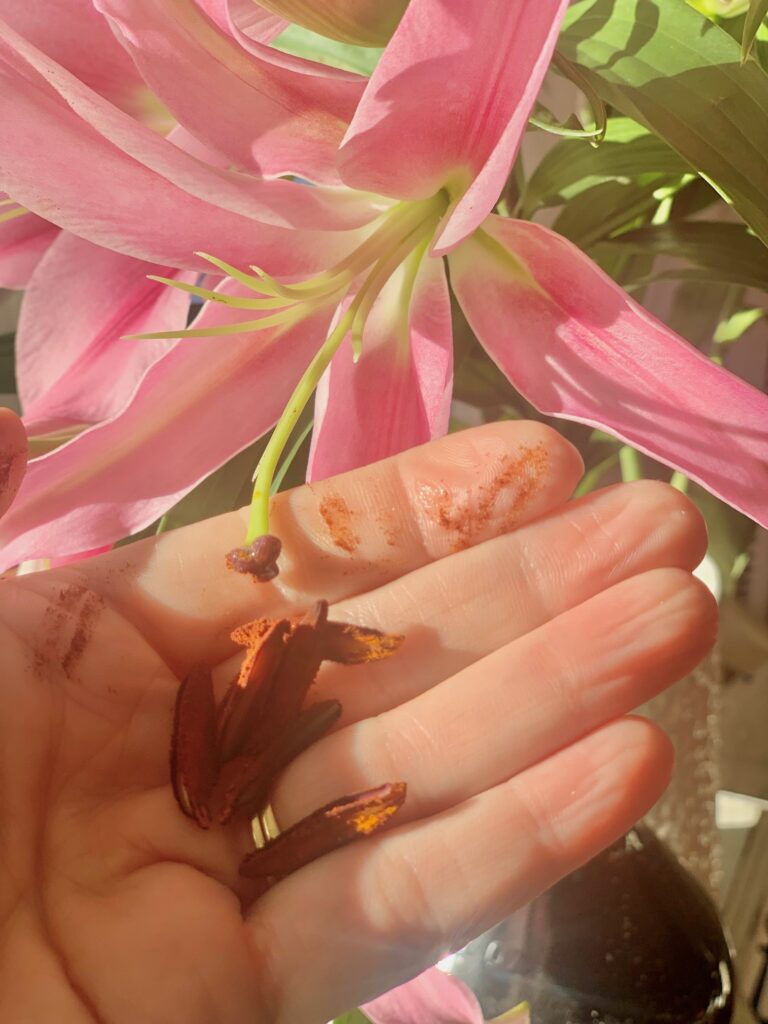
Pro Tip: Removing the anthers does not injure or reduce the life of the cut flower.
Supplies for this design
- 4 stems of Lilies - large oriental lilies work well (i.e. Rubrum Lilies or Casablanca Lilies)
- 1 block of wet floral foam
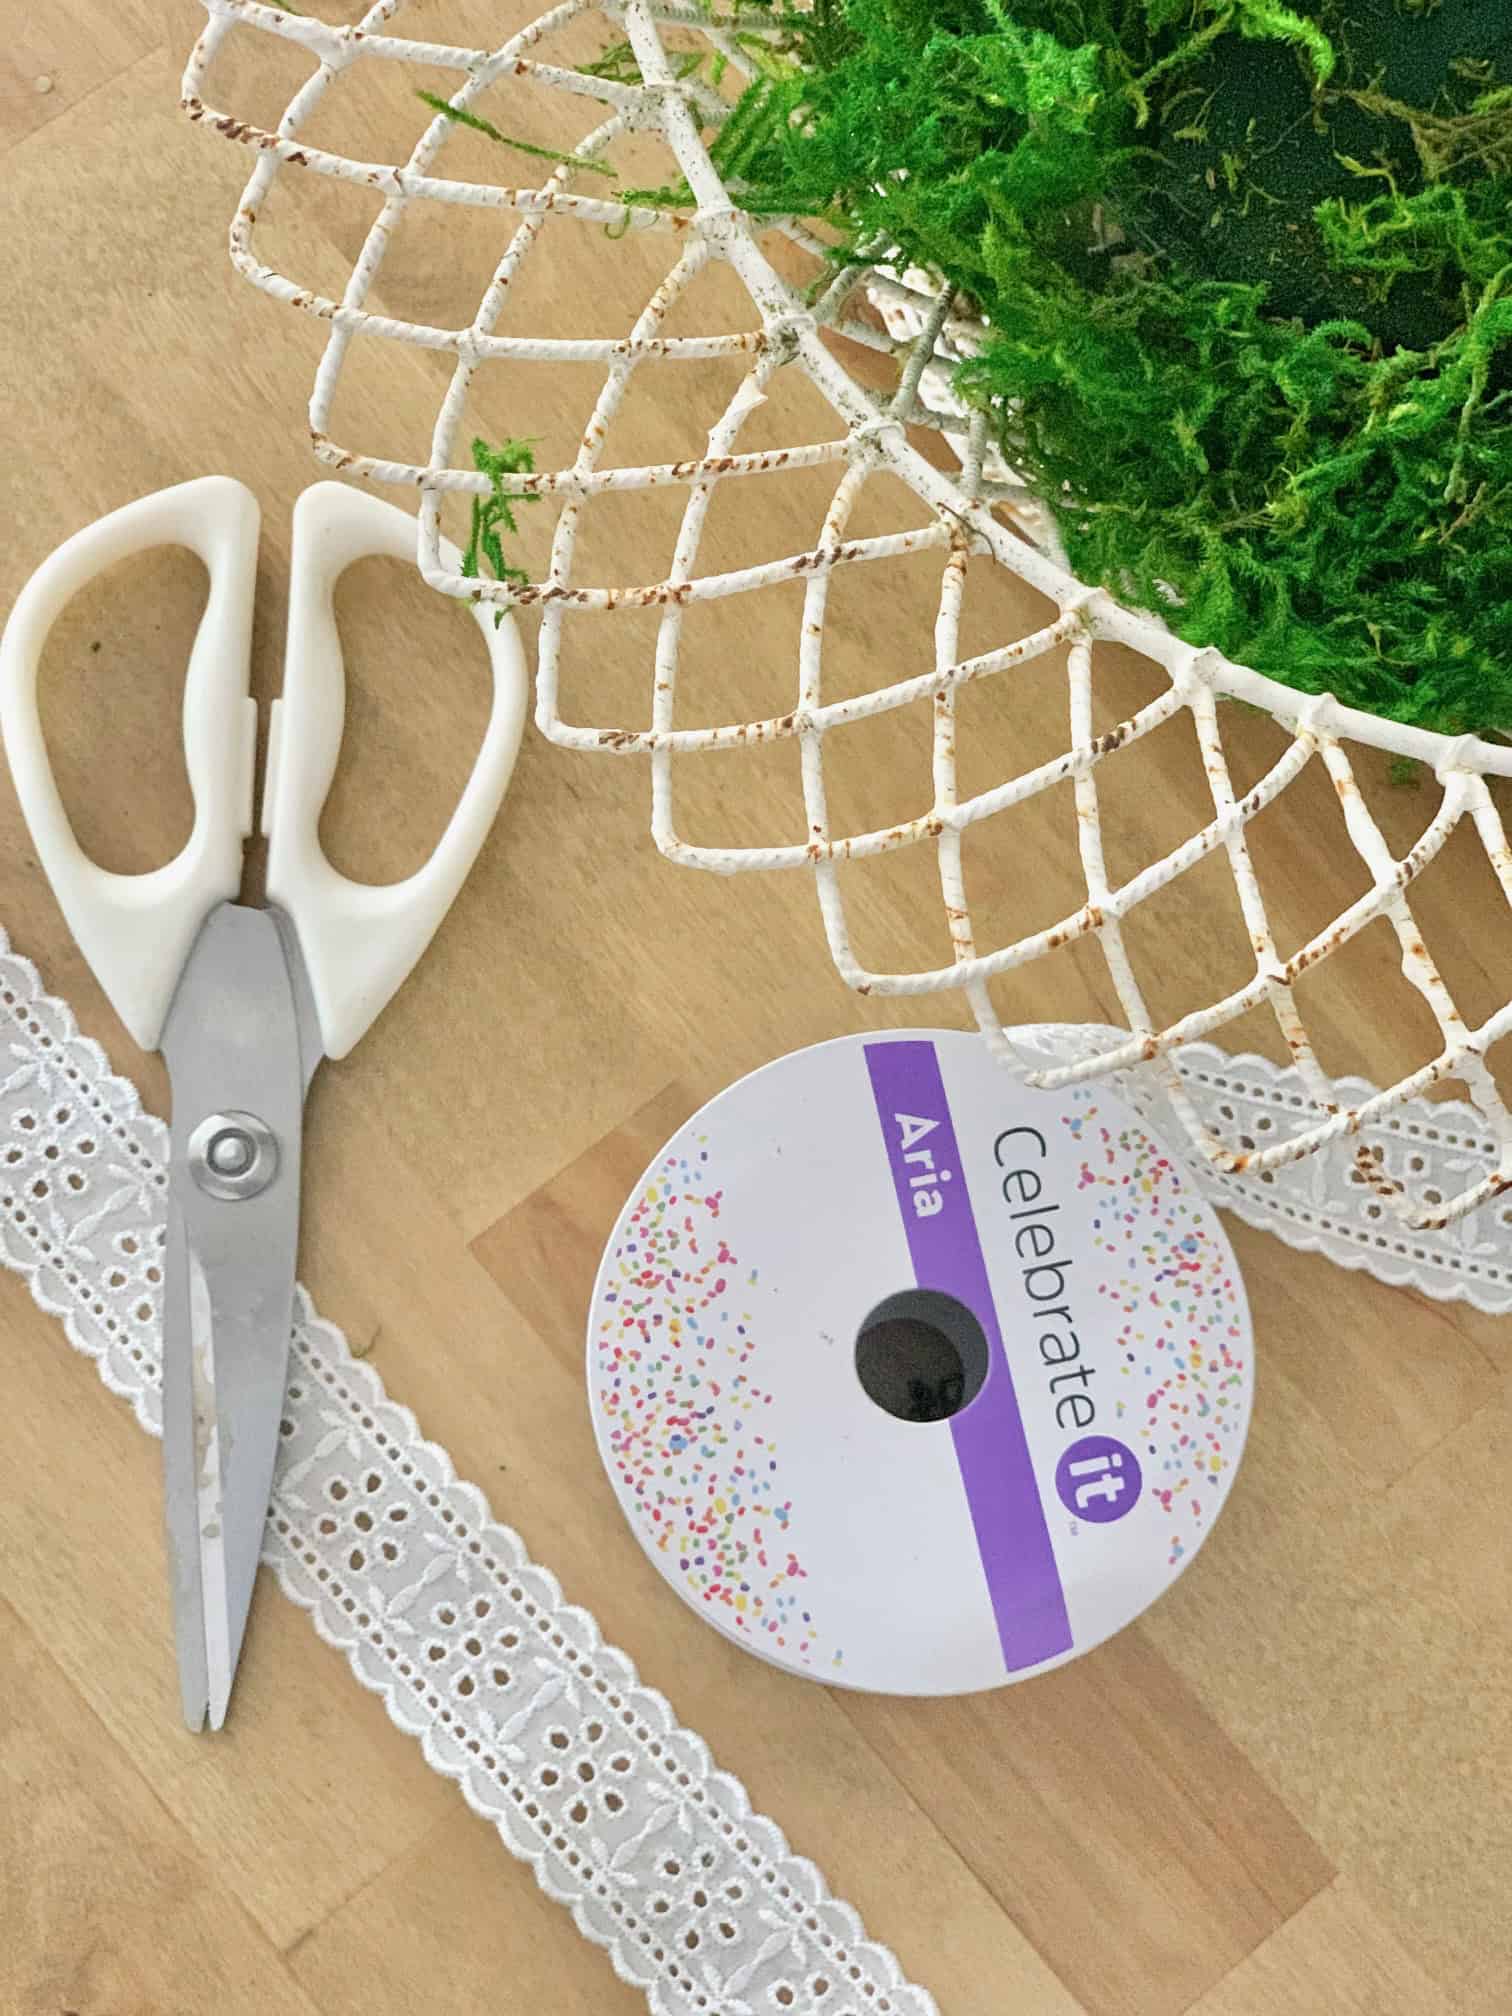
- 1 container - I used a vintage wire bowl with a glass Pyrex dish as a liner
- Floral design knife or scissors
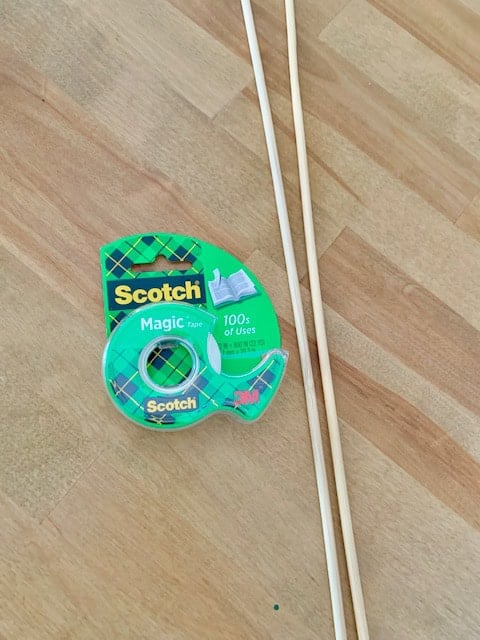
- 2 - 32" S'mores sticks - bought at a local grocery store ( you can also use straight sticks from outdoors )
- 1 pkg of Sheet moss
- Ribbon
- Scissors
- Tape
Interested in floral design? Be sure to check out my 8 Must-Have Flower Arranging Supplies for Your Home to make sure you have what you need!

Variations and special considerations
Different Types of Flowers: Lilies work well for this design but other flowers could work too. You could use a single type of flower like all roses or a mixture of flower types. A combination would offer a variety of textures and you could use bright flowers or something more neutral. For best results fewer large blooms won't make the "stalk" doesn't get too thick. The key is lots of large blooms with few stems!
Fresh or Faux: You can use either! There are some stunning faux Lilies available at your local craft stores. Just remember if making this design with faux flowers be sure to get dry flower foam instead of fresh wet foam.
Container options: This design was made in one of my favorite one-of-a-kind vintage wire baskets. Below I share some other container options.
Shop containers:

How I designed this arrangement
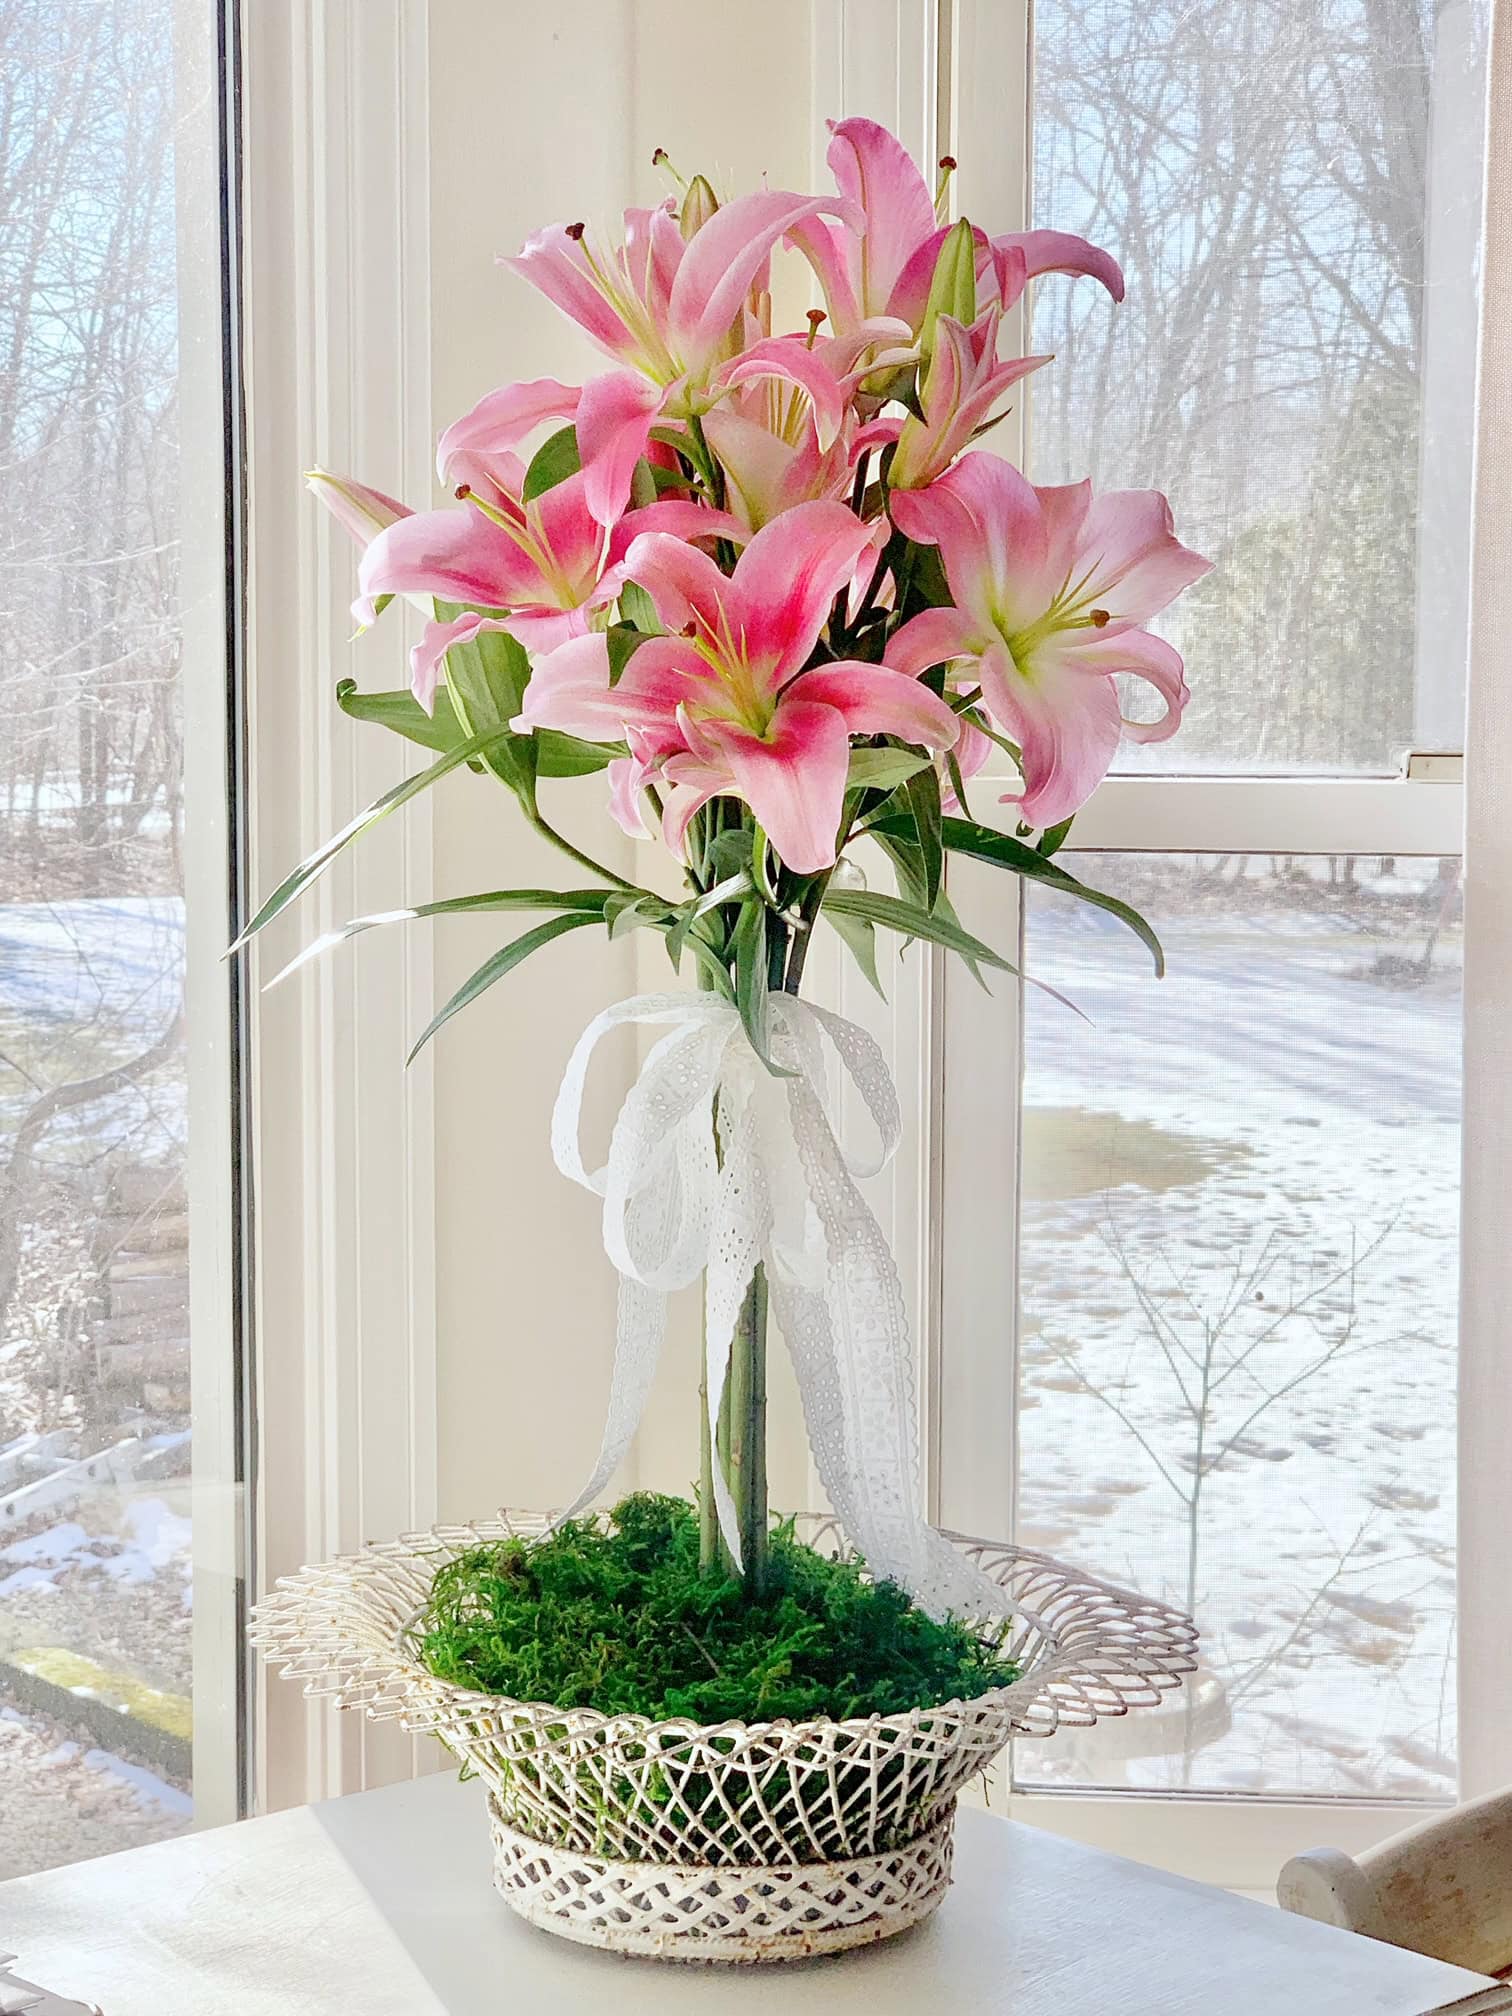
- Setting up the Floral Foam: Once most of the lilies were in full bloom, I was ready to design! The first step was to prepare the container. For this design, I used an old vintage wired bowl that I bought at Off The Common Antiques. Since this bowl does not hold water on its own, I placed a glass pyrex dish that fits right in the center of the wired bowl to create a water reservoir. Next, I soaked a block of floral foam in water and cut it to fit snugly inside the pyrex dish within the vintage bowl.
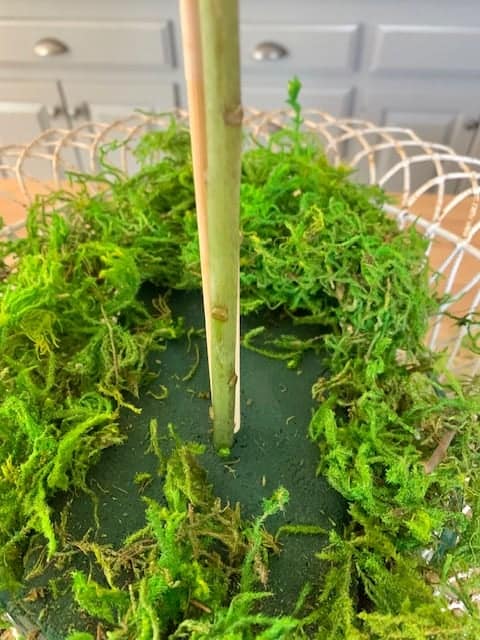
- Cover Foam Base with Moss: I then covered the glass dish and foam completely with moss so that no glass or foam was visible. I left the center portion of foam uncovered for now while arranging in the lilies. Next, I took 2 long sticks and taped them together into a bundle, which will help support the lilies. I pushed this stick bundle into the center of the foam, straight up like a mast.
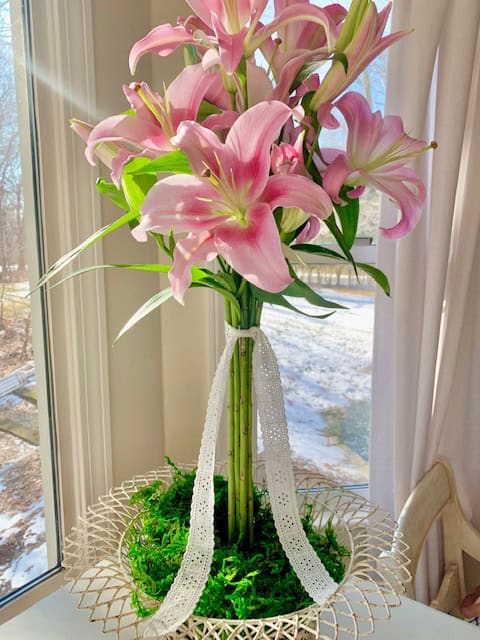
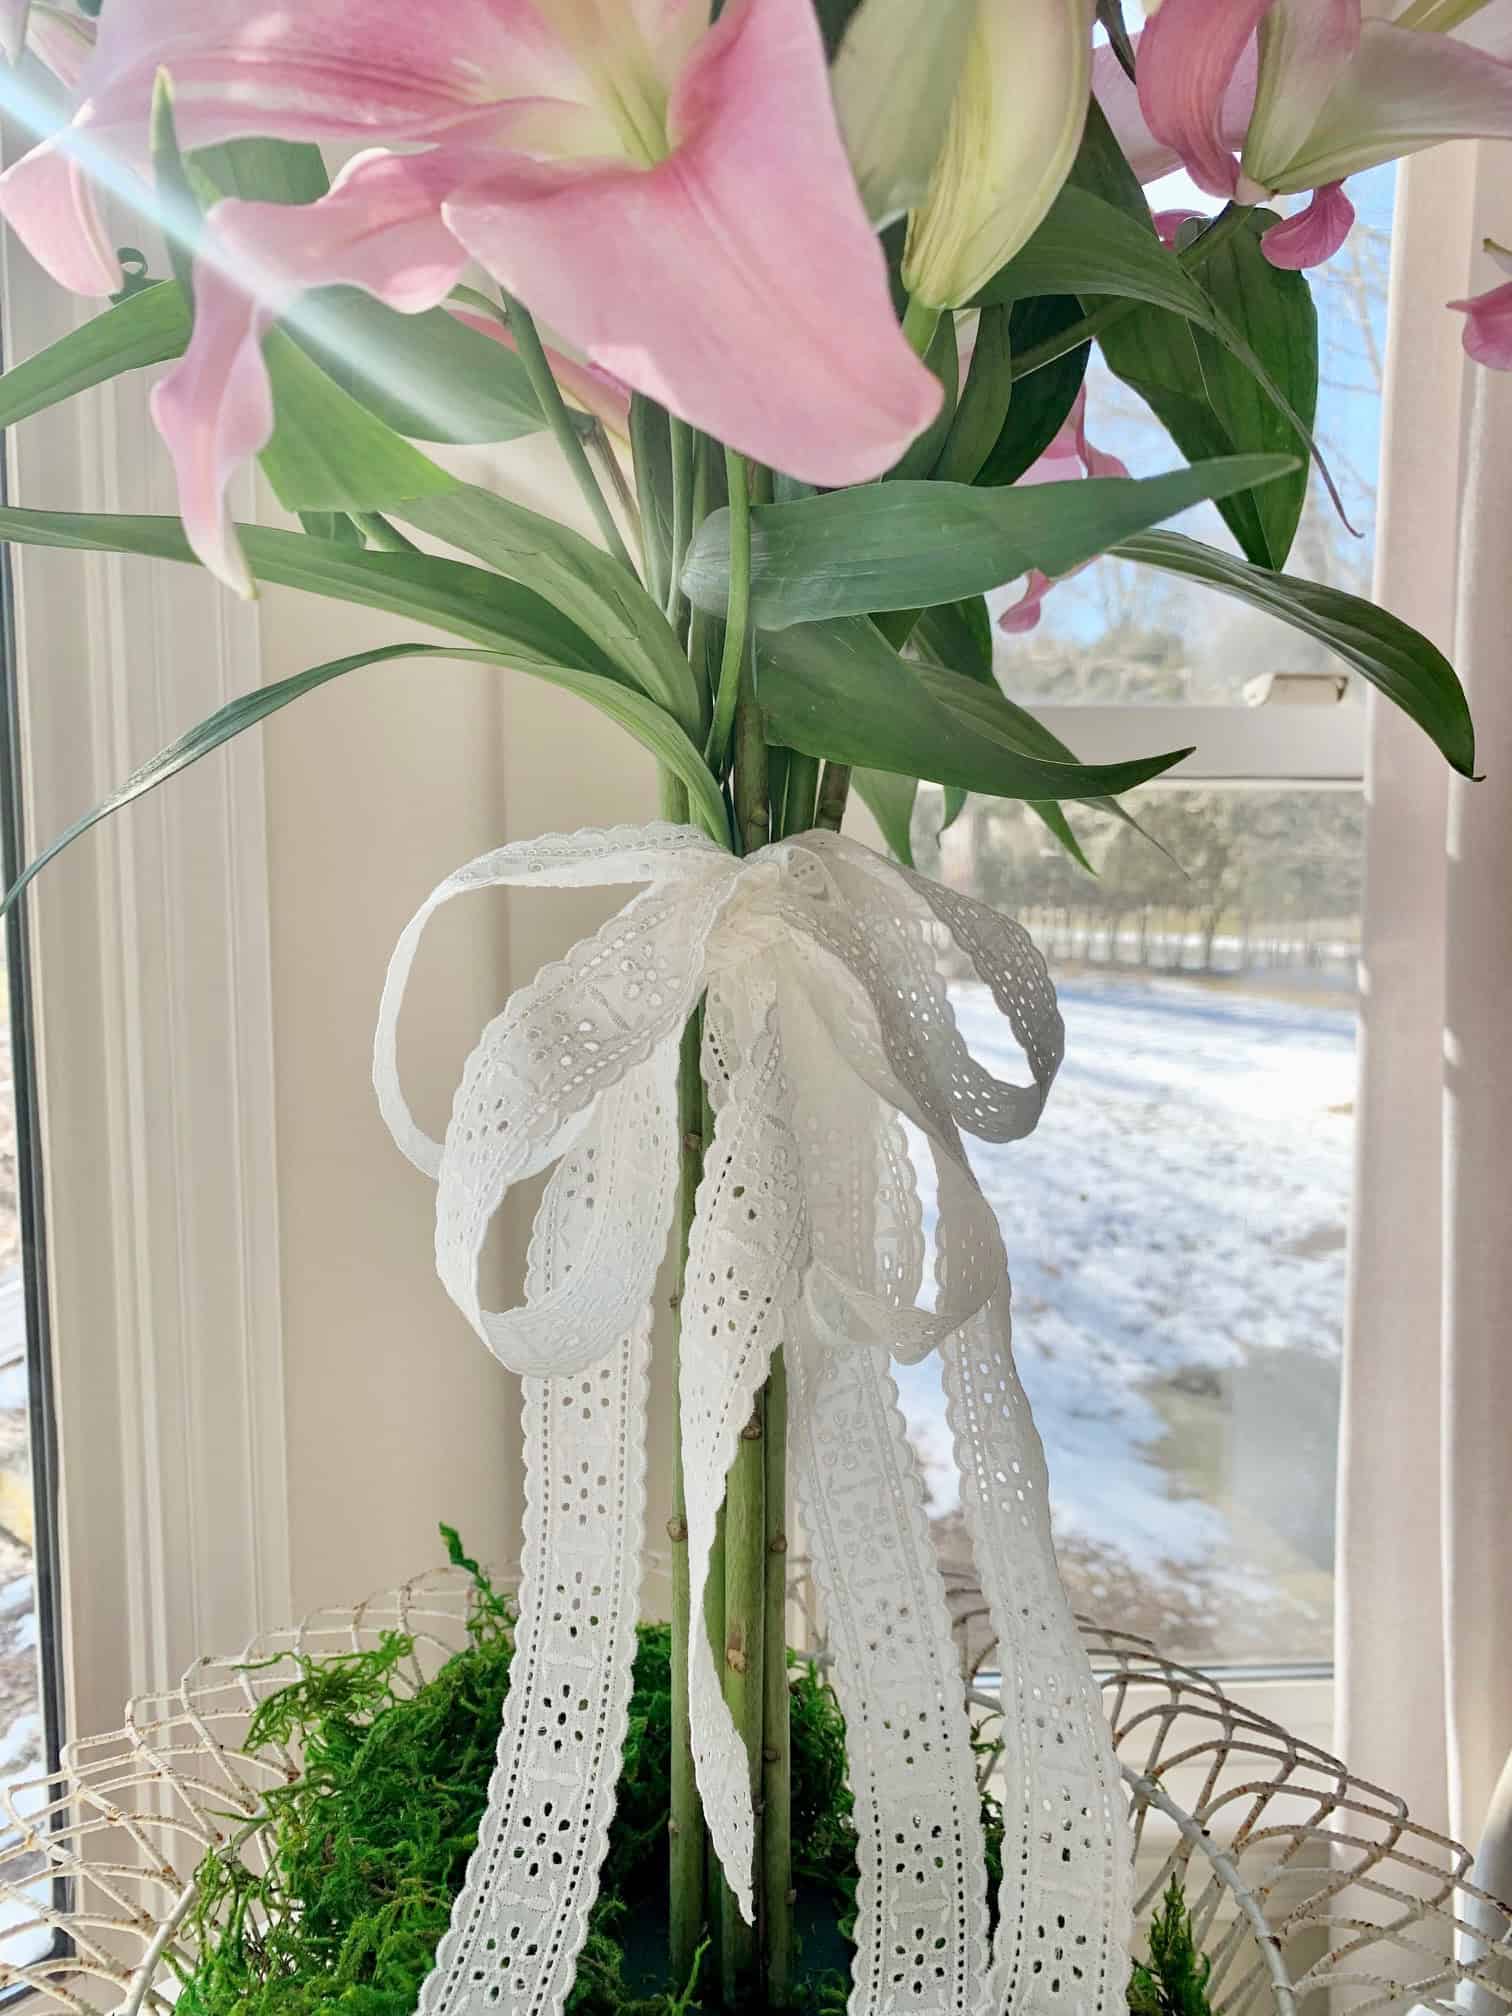
- Add and Arrange Lily Stems: Then, one lily stem at a time, I gave each a fresh cut and placed the stems around the stick bundle, pushing them into the foam. I arranged 4 lily stems evenly spaced in a circle surrounding the sticks, keeping the blooms high since the lilies are the focal point. Lily stems can seem floppy when the blooms are open, but not to worry! Next I tied the stems right under the blooms to the support sticks with a ribbon, finishing with a bow.
- Hide Visible Foam with Moss: Lastly, I filled in any visible foam with additional moss.

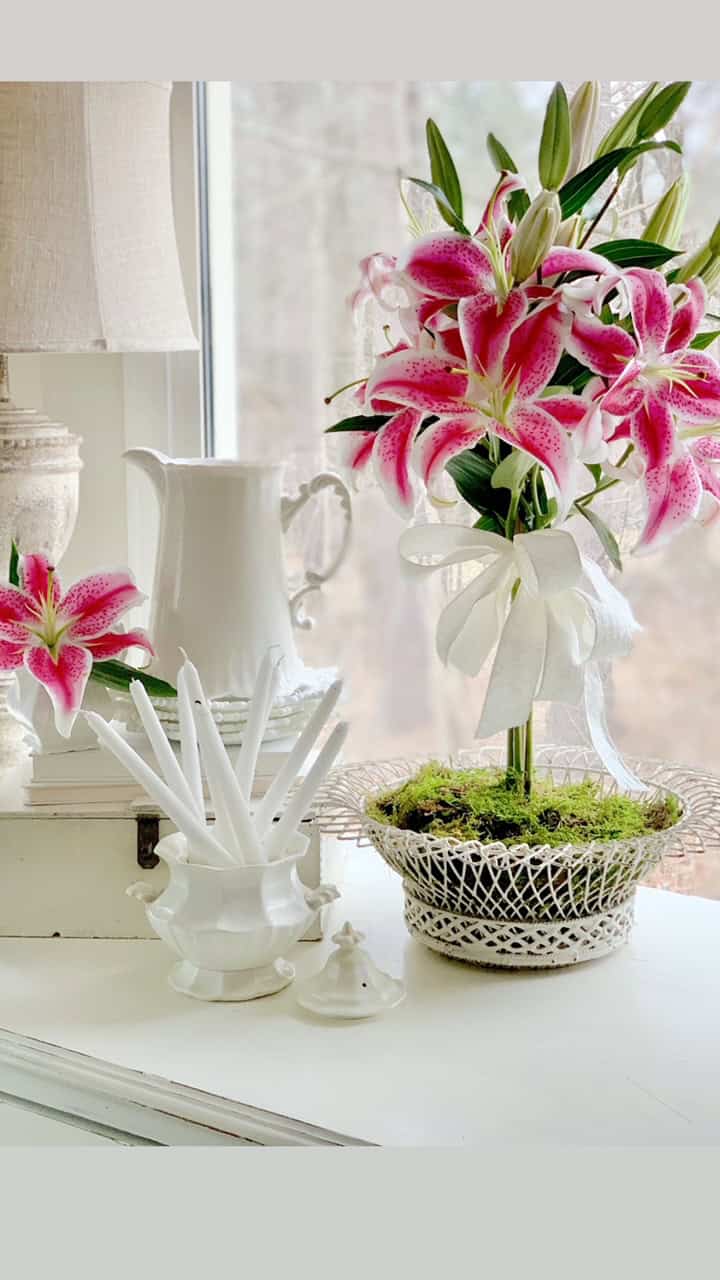
Uses for this floral design
This is the perfect bouquet for dinner parties, brunch flowers, wedding flowers, or even sympathy flowers. I have it pictured below on our buffet set up for guests.
Frequently asked questions
Lilies are most commonly associated with purity, renewal, and devotion, but their meaning can shift slightly depending on color.
White lilies often symbolize peace and remembrance, making them popular for formal arrangements and ceremonies. Pink lilies represent admiration and femininity, while yellow lilies are tied to happiness and gratitude. In floral design, lilies are often used as a statement bloom because their symbolism and scale naturally draw the eye.
The 3:5-8 flower rule is a simple design guideline used to create balanced, natural-looking arrangements. It suggests using flowers in odd numbers, typically in groupings of 3, 5, or 8 stems.
Odd numbers feel more organic and less rigid than even counts, which helps arrangements look fuller and more intentional. When working with lilies, this rule is especially useful since their large blooms can easily overwhelm a vase if overused.
Lilies pair best with flowers that either soften their bold shape or support their height and structure. Popular companion flowers include roses, ranunculus, tulips, hydrangeas, and lisianthus.
For added texture, greenery like eucalyptus, ferns, or olive branches helps balance the size of lily blooms and keeps the arrangement from feeling top-heavy.
Start by trimming lily stems at an angle and removing any leaves that would sit below the waterline. Place the lilies in the vase first to establish height and shape, spacing them slightly apart so the blooms can open fully.
Once the lilies are positioned, fill in around them with supporting flowers and greenery, keeping the tallest stems toward the center or back. Rotate the vase as you work to make sure the arrangement looks balanced from every angle.
How to Design a Lily Flower Arrangement Like a Pro
Formal floral design skills are not required. This arrangement relies on structure, support, and letting the lilies do the work.
Step-by-step Instructions
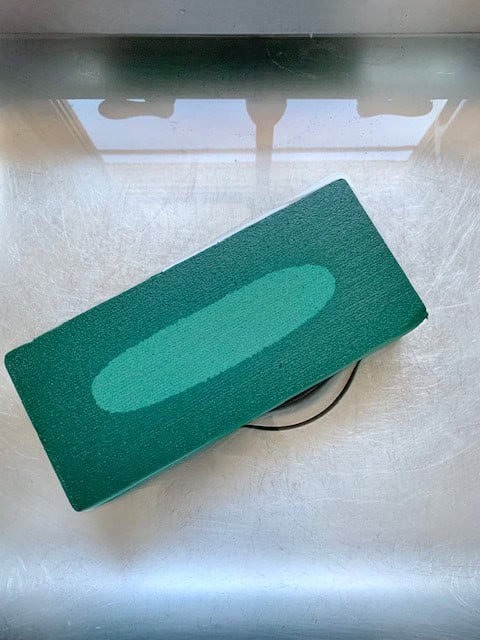
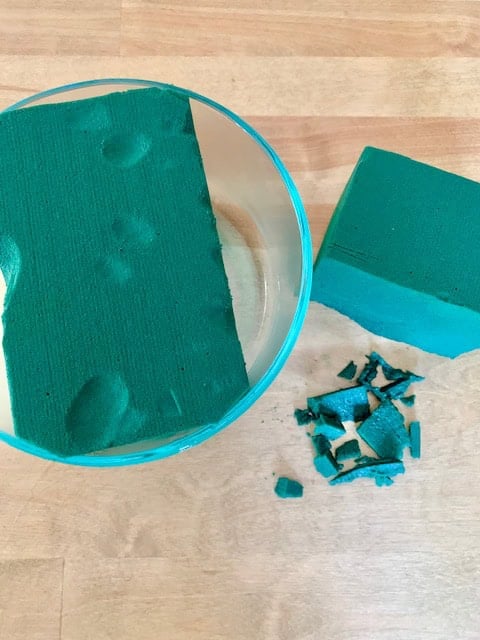
- Soak the Floral Foam
Fill a sink with water and place the brick of dry floral foam on the surface. Let it float and absorb water naturally until it sinks on its own, about one minute. Do not force it under water.

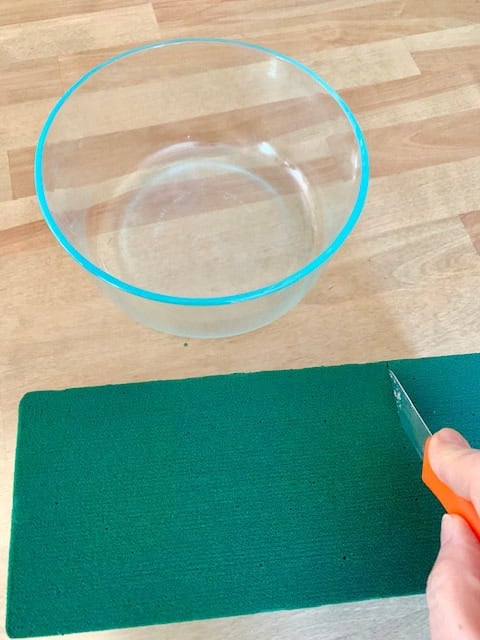
- Fit the Foam into the Container
Cut the soaked foam with a knife so it fits snugly inside your container. The foam should sit firmly so it does not shift while arranging.
- Create Water Wells
Make sure the foam placement allows small open areas or wells for adding water later. This helps keep the foam hydrated and reduces how often the arrangement needs watering.
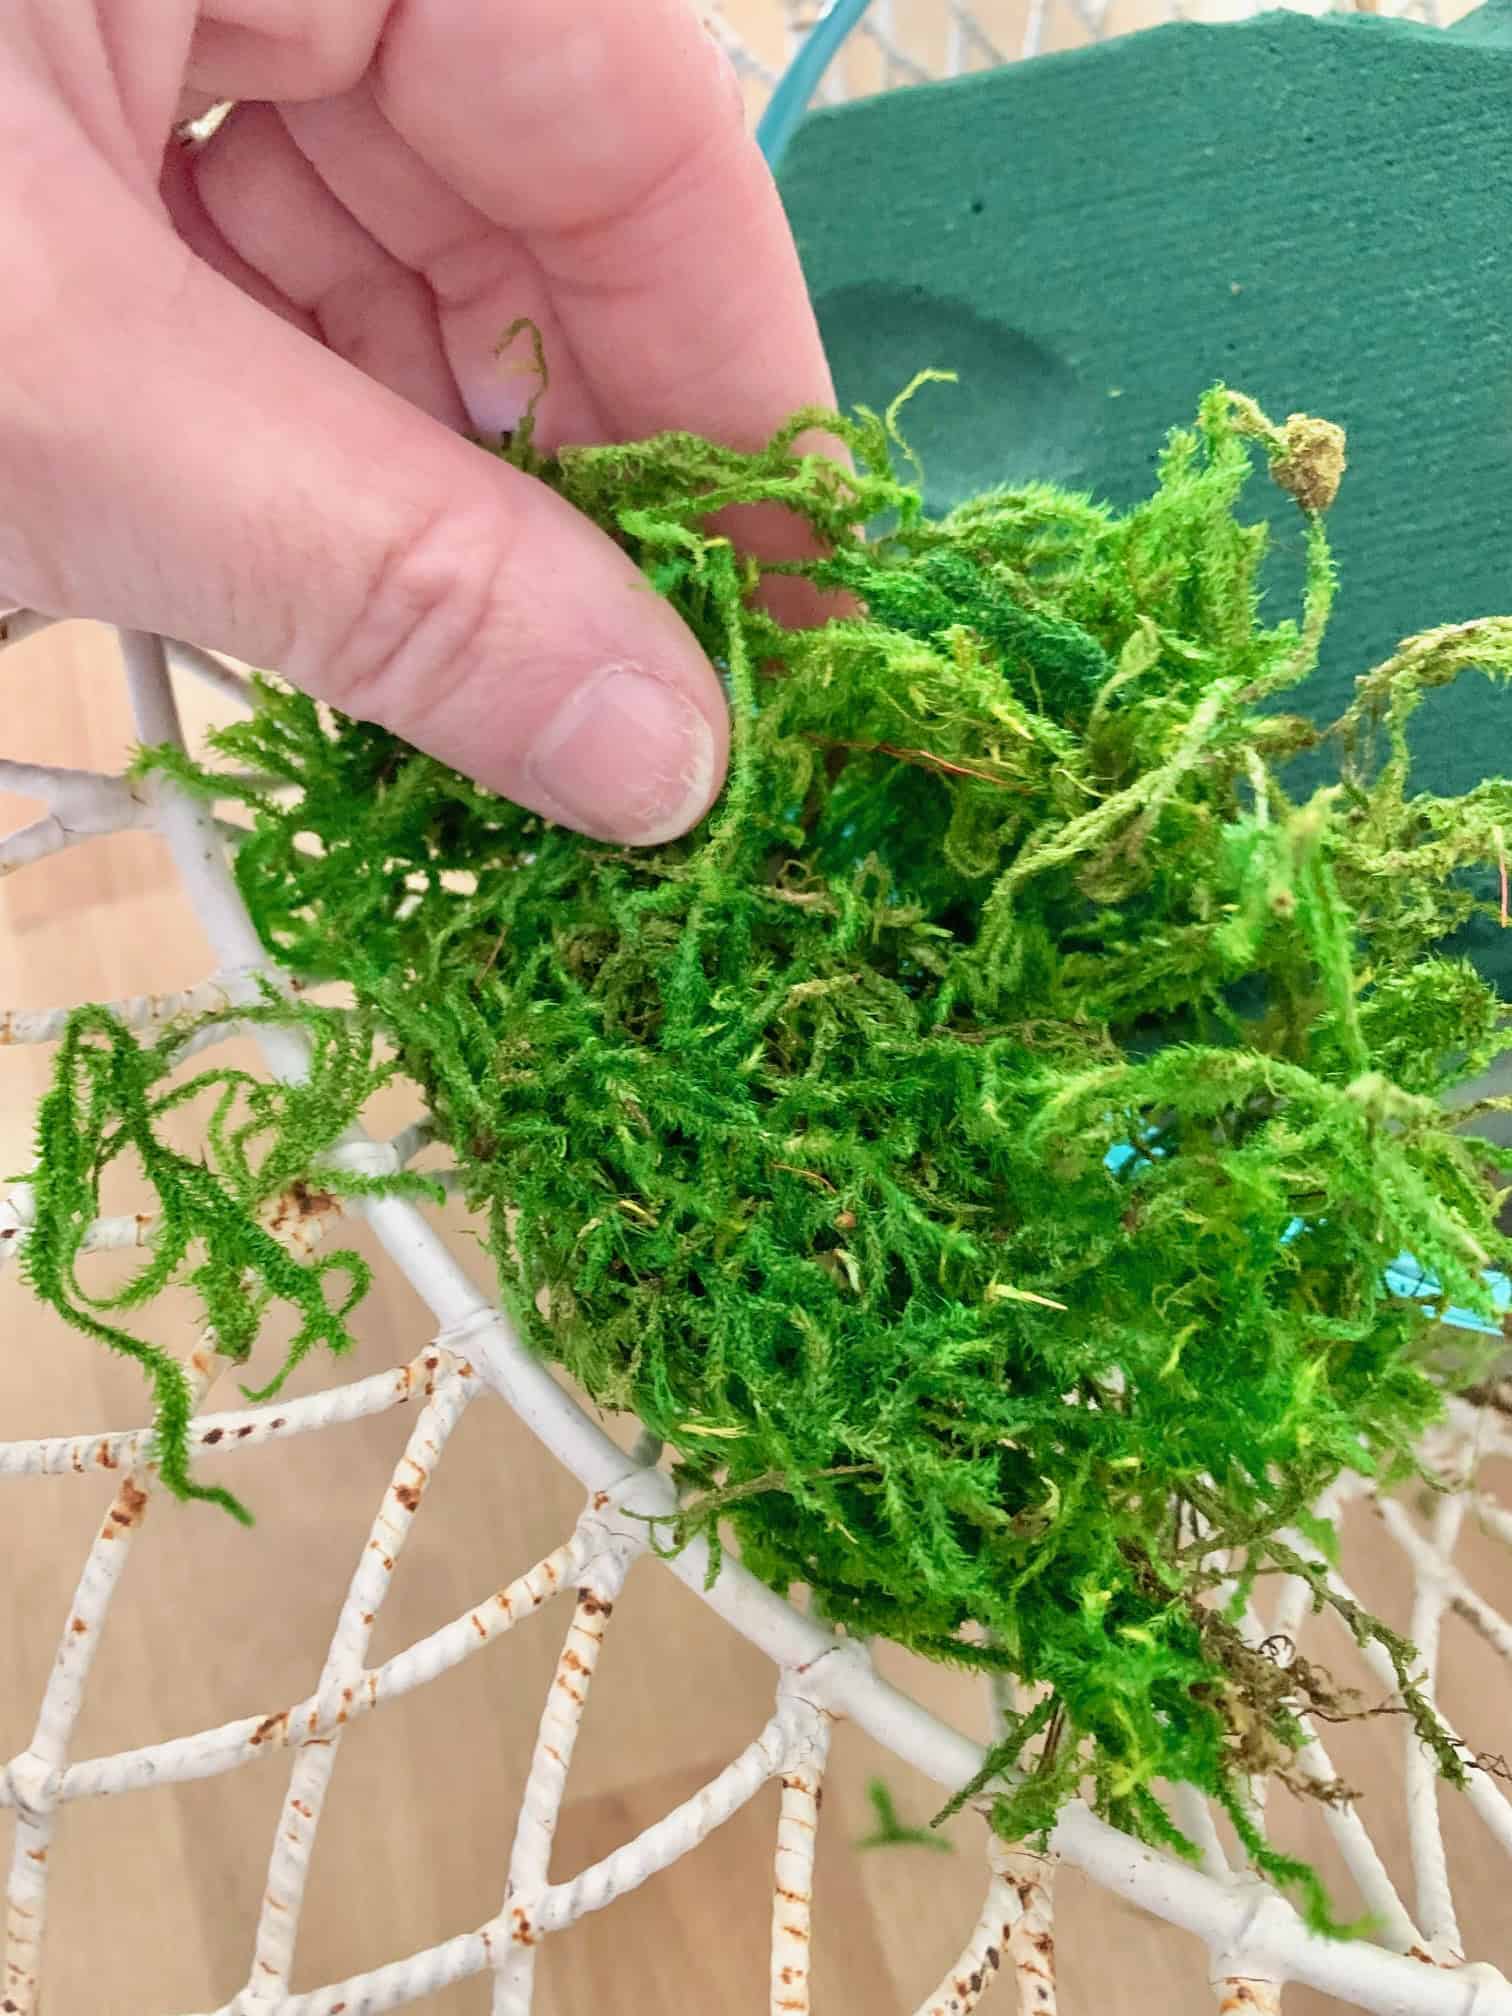
- Cover the Foam with Moss
Break the moss into pieces and place it over the foam to fully cover the surface. Leave the very center of the foam exposed for now. Add more moss as needed so no foam shows.

- Prepare the Support Sticks
In three separate places, tape two sticks together to create a bundle. These will act as internal support for the lily stems.
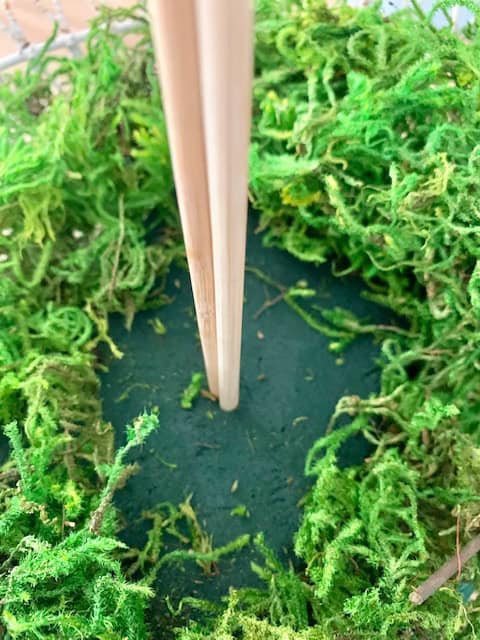
- Insert the Support Structure
Push the bundled sticks straight down into the center of the foam. This hidden structure will support the long lily stems and keep them upright.
- Place the Lily Stems
Give each lily stem a fresh angled cut. Insert the stems into the foam directly in front of the support sticks, spacing them at 12:00, 3:00, 6:00, and 9:00 positions. Keep the stems long so the blooms cluster at the top, about 20 to 24 inches from the base of the container.
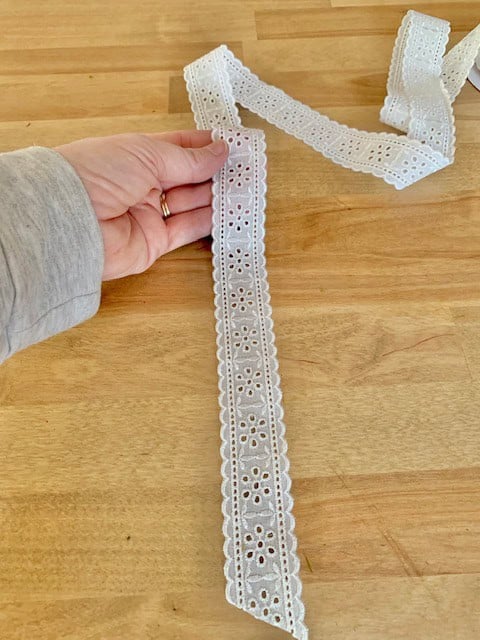
- Secure the Stems with Ribbon
Cut a 24 inch strip of ribbon and tie it tightly around the lily stems just below the blooms. This secures the stems to the internal support structure.
- Start the Bow
Using the same ribbon, begin the bow by leaving an 8 to 10 inch tail.
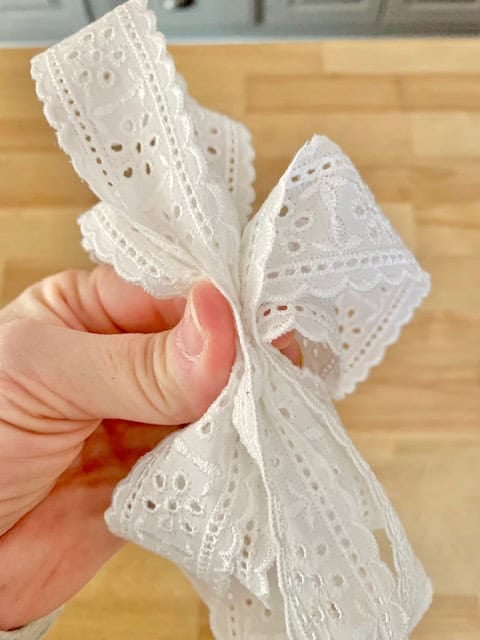
- Form the Bow Loops
Create the first loop by folding the ribbon back and pinching it in place. The loop should be about 6 inches. Form the second loop by looping the ribbon toward you and pinching it on top of the first.
- Complete the Bow
Continue looping until you have five loops total, three on top and two on the bottom. After the final loop, leave another 8 to 10 inch tail.
- Attach the Bow
Press the pinched center of the bow into the knot used to secure the lilies. Tie and knot it firmly so the bow is anchored to the arrangement.
- Trim the Ribbon Tails
Cut the ribbon tails at an angle for a finished look.
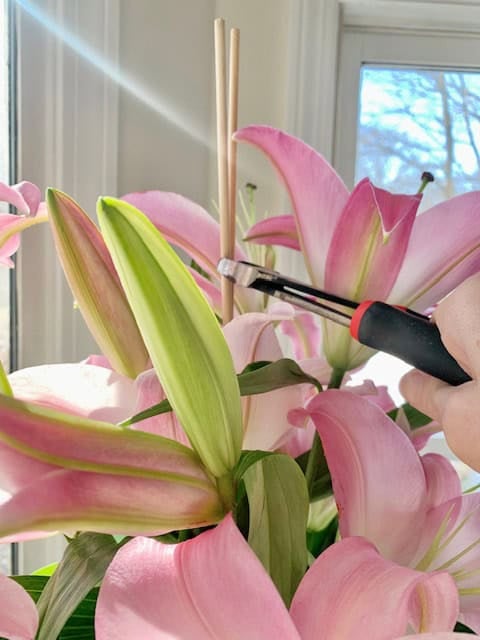
- Trim the Support Sticks
Using wire cutters, trim the tops of the support sticks so they do not extend above the lilies.
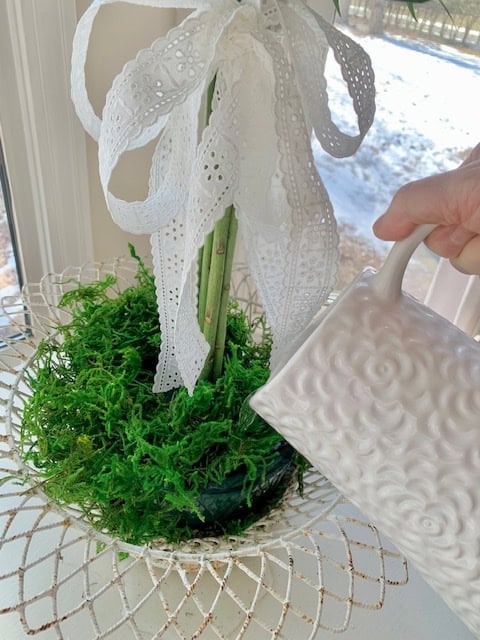
- Maintain the Arrangement
Add water to the foam every two to three days through the water wells or as needed. Enjoy your finished lily flower arrangement.


If you love working with fresh flowers as much as I do, my Floral Index has even more tutorials and tips for arranging blooms at home.
Thank you for visiting the blog today! To watch a video tutorial of this design visit here. To learn more about bow making visit my, How to Make a Ribbon Wreath Bow post. Have you tried decorating a cake with fresh flowers? If not, I show you how and answer your questions on my Cake with Fresh Flowers post. Also please check out my Garden Rose post to see the most amazing Roses!
Keep creating friends!


I'd love to create a beautiful lily flower arrangement! The tips and tricks shared in this post are quite helpful. When purchasing lilies, it's best to choose those that are still in bud form for a longer-lasting bouquet. Once the lilies begin to bloom, removing the anthers can prevent staining. For this design, using large blooms with few stems and warm water can help the lilies open faster. Thanks for the detailed guide on how to design a lily flower arrangement like a pro!
You're welcome!