DIY Paver Fire Pit: Quick, Easy, and Budget-Friendly for Your Backyard
Picture it: a family in the midst of party preparations, a weathered fire bowl in the corner of the yard, and a stack of forgotten pavers collecting dust. That was the scene until a spark of inspiration hit. "Honey, do you think we could turn those pavers into a fire pit?" And just like that, a new project was born. When it comes to getting things done, we thrive under pressure with a side of creativity. Fast forward three years and we're still basking in the warmth of our DIY backyard fire pit. Who knew a simple idea and a lazy Saturday could lead to such a fiery success?

*This post includes affiliate links, for more info on affiliate links visit here
Jump to:
- Why you will love this project
- Pavers: The budget-friendly solution for your next outdoor project
- Gathering your supplies: Where to find affordable pavers and stones for your fire pit
- Adding a fire grate: How to plan for a safe and functional design
- Designing your seating area: Finding the ideal spot and pavers for your project
- Leveling the ground: A crucial step in building a safe and sturdy fire pit
- Size and cost of our DIY paver fire pit
- Supplies for this project
- Tools for this project
- Step by step instructions
- Creating a cozy outdoor living space
- Safety guidelines for using your fire pit
- Maintenance tips
- Protect your investment: Consider a DIY paver fire pit cover
- DIY vs Store-bought
- Cost and ease comparison
Why you will love this project
- Cost-effective: Building a paver fire pit is a budget-friendly option compared to purchasing a store-bought or custom fire pit.
- Customizable: With a DIY paver fire pit, you can choose the size, shape, and materials to fit your specific backyard and personal style.
- Easy to build: Paver fire pits are relatively easy to build and require basic to intermediate DIY skills and tools.
- Outdoor entertainment: A fire pit provides an ideal gathering spot for outdoor entertainment with family and friends.
- Increased home value: Adding a fire pit to your backyard can enhance your home's outdoor living space and increase its overall value.
- Versatile: Fire pits can be used for warmth, cooking, and ambiance, making them a versatile addition to any backyard.
- Relaxation: There's nothing quite like unwinding and enjoying the calming presence of a fire pit in the comfort of your own backyard.
- Personal touch: Building a DIY fire pit allows you to add a personal touch to your outdoor living space and create a unique feature that reflects your personality and style.

Pavers: The budget-friendly solution for your next outdoor project
Even if your backyard is lacking in leftover pavers, I highly recommend considering these versatile concrete bricks for your next outdoor project. Traditionally used for hardscaping walkways, driveways, and patios, pavers come in a wide range of shapes, sizes, and materials, from natural stone to concrete blocks and patio pavers. This means you can create a custom look that fits your landscape design and matches the style of your home. We went with the classic rectangle red bricks, but the options are endless! Best of all, pavers won't break the bank - ours go for just $1.98 a piece, making it a wallet-friendly choice for any budget-conscious DIYer.

Gathering your supplies: Where to find affordable pavers and stones for your fire pit
To get started, head to one of your local home improvement stores or hardware store to purchase your materials. You can also search for pavers and stones at a flea market or online marketplace to save even more money. Once you've gathered your supplies, it's time to get to work.
Adding a fire grate: How to plan for a safe and functional design
When planning your fire pit design, it's important to keep in mind that you'll need a fire grate for this wood-burning fire pit to safely contain your fire. A fire grate is a metal grid that fits inside the fire pit and holds the wood off the ground, allowing air to circulate for a more efficient burn. If you already have a fire grate that you use in your indoor fireplace, you can simply repurpose it for your outdoor fire pit for the summer months. When purchasing your pavers, make sure to measure the interior of your fire pit so that you can buy a grate that fits inside. A grate that is too big won't fit inside the fire pit. Planning for the fire grate during the design phase will ensure that your fire pit is not only beautiful but also safe to use.

Designing your seating area: Finding the ideal spot and pavers for your project
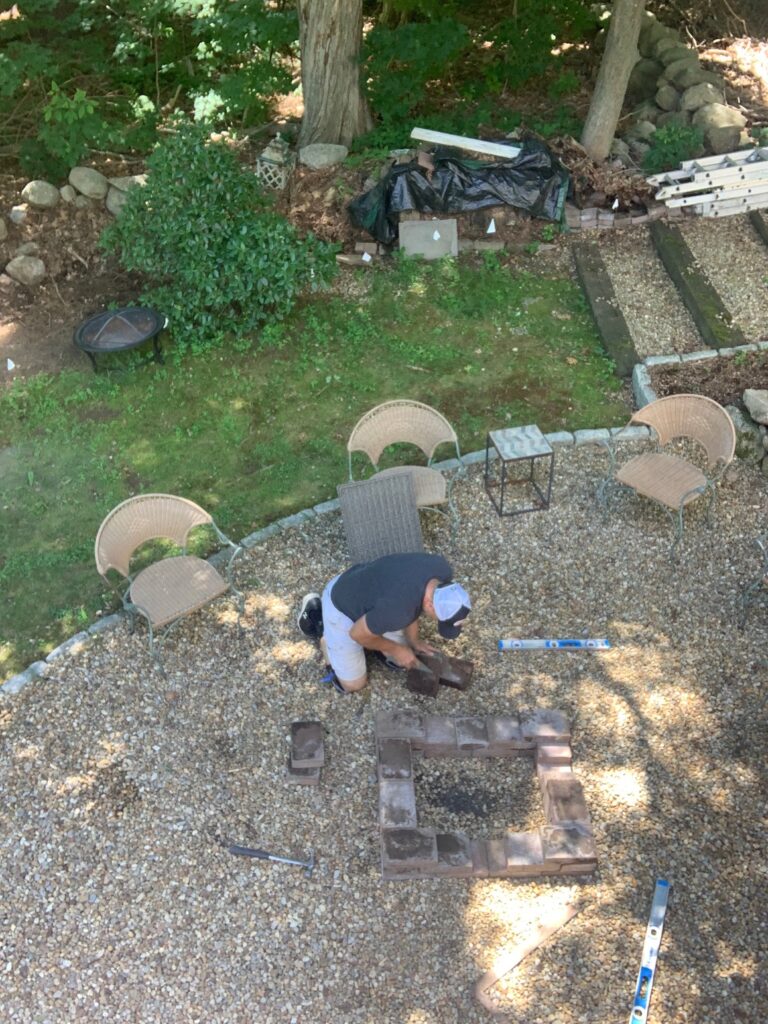
The next step to building your fire pit is to find the perfect spot in your backyard. You want to make sure it's away from any trees, bushes, or flammable materials to ensure safety. If you're lucky enough to have a designated space already, as we did with our charming cobblestone-edged stone-filled fire pit area, then you're one step ahead. Once you've picked out your spot, it's time to lay out your pavers and plan for your fire pit design.
You can choose between a square fire pit, a circular one, or a rectangular fire pit, depending on your preference. For our backyard, we decided to go with a rectangular fire pit to fit the space that we had created a few years back. If you want to create a larger seating area, consider building a custom patio with brick or stone pavers and incorporating the fire pit as a central focal point.

Leveling the ground: A crucial step in building a safe and sturdy fire pit
Before you start building, it's important to make sure that the ground is level. A level surface ensures that your fire pit looks neat and tidy while also preventing any accidents or injuries. Clear the area of any debris or plants and use a shovel to level out the ground. Then, use a level tool to check that the surface is even. You may need to add or remove soil in certain areas to achieve a level surface. I recommend you lay down gravel or stone prior to laying the pavers. This will provide extra support for your paver fire pit. Taking the time to level and add gravel correctly will pay off in the end, ensuring that your fire pit sits squarely and is safe to use. Any unevenness or gaps can cause the pavers to shift or move, making the fire pit unstable and potentially dangerous. By taking the time to level the ground and ensure a sturdy base, you'll have a fire pit that is not only beautiful but also safe to use.

Size and cost of our DIY paver fire pit
Our fire pit measures 38 inches by 32 inches and is 12.5 inches tall. The opening is 26 inches by 20 inches. We used five layers of pavers, with each layer consisting of 12 pavers. Each paver measures 9 inches by 6 inches by 2.5 inches. As mentioned earlier, the pavers were leftover from another project from years ago, but if you were to purchase them, they would cost approximately $1.98 each, which adds up to a total cost of $118.80. Fortunately, we had the gravel, and the space was already prepared. We also had all the necessary tools and used our indoor fire grate. Therefore, the only expense we had was for the Fireblock Draftstop sealant, which cost $7.68 x's 3 ($23.04).
Supplies for this project
- Fireblock Draftstop Sealant (available at hardware stores, we used 3 tubes)
- Gravel or pea stone
- Pavers (we used these)
- Fire grate
Tools for this project
- Level
- Framing square
- Circular saw with a concrete blade
- Outdoor power tool extension cord
- Safety goggles
- Gravel/stone spreader (trowel, shovel or rake)
- Knee pads (optional but a good idea)
- Hammer or rubber mallet
- Caulking gun (for Fireblock Draftstop Sealant)
Step by step instructions
By following these steps, you can ensure that your fire pit is not only beautiful but also sturdy and safe to use.
- Choose a location: Select a level area in your backyard for your fire pit. Make sure the spot is clear of any flammable materials, trees, or structures.
- Dig the pit: Use a shovel to dig a shallow pit the size of the intended fire pit (ours measured 38" x 32" x 11"). Make sure the bottom is level.
- Prepare the base: Add 2-3 inches of gravel or pea stone to the bottom of the pit and level it with a trowel, shovel, or rake.
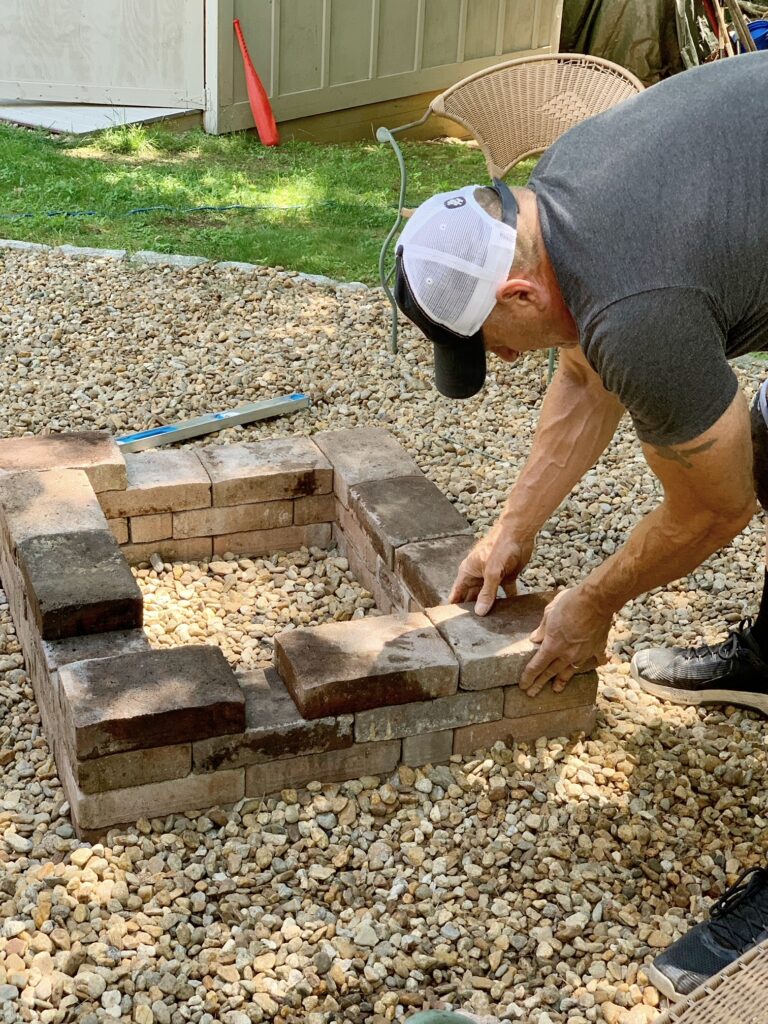
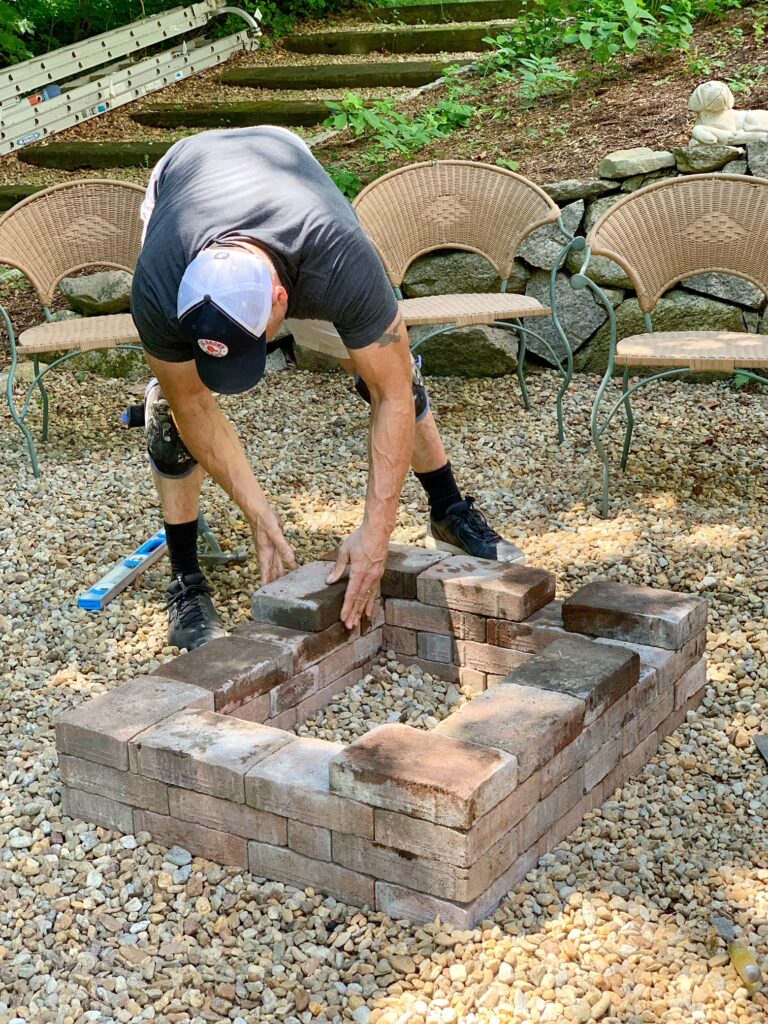
- Lay the first layer of pavers: Starting from the center of the pit, lay the pavers in a circular pattern. Use a framing square to make sure each paver is straight and level.
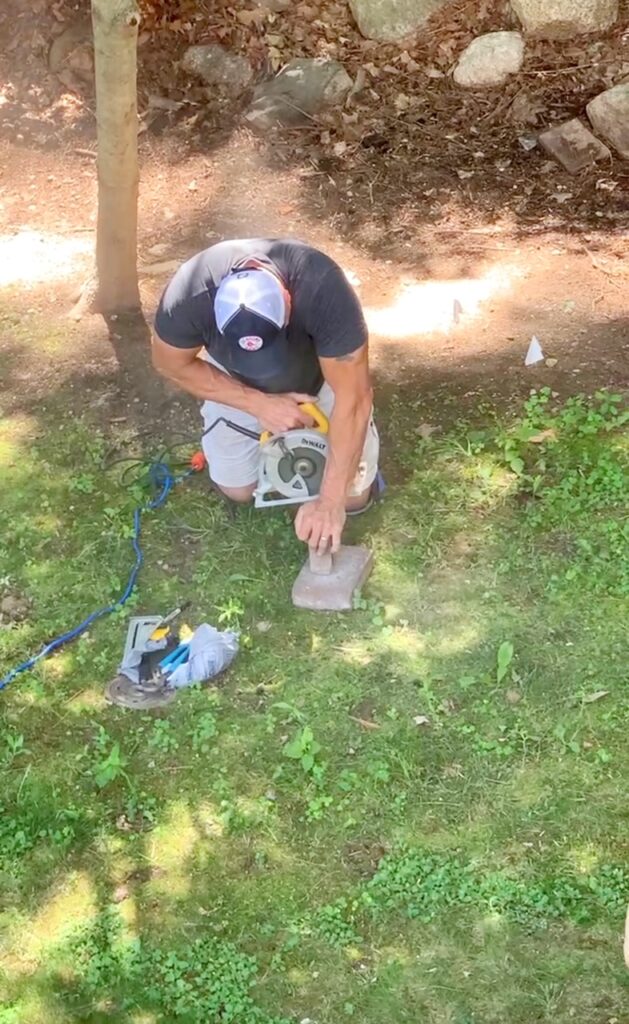
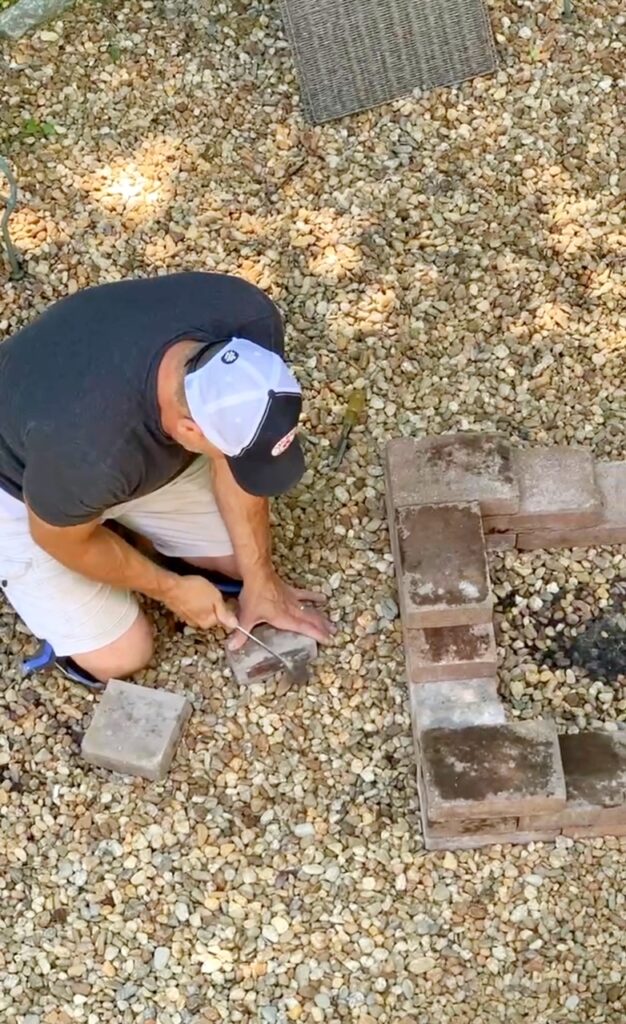
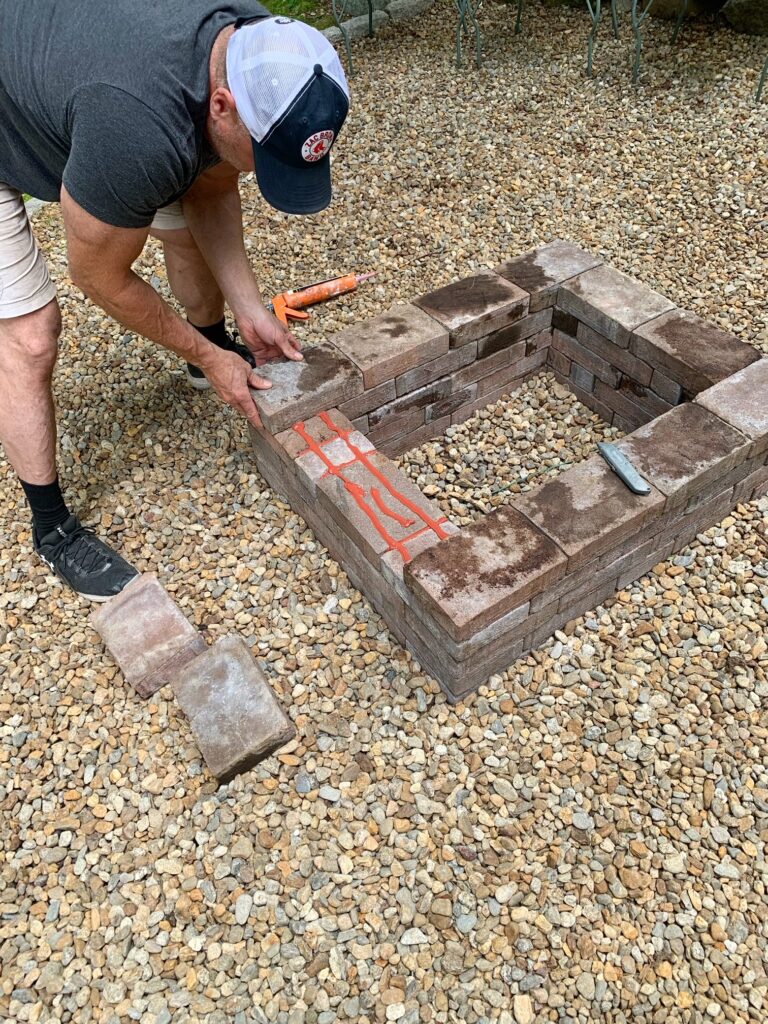
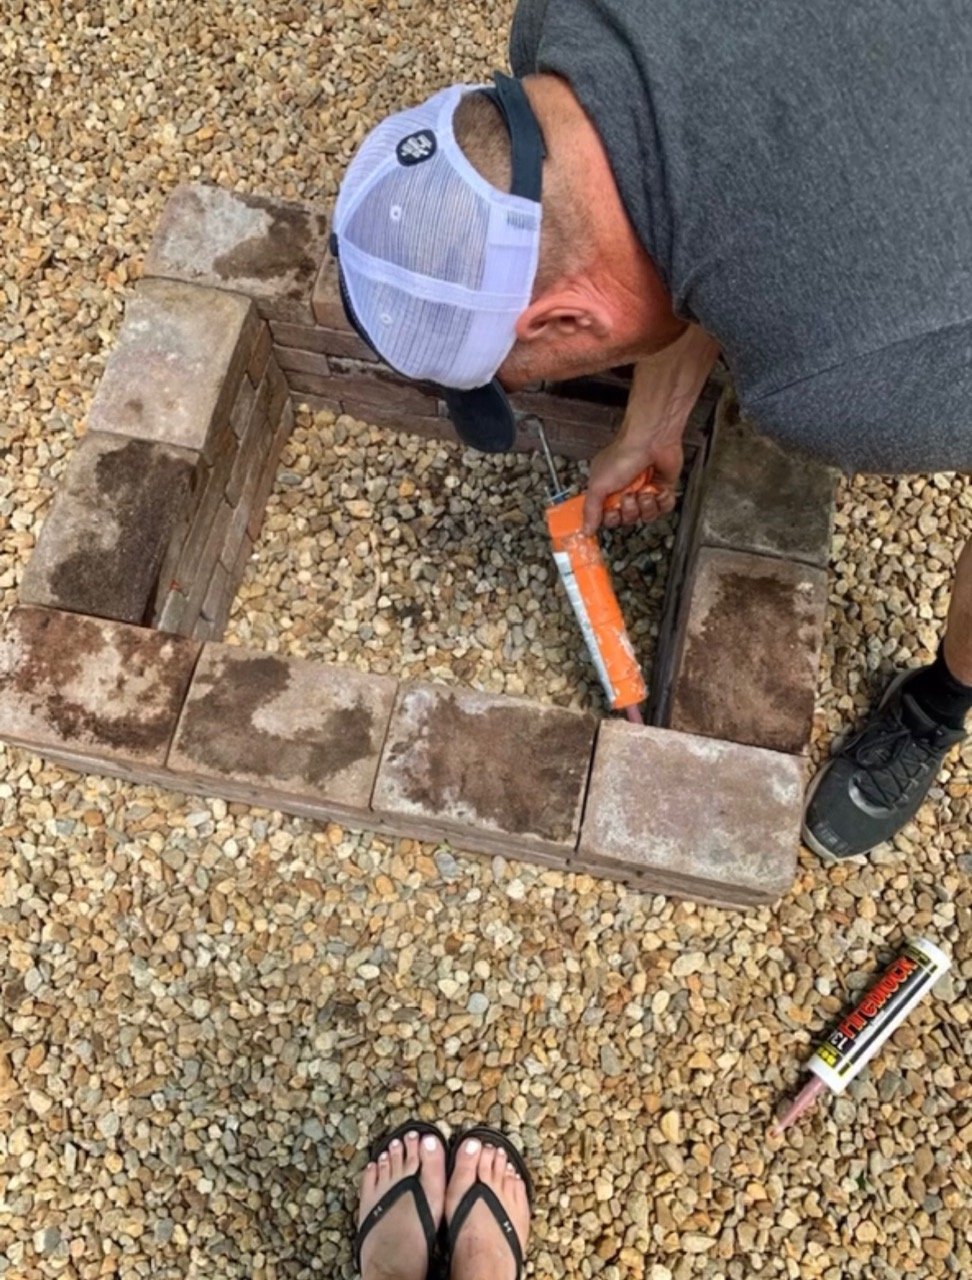
- Build up the walls: For the second layer, offset the pavers to cover the seam (joint) between the two pavers below. This technique is called "running bond" and helps to create a stronger structure. Use the circular saw with a concrete blade that is powered by an outdoor power cord to cut the pavers to fit the size of the circle. Use a hammer or rubber mallet to gently tap the pavers to adjust the alignment of the pavers. It is important to avoid hitting the pavers too hard as this could cause them to crack or break. Use the Fireblock Draftstop Sealant to secure the pavers together by adding the sealant between and to the top of the pavers between layers.
- Finish with a top layer: Add a final layer of pavers to the top of the wall to create a smooth, flat surface. Use a level to make sure they are even. Use the Fireblock Draftstop Sealant to secure the top layer of pavers together. Allow the sealant to dry before use.
- Install the fire grate: Place the fire grate in the center of the pit on top of the pavers. The fire grate will allow air to circulate under the fire and will protect the pavers from the high heat of the fire.
- Enjoy your fire pit: You're ready to start using your new fire pit! Always practice fire safety and never leave a fire unattended.

Creating a cozy outdoor living space
Once your fire pit is built, you can place a fire grate into your pit to hold the logs. You can buy inexpensive fire grates from Lowes. You can also have fun adding string lighting, throw pillows, Adirondack chairs, and some beautiful planters for a cozy outdoor living space. Don't forget the hot cocoa and hot dogs to roast marshmallows over the fire!

Safety guidelines for using your fire pit
- Keep the fire pit at least 10 feet away from any flammable materials such as trees, bushes, or buildings.
- The height of a DIY paver fire pit can vary depending on personal preference, but it's generally recommended to build it at least 12-18 inches tall. This provides enough space for the fire to burn safely and also helps contain the flames. However, it's important to check with your local building codes to ensure you comply with any specific regulations regarding fire pit height.
- The recommended distance for placing seating around a fire pit is at least 6 feet (1.8 meters) away from the fire pit edge. This distance is recommended by the National Fire Protection Association (NFPA) and is intended to provide a safe buffer zone to protect people from accidental burns or flying embers.
- Ensure the fire pit is on a level and stable surface to prevent it from tipping over.
- Never leave the fire pit unattended, and always have a way to extinguish the fire nearby, such as a hose or a bucket of water.
- Use only dry wood as fuel, and never use flammable liquids such as gasoline or lighter fluid to start the fire.
- Keep children and pets at a safe distance from the open flame fire pit while it's in use.
- Consider placing a grate or screen over the top of the fire pit to prevent sparks or embers from escaping and potentially starting a fire.
- Be aware of any local laws or regulations regarding the use of fire pits, such as burn bans or restrictions on open fires.
- When you're finished using the fire pit, make sure the fire is completely extinguished before leaving it unattended. Pour water over the fire and stir the ashes to ensure that all embers are extinguished.
- Regularly clean and maintain the fire pit to prevent the buildup of ash or debris that could cause a fire.
Note: These guidelines are intended to provide general safety recommendations for the use of a DIY fire pit. It is your responsibility to exercise caution and adhere to any relevant laws or regulations in your area. The author of this content is not liable for any damage or injury resulting from the use of a fire pit. please visit my Terms and Conditions for more information.

Maintenance tips
Regular maintenance is key to keeping your DIY paver fire pit in good condition. After each use, allow the fire to completely burn out and cool down before removing any ashes or debris. Use a shovel or broom to sweep out the ashes and dispose of them in a metal container. Be sure to check the inside and outside of the fire pit for any debris that may have accumulated. By taking the time to properly maintain your fire pit, you'll ensure that it lasts for years to come.
Protect your investment: Consider a DIY paver fire pit cover
Consider making a cover for your DIY paver fire pit to protect it from the elements and extend its lifespan. You can use an old door, decking, or other materials to create a custom cover that fits your fire pit perfectly. An added benefit of the cover is that it can also serve as a tray for hors d'oeuvres and drinks when the fire pit is not in use. A cover can be a simple and affordable solution to keep your fire pit in great condition and ready to use whenever you want to gather around the fire.

DIY vs Store-bought
Building a DIY fire pit using concrete pavers is a great option for those looking to save money while still adding a functional and stylish element to their outdoor space. The cost of building a paver fire pit can vary depending on the materials used, but it is generally more affordable than purchasing a store-bought fire pit kit or having a custom fire pit professionally installed. In addition, building this simple fire pit is a fun and rewarding project that can be completed with basic tools and some DIY skills. While a store-bought fire pit or a custom installation may offer additional features or a more polished look, the cost and ease of building a DIY paver fire pit make it a popular and practical option for many homeowners.
Shop Fire Pit kits:
Cost and ease comparison
DIY Paver Fire Pit:
- Cost: The cost of building a DIY paver fire pit can vary depending on the size, design, and quality of the materials used. Generally, the cost of materials for a simple DIY paver fire pit can range from $100 to $300, depending on the type of pavers used, the size of the fire pit, and any additional features such as a fire pit insert, fire grate or spark screen.
- Skill level: Building your own fire pit can be a DIY project that is achievable for many people with intermediate DIY skills. It requires a good understanding of the tools and materials needed for the project, such as a level, shovel, pavers, gravel or stones, and a fire pit insert and or fire grate. The process involves excavating the area, creating a base, laying the pavers in a desired pattern, and filling the gaps with sand. While it may seem daunting, there are many online tutorials and step-by-step guides available to help with the process. However, it's important to note that some level of physical strength and endurance may be required for the digging and lifting involved in the project.
- Time: The amount of time it takes to build a DIY paver fire pit will depend on several factors such as the size of the fire pit, the complexity of the design, and the skill level of the person building it. Generally, building a simple paver fire pit can take about one to two days. Our fire pit took my husband roughly 6 hours to assemble. However, more complex designs or larger fire pits may take longer, requiring additional time for planning, excavation, and construction. It's important to allocate enough time for the project and to work at a steady pace to ensure that the fire pit is built safely and accurately.
Store-bought Fire Pit Kit:
- Cost: The average cost of a paver fire pit kit can vary depending on the size, design, and quality of the kit, as well as the location and retailer. On average, a basic paver fire pit kit can range from $250 to $600, while more elaborate kits with additional features or larger sizes can cost upwards of $1000 or more. Some factors that can influence the cost of a paver fire pit kit include the type of pavers used, the quality and size of the fire pit insert, and any additional features such as a cooking grate or spark screen. It's important to research and compare prices from different retailers to find a paver fire pit kit that fits your budget and needs.
- Skill level: Putting together a paver fire pit kit is generally considered to be an easier DIY project compared to building a fire pit from scratch with individual pavers. Most paver fire pit kits come with detailed instructions and all the necessary components, such as the fire pit insert, pavers, adhesive, and sand. Depending on the complexity of the kit, it may require basic to intermediate DIY skills, such as being able to level the ground, follow instructions, and use basic tools like a shovel and level. However, it's important to read through the instructions thoroughly before starting the project and to have someone assist with lifting and moving the heavy pavers.
- Time: Generally, a basic paver fire pit kit can be assembled in a weekend or less with 8-10 hours of work. One benefit to buying a kit is that the fire pit pavers are all cut to size so assembly is a bit faster and easier than a DIY paver fire pit.
Gather your favorite people, add some music, and make a night of enjoying the fire pit of your dreams! It's amazing how a spark of inspiration and a lazy Saturday can lead to a fiery success. Building a DIY paver fire pit is cost-effective, customizable, and easy to build, making it a versatile addition to any outdoor area. So, grab your friends and family, and let the warmth of your new fire pit ignite the fun!

For more outdoor inspiration please visit:
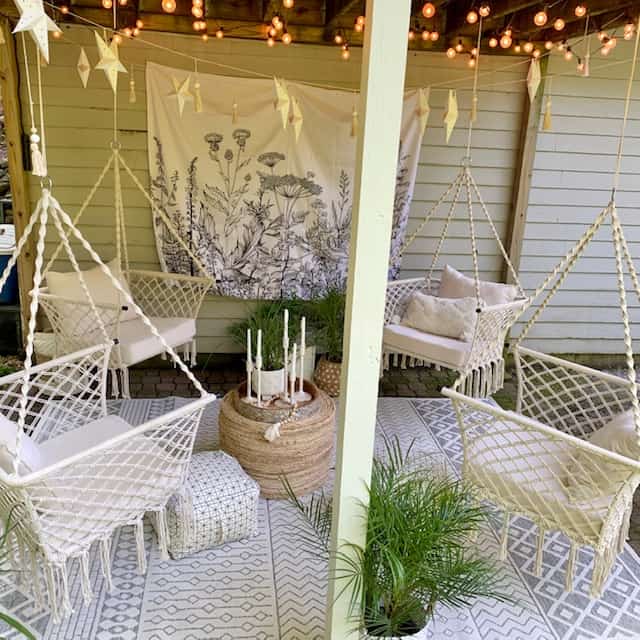
Cozy Under-Deck Space featuring Hammock Chairs: This post showcases a budget-friendly, cozy under-deck space, featuring four macrame hammock chairs, a rug, cafe lights, wicker decor, a DIY garland, and a wildflower tapestry. The macrame hammock chairs were chosen for their comfortable and structured design and can be hung from a ceiling, tree, or floor joists. The seating area is well-lit by 5 strands of 25' cafe lights that were installed using clips, and a 7'10" x 10' outdoor rug ties the space together.
Now to work on the Hot tub! Thanks for visiting the blog today for this DIY Paver Fire Pit: Quick, Easy, and Budget-Friendly for Your Backyard post. For more cool backyard fire pit ideas visit my Pinterest board!
Keep creating friends!