
How to Decorate a Sled for Christmas: Tips from a Vintage Seller

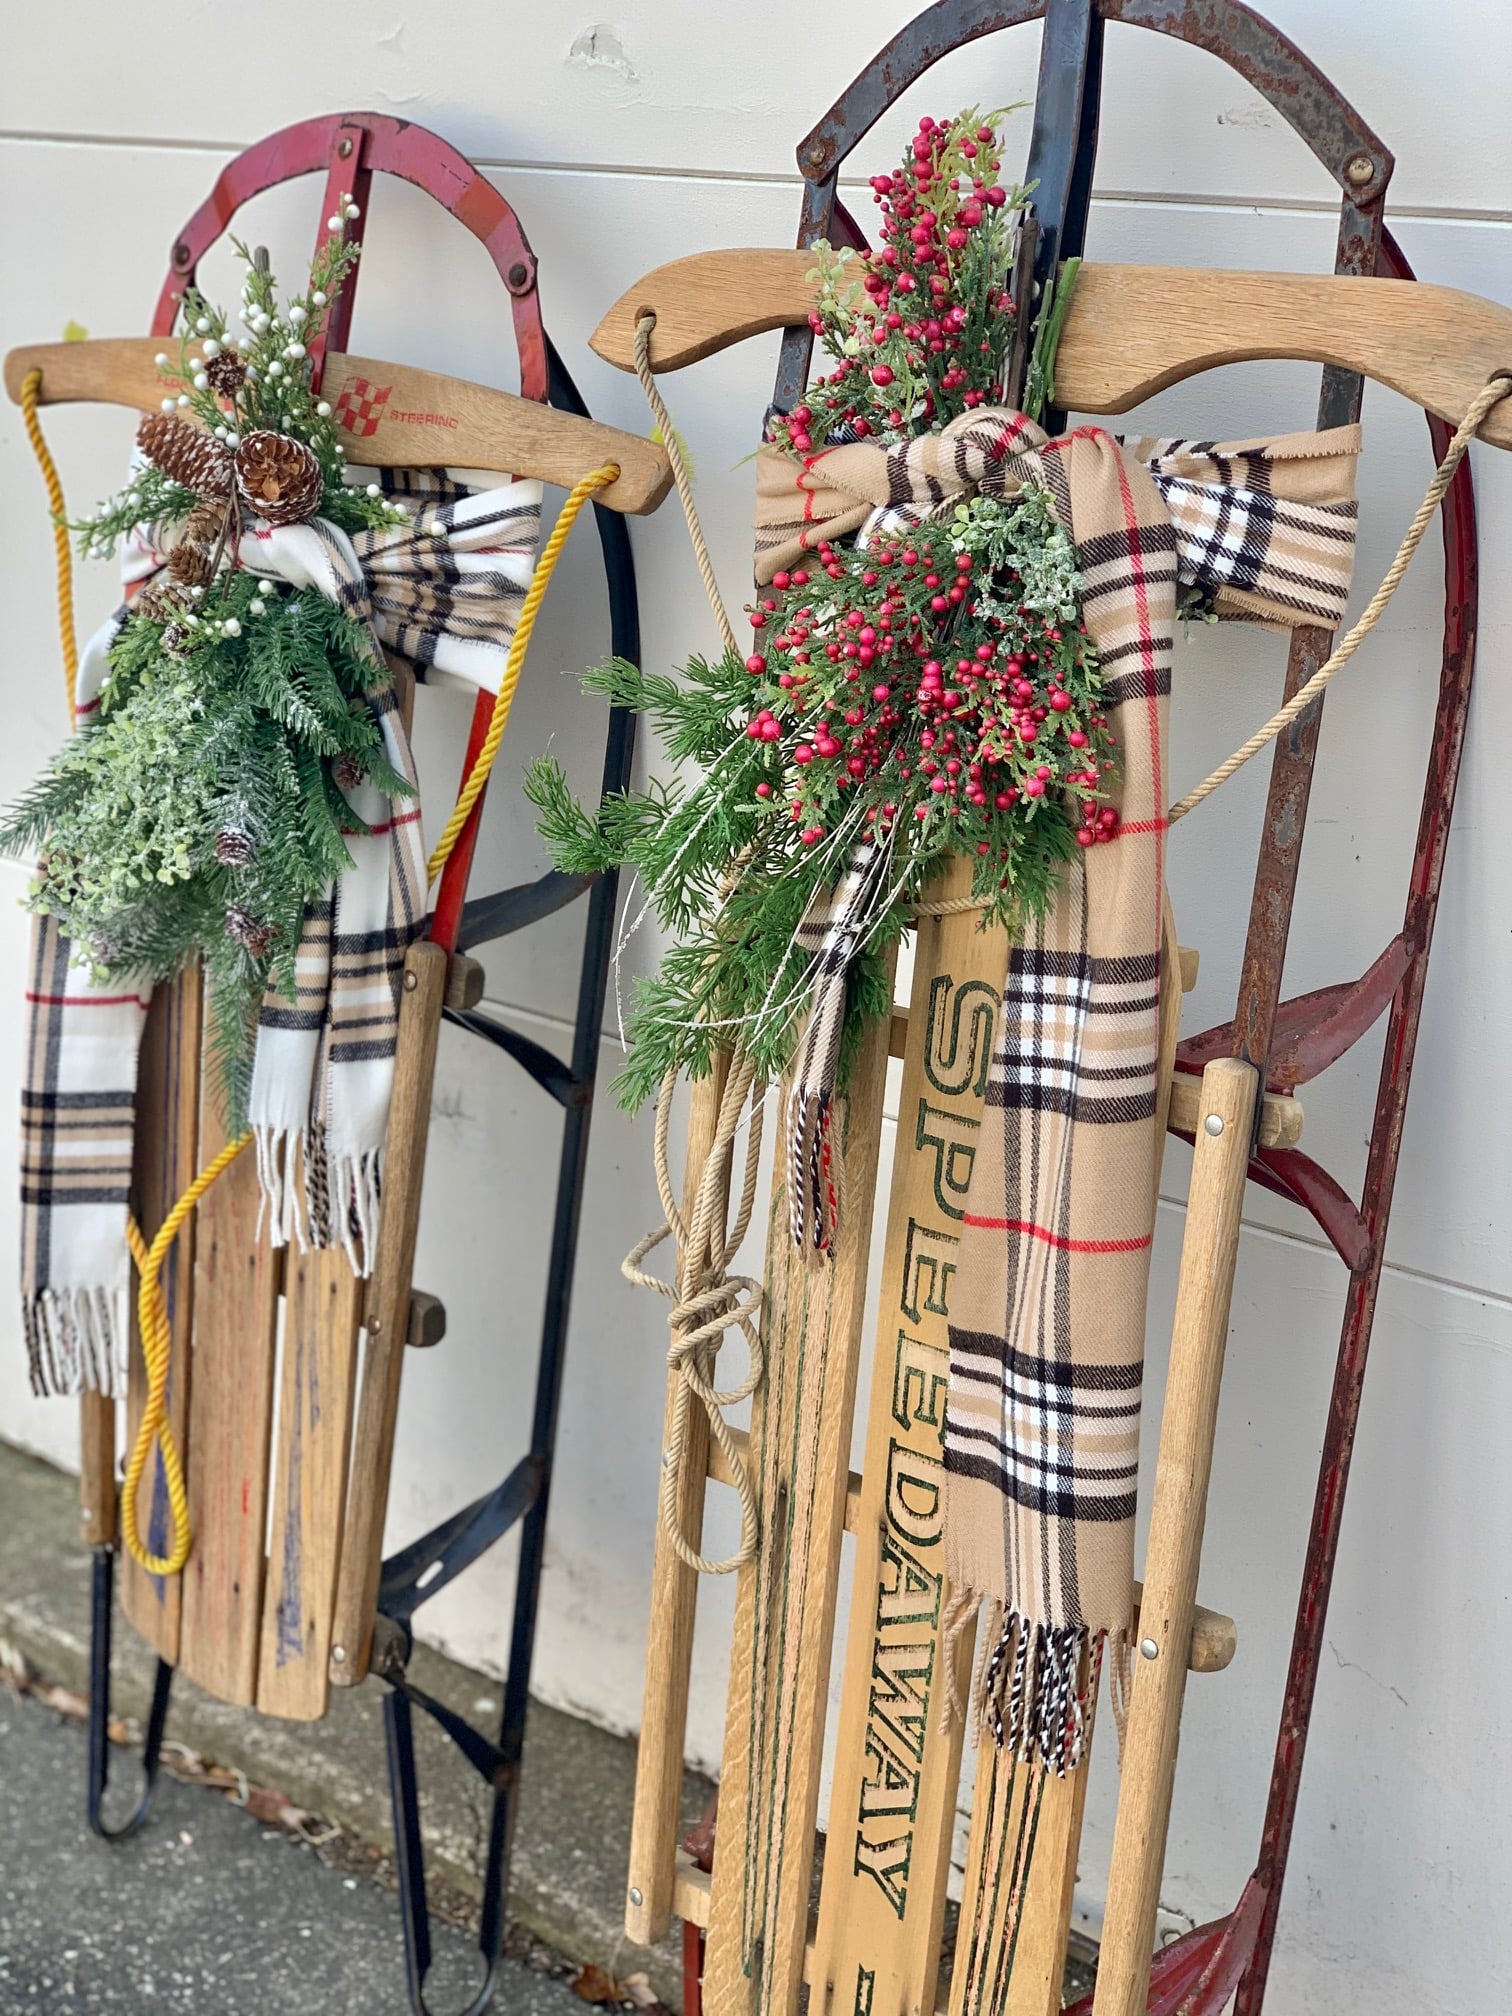
Decorating a vintage sled for Christmas is an easy way to add nostalgic holiday charm to your home or front porch. Start with an old wooden sled, attach a swag of evergreen branches using floral wire, and finish with berries, a plaid scarf, and optional twinkle lights. After years of decorating and selling vintage sleds at my antique booth, I've found that simple combinations of greenery, ribbon, and natural accents create the most beautiful displays.
Content may contain affiliate links. When you shop the links, we receive a small commission at no cost to you. Thanks for supporting my small business.
Want to decorate your own vintage Christmas sled? I've gathered some of my favorite supplies and decorative accents, along with similar finds to help you recreate this charming holiday look. Shop the Christmas sled decorating supplies.
Back when I had my vintage booth at Off The Common Antiques, decorated Christmas sleds were always among my best sellers. Over the years, I've decorated dozens of old wooden sleds, and I've learned a few tricks for making them look beautiful without spending a fortune.
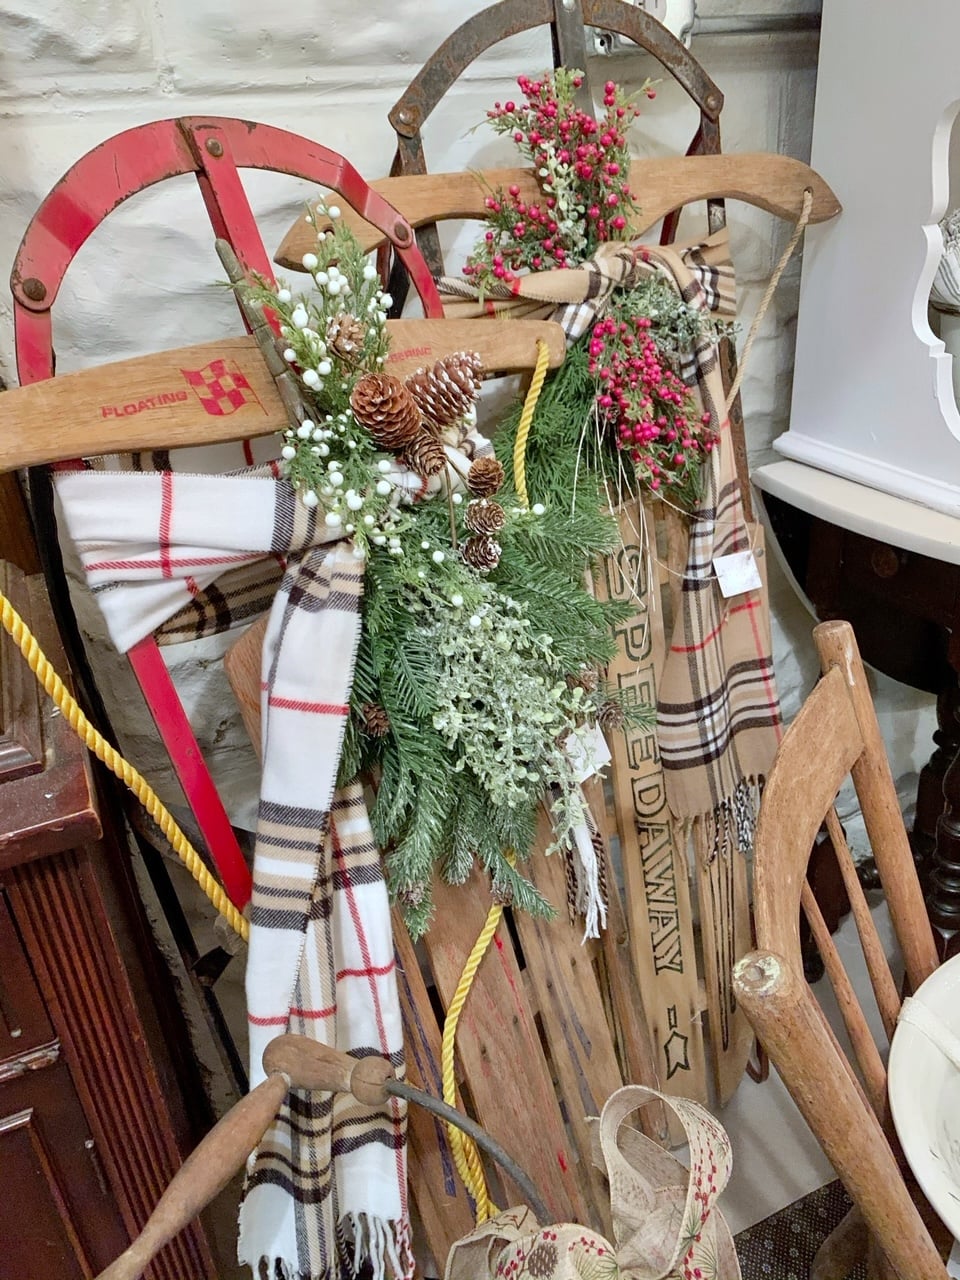
The secret? You don't need much! A plaid scarf, a few evergreen branches, berries, and some floral wire can transform a weathered old sled into a charming Christmas decoration.
Whether you're decorating a vintage sled for your front porch, entryway, or beside the Christmas tree, I'll show you exactly how I put mine together, along with some of my favorite decorating ideas from years of selling them.
At a Glance: How to decorate a sled for Christmas
_______________________
- Project: Vintage Christmas sled decoration
- Best for: Front porches, entryways, and indoor holiday displays
- Main supplies: Vintage sled, greenery, floral wire, berries, and plaid scarf
- Skill level: Beginner-friendly
- Style: Vintage, traditional, farmhouse, or woodland
- Result: A charming decorated Christmas sled
Summarize and Save this content on:
Jump to:
- At a Glance: How to decorate a sled for Christmas
- Finding your perfect vintage sled
- Getting your sled ready for decorating
- What you'll need
- Step-by-step instructions
- Vintage sled decorating ideas for Christmas
- Where to display your decorated Christmas sled
- Taking care of your vintage sled
- For more holiday inspiration
Finding your perfect vintage sled
Living here in the Northeast, I'm pretty lucky when it comes to finding old sleds. They're tucked away in almost every antique shop, thrift store, and barn sale I visit. While Marketplace and eBay are good options too, I prefer hunting for them in person so I can check their condition.
Here's what I've learned about pricing after years of sled-hunting: Most thrift stores sell them for $10-20, especially if they need a little TLC. Antique shops usually price them between $25-50, depending on the age and condition. The really old ones with great patina or original paint can go higher, but for decorating purposes, I usually look for the affordable finds that just need a little love.
Quick tip: Fall is the best time to shop for sleds - prices tend to jump once the holiday decorating season kicks in. I've scored some of my best deals in September and October!
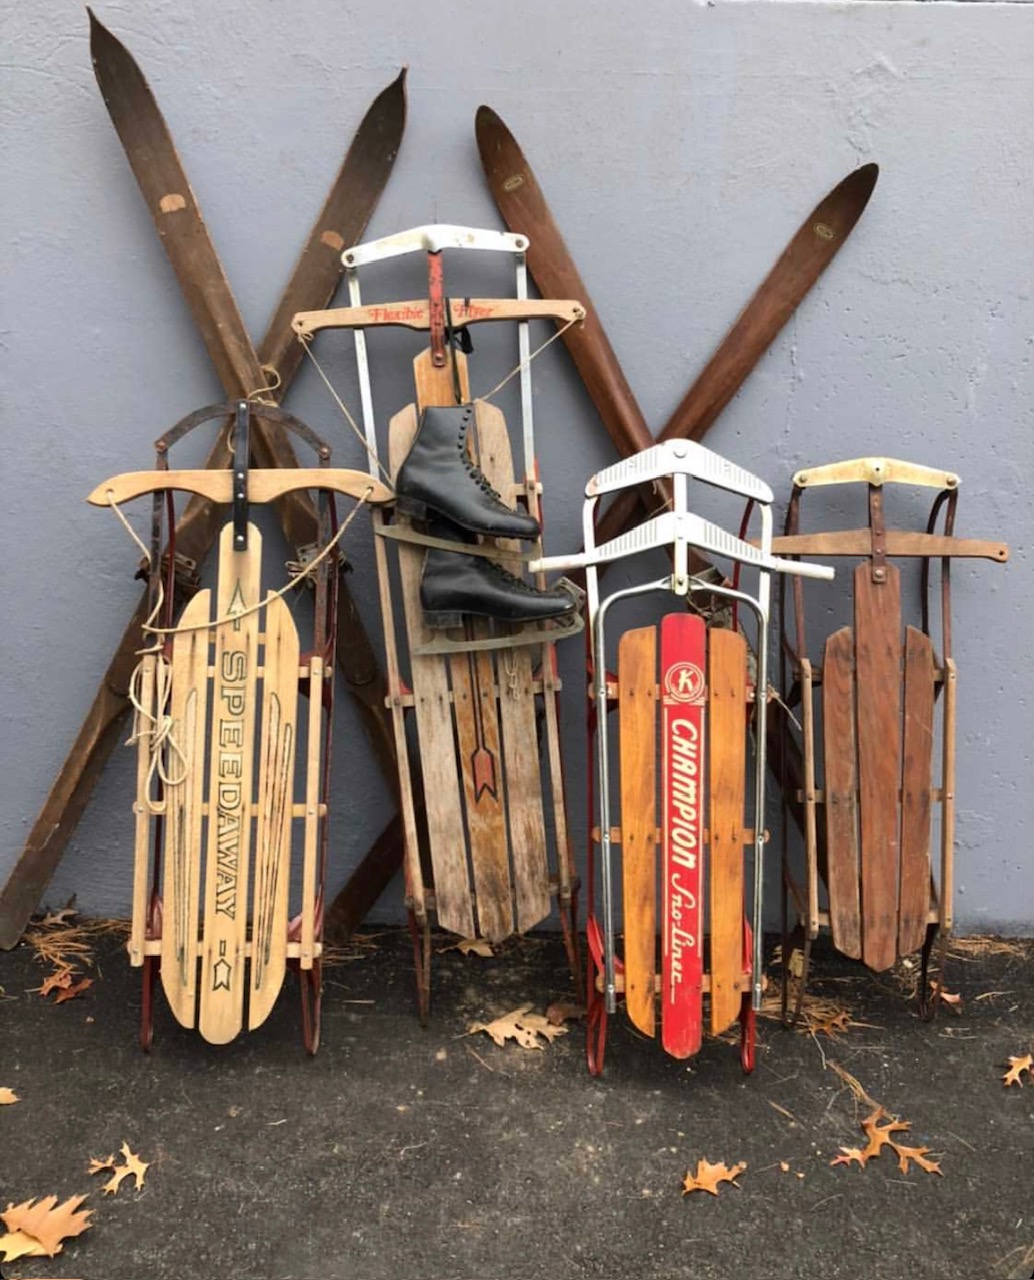
If you're lucky, you might even find one with the original owner's name still carved or written on it - these personal touches add such wonderful character and history to a vintage piece. Please let Bernie Schram from Broadway know we found his sled!!

Getting your sled ready for decorating
Let's get that sled cleaned up! First thing I do is take my old sled outside and brush off any cobwebs and loose dirt. Then I use a slightly damp cloth with a bit of Murphy's Oil Soap to wipe it down - nothing too wet though, as we don't want the wood to swell.
If your sled is really rough, you might want to give it a light sanding. I use 120-grit sandpaper just to smooth out any splinters or really rough patches. Don't go overboard here though! After cleaning and prepping hundreds of sleds, I've learned that those dings, worn spots, and even rusty runners are what give vintage sleds their charm.
While some folks like to paint their sleds (Fusion Mineral Paint is great for this if that's your style), I personally love keeping that original aged patina. Those weathered boards tell a story of winter adventures from years ago, and that authentic vintage look is what makes them such perfect Christmas decorations.

What you'll need
Let's talk about my favorite supplies for decorating sleds. The best part? You probably have some of these tucked away in your holiday bins already!
Here's what I use:
- A plaid scarf (I love these from Amazon)
- Faux pine garland or loose greenery stems
- Red berry picks (real or faux)
- Green floral wire
- Wire cutters
- Hot glue gun (optional - I rarely use mine but some folks like the extra security)
Shop for Supplies for this decorated sled:

That's really all you need for a beautiful display! I keep it simple because I've found that's what looks best. Sure, you can grab more supplies from the craft store, but honestly, the classic combo of plaid, greens, and berries creates that timeless holiday look that works everywhere from your front porch to your cozy living room.
Quick tip: I always look for thicker scarves - they make fuller bows and hold their shape better. And don't worry about getting the most expensive faux greenery. Once it's all arranged, even basic craft store stems look great!

Step-by-step instructions
- Prep Work
Start with a clean, sanded vintage sled. All rough edges should be smooth and the surface ready for decorating.

- Battery Pack Installation
Using a hot glue gun, secure the battery pack for your twinkle lights to a hidden spot on the sled. Reinforce this with wire to ensure it stays firmly in place.(Optional)
- Foundation Greenery
Begin attaching long pieces of artificial greenery with wire. Position them slightly off-center, working the greens both up and down the sled for natural flow. - Detail Greenery
Hot glue smaller sprigs of assorted greenery to fill gaps and add texture to your base layer. - Add Berries
If your berry branches are too long be sure to cut them down to usable sizes. Glue the berries to the greens. - Scarf Styling
Wrap a winter scarf around the sled's crossbars, positioning the knot at the center of the main curve of the sled. - Final Touches
Add extra greenery and berries with hot glue around the scarf knot. Weave twinkle lights throughout the arrangement, hiding wires under the greenery. - Display
Position your decorated sled in your desired location, turn on the lights, and enjoy your festive creation.


Vintage sled decorating ideas for Christmas
Want to mix things up? Here's what I love to add to my sled displays after years of decorating them:
- Old ice skates are probably my favorite add-on - I hang them from the back of the sled by their laces, letting them dangle naturally. You can usually find these at thrift stores for a few bucks, and they add such great character!
- Small birch logs bundled with twine look amazing laid across the sled boards. I've even used those faux birch logs from the craft store, and honestly, they look just as good.
- Pine cones are another easy addition - I gather them from my yard and sometimes dust them with a tiny bit of fake snow. For indoor displays, I'll sometimes add a few small wrapped "presents" (just empty boxes wrapped in kraft paper with plaid ribbon).
- The cutest touch? A strand of battery-operated twinkle lights woven through the greenery. I usually tuck the battery pack behind the bow, and those tiny warm white lights add such a magical glow at night. Just make sure to use outdoor-rated lights if your sled will be on the porch!
Remember though - less is more! You don't need all these elements at once. Pick one or two that match your style and go from that.

Where to display your decorated Christmas sled
After decorating many sleds, I've discovered they look great just about anywhere! Here are my favorite spots that always work:
Decorating with an old sled indoors
I love propping a decorated sled next to the Christmas tree - it's perfect for holding those "Santa already came" presents! By the fireplace is another favorite spot, just lean it against the hearth for instant charm. In my living room, I sometimes tuck one into a corner with a cozy throw blanket and some battery-operated twinkle lights. They even work great as coffee table centerpieces - just scale down the decorations a bit.

Vintage Christmas sled ideas for the front porch
My front porch is where my sleds really shine! The sleds are a part of my winter decor! Just make sure to place them in a covered area to protect them from direct snow and rain. I learned the hard way that uncovered porches can be tough on vintage sleds, so now I always position them under our covered entryway. If you do place them in a somewhat exposed area, here's a tip: spray your greenery and bow with a UV protectant spray to keep them looking fresh all season.
Quick note: For outdoor displays, I always secure everything with floral wire - those winter winds can be pretty fierce!
Taking care of your vintage sled
Once the season is over, a little care goes a long way! I usually remove all the decorations and give my sleds a quick wipe down before storing. Keep them in a dry place - I store mine hanging in my garage, but any dry spot works. Just avoid damp basements or attics where moisture can damage the wood.
For more Christmas Decorating tips and inspiration visit: How to Turn a Tree Collar into a Fabulous Christmas Tree Basket for stylish tree bases, get help Troubleshooting a Skimpy and Sparse Christmas Tree for fuller displays. Also my guide on decorating Christmas trees.
For more holiday inspiration


Holiday Display Ideas: For more ideas on creating a standout holiday focal point, visit my Firefighter Santa post and see how we styled 30 years of festive figurines.
There's just something special about an old wooden sled dressed up for the holiday season. Maybe it's the memories these vintage beauties carry, or how they add that perfect farmhouse touch to your Christmas decor. I love seeing how differently each one turns out - some decked out for a cozy indoor display, others weathering the winter on a front porch next to a beautifully decorated lantern.
Remember, decorating vintage sleds isn't about perfection. Those worn wood planks and rusty runners tell a story, and your personal style adds another chapter. Whether you found your sled at an antique store or it's been sitting in your garage for years, now you've got all my tried-and-true tips to transform it into something special.
I'd love to see how your sled turns out! Share a photo in the comments below, or tag me on Instagram. And don't be surprised if decorating one sled turns into a collection - I started with just one little sled a few years ago, and well... let's just say my garage is getting pretty full!
Happy decorating friends!