

The Easy Way to Fake a Wood Finish with Paint
Want the look of real wood without stripping, staining, or spending a fortune? You're in the right place.
This faux wood painting technique is my favorite way to turn plain, painted, or laminate furniture into something that looks beautifully weathered and wood-like, without the mess of real woodwork. Whether you're updating an antique market find or refreshing a dark-stained piece, this easy method gives you that grainy, rustic charm using just paint, glaze, and a simple tool or two.
I've used this finish on tables, cabinets, and even a few surprise surfaces. In this tutorial, I'll walk you through the exact steps, show how it holds up on laminate, and share a few tricks that make it easier to get a natural wood effect every time.
Let's fake a finish worth bragging about.

Content may contain affiliate links. When you shop the links, we receive a small commission at no cost to you. Thanks for supporting my small business.
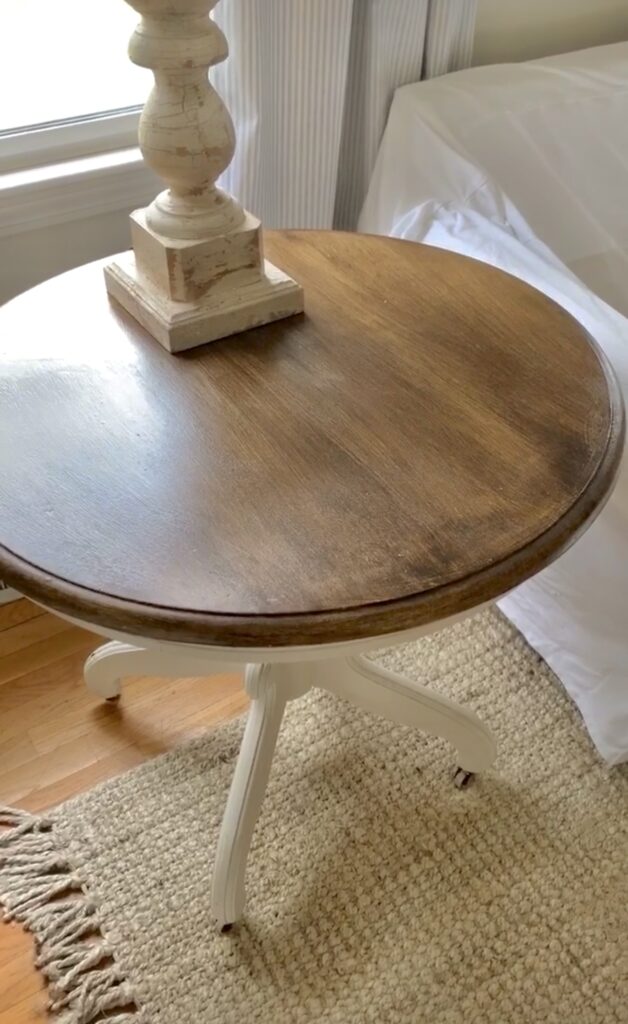
This soft faux wood finish added just enough warmth in my white living room styling.
Jump to:
- About this faux wood painting technique
- Why you will love this technique
- 3 Steps to a beautiful finish
- Step by step instructions
- Using this technique on laminate furniture
- Frequently asked questions
- Variations and creative ideas to try
- Other projects I've done using this technique
- More furniture refinishing inspiration
About this faux wood painting technique
I first tried this technique a few years ago on a vintage end table I scored from Facebook Marketplace. It was surprisingly simple, and four years later, that table still looks just as good as the day I finished it. The piece sits at the end of our sofa in our cozy white living room and fits the space perfectly. No scratches, no stains-it's held up beautifully.
The best part? You'd never guess the tabletop isn't real wood. This faux wood grain finish gives it an authentic, textured look that always gets compliments.

Pictured is a dining room table with this simple fake wood paint technique.
Why you will love this technique
- Ease: No sanding and no priming required (unless you're working with laminate-more on that below). This simple faux wood paint technique is beginner-friendly. Chalk paint is easy to work with, but the real star here is Valspar Antiquing Wax. It goes on smoothly and gives you plenty of time to adjust the finish before it dries and sets in place. It's forgiving and effective.
- Cost: Pick up an inexpensive piece of furniture from your local thrift store or Facebook Marketplace and give it a brand new look for a fraction of what you'd pay for something new. This technique is an affordable way to refresh your space with custom character.
- Look: Wood grain is timeless. What I love most about this method is that it mimics real wood from a distance, but up close it reveals brushstrokes and layered texture. It gives your piece the feel of a one-of-a-kind, hand-painted finish with an artistic twist.
3 Steps to a beautiful finish
Want to transform your furniture with a faux wood look that's both timeless and easy to achieve? Here's a quick overview of the three-step process I use every time.
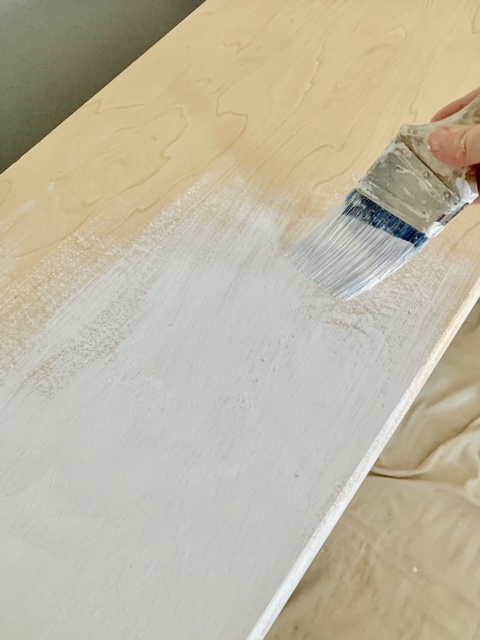
1. Chalk paint your piece
Start by cleaning your furniture thoroughly. Most pieces don't need much prep if you're using chalk paint, but for dark or vintage furniture, I recommend applying two coats of B-I-N Shellac Primer first. Let it dry completely, lightly sand, and then move on to your chalk paint. Plan on 2 to 3 coats of paint depending on coverage. The good news is that chalk paint dries quickly, so you can move through this step fast.
Need more detail on how to handle dark furniture and primer? I walk through the process step by step in my Antique Mirror Makeover post.

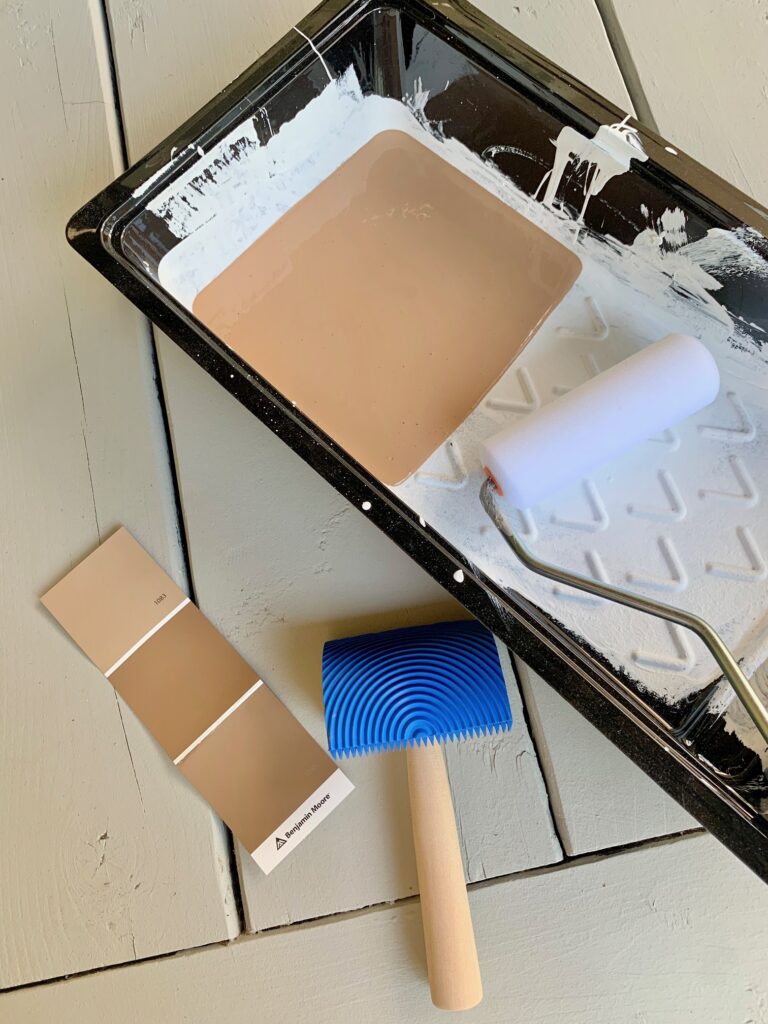
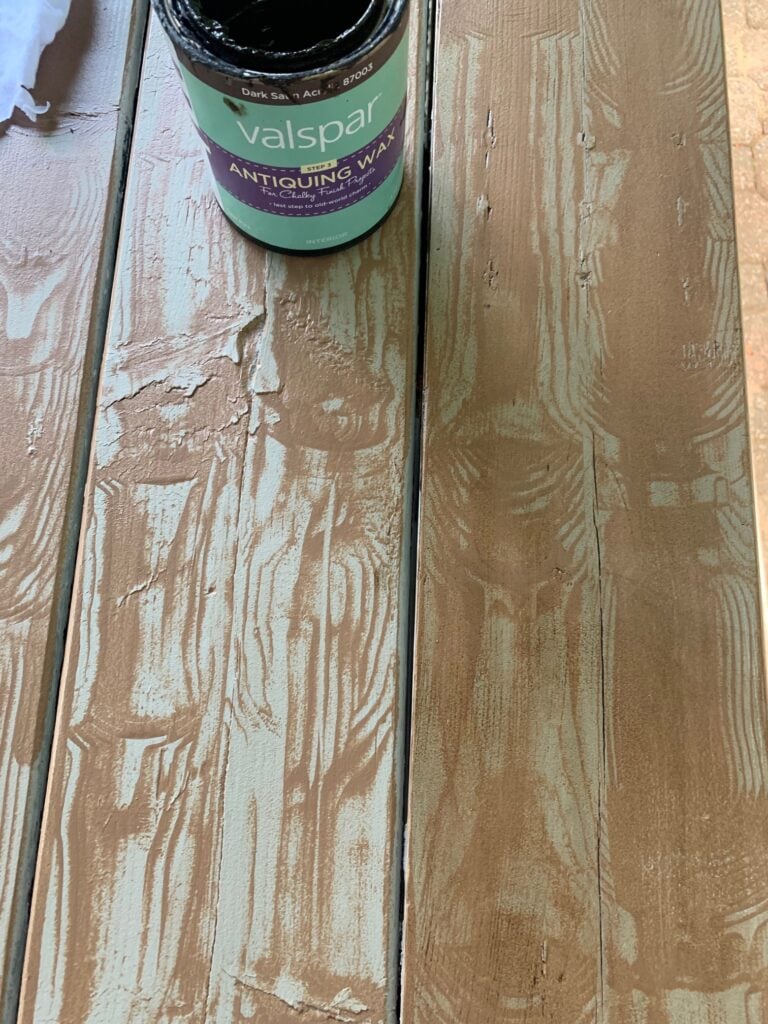
2. Antiquing Wax for a Wood Grain Look
Once your piece is fully dry, tape off any areas you want to keep clean. Stir your Valspar Antiquing Wax well before applying. This product behaves more like a gel wood stain than a traditional wax, so it's ideal for creating wood grain effects. Use a chip brush and apply the wax in long, even strokes, following the direction of the faux grain you want to create.
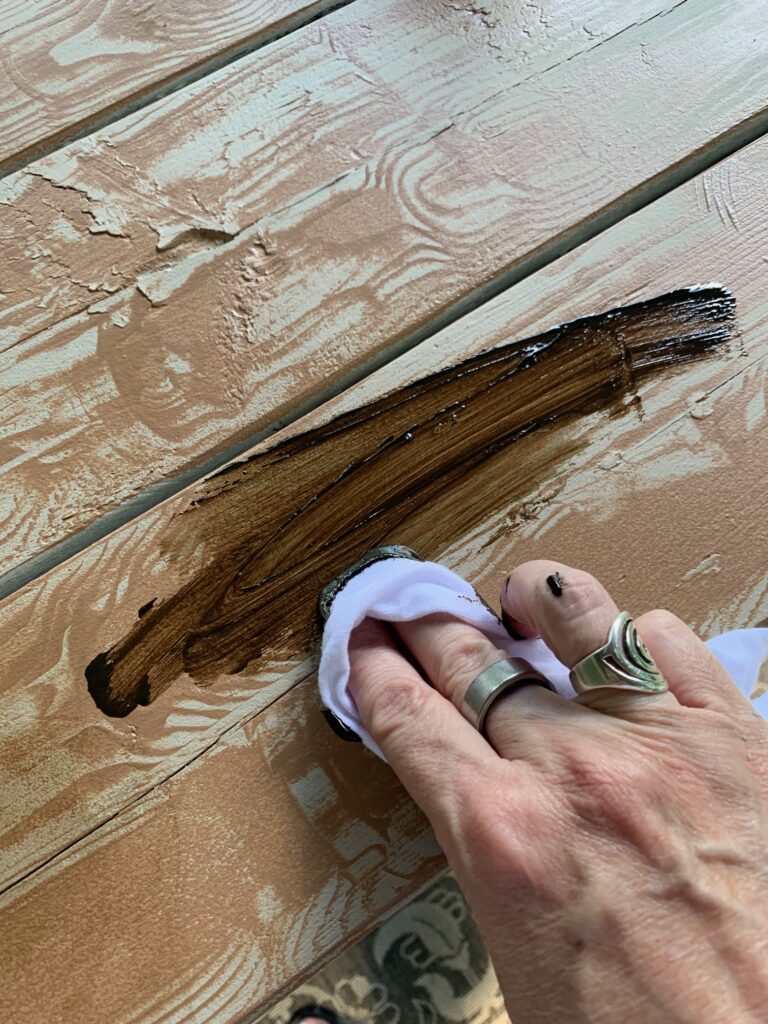
You can soften the look using a lint-free cloth to lightly smooth the surface. Build up the richness with additional coats, allowing about two hours of dry time between each, until you reach the depth of color you want.

3. Seal with Polycrylic for durability
After the wax layer has dried overnight, seal everything with a coat of Minwax Polycrylic clear satin polyurethane. This gives your piece a durable, protective finish. Once dry, add new knobs or pulls if you want to complete the transformation.

Now, let's dive into each step in more detail!
Step by step instructions
Supplies for this project
- A furniture piece of your choice
- White chalk paint (enough to cover your piece)
- Valspar Antiquing Wax
- Minwax Polycrylic clear satin polyurethane
- Chip Paint brushes
- Chalk paint brush
- Frog tape -painters tape
- B-I-N Shellac Primer (for older dark stained pieces)
- Chalk paint your piece
Start by cleaning your furniture thoroughly. For most pieces, chalk paint requires little prep. However, if you're working with an older or dark-stained piece, I suggest applying two coats of B-I-N Shellac Primer first. Let it dry, lightly sand, then move on to your chalk paint.
Chalk paint typically needs 2 to 3 coats, but it dries quickly, so this step moves along fast.
(See special notes for laminate furniture below.)
- Antiquing wax for a wood grain look
Once the chalk paint is dry, use painter's tape to block off any areas you don't want waxed. Stir your Valspar Antiquing Wax thoroughly. This wax acts more like a gel stain than a traditional wax, which makes it perfect for creating a wood grain effect.
Apply it using a chip brush, brushing in the same direction to mimic the look of natural grain. If desired, use a lint-free cloth to soften the texture. Add multiple coats if you want a deeper color, letting each coat dry for about two hours before adding the next.
- Sealing your piece with Polycrylic
Once the antiquing wax is fully dry (overnight is ideal), apply a coat of Minwax Polycrylic to protect the finish. Let it dry completely before handling or styling your piece.
At this point, you can also swap out hardware like knobs or pulls for a fresh finishing touch.


Using this technique on laminate furniture
Laminate furniture has a slick surface that doesn't hold paint well without the right prep. To help the chalk paint stick and last, start with a high-quality bonding primer.
I recommend Benjamin Moore Stix Primer . It grips to smooth surfaces and gives your paint something to hold onto. Once the primer is dry, you can apply your chalk paint and continue with the wood grain finish just like you would on solid wood.
With the right primer in place, you'll get a beautiful, durable result that won't chip or peel down the line.
Frequently asked questions
Chalk paint is ideal because of its texture and strong adhesion, but you can experiment with other types like oil-based or mineral paint. For our outdoor table, I used exterior latex paint and it held up well under the antiquing wax.
Yes, you can. Just be sure to use a bonding primer like Benjamin Moore Stix Primer before applying the chalk paint. This step helps the paint adhere properly to the slick laminate surface.
Not usually. If your piece is in good shape, sanding isn't necessary. Just make sure it's clean before you start.
Almost anything. This technique works on solid wood and laminate pieces. It's great for thrifted finds, vintage pieces, or budget buys from Facebook Marketplace. Try it on kitchen tables, coffee tables, end tables, or even dining tables for a warm, custom look.
Yes, but it depends on the type of paint. For best results, use wax over chalk paint or mineral paint. If you're using latex or acrylic, make sure it's fully cured and consider lightly scuff-sanding before applying the wax.
It can, but you'll want to test for adhesion. If the existing finish is glossy or chipped, give it a light sand and clean it thoroughly. Then proceed with primer if needed before applying chalk paint.
Use a chip brush and pull the wax in long, straight strokes. You can also experiment with a wood grain rocker tool while the wax is still wet for a more dramatic texture.
Yes, sealing is highly recommended. It protects the finish and helps your faux wood look last longer. Polycrylic is great for indoor pieces. For outdoor use, consider a spar urethane or exterior-grade sealer.
Variations and creative ideas to try
Try Different Base Paint Colors
The color underneath your antiquing wax makes a big difference in the final look. The end tables above use white chalk paint, so the finish has a light, soft contrast. For a warmer wood tone like the outdoor table below, try a pale yellow or soft orange. For something cooler and more weathered, gray is a great option.
Test First with a Sample Board
If you're trying this technique for the first time or working with a new color, make a sample board. Use a spare piece of wood, paint it with your base color, then apply the antiquing wax. This lets you see how the finish will look and decide if you want visible brush strokes or a more blended texture using a rag.
Add Distressing for Character
Chalk paint is perfect for distressing. Once your finish is dry, use medium-grit sandpaper to lightly scuff the legs or edges of your furniture for a bit of vintage charm. For more ideas, check out my post on the best paint for distressing. I walk through four easy techniques you can try.
Tip: To learn more about distressing furniture visit my, How to Distress Chalk Paint Furniture: The Only Technique You Need post!
Other projects I've done using this technique
Outdoor table
I first used this technique on a heavy outdoor dining table we picked up on Facebook Marketplace for $200. It came with matching benches and was the perfect fit for our under-deck patio space. I loved the black legs, but the top needed something. I wanted a warm faux wood finish to tie in with the natural rattan chairs near our DIY paver fire pit.
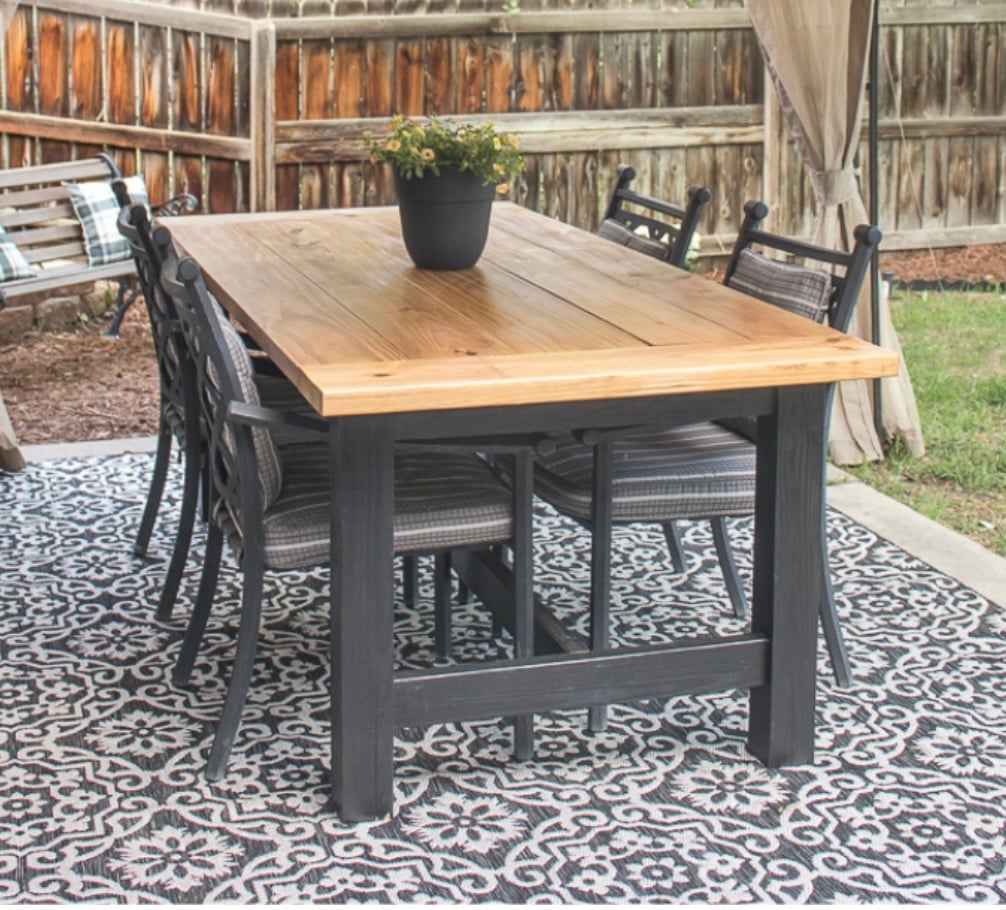

To start, I painted the top with Benjamin Moore exterior latex paint in Seagull Gray to match our house. Then I layered on an orange-toned exterior latex to mimic the warmth of real wood. I used a wood grain tool, rolling on the orange paint and dragging the tool to create faux knots and streaks.
The result? Not great. The pattern was too bold, the color combo too harsh, and the whole finish looked choppy. I almost gave up, but then came the Valspar Antiquing Wax. I grabbed a soft t-shirt rag and rubbed it on, letting the wax blend the layers and soften the look. That's when the whole piece came together and finally matched the inspiration table I had in mind.


The finish before the Valspar was super choppy and the colors together looked terrible. I knew going in that by using Valspar antiquing wax for the top coat I would have a more blended look that would closely resemble my real wood inspiration table. For this application, I took a t-shirt rag and rubbed the antiquing wax onto the table and finally my vision came to life!
A Quick Note on the Wood Graining Tool
I thought I'd love it more than I did. The pattern was too large for my taste, and I ended up preferring the subtle, hand-painted texture you get from a dry brush instead. (I've linked a similar tool, since the one I used is no longer available.)
Outdoor Finish and Durability
To protect the finish, I sealed the table with a clear outdoor decking sealer. I've had a few people ask whether the Valspar Antiquing Wax holds up to summer heat, and in my experience, it absolutely does. It behaves more like a gel stain than a soft wax, and it has handled the heat just fine here in Massachusetts.

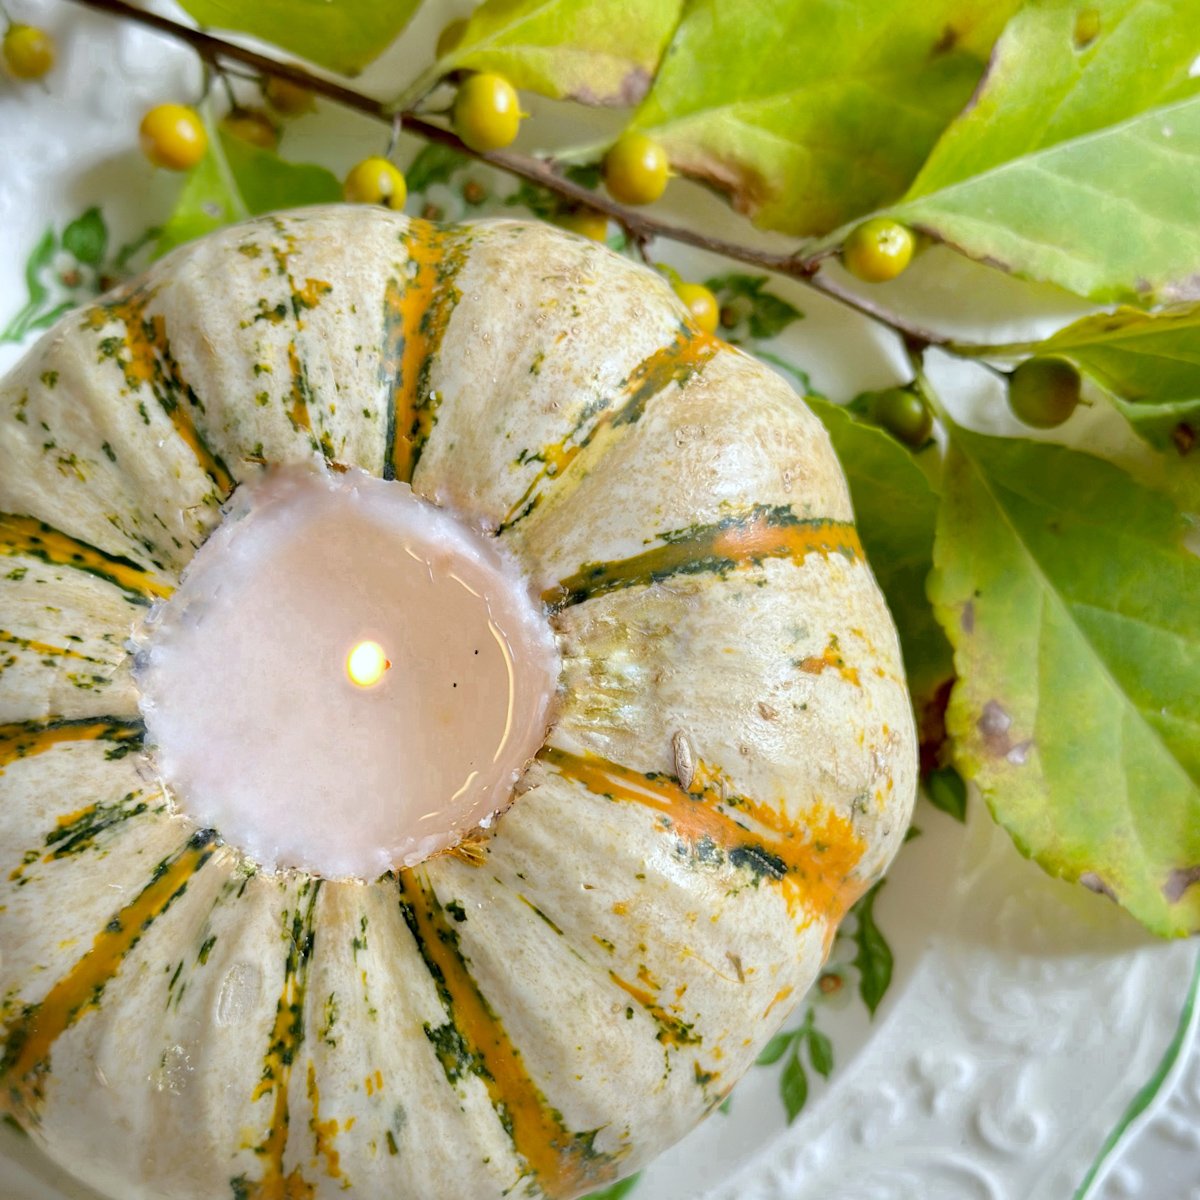
You can see more of this piece styled for fall in my Simple Fall DIY Dining Table Centerpiece Idea post. Here's a peek at how it looks in our outdoor dining space.

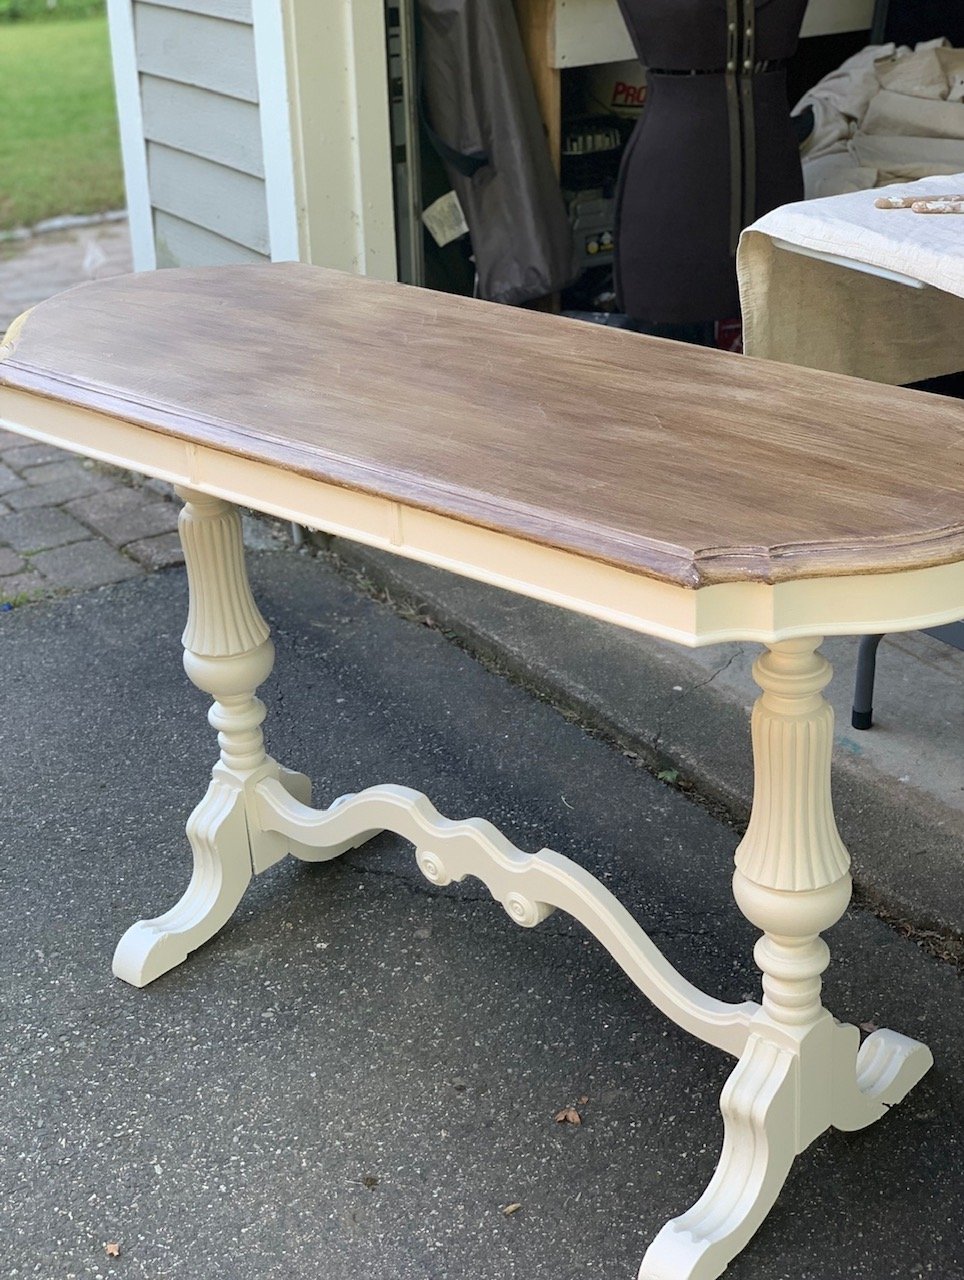
Dining table makeover
I also used this technique on a dining table I refinished for my antique booth. For the base, I chose Fusion Mineral Paint in a rich green shade called Bayberry. It gave the skirt and legs a warm, earthy contrast that really made the table stand out.
On the tabletop, I applied a white chalk paint base coat, then layered on Valspar Antiquing Wax to create the faux wood grain effect. For this one, I used a lint-free rag instead of a brush. The result was a softer, more blended finish that still showed off the grain but felt a bit more refined.

Console table
I refinished this entryway table using the same technique as the original project. This faux wood look is always a hit and it tends to sell quickly at my vintage booth. This particular table was a $25 Facebook Marketplace find that just needed a little love.
The legs are painted in a soft cream chalk paint, and the top features my simple 3-step process to create a wood-like finish. It's a straightforward makeover that gives big impact and classic charm.
Night stands for our guest bedroom
Lastly, this application was perfect for the night stands we added to our guest bedroom retreat. We pulled the entire room together on a budget, and these tables were a great find on Facebook Marketplace at just $40 for the pair. Thanks to this simple technique, I now have beautiful pieces that look far more expensive than they actually were.
You'll notice the finish on these night stands looks much lighter than the others. I followed the same process but gave the Valspar wax a more thorough wipe-down, leaving just a soft wash of color on the surface.


I love DIY projects that breathe new life into tired furniture. This faux wood finish is one of my favorites because it's simple, forgiving, and gives beautiful results. If you've been curious about painting furniture to look like wood, Valspar antiquing wax is a great product to start with.
Thanks so much for stopping by the blog today. I hope this tutorial on how to paint furniture to look like wood in 3 easy steps gave you the confidence to give it a try. If you're looking for more inspiration, be sure to browse my other furniture refinishing projects, including this sweet DIY dog bed makeover.
Until next time, keep creating and having fun with your space!


Hello stephanie I am roro from danmark I want a help to give my white smoothy dinning table a faux wood look with high protection ,so what I need to do and save in money as possible
Hi Roro, If your dining room table is already white you are half way there! I would suggest getting the Valspar antiquing wax and follow the instructions in the blog post to apply. For a dining room table I would suggest two coats of polycryllic. Be sure to let the polycrylic dry completely between coats and let it cure (per instructions on the can) before use.
Is the antiquing wax the same as finishing wax. I keep reading you can't apply polcrylic over wax.
Thanks!
Hi Brenda, I don't believe it is. The antiquing wax is quite unique in that it does not feel or apply like wax (despite its name!). It's more of a gel than a wax. I have done this application a number of times with poly and the finish is beautiful and durable! Hope this helps!
What do you use to put the polycrillic on?
Hi Beth, So sorry for the delay. I apply the polycrillic with a regular brush but you can also use a sponge brush. Thank you for visiting the blog!
Amazing technique !! Thanks for sharing I will definitely use this ! All the best
Awesome, good luck Paul!
Hi, love this! But I thought we couldn't use polyurethane over wax? Could you please advise? I started to chalk paint my dinner table, but bought rustoleum dark wax, hoping I ll manage to create a similar effect, and cant find your recommended poly. Can any polyurethane be used over wax?
Hello! I have heard folks say that however, I have never had an issue when using polyacrylic over the Valspar antiquing wax. In this application Im using the wax to create a wood grain, typically wax IS my top coat. Valspar's antiquing wax is very unique and acts a lot like a gel stain. Very different than say Annie Sloan's wax. This could be the reason the poly works over it. Good luck! Happy creating!